Zapier
What is Zapier?
Section titled “What is Zapier?”Zapier is an online automation tool that connects applications like Google Sheets, Slack, Gmail, Mailchimp, etc. Using Zapier as a service, you can connect two or more applications to automate repetitive tasks. It also provides Webhooks that allow to send POST data and accept to a specific URL. Using a Webhook, you can connect your Draftbit app to send data to a Zapier workflow.
Integrate Draftbit and Zapier
Section titled “Integrate Draftbit and Zapier”If you do not have a Zapier account, create one here. The initial step is to create a custom Webhook in Zapier. To use a Webhook integration, you have to be on their Pro plan.
Create a trigger in Zapier
Section titled “Create a trigger in Zapier”- From your Zapier account, go to the My Zaps page and click the button Create a Zap.

- It will load the editor to create a Zap.
- Enter the name of your Zap and click the
Webhookto choose the type of the trigger.

- Then, choose an event. Select
Catch Hookoption which allows sending POST, PATCH, or GET requests to a Zapier URL. ClickContinue. - In the
Set up triggersection, Zapier provides the Custom Webhook URL. You will need this URL to send POST request from the Draftbit app later. - Based on your data, you can send JSON objects to a Zapier URL with a key. The structure of sending the data with an object key (an example shown below), Zapier will only grab the child key(s) from the object.
// Example data in Body sent to Zapier with a "key" to the child object{"key": {    "key1":"value1",    "key2":"value2"  }}
// Child object data received by the Zapier{ "key1":"value1", "key2":"value2"}- After setting up a key object, click
Continue. - Enter the name of the
Child KeyunderSet up triggerand then again clickContinue.
Setup steps in Draftbit
Section titled “Setup steps in Draftbit”To access the API in the Draftbit app, you need to use the Zapier Webhook URL as the Base URL.

In the Draftbit app:
- Open the Data modal from the left menu bar.
- From the Add a service menu, click on
REST API. - Enter a name for your REST API.
- Paste your REST API URL into the
Dev URLorProd URLinput field. - Remove the
Content-Typeheader from theHeaderssection. This request-header field is not allowed by Access-Control-Allow-Headers in preflight response. It stops from posting JSON data from a Web Browser. The Preview mode runs inside a web browser. More information on this is at Zapier Help. - Click
Save.

Available Zapier Recipes
Section titled “Available Zapier Recipes”POST request to send new data
Section titled “POST request to send new data”Submitting new Data from the Draftbit app to a REST API requires the request to be sent using HTTP POST method.
Your component needs to have:
- accepts user input
- has a
Data Sourceprop
You can use any component that contains a Data Source prop to log user input and submit data. This list of components currently includes:
Once you have the necessary component(s) on your screen, you’ll need to create a new endpoint in your Draftbit service:
- Click Add endpoint.
- In Step 1: enter a name for the endpoint and select the Method to
POST. - Set the Role to
Create. Set the Object Type tobooksfor this example. - In Step 3: add a valid Body structure to submit a
POSTrequest. Add one or many{{variable}}for test values. Click Body Preview to validate the structure of the Body in the request. - Below is a general breakdown of what the request will look like. You’re about to add multiple fields to a request, make sure you include a comma after each field ,:
// example data with object "key"{"key": { "firstKey": {{firstField}} }}- In Step 5: click the Test button next to the Endpoint.
- Click Save.
On the Zapier dashboard, press the button Test Trigger. You will notice that the request is sent successfully. It will show the data object with keys and values of what is being sent from the Draftbit app.

Using a Touchable/Button component, you can trigger the action API Request to submit the data to the endpoint.
- On the Touchable component go to the
Interactionstab (the last tab). - Click the
+to open a drop-down menu in theActiontab and select API Request. - Setup the API Request by selecting the
Serviceand theEndpoint. - Then add the configuration for body request to be sent by selecting the value for
textInputValue.

Set up an Action in Zapier for POST request
Section titled “Set up an Action in Zapier for POST request”An action is an event a Zap performs after it starts. The following section is a walk-through example of how you can send data from a Draftbit app to an app like Google Sheets.
- To set up an action, select an app from the App Event. For this example, we are selecting Google Sheets.

- Select the Action Event as to what action to perform in the Google Sheets app. For example, select the Action Event
Create Spreadsheet rowto create a new row in the Spreadsheet. Then, clickContinue. - Select a Google account where the Spreadsheet is hosted.
- Select the name of the directory Google Drive where it is stored. Then, select the
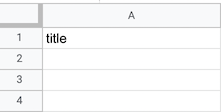
Spreadsheetand theWorksheetinside it. - Make sure your Google Sheet has headers in the first row. In the example below, there are two headers set in the first row.
- The headers here represent the same key names described in the previous section’s data.
- Depending on the data, it will ask what values to assign to which headers. Assign the keys to the specific headers from the request and then click
Continue. Zapier will set up the action event.
- You can test out the action. Make sure to press
Test & Continueand click the buttonTurn on Zap.

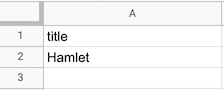
The data row created from the test will show in the Spreadsheet:
Try sending the data from the Draftbit app. Open up the Preview mode, enter the value(s) in TextInput field(s) and then press the Button.
PATCH request to update data
Section titled “PATCH request to update data”The PATCH request is used to update one or many entities in a row by matching a specific field. It accepts similar input components as mentioned in the POST request, and the request is triggered using a Touchable component.
The PATCH request sent to Zapier Webhook URL must contain a field key and value that is used to search which key to update.
Your component needs to have:
- accepts user input
- has a
Data Sourceprop
You can use any component that contains a Data Source prop to log user input and submit data. This list of components currently includes:
Once you have the necessary component(s) on your screen, you’ll need to create a new endpoint in your Draftbit service:
- Click Add endpoint.
- In Step 1: enter a name for the endpoint and select the Method to
POST. - Set the Role to
Update. Set the Object Type tobooksfor this example. - In Step 3: add a valid Body structure to submit a
POSTrequest. Add one or many{{variable}}for test values. This is generally assigned a default value whenever you add a Data Enabled Input component in your Draftbit app. To add it in theBody Structure, it needs to be inside the double curly braces as:{{variable}}. The information regarding this is also given in theBodytab. Click Body Preview to validate the structure of the Body in the request. - Below is a general breakdown of what the request will look like. You’re about to add multiple fields to a request, make sure you include a comma after each field ,:
// example data with object "key"{"key": { "firstKey": {{valuetoSearchBy}}, "secondKey": {{valuetoUpdate}} }}- In Step 5: click the Test button next to the Endpoint.
- Click
Save.
In the above code snippet, the {{valuetoSearchBy}} is used to search the value. It acts as a unique identifier while searching for the correct key in the end application where the data is saved. The {{valuetoUpdate]} is the actual value that is going to be updated through the PATCH request.
On the Zapier dashboard, press the button Test Trigger. You will notice that the request is sent successfully. It will show the data object with keys and values of what is being sent from the Draftbit app.
Set up an Action in Zapier for POST request
Section titled “Set up an Action in Zapier for POST request”An action is an event a Zap performs after it starts. The following section is a walk-through example of how you can search the specific column and update it from a Draftbit app to an app like Google Sheets.
- To set up an action, select an app from the App Event. For this example, we are selecting Google Sheets.
- Select the Action Event
Update Spreadsheet Row in Google Sheetsto search for a value to update the Spreadsheet from the previous action. Then, clickContinue. Do note that, Zapier allows to search a column header based on a value and then update any other column’s value related to that column header. - Select a Google account where the Spreadsheet is hosted.
- Select the name of the directory Google Drive where it is stored. Then, select the Spreadsheet and the Worksheet inside it.
- For
Row, click the drop-down menu, selectAdd a search stepfor Zapier to create an Action EventLook Spreadsheet Row in Google Sheetsto search for a value to update in the Spreadsheet. Go to that event.
- Select a Google account where the Spreadsheet is hosted.
- Select the name of the directory Google Drive where it is stored. Then, select the Spreadsheet and the Worksheet inside it.
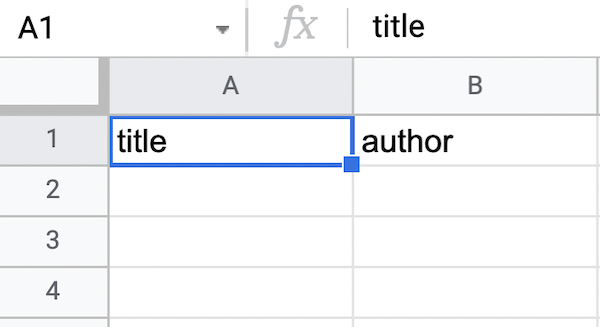
- Make sure your Google Sheet has headers in the first row. In the example below, there are two headers set in the first row.
- The headers here represent the same key names described in the previous section’s data structure.
- Depending on the data, set the
Lookup Columnvalue to thetitleheader in the Spreadsheet. - Set the
Lookup ValuetoTitle: some valuecoming from the Webhook. - Click
Continue.
Click onRestest & Continueto test the Webhook’s value and move on to the next step. - After the test is successful, Zapier will automatically add the dynamic key under the section
RowinUpdate Spreadsheet Row in Google Sheets. - Test the action, and on success, you can click the button
Turn on zapto use with the Draftbit app.