
REST API Endpoints
Endpoints work with API Services to let your app connect to specific resources from your server or backend
First make sure you've created at least one REST API Service in your app. After you've created a REST API Service, you'll be prompted to add new Endpoints for your service.
An Endpoint is a specific path associated with your API service that is appended to the Dev URL or Prod URL. These are used to make HTTP requests from your application to your API using standard GET, POST, PUT, PATCH, and DELETE methods.
Endpoints are usually associated with a particular resource. For example, if your app is about cooking you might have a group of Endpoints for a 'recipes' resource so that users can perform CRUD operations (create, read, update, and delete) on recipes. And maybe another group of Endpoints for an 'articles' resource.
These Endpoints can then be used by a Fetch component or API Request Action in your app to work with your data.
It's recommended to not use periods (".") in endpoint field names
Adding an Endpoint
To add an Endpoint, select on one of your existing REST API Services in the API & Cloud Services modal then simply click the Add New Endpoint button located in the Endpoints section.
Configuring an Endpoint
Creating a new Endpoint requires several configuration steps that you'll be guided through. Depending on the type of Endpoint you are creating, some settings may not be available and others may be optional.
Basics
Property | Description |
|---|---|
Name | Add a name to the Endpoint to identify it in the Draftbit builder interface. |
Method | Select an HTTP method to make the appropriate request depending on your API endpoint.
|
Object & Role
We utilize Objects and Roles in queries to optimize fetching and caching data in your app. They also help keep the UI updated when data changes somewhere in your app.
You should only have one Object and Role combination (e.g. Get Many Posts) per API service.
Property | Description |
|---|---|
Role | Roles describe what this Endpoint intends to do, i.e. the verb (e.g. Get Many). You can select an option from the dropdown. For example, if you're creating an Endpoint that returns an array of many blog posts, you would select
|
Object | Object describes what data type the Endpoint manipulates and are typically described with nouns (e.g. Post). You can type a new value into the input or select an existing Object type from the dropdown. For example, when you are building a blogging app, the Endpoints for fetching a list of posts and creating a new post should both have the same Object type, such as |
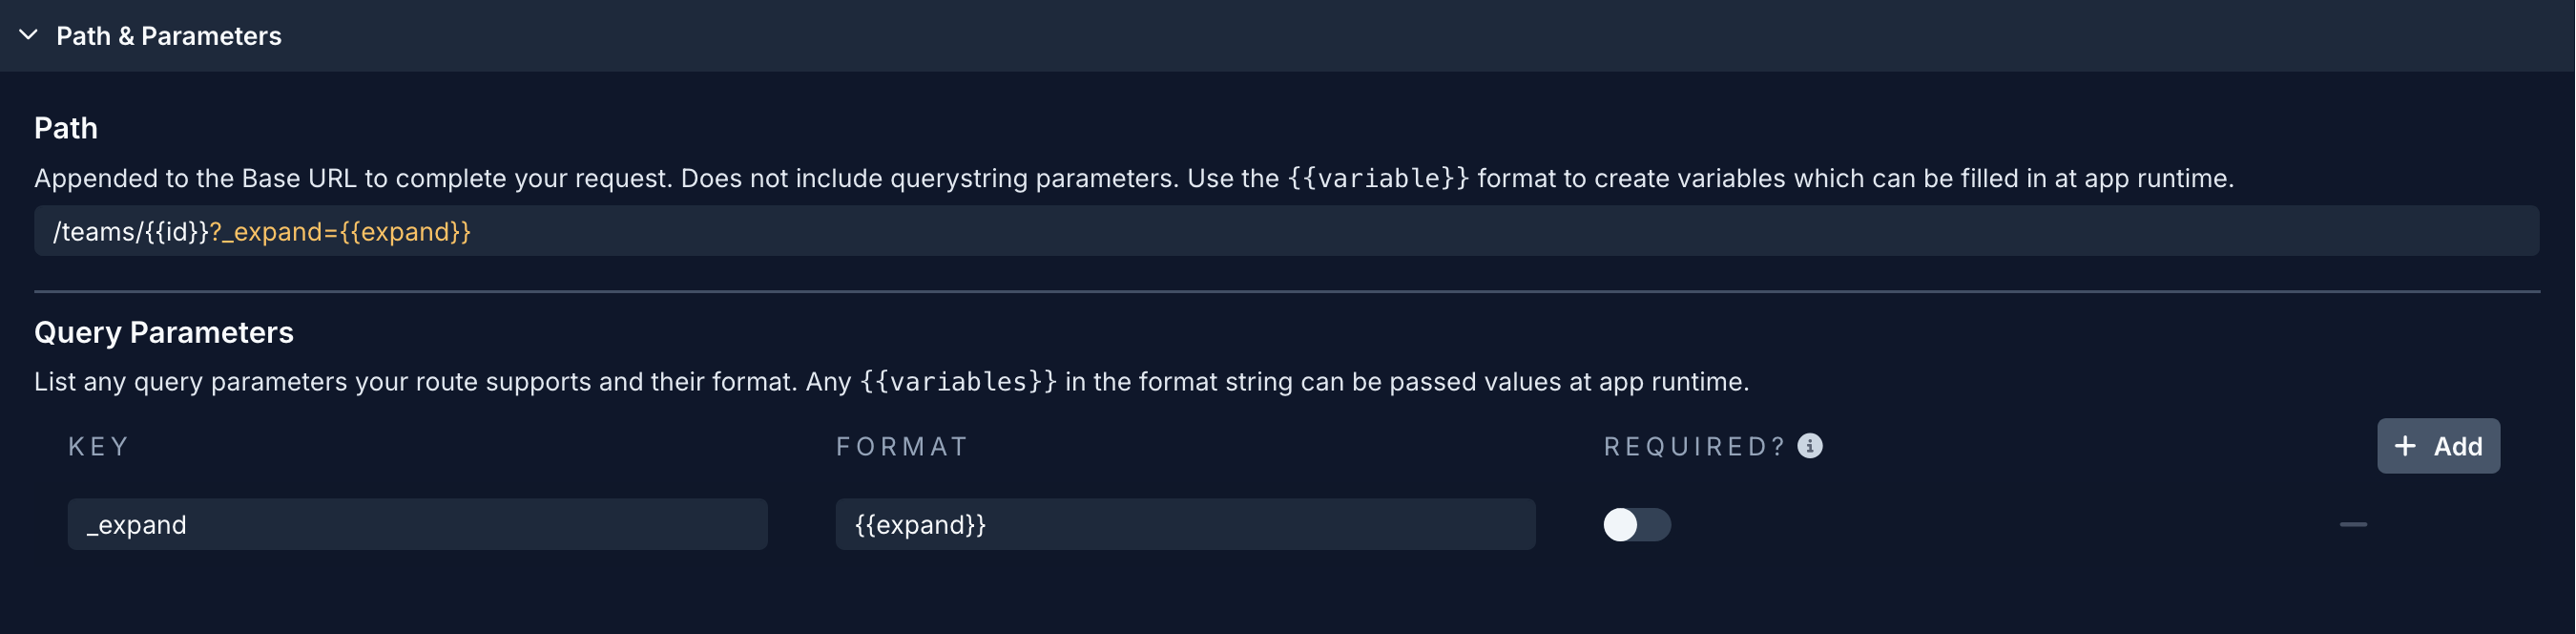
Path & Parameters
The Path will be appended to the Base URL you defined when creating the associated REST API Service. In this example, https://api.example.com is the Base URL for the API service and /posts/123 is the Endpoint Path.

You can use {{variable}} syntax in the path to create dynamic paths. For example, if we had a connection to the above example API, our Endpoint path to get a post by a dynamic value like id would look like this: /posts/{{id}}.
In the Query Parameters section, you can specify any standard query string parameters and these can also be combined with the {{variable}} syntax. For example, we might have an endpoint for our API that accepts query string parameters to further refine the request, such as:
/posts?author_id={{author_id}}
Or even something more complex, like this:
/team/{{id}}/posts?where[author_id][eq]={{author_id}}&where[is_published][eq]={{is_published}}
When you use {{variables}} in the Path or Query Parameters, you'll be able to pass values into those variables when testing your Endpoint (explained further down the page) and when using the Endpoint with a Fetch component or API Request Action.
Property | Description |
|---|---|
Path | Appended to the Base URL to complete your request. In the case of dynamic values, pass a |
Query Parameters | Click the
|
Request Body
Only available forPOST, PUT and PATCH requests.
Here you can define a body structure using valid JSON format for the request. To create a variable for passing data, use {{variable}} syntax as values for the keys defined in the Body Structure. This way, you can map these variables when sending an API request from a Fetch component or API Requst Action.
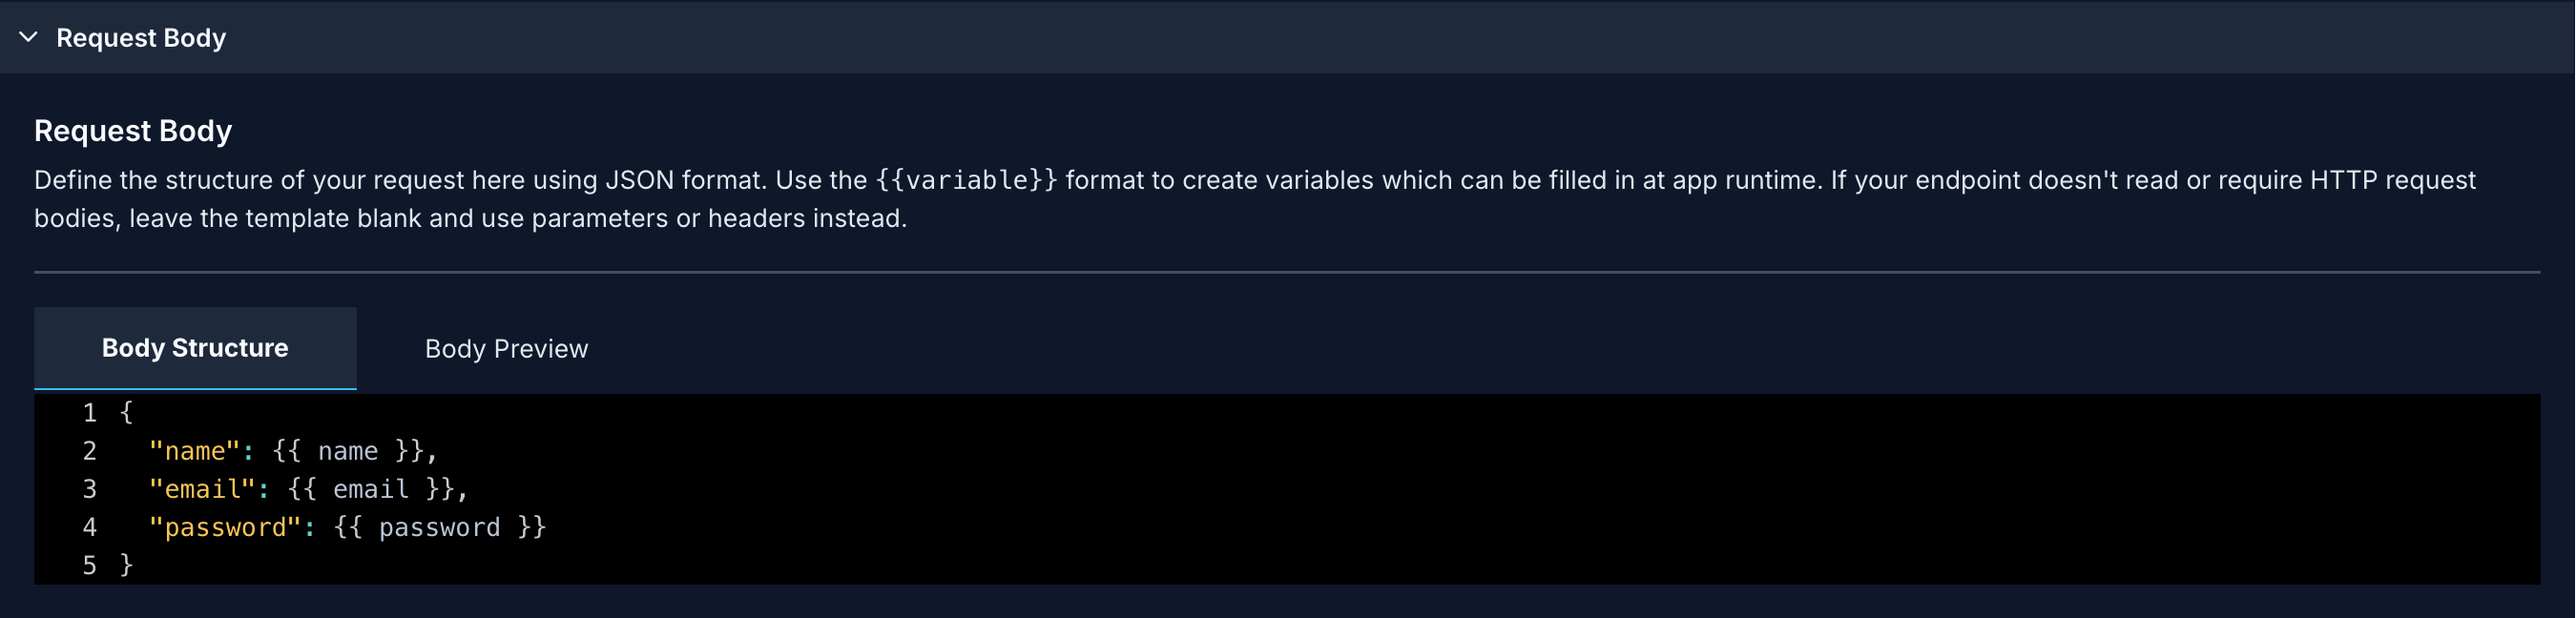
For example, if we are creating an Endpoint that is making a POST request to our API that stores a new article in our database, we might pass a JSON structure like this as the body of our request:
{
  "title": {{title}},
  "body": {{content}}
}
Of course, you can also pass more complex JSON structures if your app requires it:
{
  "create": {
    "type": "post",
    "fields": [
      { "key": "title", "value": {{title}} },
      { "key": "content", "value": {{content}} }
    ]
  }
}
To make specific keys require a value within the Body Structure, you can add an exclamation point (!) to the end of the variable name. In the example below, the title is required, but body would be optional:
{
  "title": {{title!}},
  "body": {{body}}
}
Property | Description |
|---|---|
Body Structure | The JSON structure of your request body. In the case of dynamic values, pass a Add an exclamation point ( |
To preview the structure of the request's body, including any test values, you can switch to the Body Preview tab:
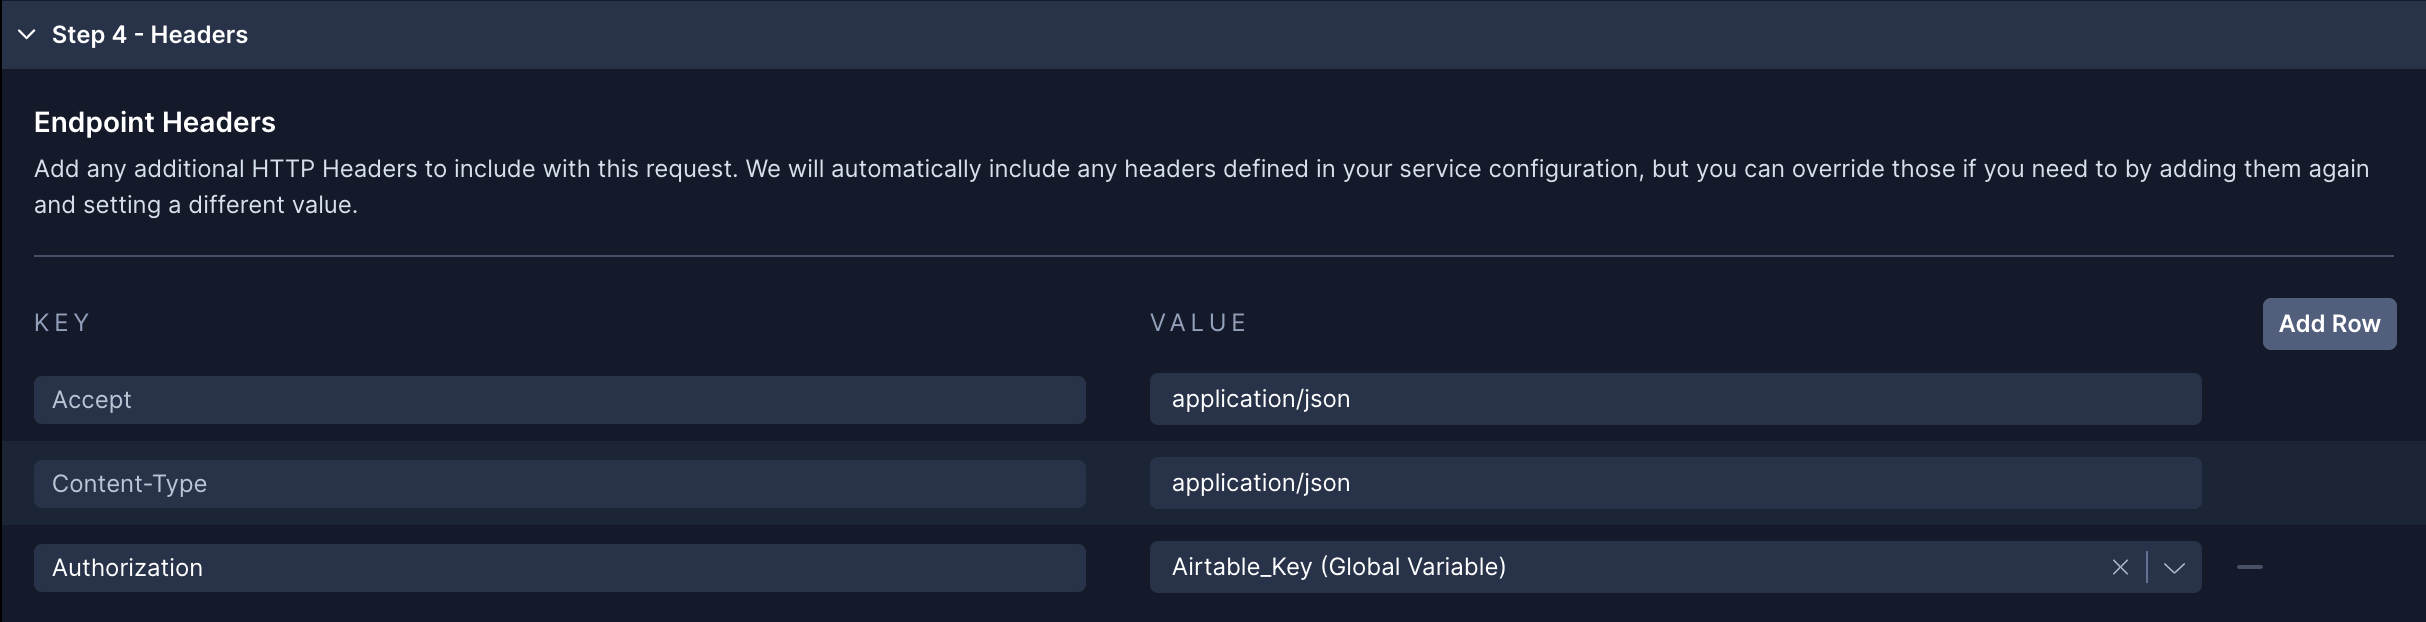
Headers
Here you can set HTTP headers for this specific Endpoint. If you need to set HTTP headers for ALL Endpoints that will be associated with this Service, you can set them in the Service's configuration. Any header defined by the API service will be automatically added here.
If you have existing headers set on the Service level and create the same headers for an Endpoint, the headers for the Endpoint will be used.
You can type a value directly into the value field or select a variable that you've created from the dropdown.
| Property | Description | Example |
|---|---|---|
| Key | The HTTP header name | Authorization |
| Value | The value or variable associated with the header | auth_token (Device Variable) |
JSON DataBy default, Draftbit sets the
AcceptandContent-Typeheaders toapplication\jsonsince Draftbit only supports JSON data.
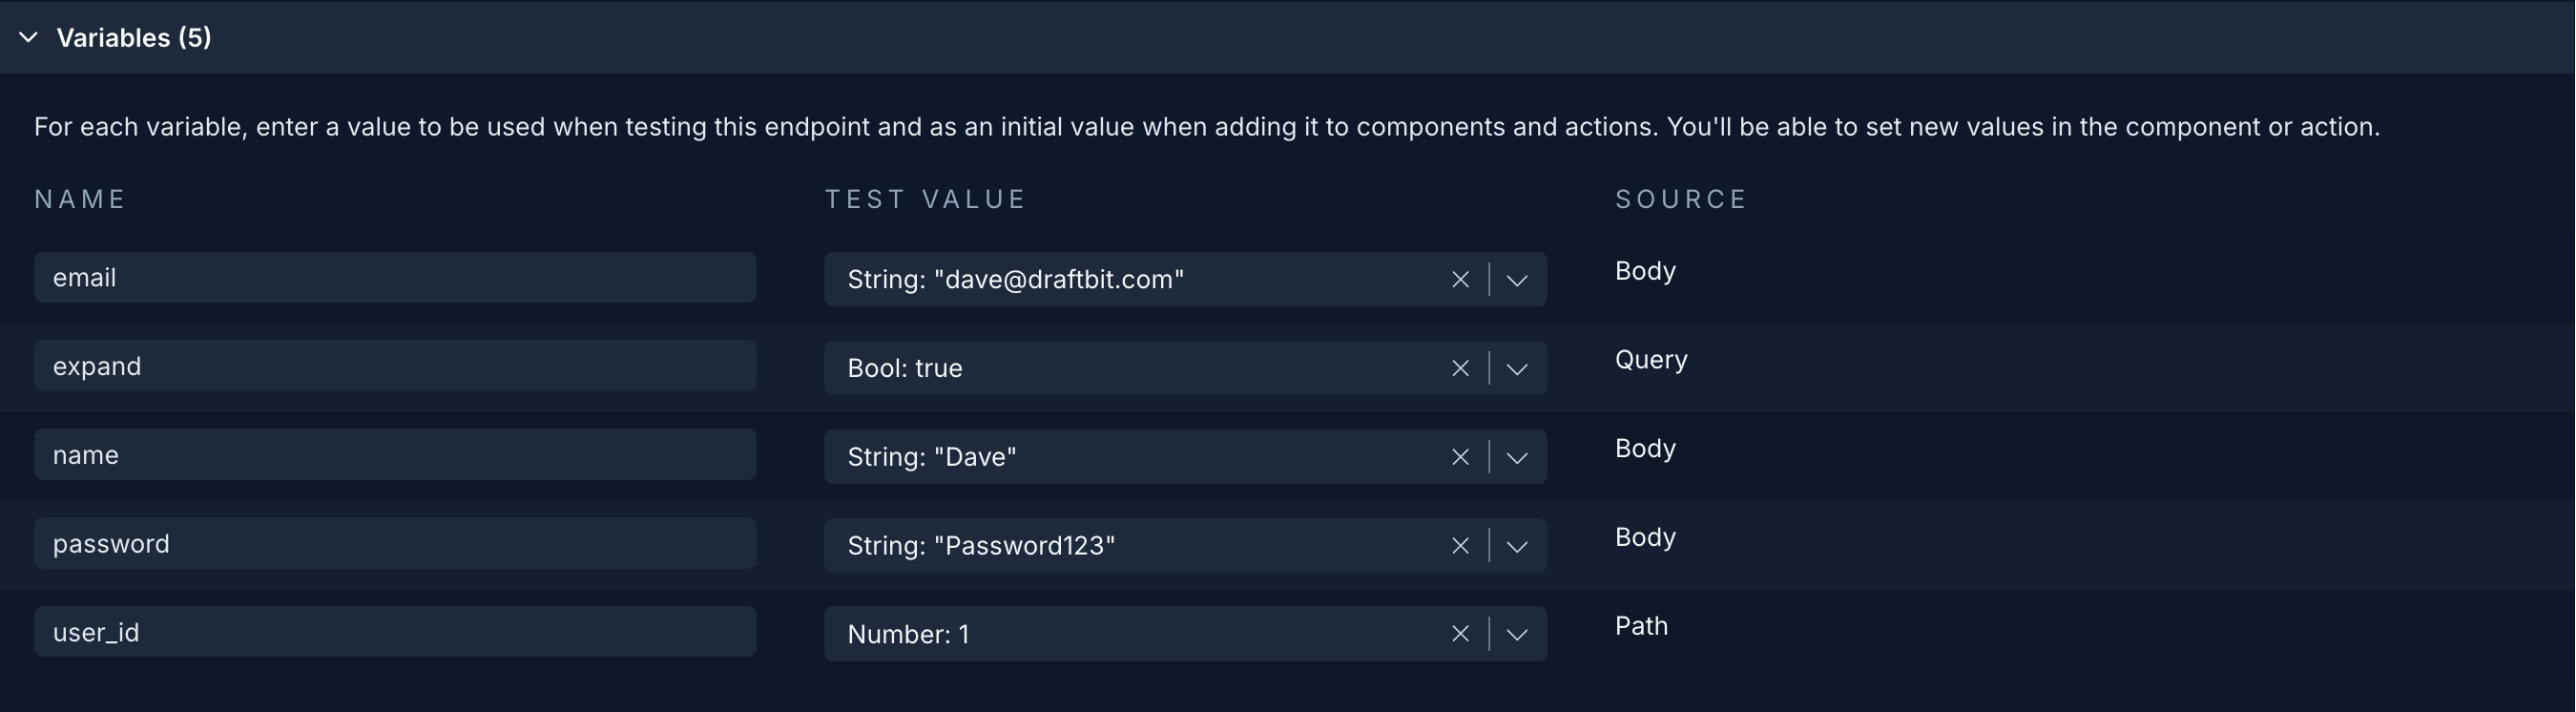
Variables
Only available for requests using {{variables}}
Here you can provide test values for any {{variables}} that you've included in the Path and Query Parameters, in addition to the Body Structure of a request using the POST, PUT, or PATCH methods. Type a value directly into the value field or select a Variable that you've created from the dropdown.
Test + Default ValuesThese values will be set when testing your Endpoint before saving (see next section) and they will also be used as the default values when using the Endpoint with a Fetch component or API Requst Action.
Property | Description |
|---|---|
Name | The name you assigned to the variable when creating it (read-only) |
Value | The test/default value to use for the variable |
Source | Indicates where the variable is being used in the request
|
Test & Preview Response
Once you configured your Endpoint, you can then click preview the full Endpoint URL and click the Test button to test the request before saving.
When the request is successful, the response will be displayed and you can finish by clicking the Save button. If the server returns a response with an error the status code and message will be displayed.
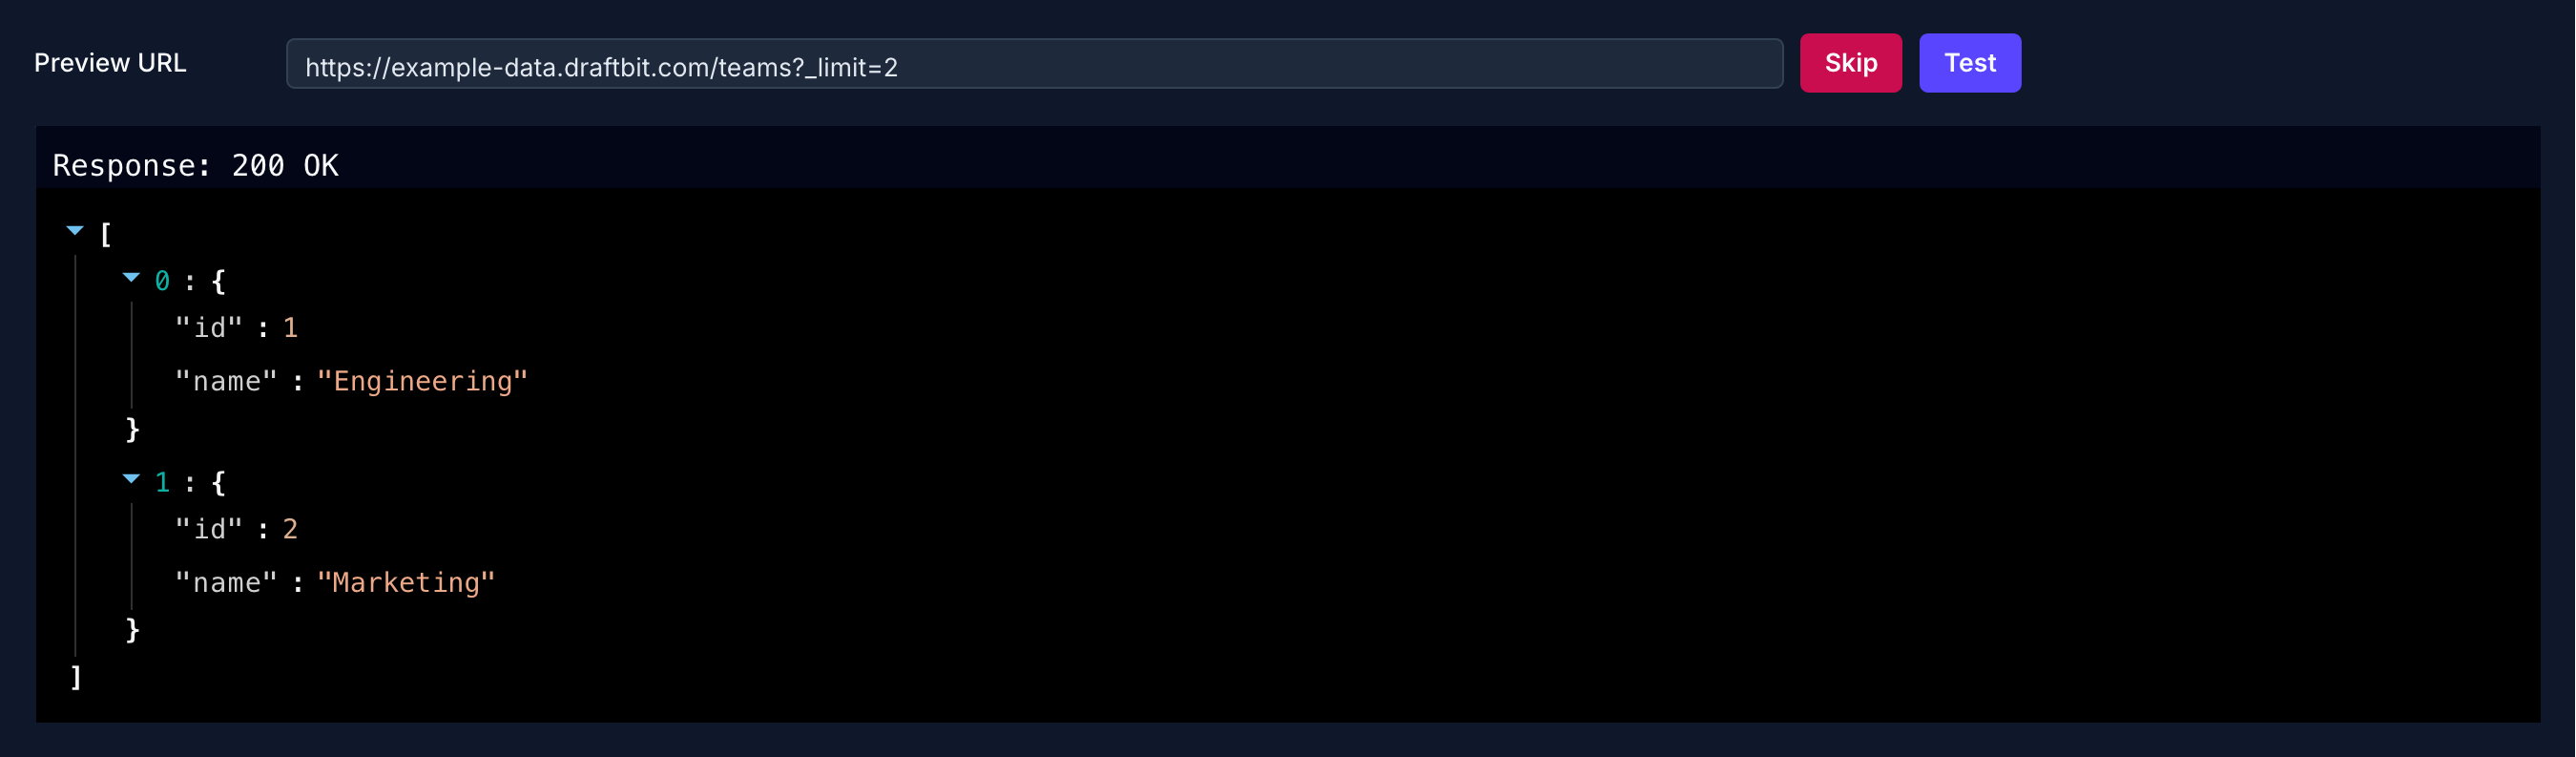
Don't use Skip!Using Skip will let you use your Endpoint without testing, BUT you will not be shown a list of available fields for data returned by this Endpoint when using it in a Component or Action and you'll lose other benefits from having a data schema associated with your Endpoint.
If for some reason you really need to skip, you should come back and Test then re-save the Endpoint as soon as possible.
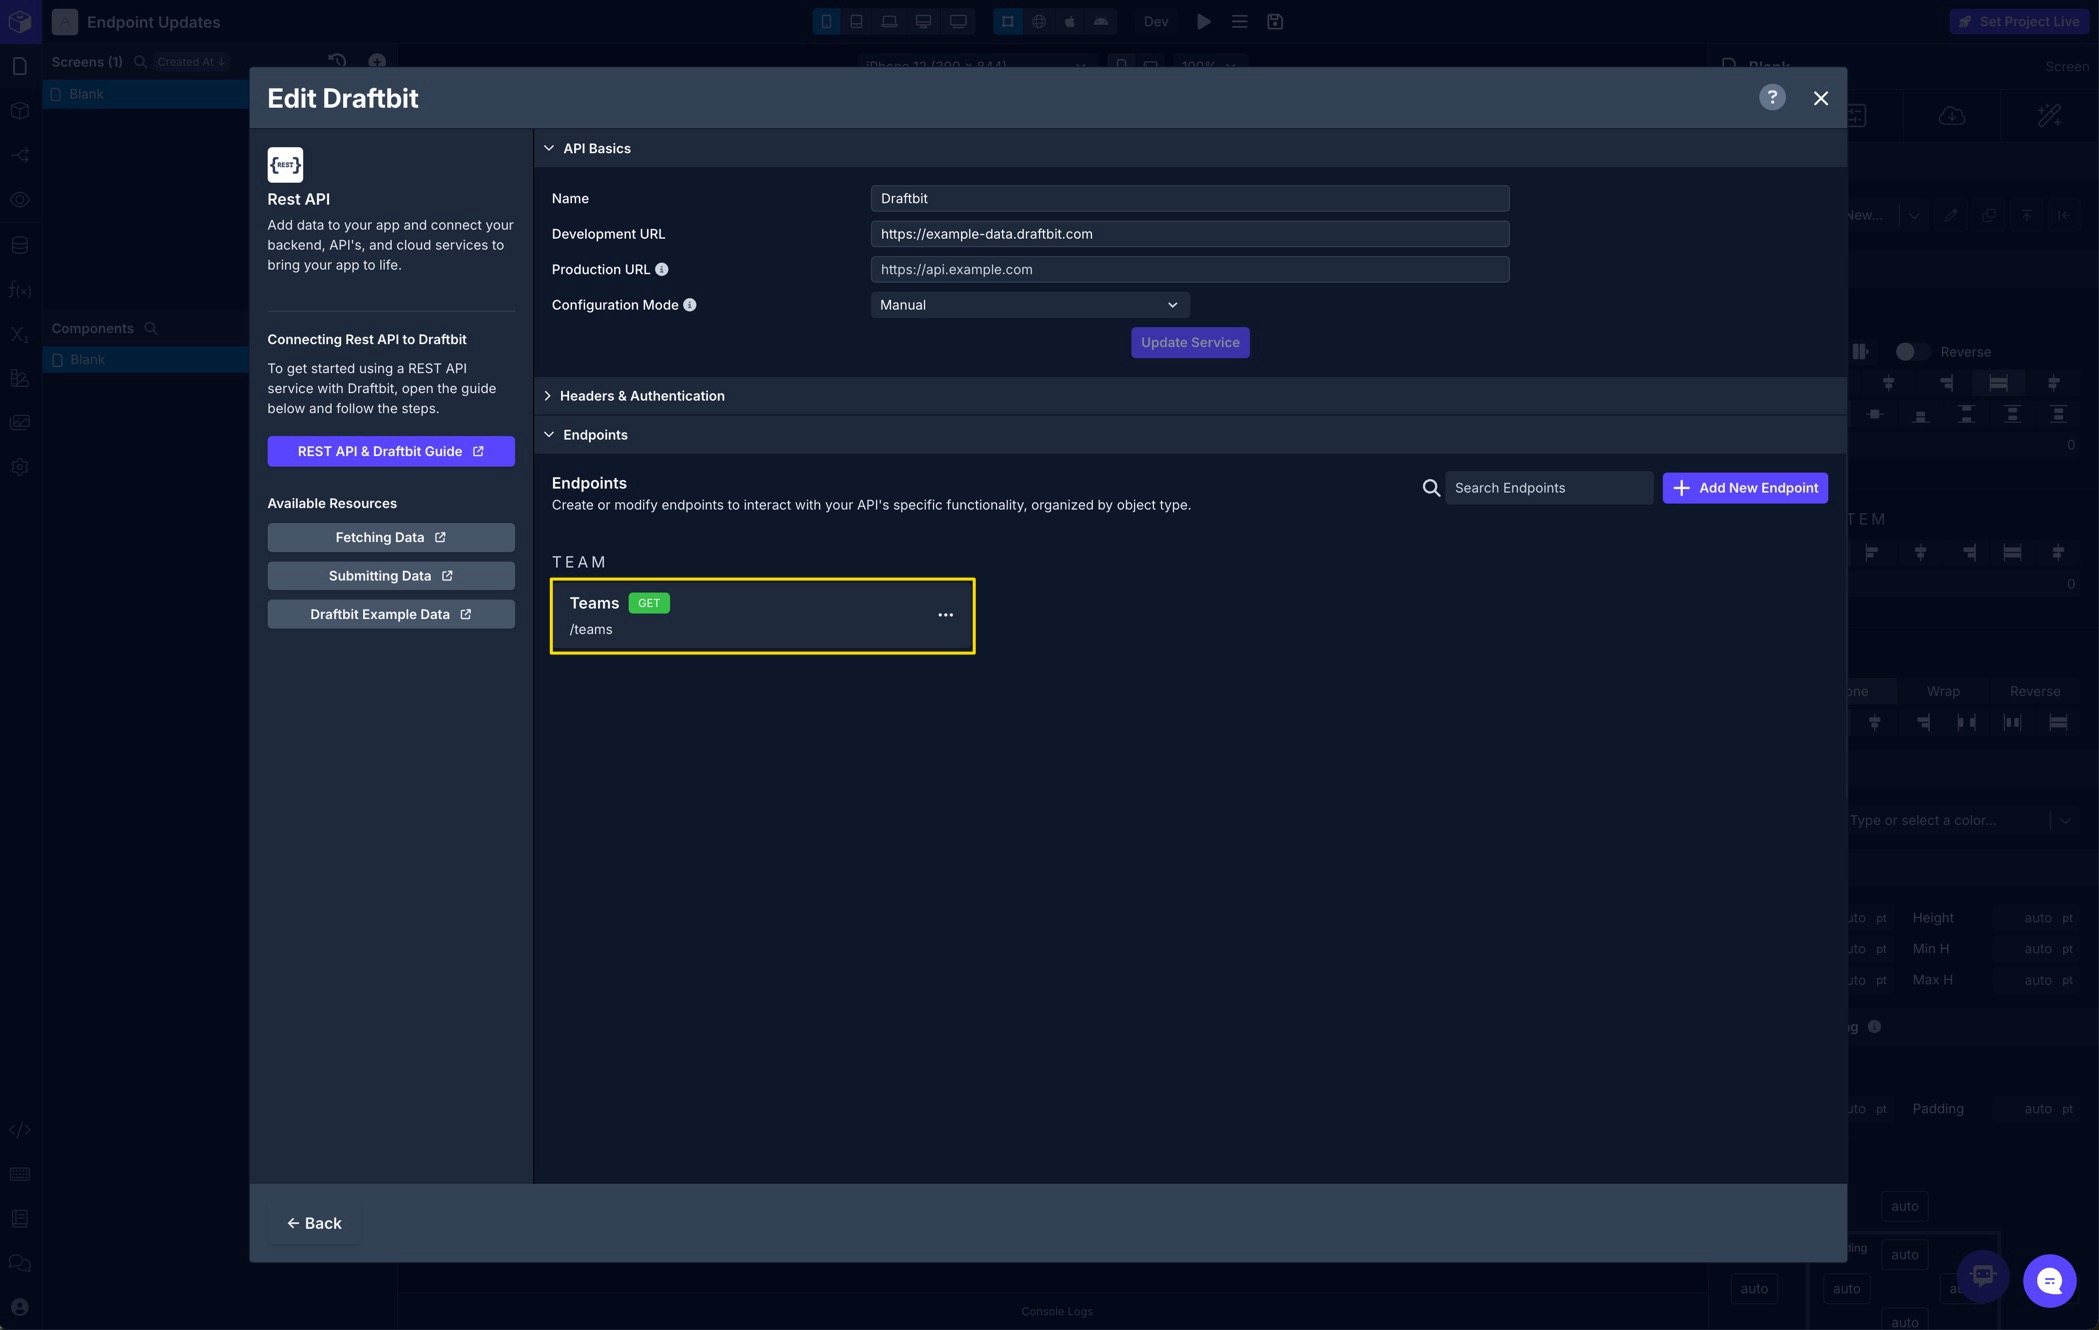
Editing an Endpoint
Click on one of your existing Services in the API & Cloud Services modal and select the Endpoint from the Endpoints section to adjust any of the previously configured settings.
If your Endpoint is automatically managed from an OpenAPI spec, only a limited set of props will be editable. To make changes, it's recommended to update and re-fetch your schema or switch the API service to
ManualConfiguration Mode
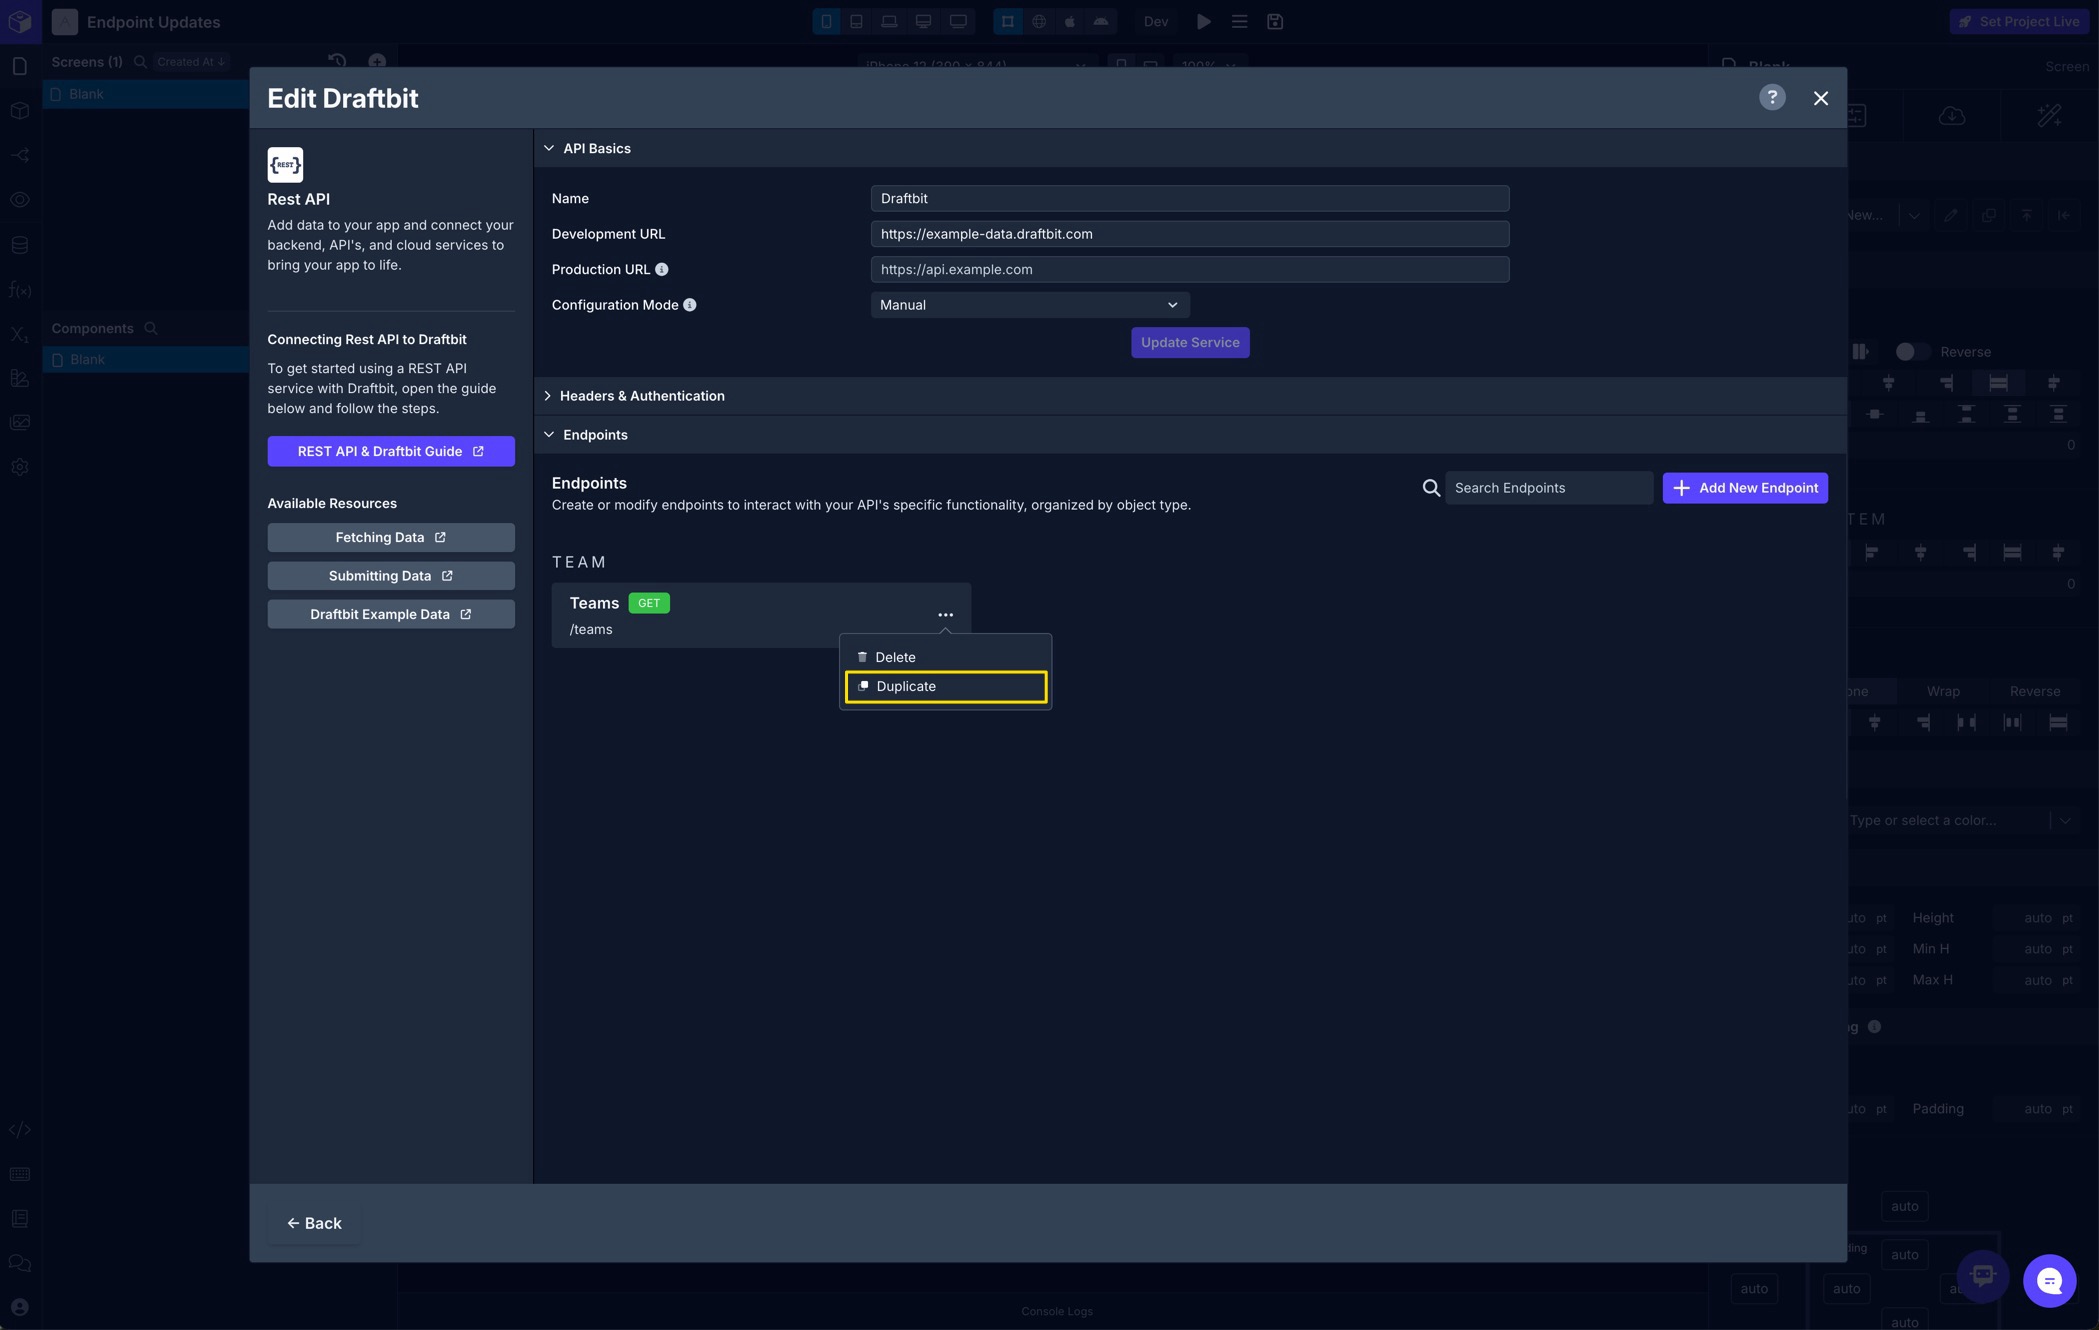
Duplicating an Endpoint
To duplicate an Endpoint, click the overflow menu (...) for the Endpoint you want to duplicate and then click Duplicate.
Deleting an Endpoint
To delete an Endpoint, click the overflow menu (...) for the Endpoint you want to delete and then click Delete.
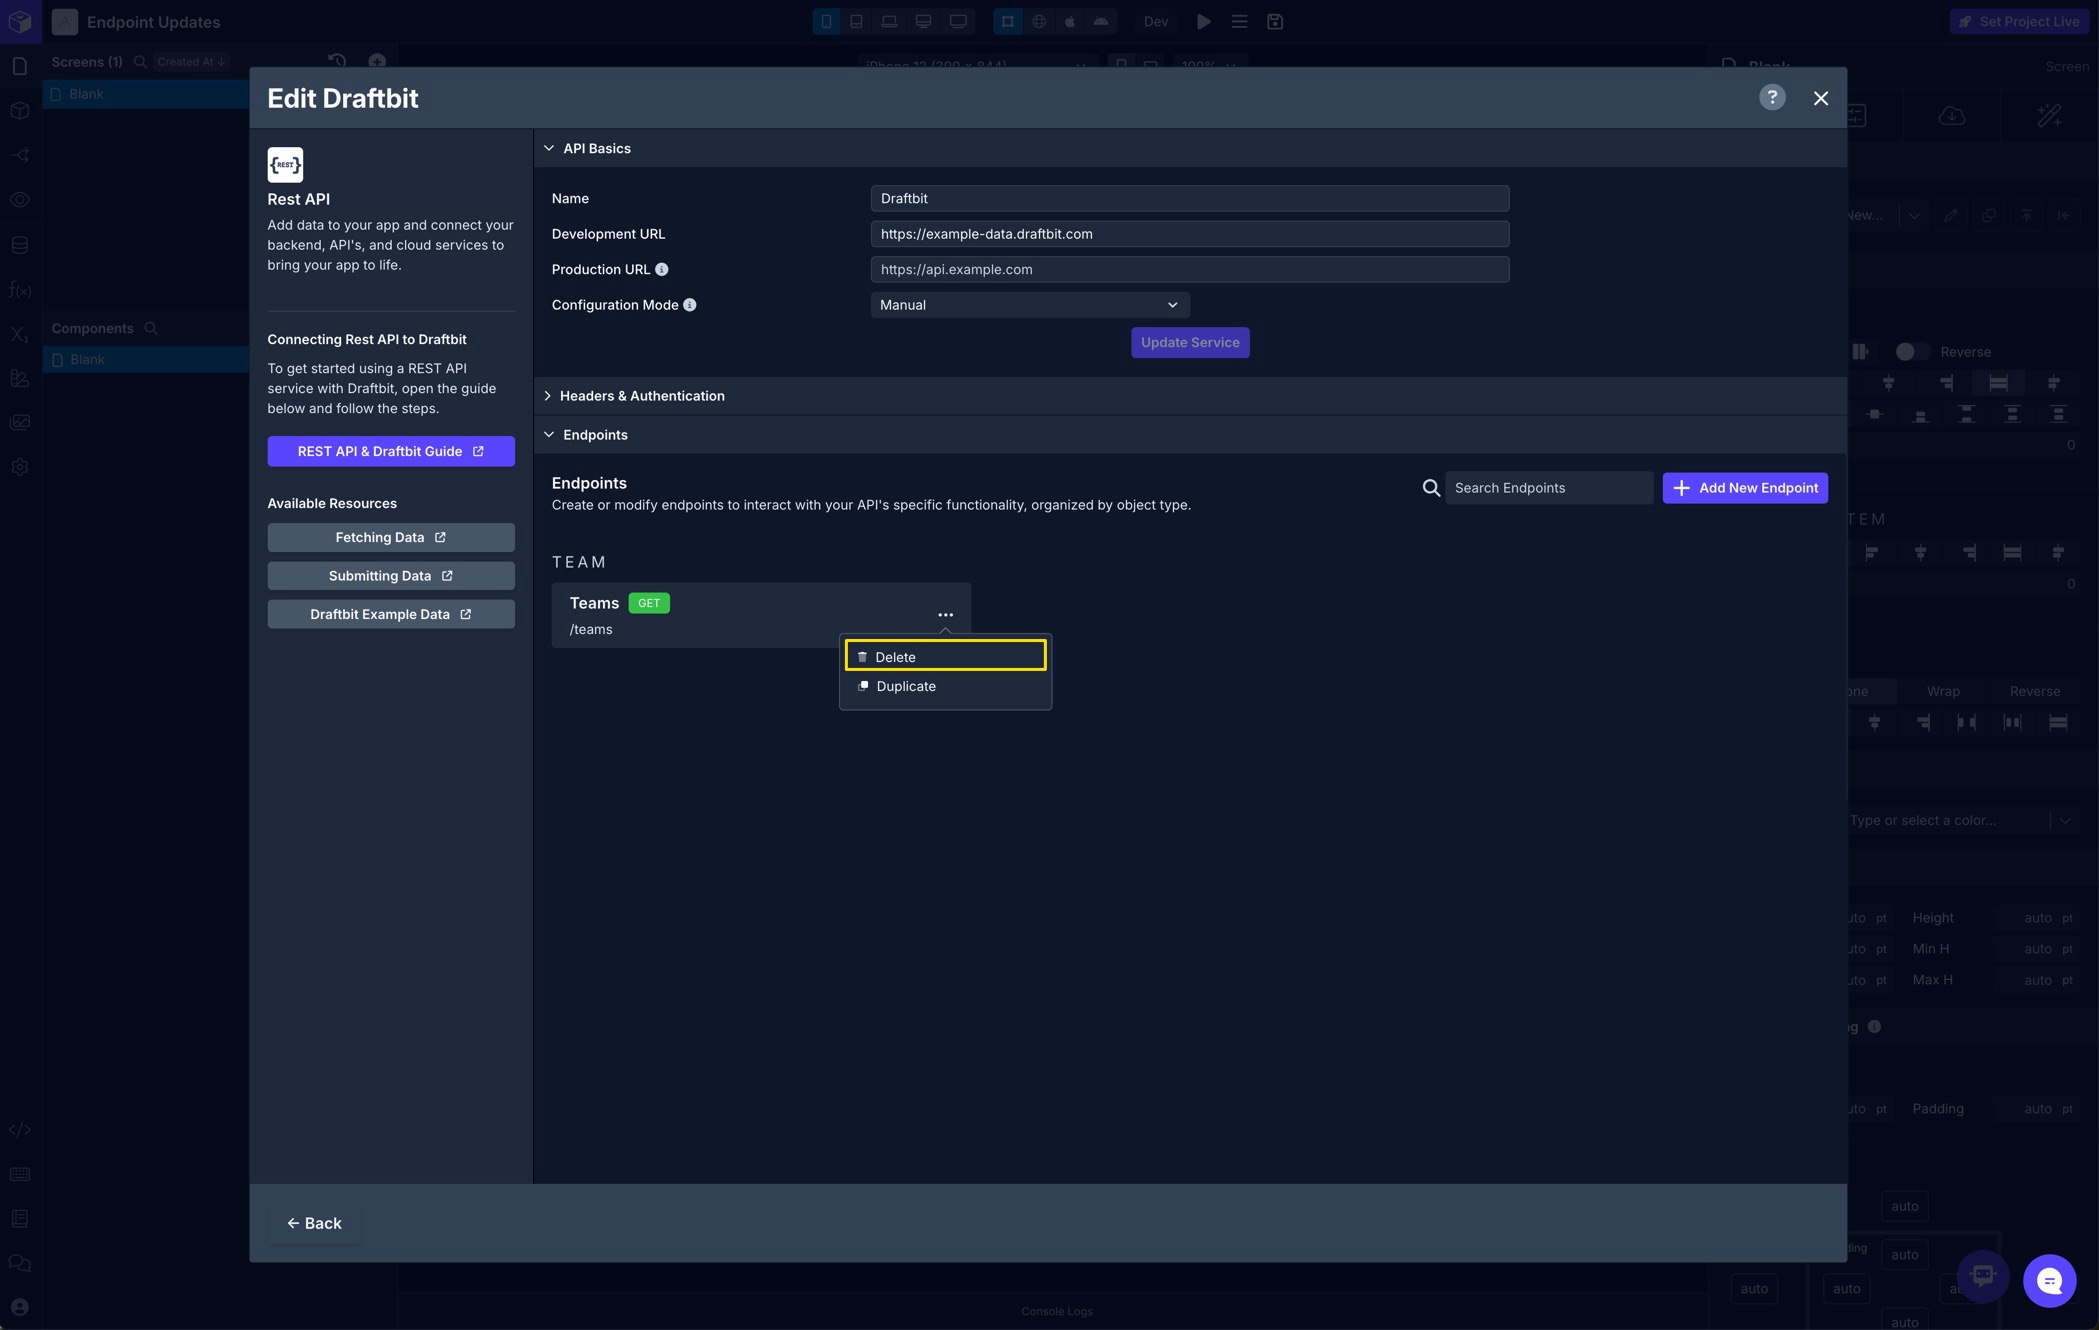
This is permanentWhen you delete an Endpoint all Fetch components and API Request Actions that reference the Endpoint will also be reset. This can't be undone!
CORS Issues
If you encounter CORS issues, you can update your server to allow access from the following origins:
Additional Resources
- MDN Docs - Request.mode
- MDN Docs - Request Credentials
- Endpoint – What is an API Endpoint?
- Draftbit uses React Query under the hood.