Passing Data
Pass data from one Screen to another when navigating
You can pass data between screens using Navigation Params. This is useful when you want to pass a record's id from a 'list' screen to a 'details' screen to fetch a record's details based on its id, for example.
Navigation Params
The Navigation Params are set on the Screen where they are intended to be used. There are a couple ways to create Navigation Params.
Create a Navigation Param on a Screen
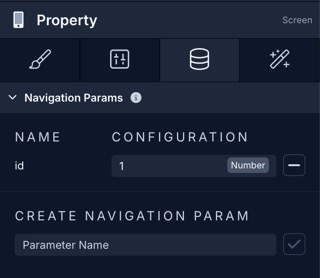
Select the Screen component in the components tree and go to the Data tab in the right panel. There you'll find the Navigation Params section for the selected Screen where they can be managed.
Enter the name of the parameter you want to create and click the ✔️ button. Once your parameter is created, you can give it a default value.
In the example below, we have a parameter named id set with a default value of 1
Create a Navigation Param in a Navigate Action
You can also create a Navigation Param for a Screen directly in the Navigate Action's settings. Select a Trigger that should run the Action and add a Navigate Action to the workflow.
With the Navigate Action selected, in the right panel of the Action Editor enter the name of the parameter you want to create and click the ✔️ button. Once your parameter is created, you can immediately pass in a value.
Default value
When you give a Navigation Param a default value, that value will be used by other components or Actions that reference the parameter unless you set it explicitly, for example when using a Set Variable Action.
Pass data to a Screen
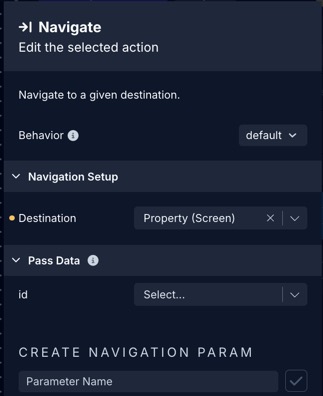
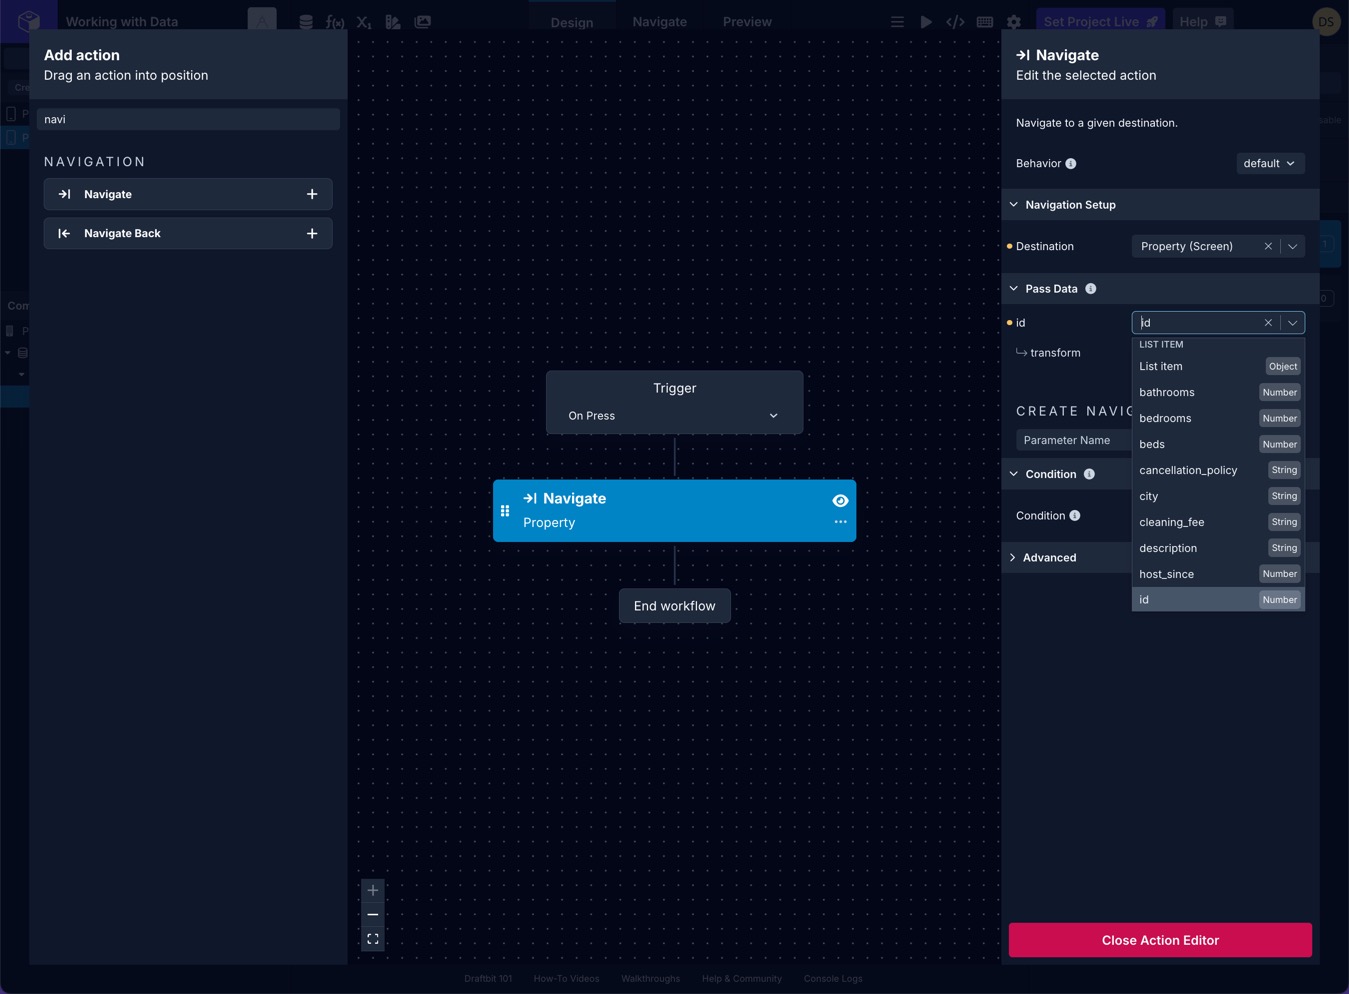
Once you have a Navigation Param set up on a Screen, you can then pass data to that Screen using the parameter with a Navigate Action. Select a Trigger that should run the Action and add a Navigate Action to the workflow.
With the Navigate Action selected, in the right panel of the Action Editor select a Destination. Any Navigation Params available for the destination Screen will be listed under the Pass Data section where you can then assign values to them from the dropdown.
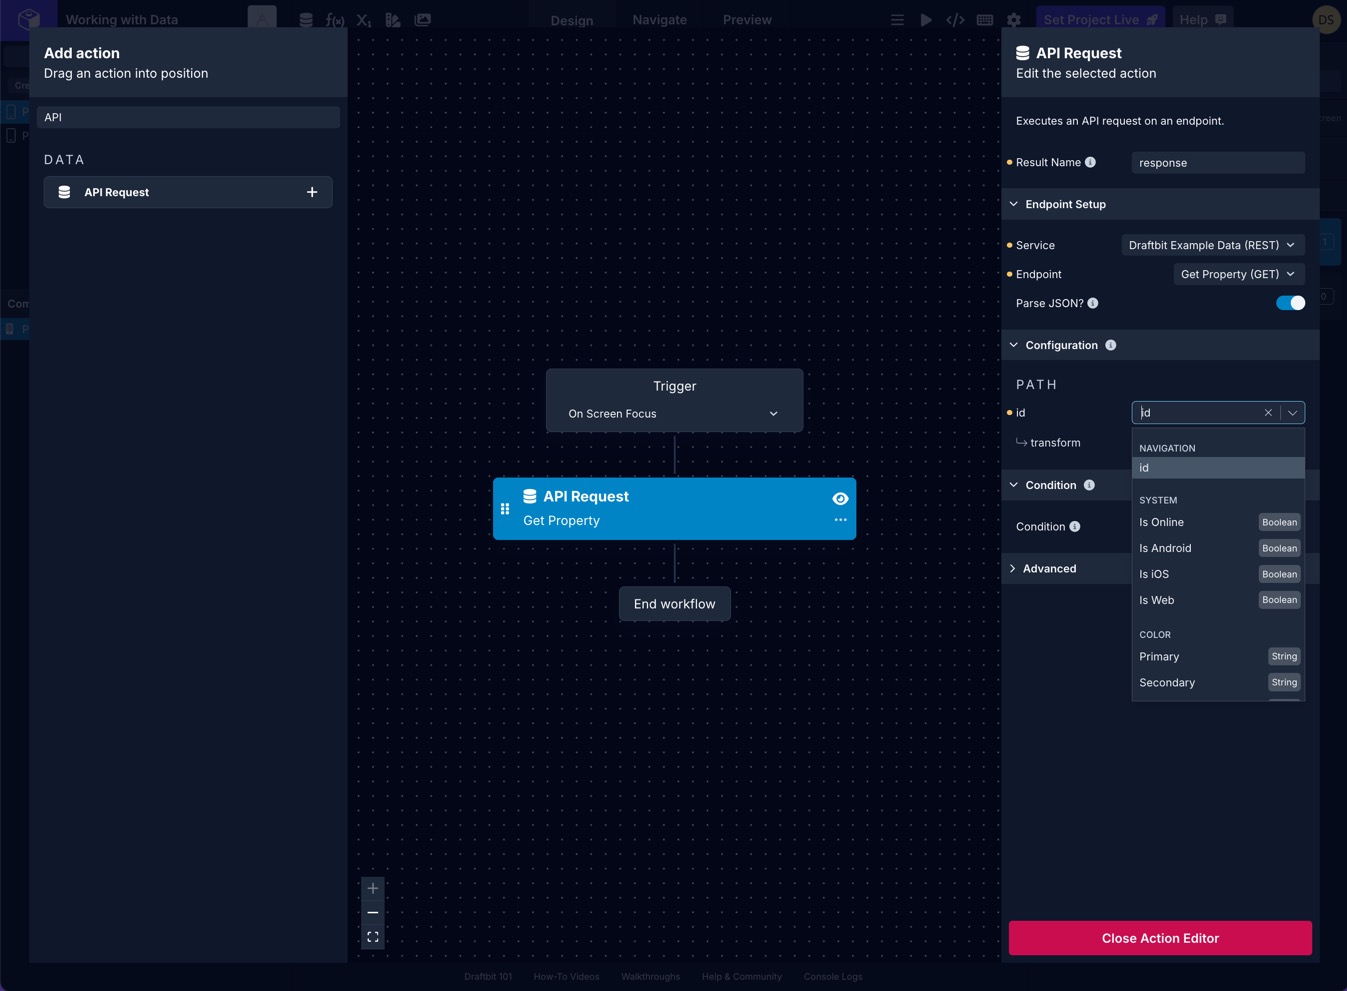
Use data passed to a Screen
Any Navigation Params that you create for a Screen will be added to the variable selection dropdown under the Navigation section wherever variables are accepted. This includes Actions and data-enabled components.