Publishing Your App to the Google Play Store
Draftbit supports publishing your app to the Google Play Store. In order to do this, you'll need to complete a few setup steps and provide us with some information. This guide details those steps.
App Publishing StatusTo publish your app it needs to be set from Draft to Live. See more in Intro to Publishing
Connecting Your Expo Account
We use [Expo EAS] (https://expo.dev/eas) to complete the Android build and submission process on your behalf. You will need to create a free Expo account so we can do this.
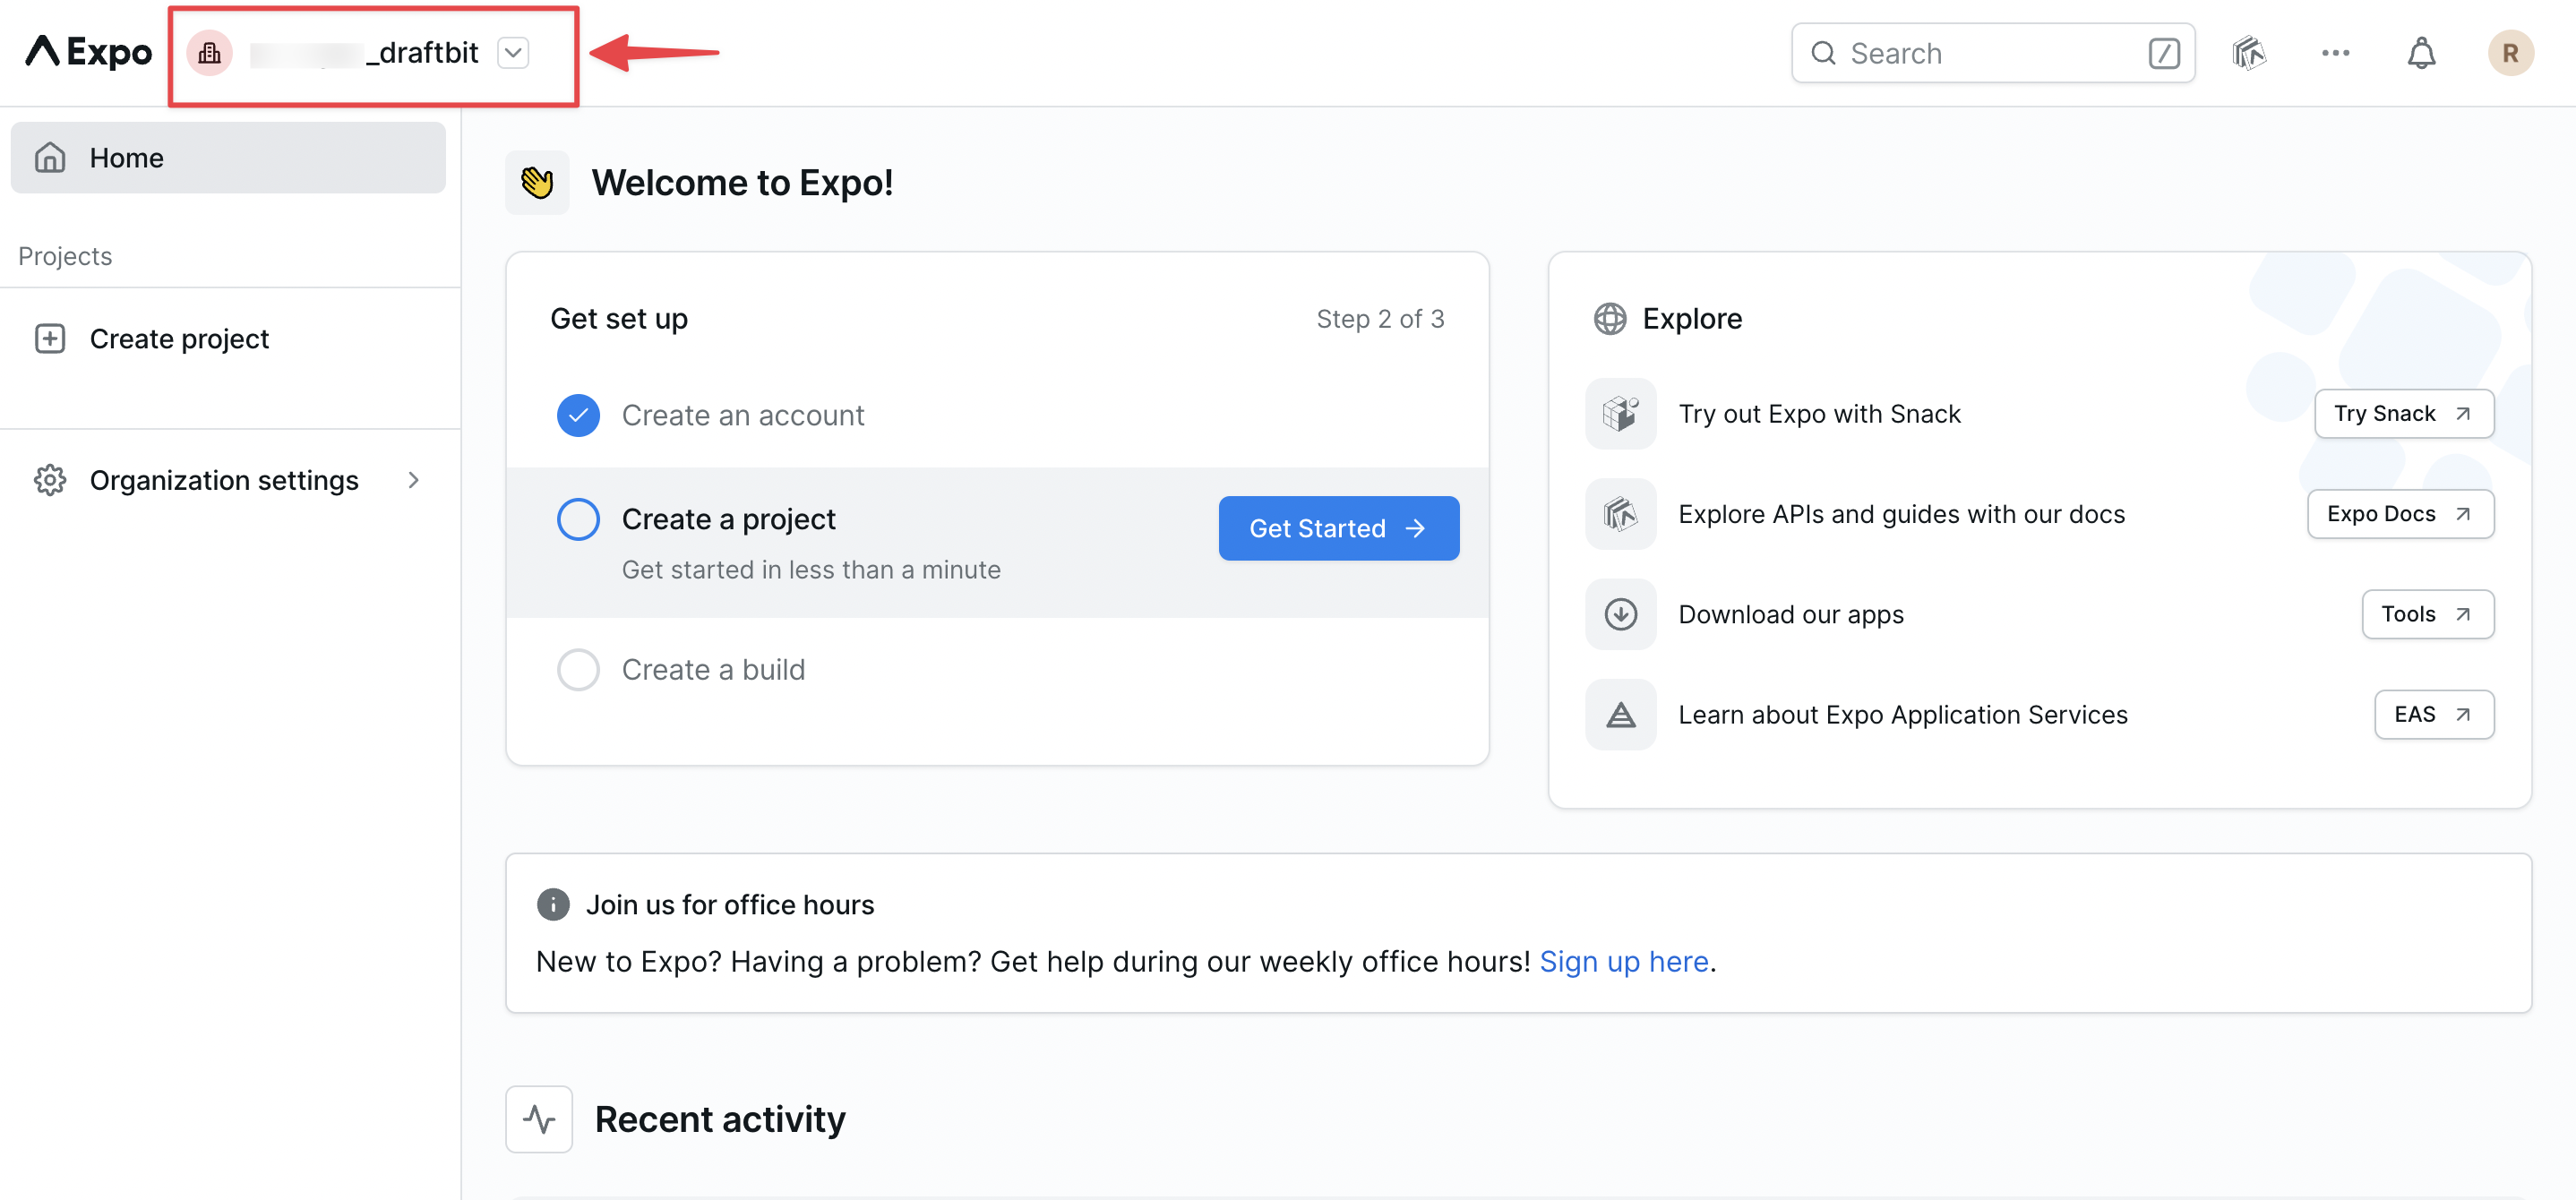
Expo Account TypeYou must have an Expo Organization account to proceed. After entering your account name into the 'Expo Organization Account' section, the Draftbit account something@draftbit.com will appear, to which you can then send an invite.
Once you've created your Expo account, add that account name in your Google Play Store Settings in Project Settings.
Your Organization account name can be found on your Expo account Dashboard.
Inviting Draftbit to your Expo account
You'll also need to grant Draftbit access to submit app builds on your behalf via Expo EAS.
To do this:
-
Log into your Expo Organization account.
-
Go to Organization Settings (found in the bottom left in your dashboard) and then to Members.
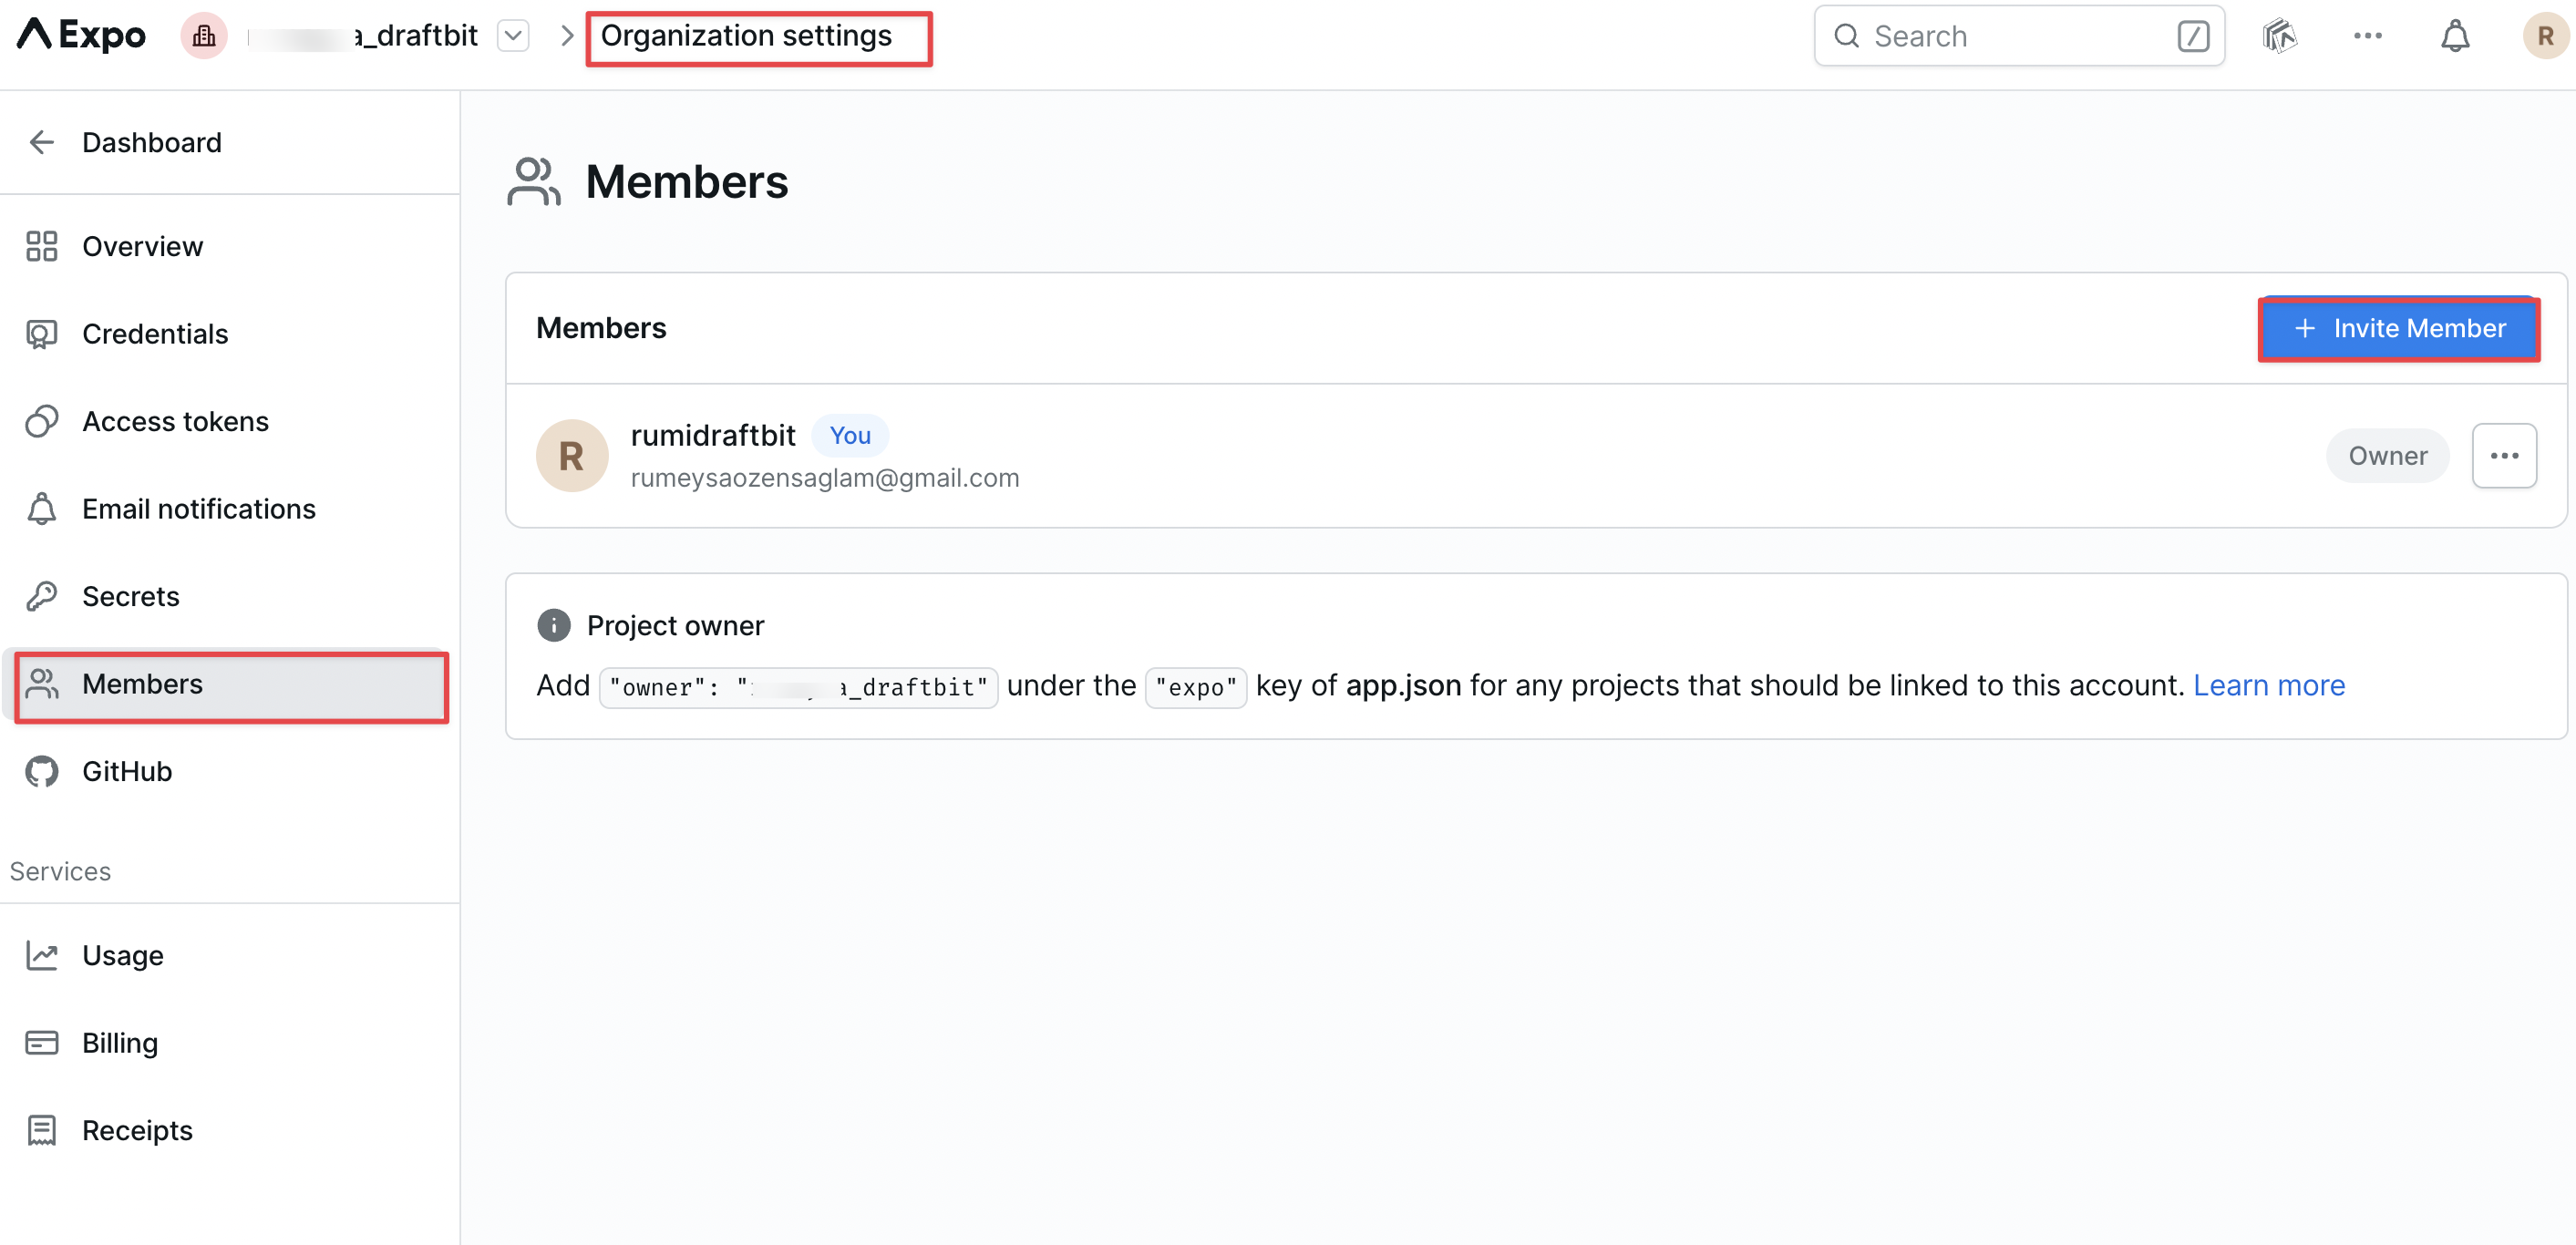
- As mentioned in above section, after entering your account name in the 'Expo Account Name' section within your project settings, a Draftbit account will appear underneath. Invite this account as a Member and assign it an Admin role.
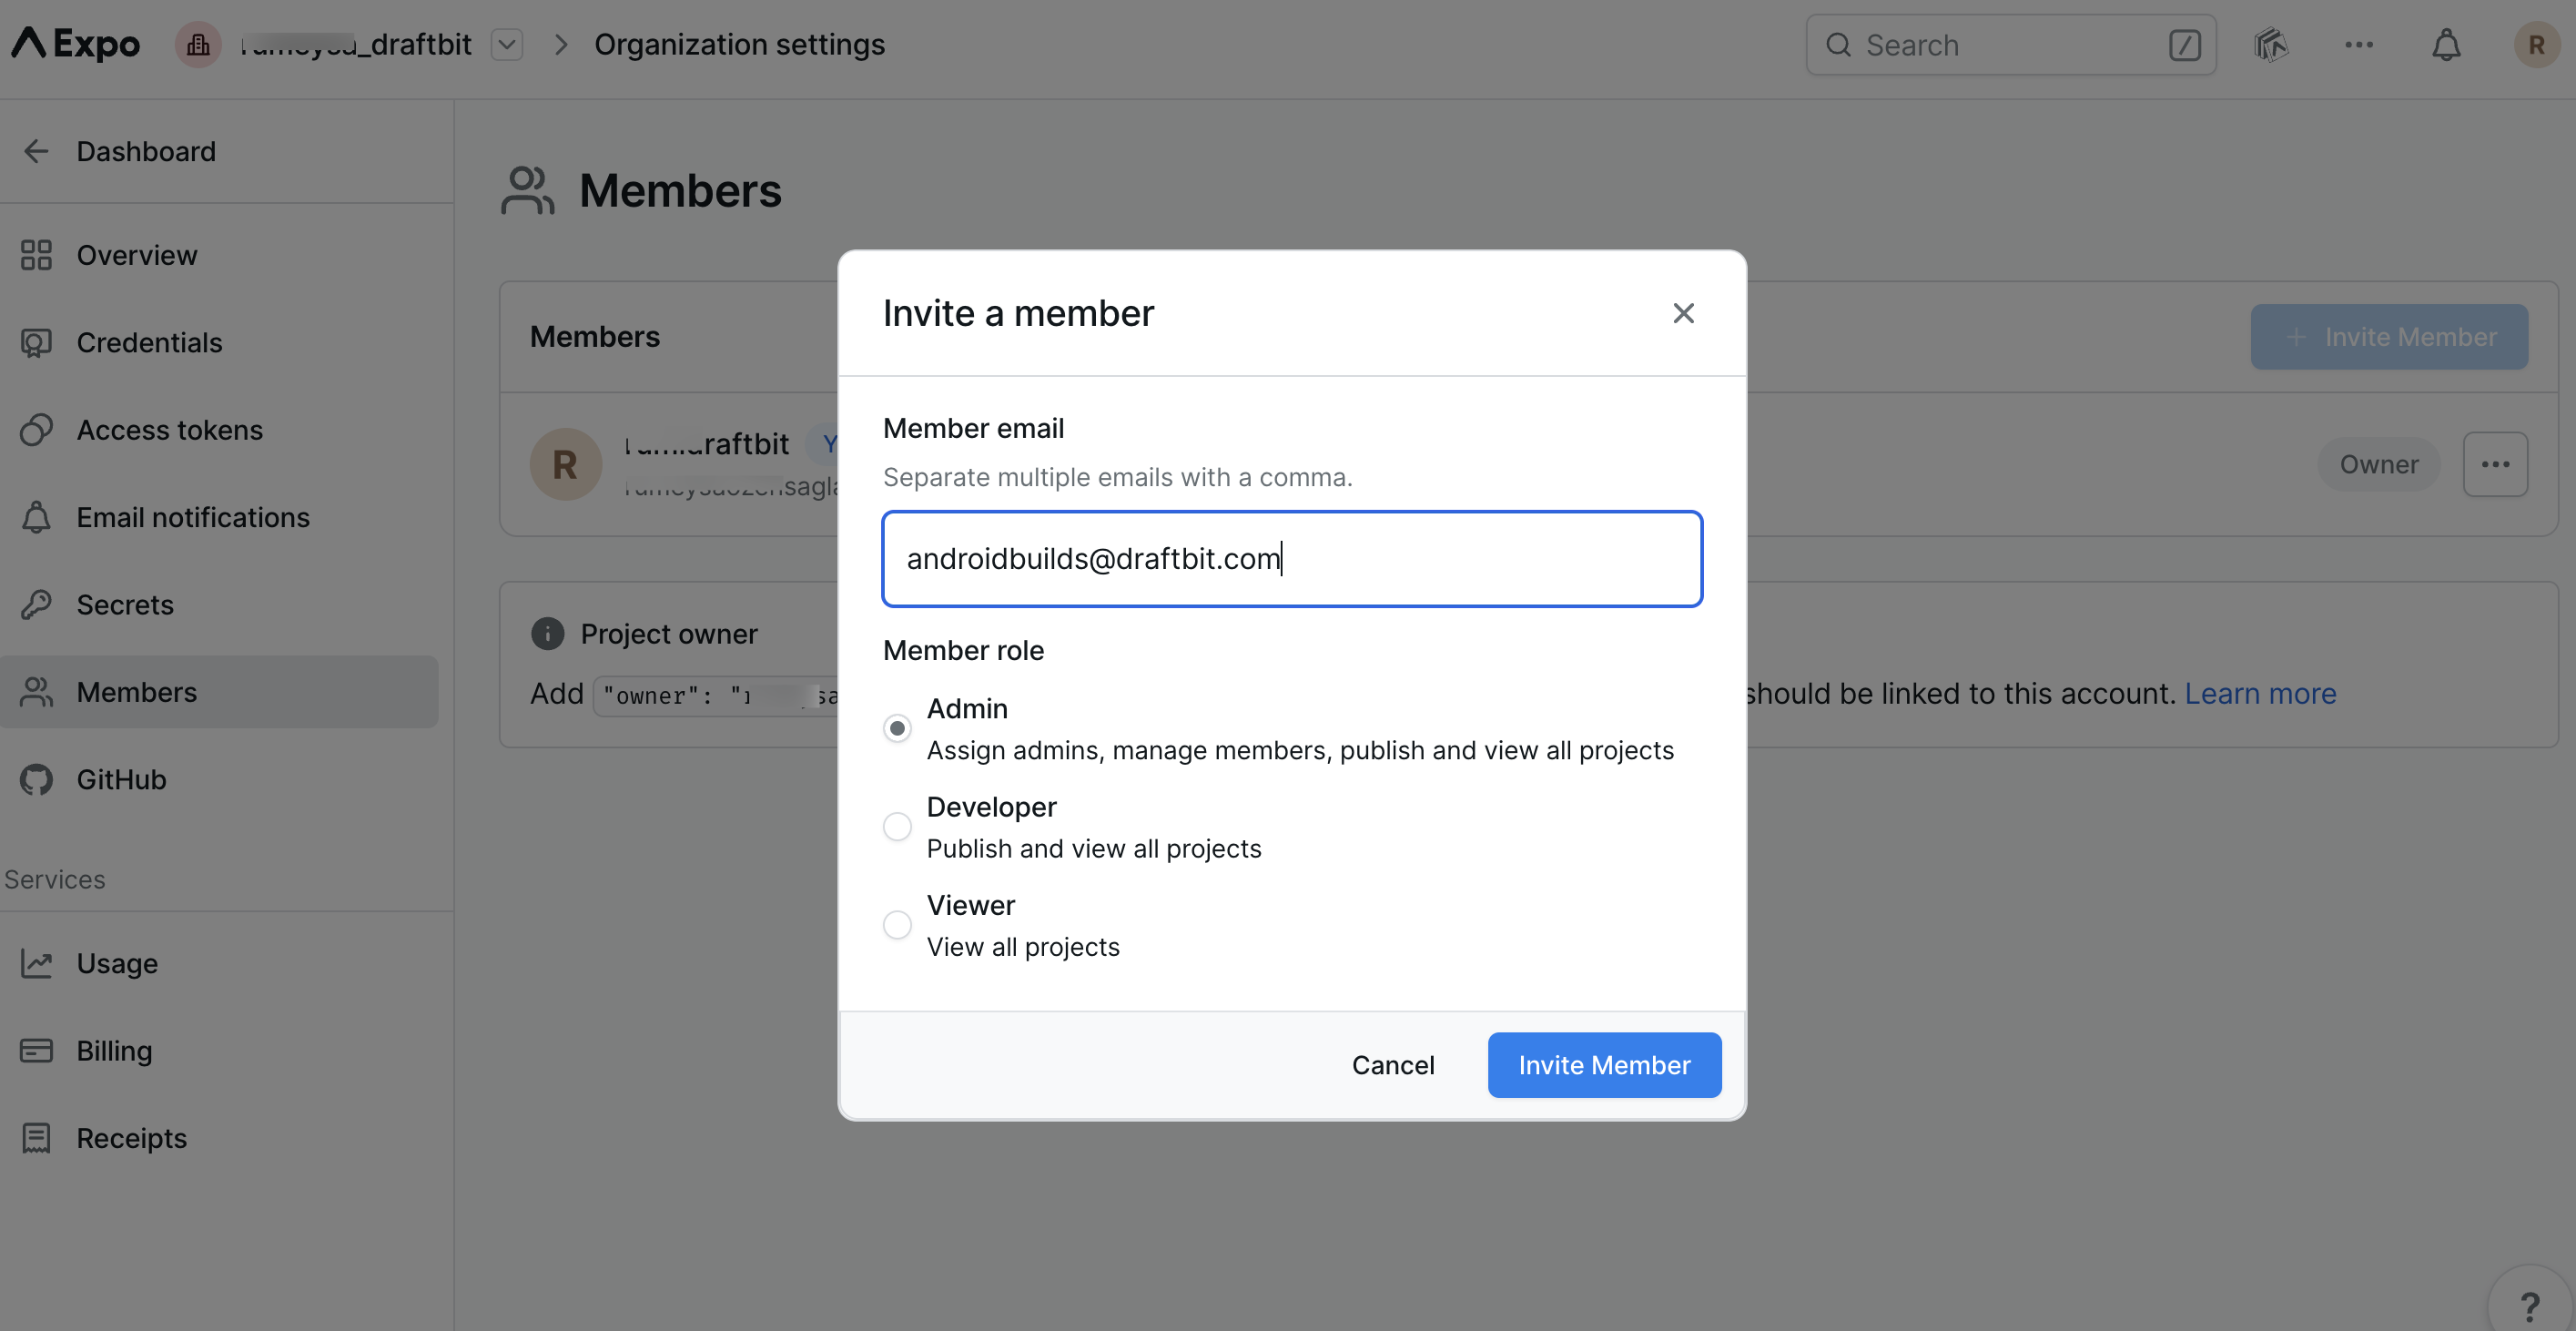
Note on Admin AccessDraftbit will only make use of admin access to automate the publishing process for your app. You may want to limit your use of the Expo account you share with us to just Draftbit apps.
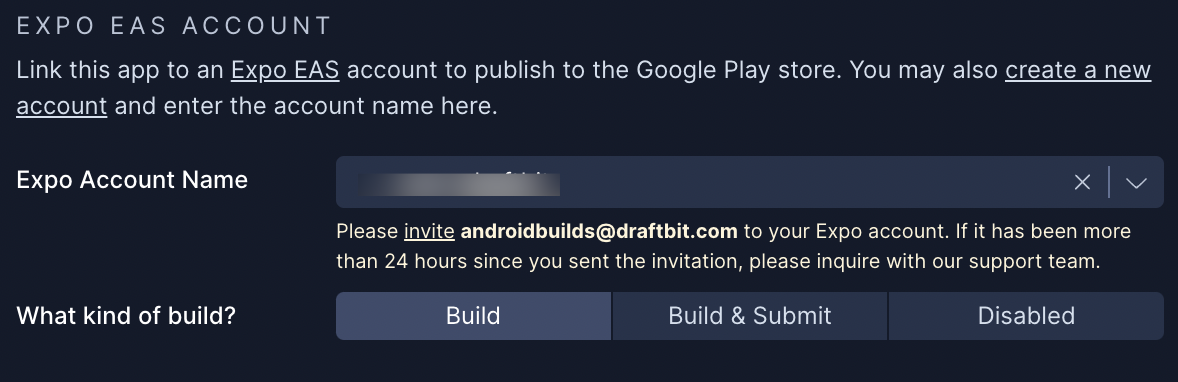
What kind of build?

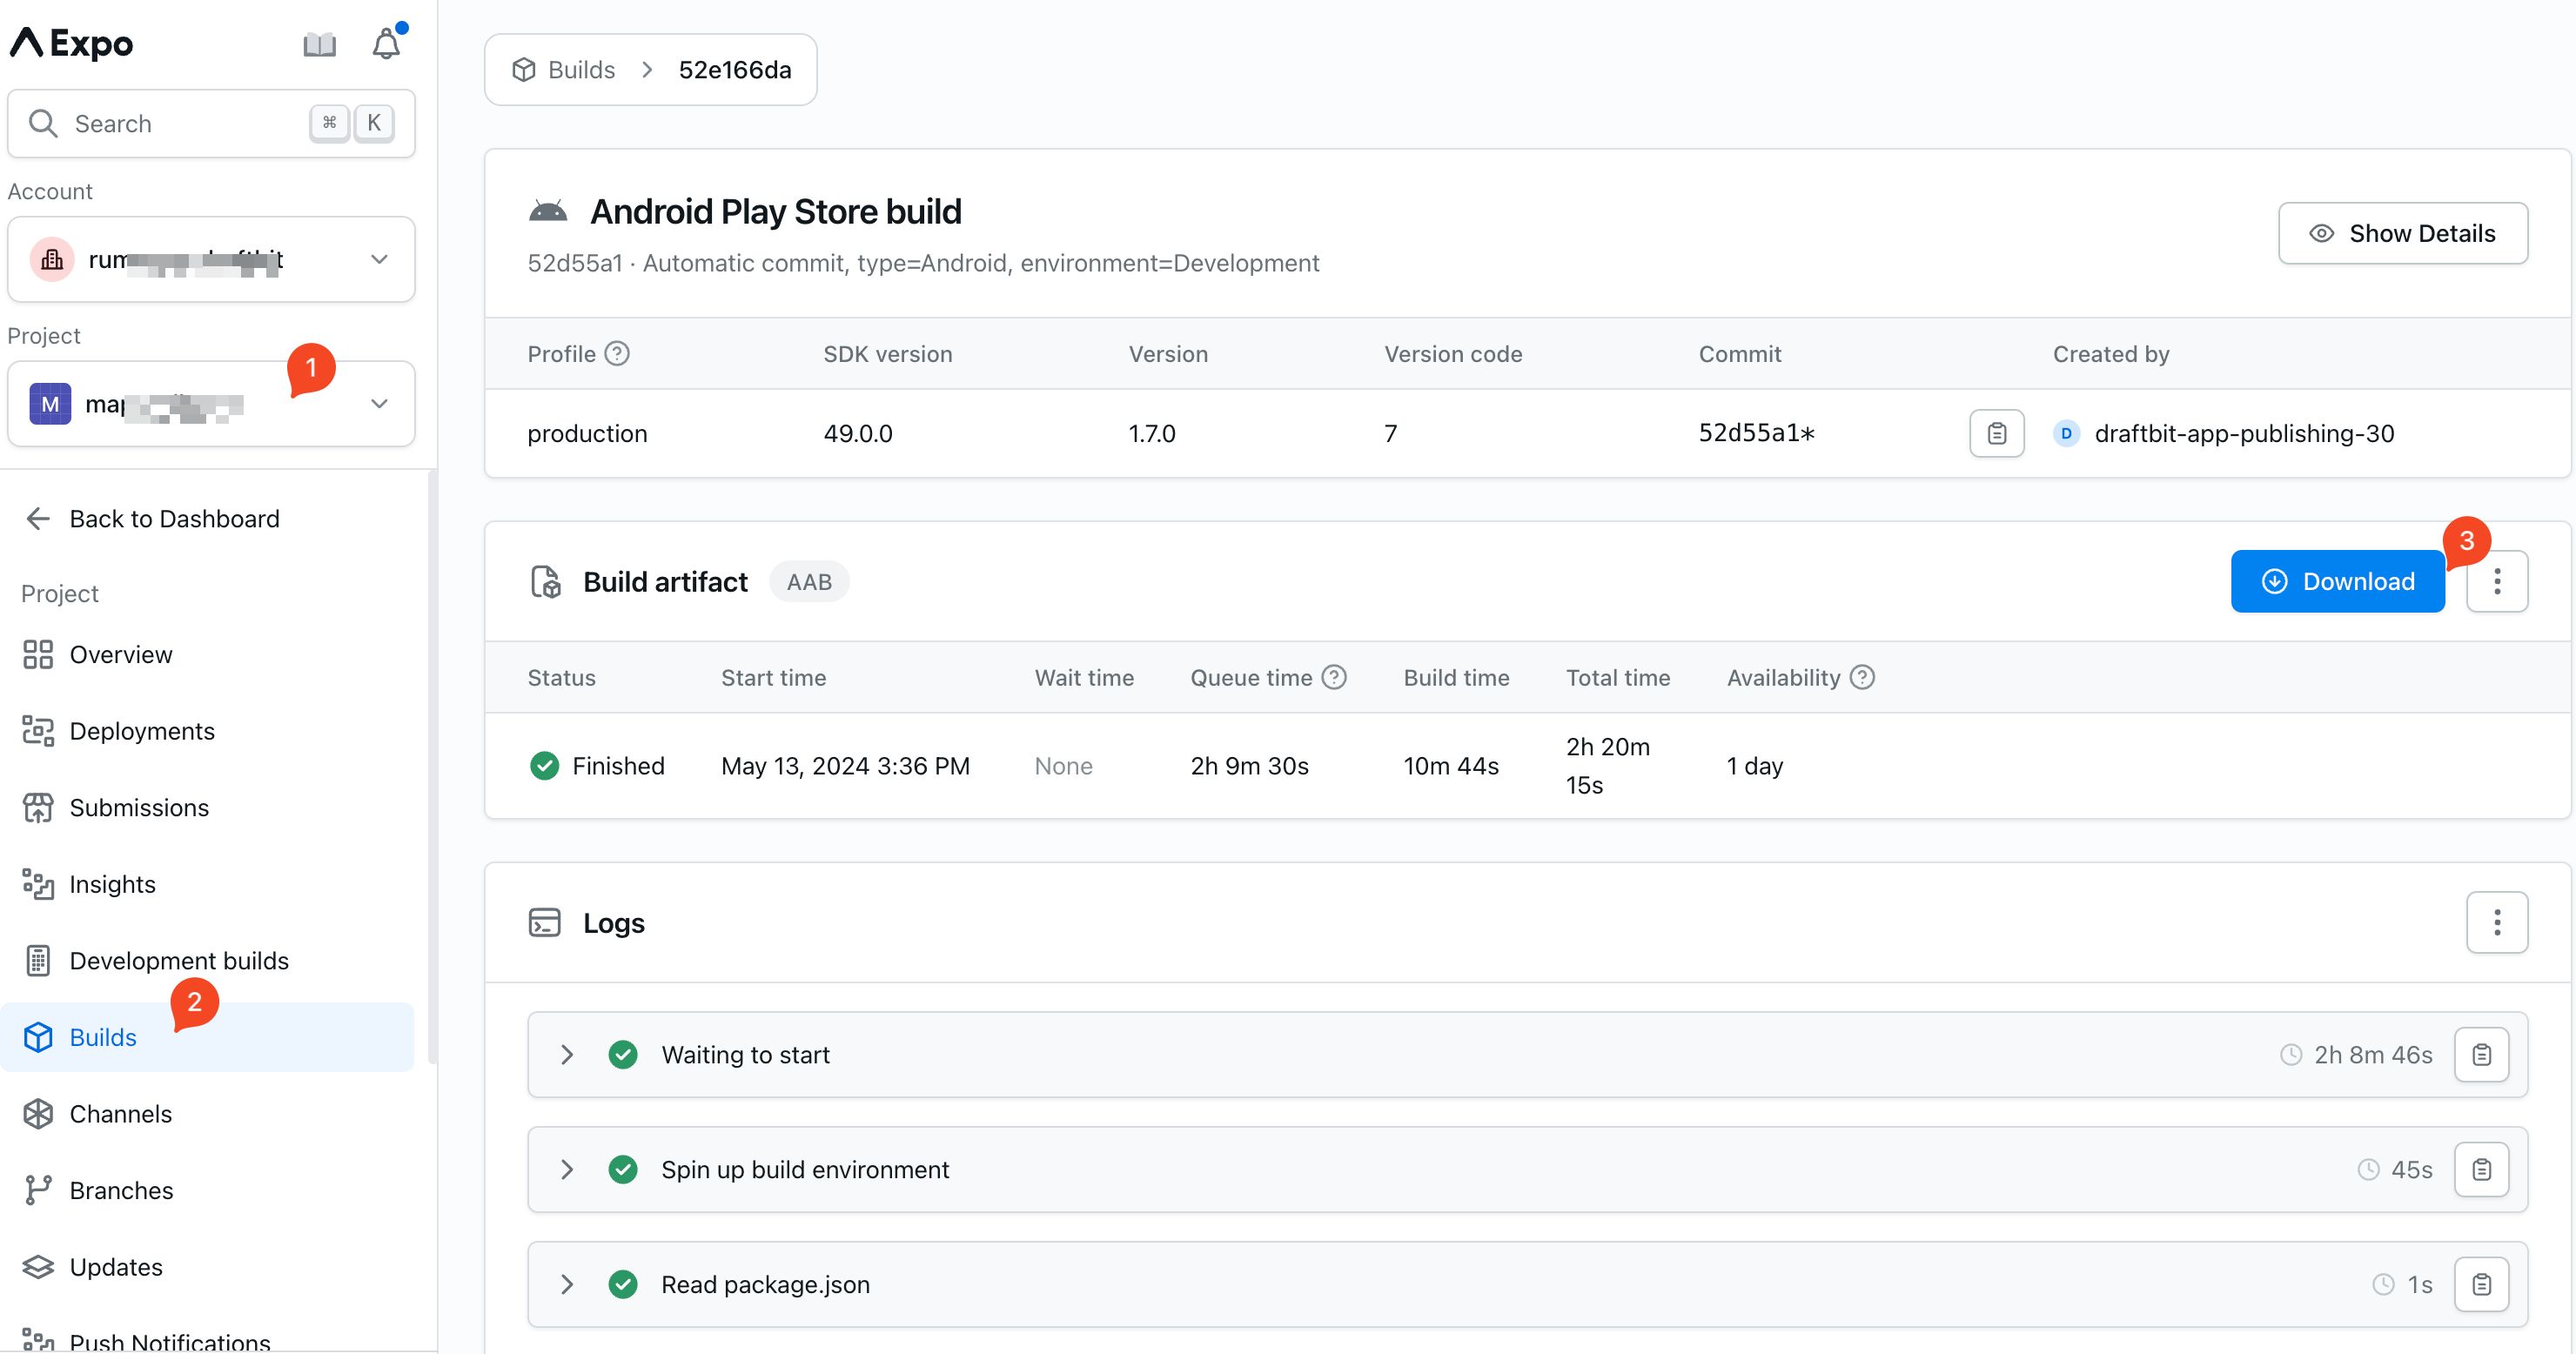
Under the EXPO EAS ACCOUNT section, if this is your first app publish to the Google Play Console, you'll need to handle the upload process manually. So you need to select the Build option. This will create the Android App Bundle (.aab) file, which is the essential package for deploying your app on Google Play. Since this is a new app, you'll need to upload the generated .aab binary file to the Google Play Console yourself. You can find instructions on uploading builds in the Google Play Console documentation https://developer.android.com/studio/publish/upload-bundle. After a successful build, you can contact our Support team for the binary file. It will be also available for download within the EAS dashboard:
For future app updates, you should update the selection in the Project Settings as Build & Submit. By enabling this option, Draftbit will automatically upload your build to your designated Google Play Console app listing, streamlining the publishing process.
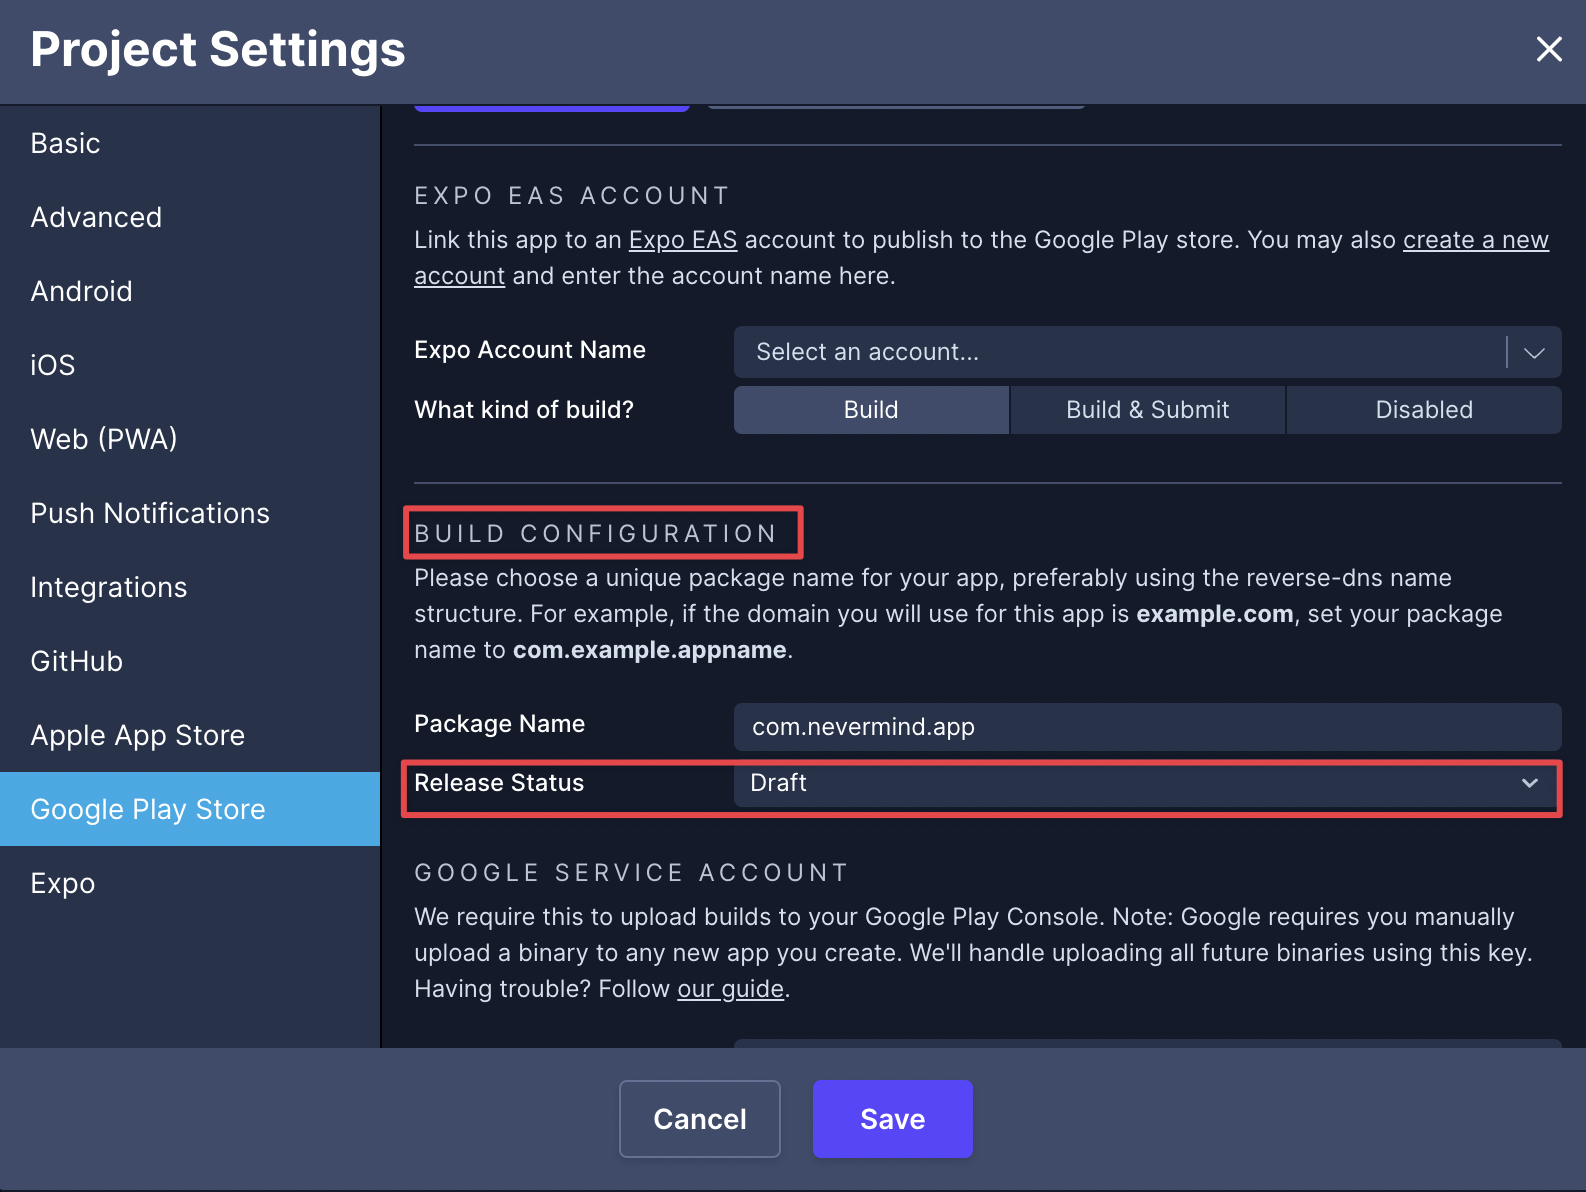
Choose a Package Name
The package name of an Android app uniquely identifies your app on the device, in Google Play Store, and in supported third-party Android stores.
Package NameFor example, the URL of an app page is
play.google.com/store/apps/details?id=com.example.app123. The app's package name iscom.example.app123.
The package name should use the reverse-dns name structure. For example, if the domain you will use for this app is example.com, set your package name to com.example.appname.
Once you choose your desired package name, add it to the Build Configuration section of your Google Play Store Project Settings in Draftbit.
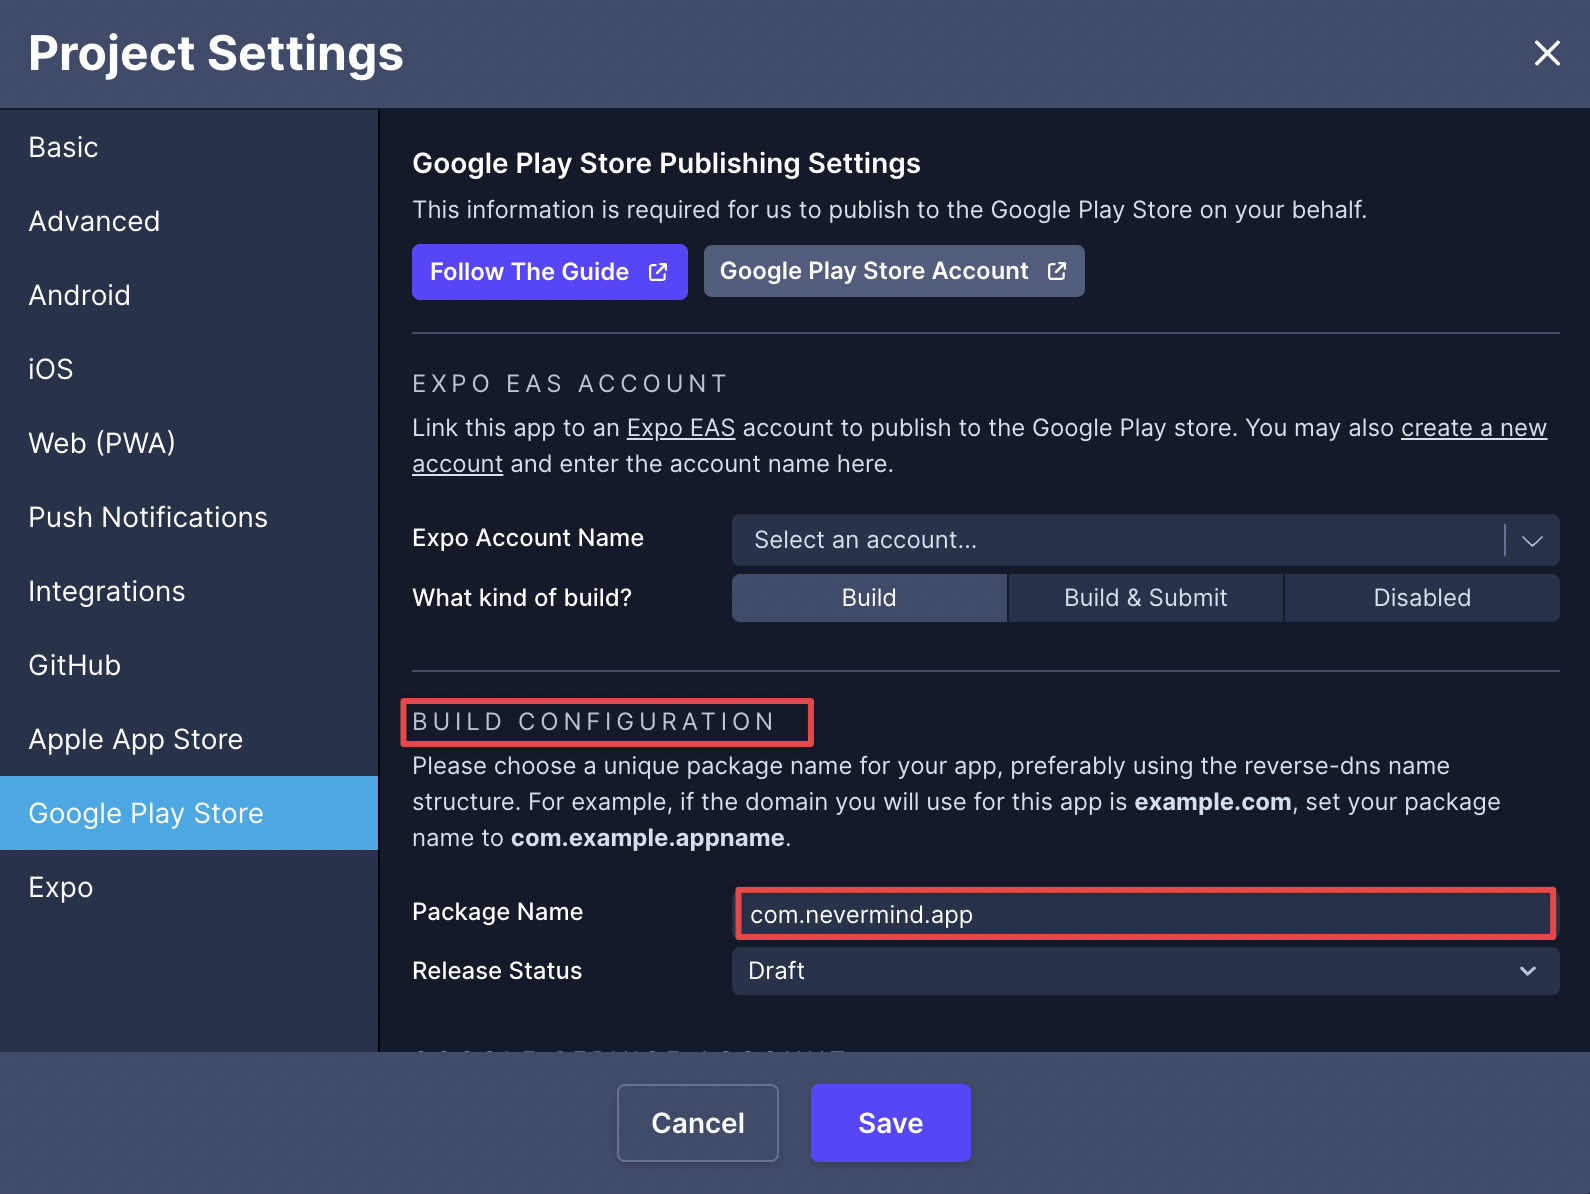
Setting Release Status
Google Play Store requires each app to be assigned a status when created. You can set that in the Build Configuration section of your Google Play Store Project Settings in Draftbit.
Release Status Must Match The Release Status Of Your App In The Google Play Store ConsoleIf you choose a release status in Draftbit that doesn't much the status of your app in the Google Play Console, the build will fail to upload to your account. By default, the status will be set to "Draft" in the Google Play Console unless you choose to promote it. So, selecting "Draft" as your Draftbit release status should be the appropriate setting in most cases.
Creating a Google Play Store Developer Account
To publish to the Play Store, you'll first have to create a Google Play Store Developer account. You can do so here.
Google Play Store Developer Account Requirements
- A Google Play Store Developer account requires you to pay a $25 fee
- You will need to provide an address & phone number for the account
- You may be required to verify your account by providing a government-issued photo ID that matches the information you provided on sign-up
Creating an app in Google Play Console
You'll need to create an App in your Google Play Console in order to upload Draftbit app binaries.
To do this:
- Go back to your Google Play Console and navigate to the All Apps page, then click the Create app button in the upper right.

- Select Default language, App or game, Free or paid, fill in the App name input and click Create app in the bottom right.
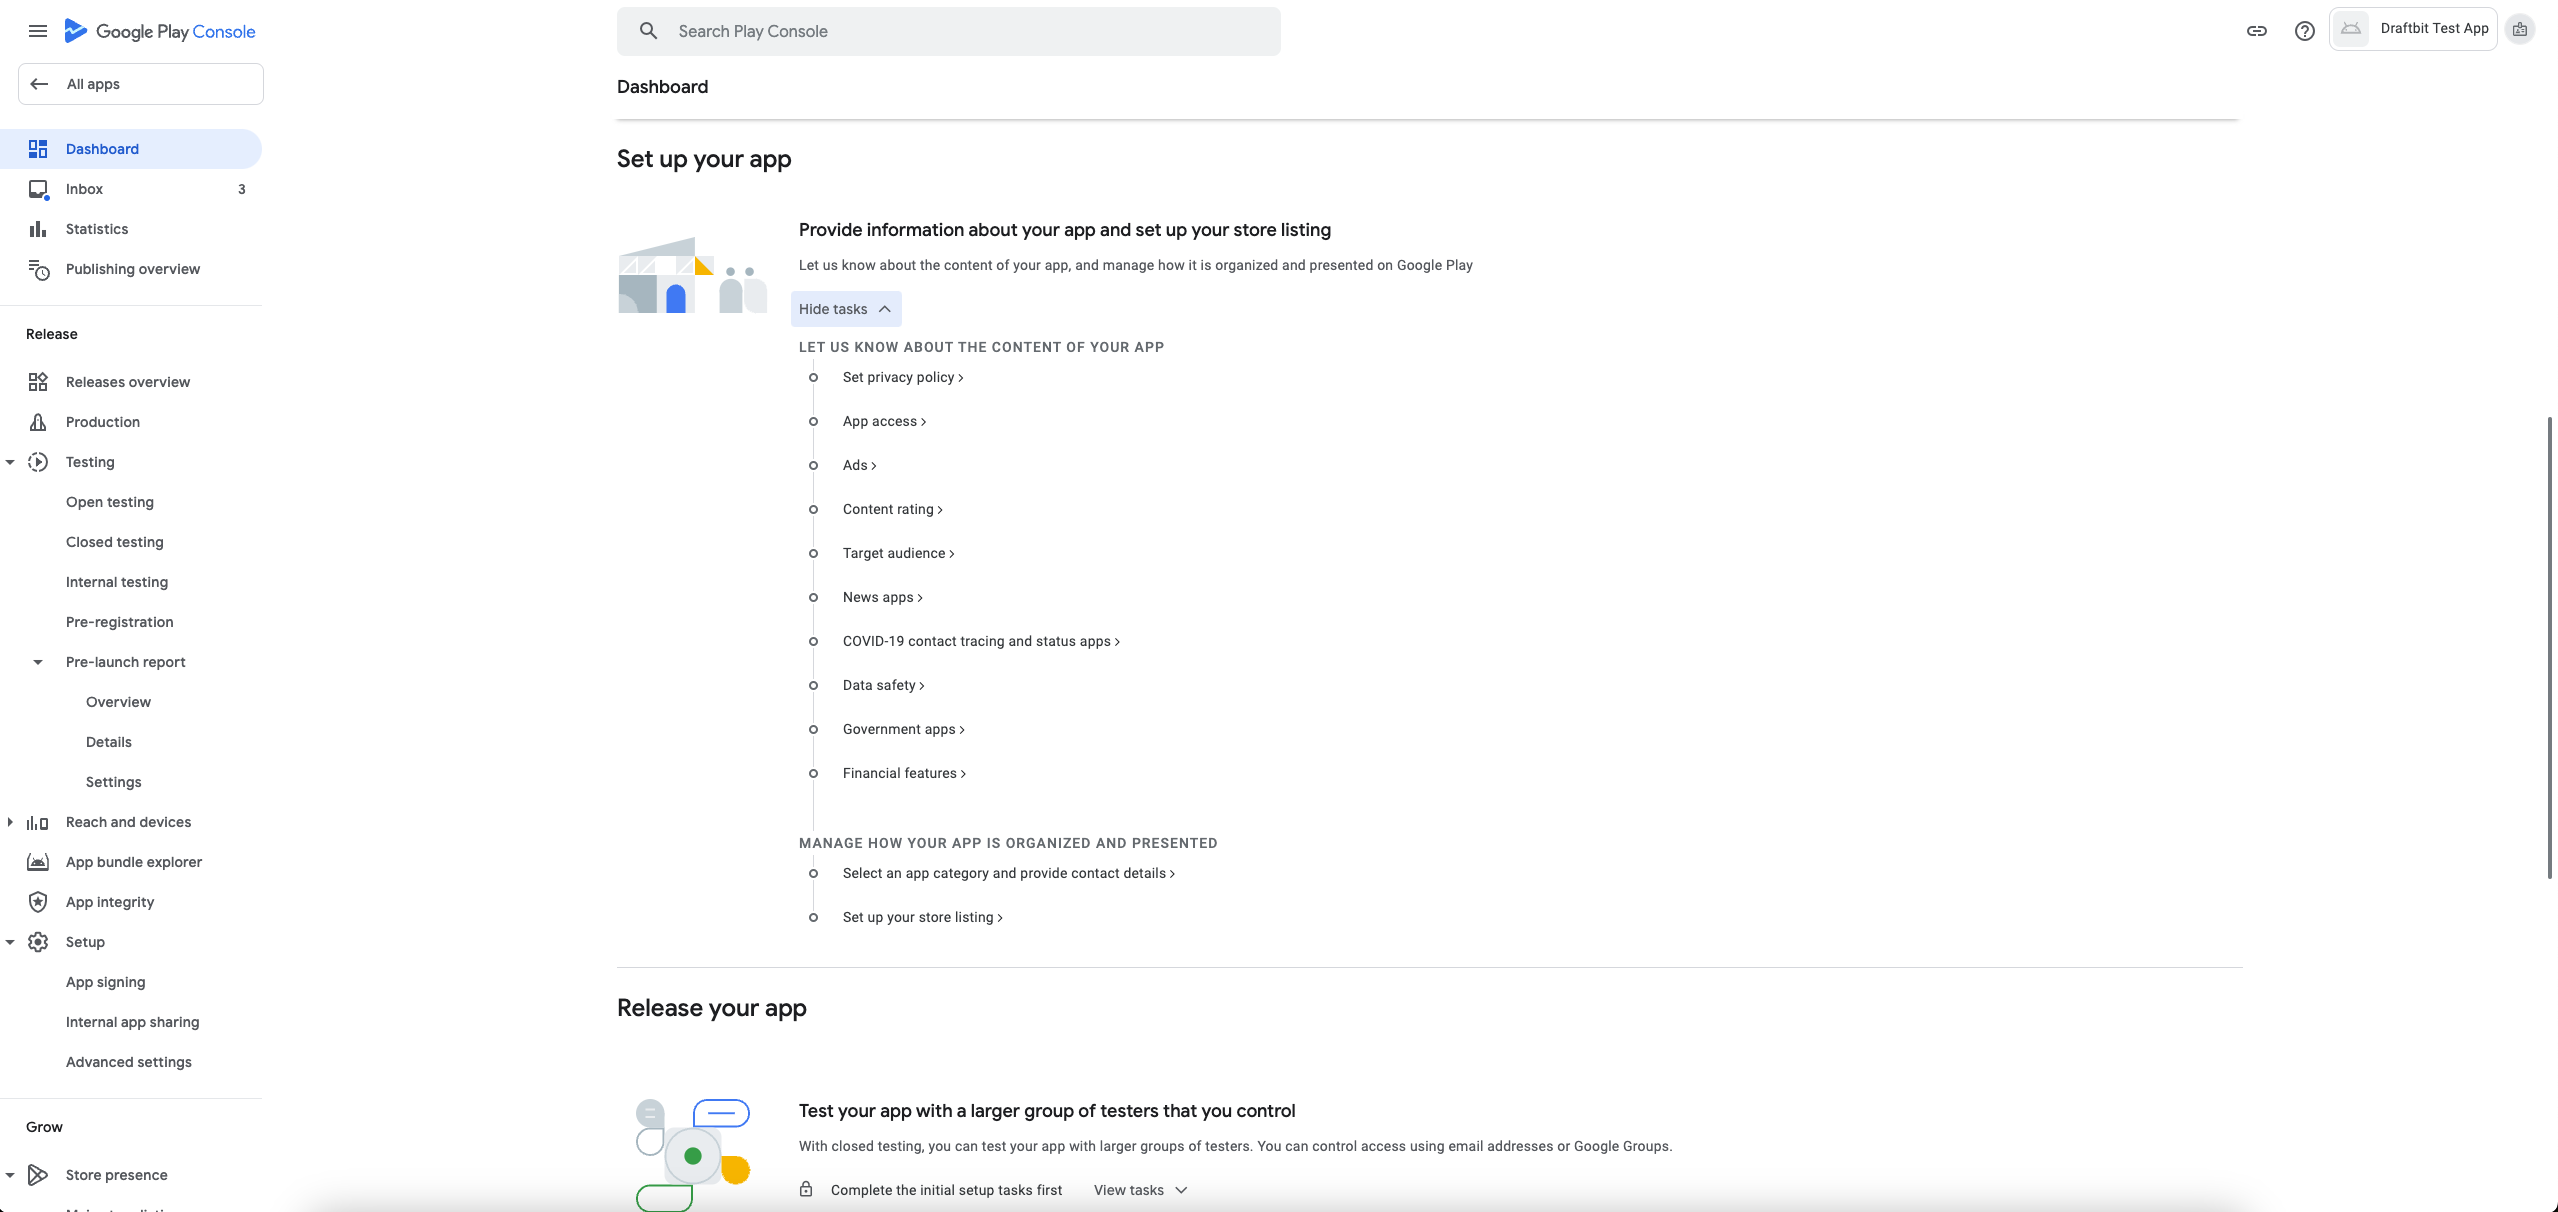
- You'll be redirected to a new page, Dashboard, where you can fill in all information about your application. This step can be done later if you prefer.
Creating a Google Service Account Key
In order for Draftbit to publish builds to your Google Play Console, you'll need to create a Google Service Account Key and upload it to your Draftbit account.
To do this:
- Open Google Cloud Console
- You will be directed to New Project page. You need to enter your project name and organization name (optional) and press on Create to continue.
- Enable Google Play Android Developer API
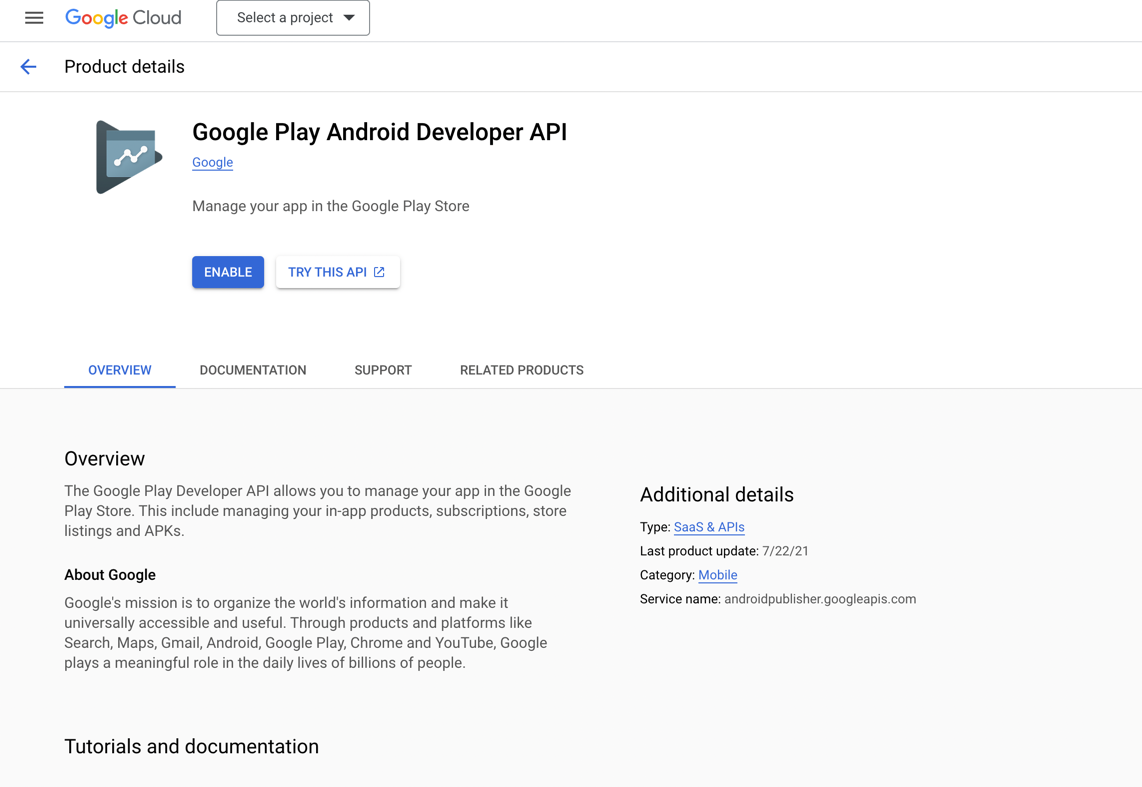
- In the upcoming page ensure that you have selected the project you have recently created and then click on Enable button.
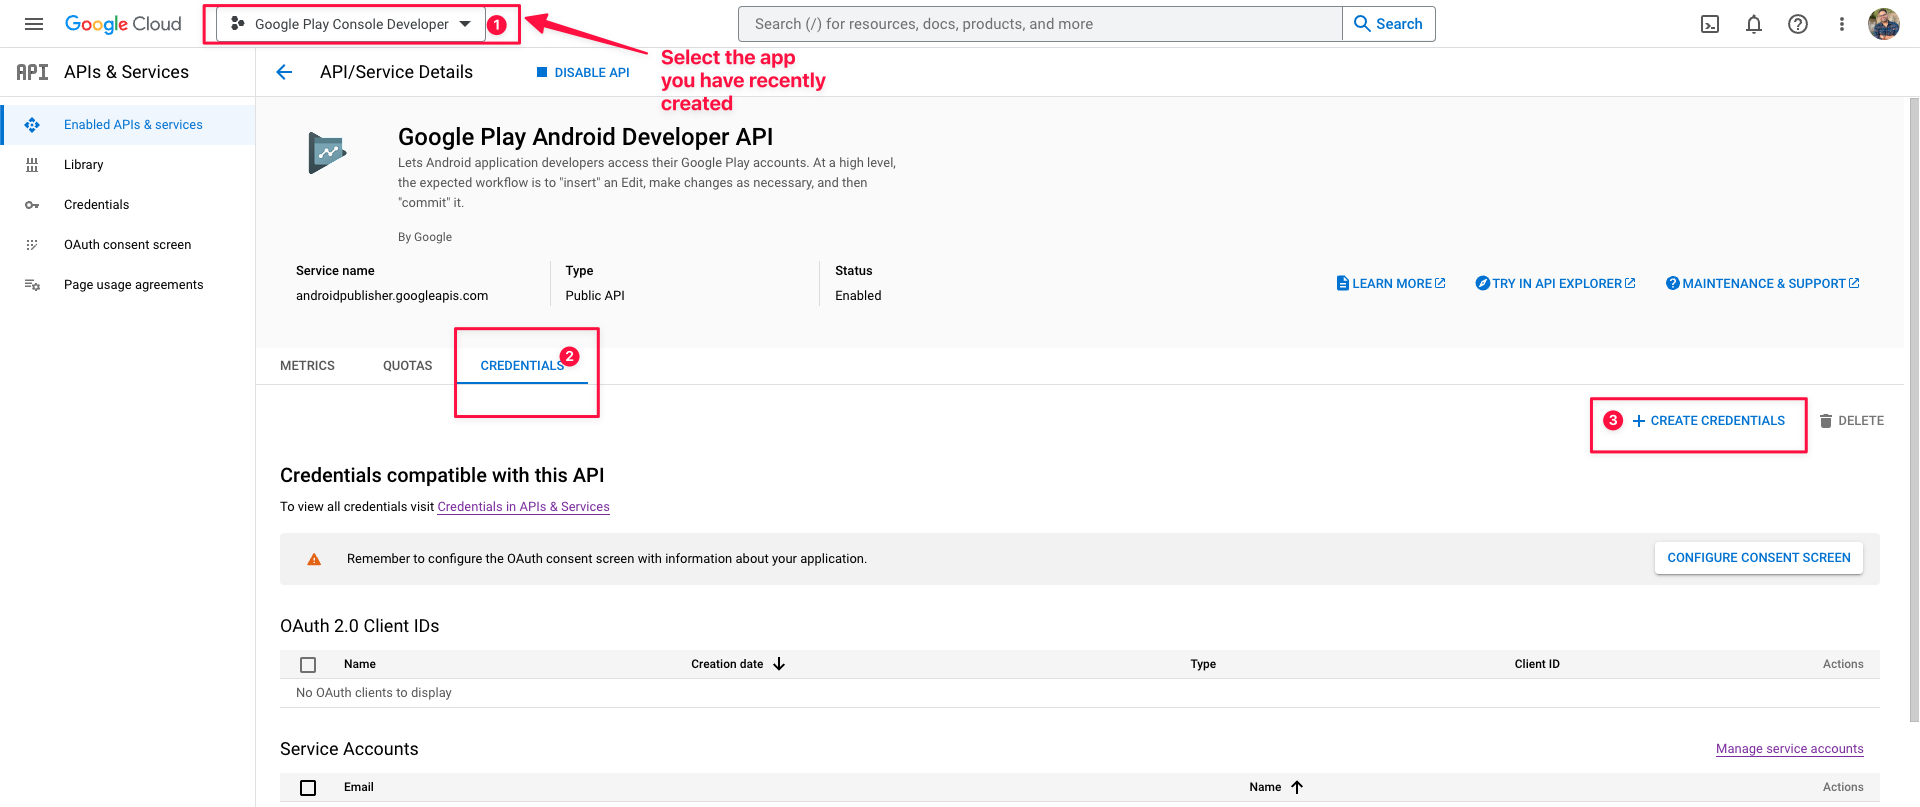
- Now select Credentials tab and click Create Credentialsbutton. From the dropdown menu select Service Account option.
- You will be directed to IAM & Admin page.
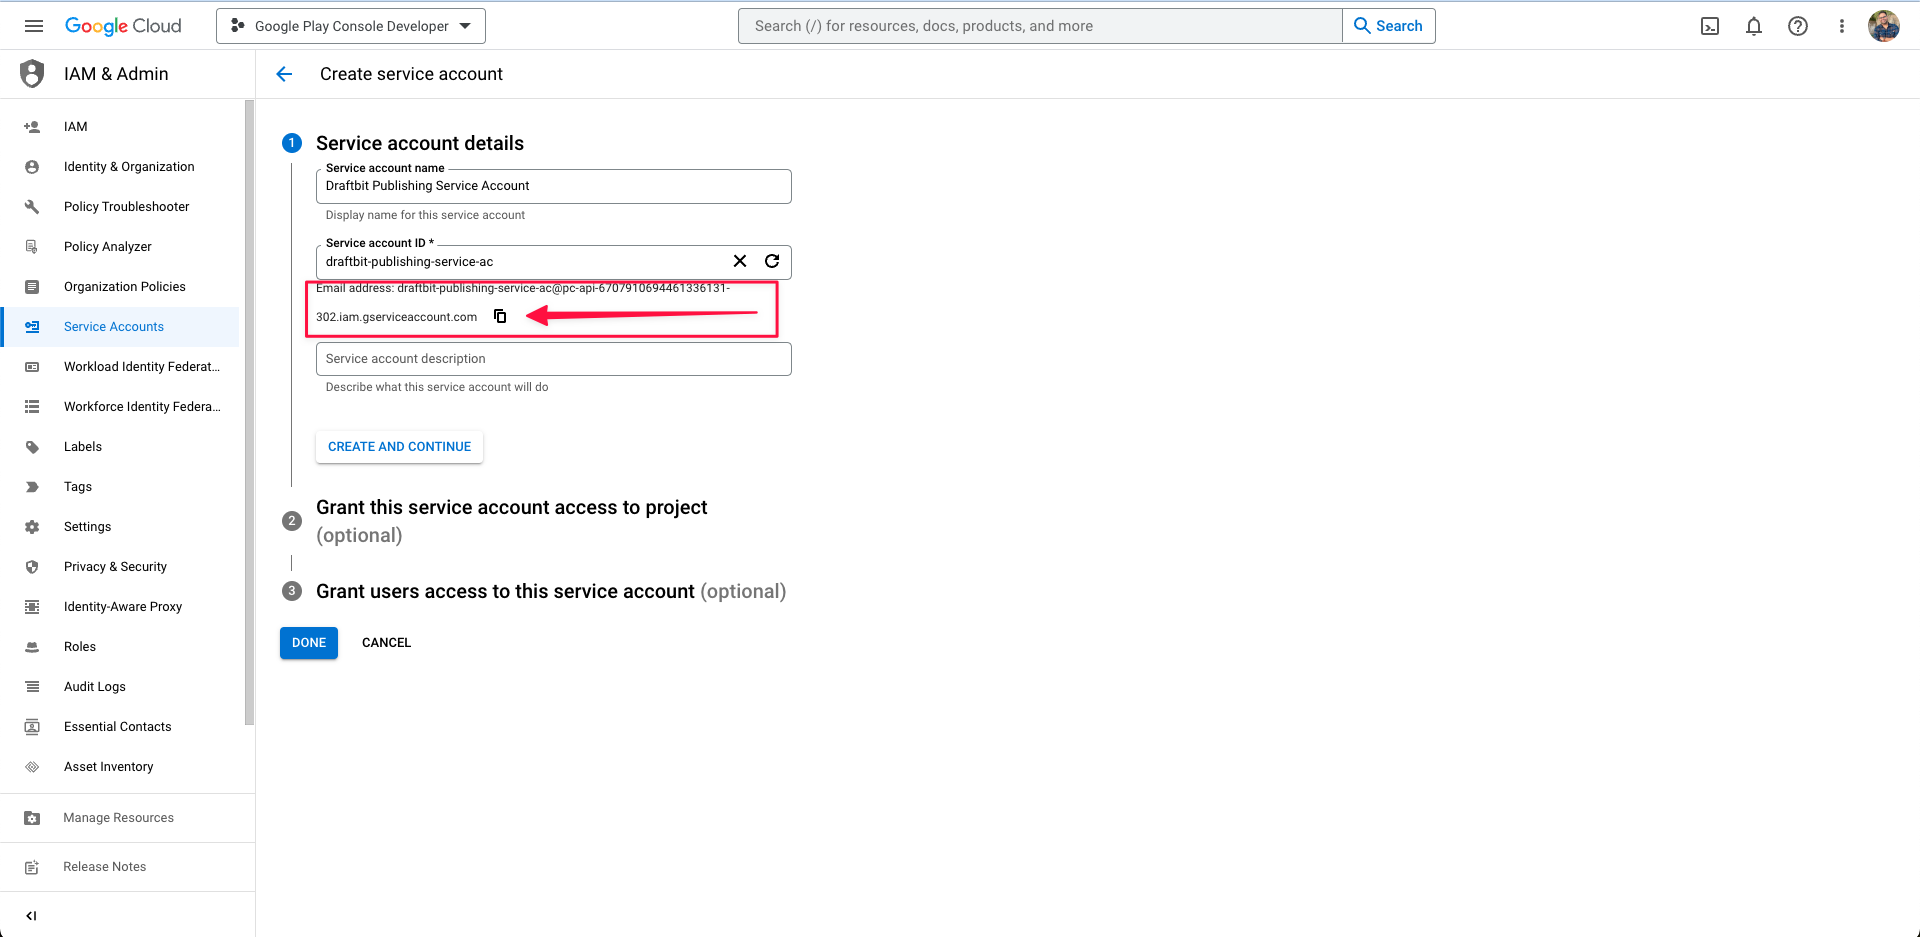
- In Step 1, enter a Service account name. Pick a name that makes it easy to identify that this account is for the Google Play Store.
- A "Service account ID" will be added automatically, but you can edit to be whatever you like.
- Copy the email address given when you have entered the Service account name and click on Create and Continue button.
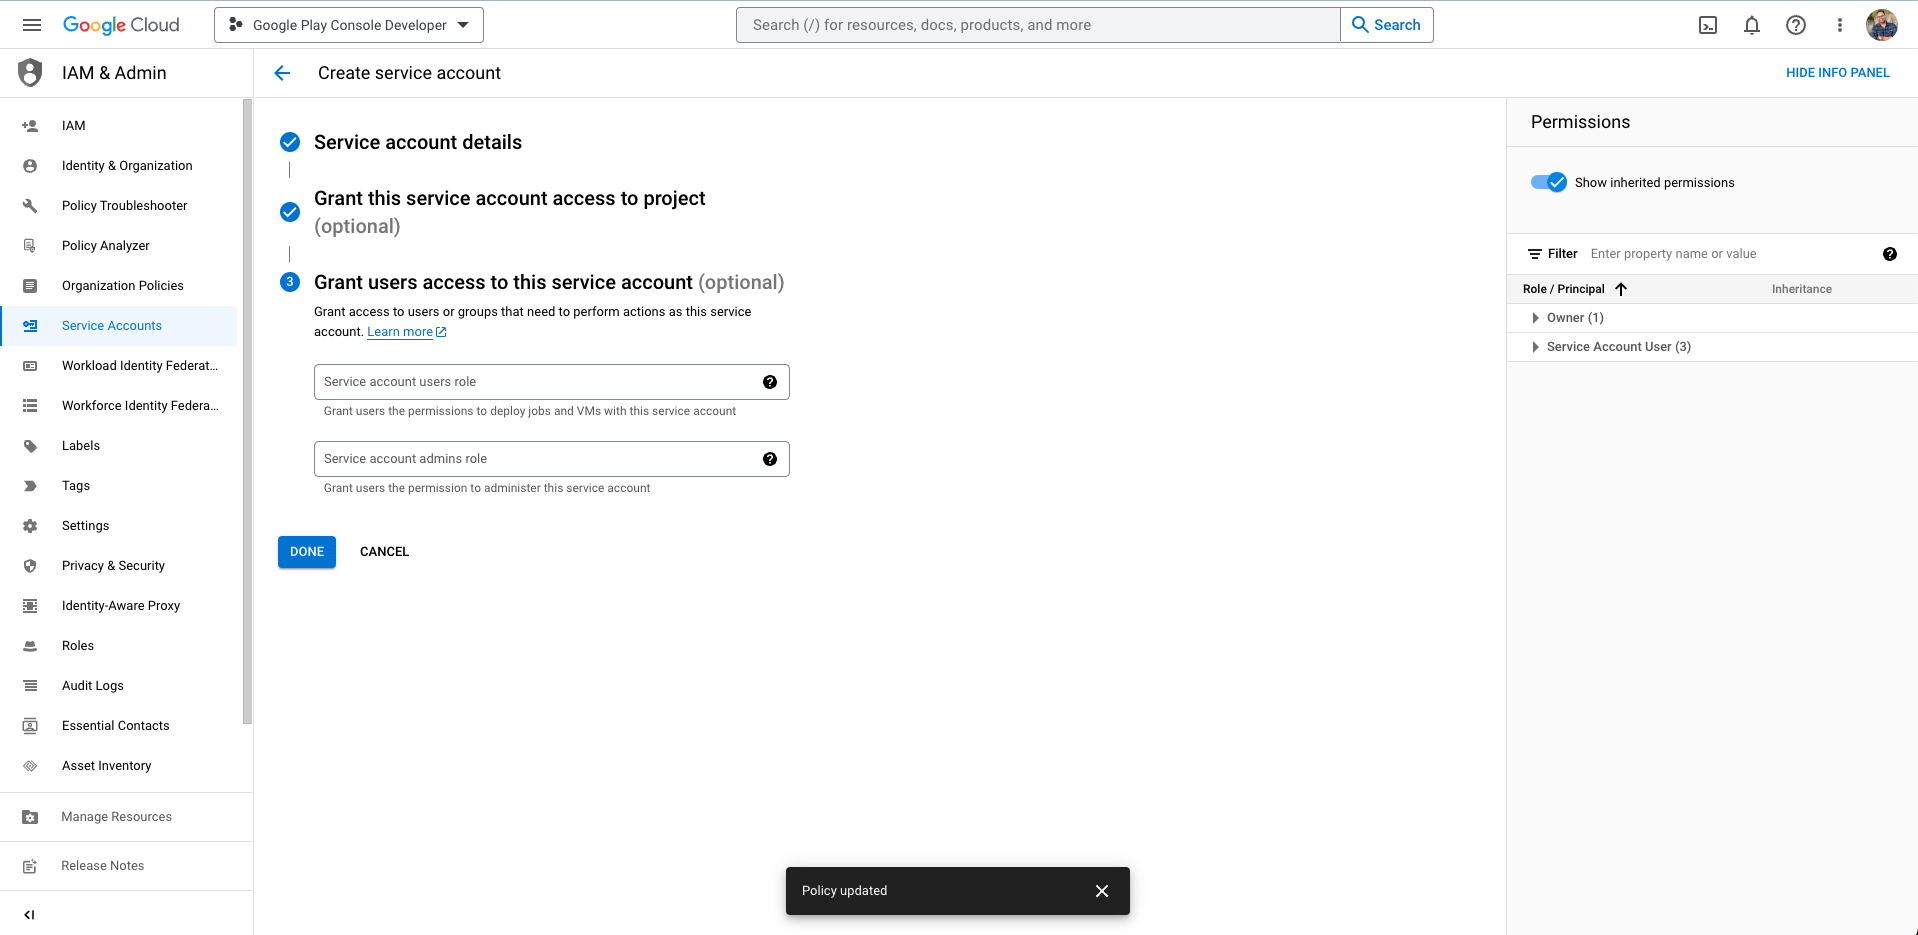
STEP 2: Very Important StepNext, you'll grant your service account access to your Google Play Console Developer account. Click Select a role and choose Service Accounts > Service Account User. Note that typing in the filter text box won't return the Service Accounts role - you'll have to scroll to it.
This is an important step.
Missing this step will cause a failure of auto submissions.

- The the third step is optional, you can leave it as it is and click Done to continue.
- You will be navigated back to APIs & Services page.
- You'll now select the service account you have created here and the page will be directed to Service Accounts automatically.
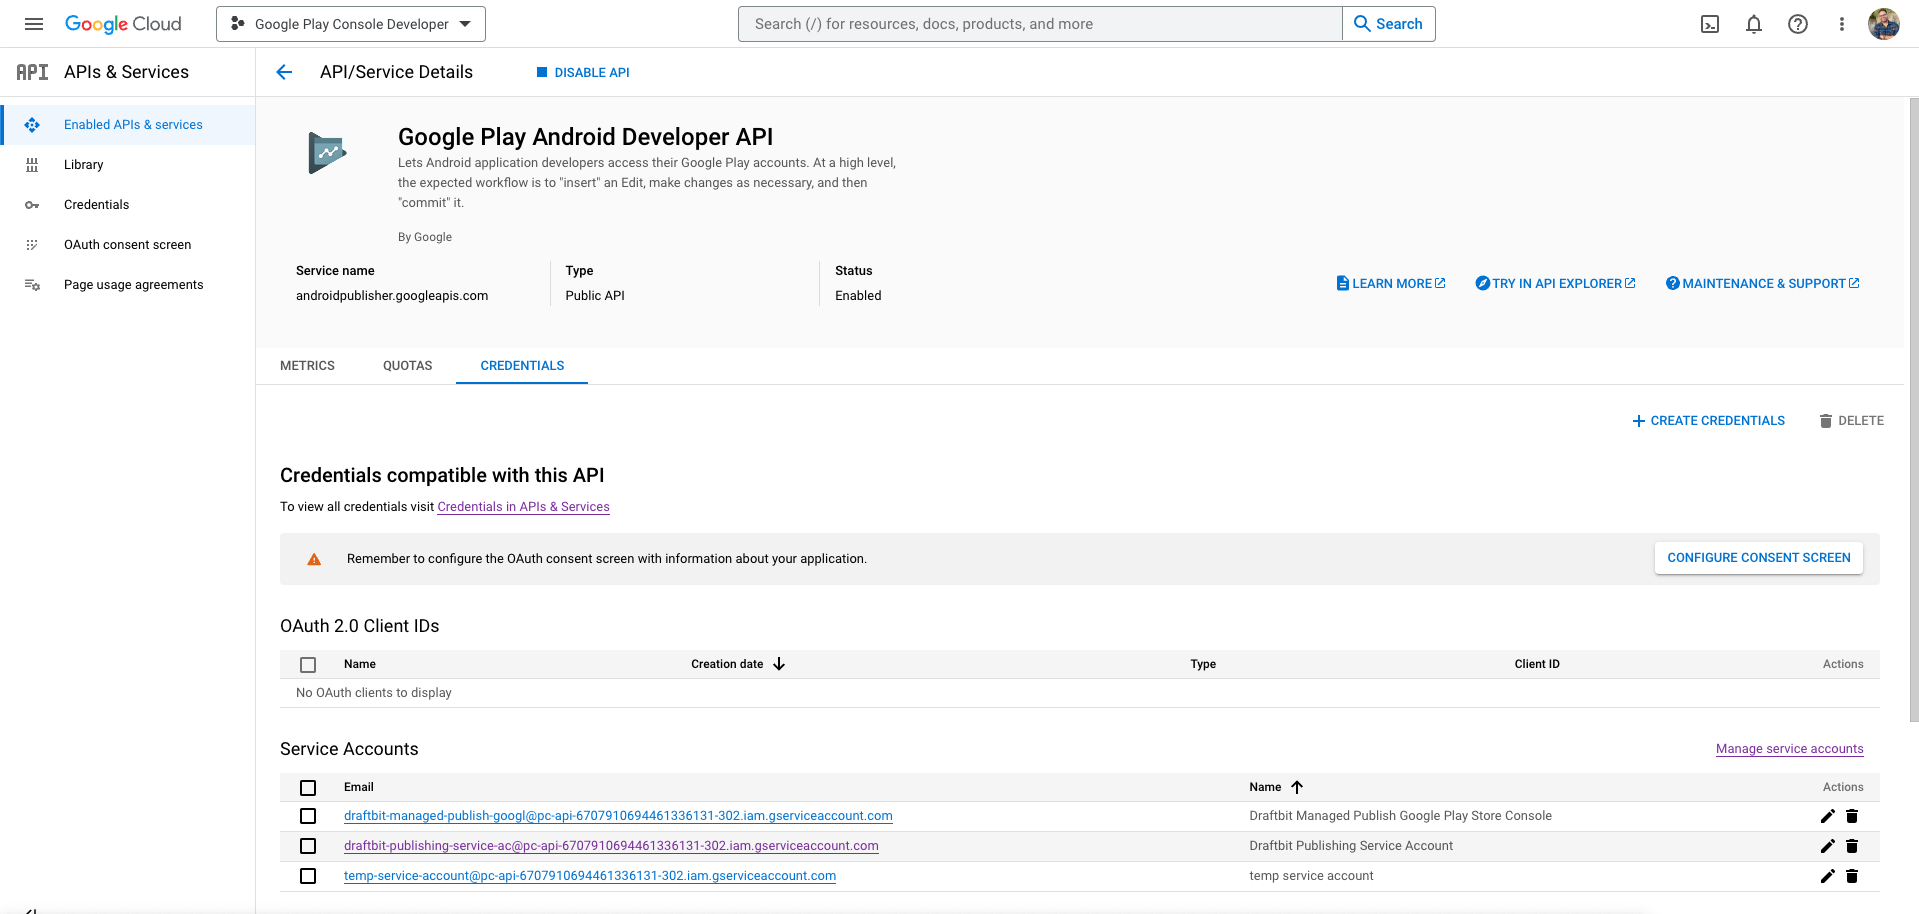
- In the navigated page, you'll now need to select Keys from the options button for your newly created Service Account.
- Select Create new key
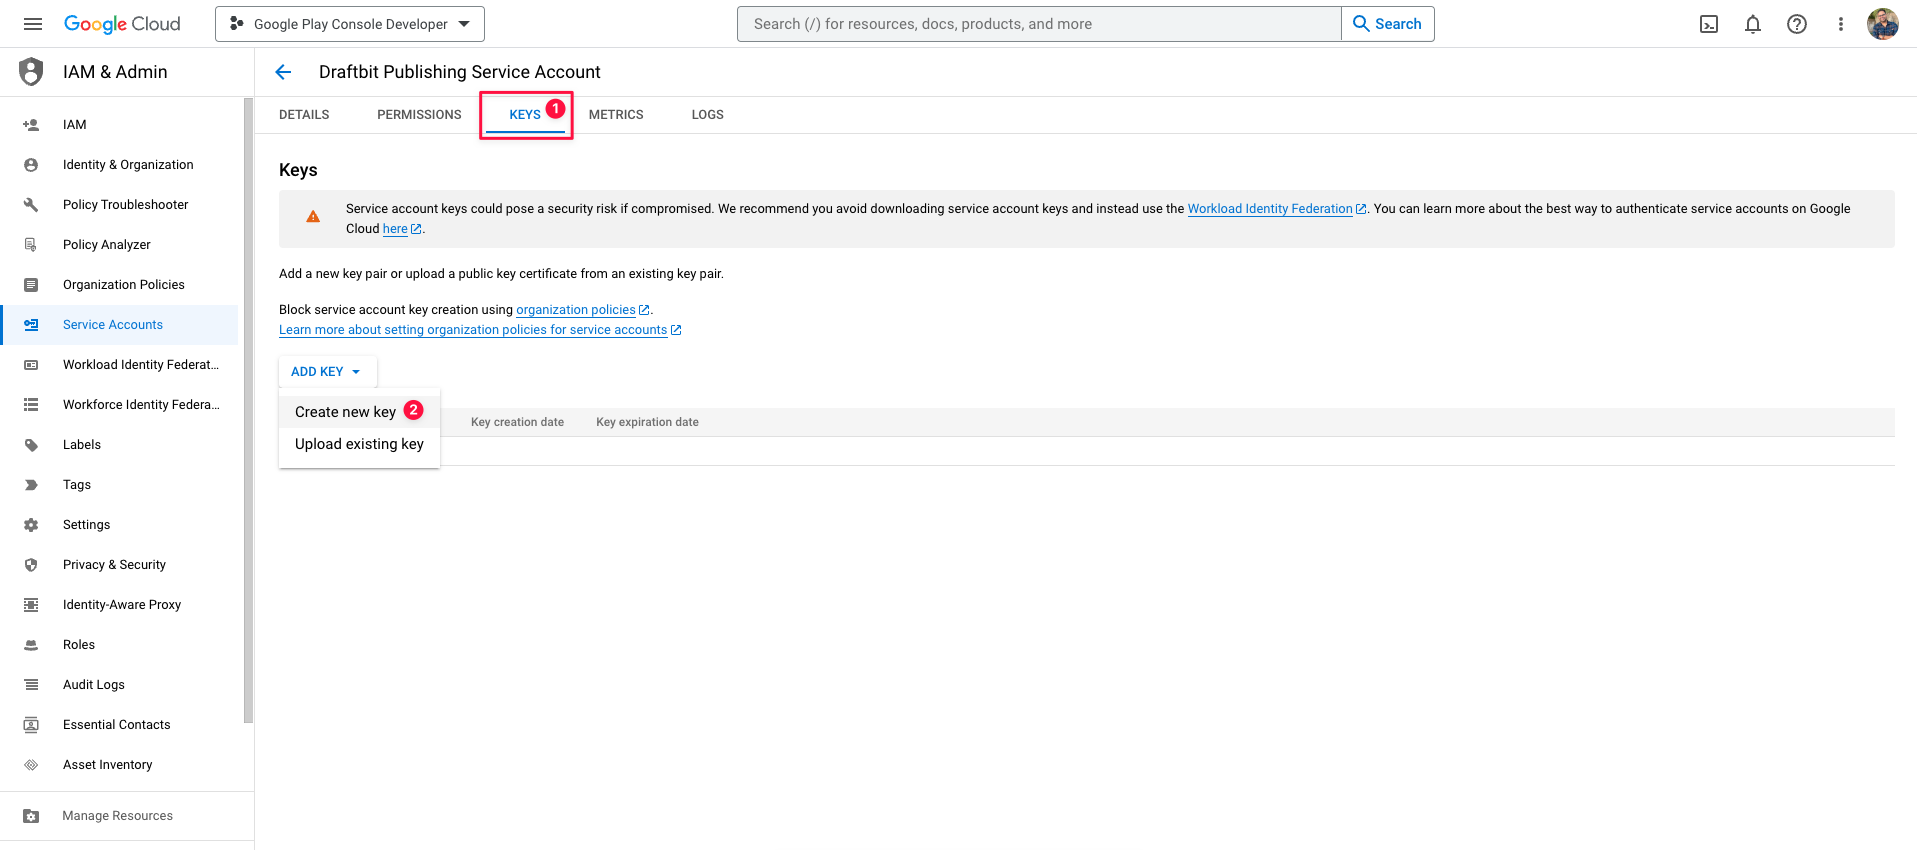
- Select JSON and then click Create. Download the .json file and store it in a safe place.
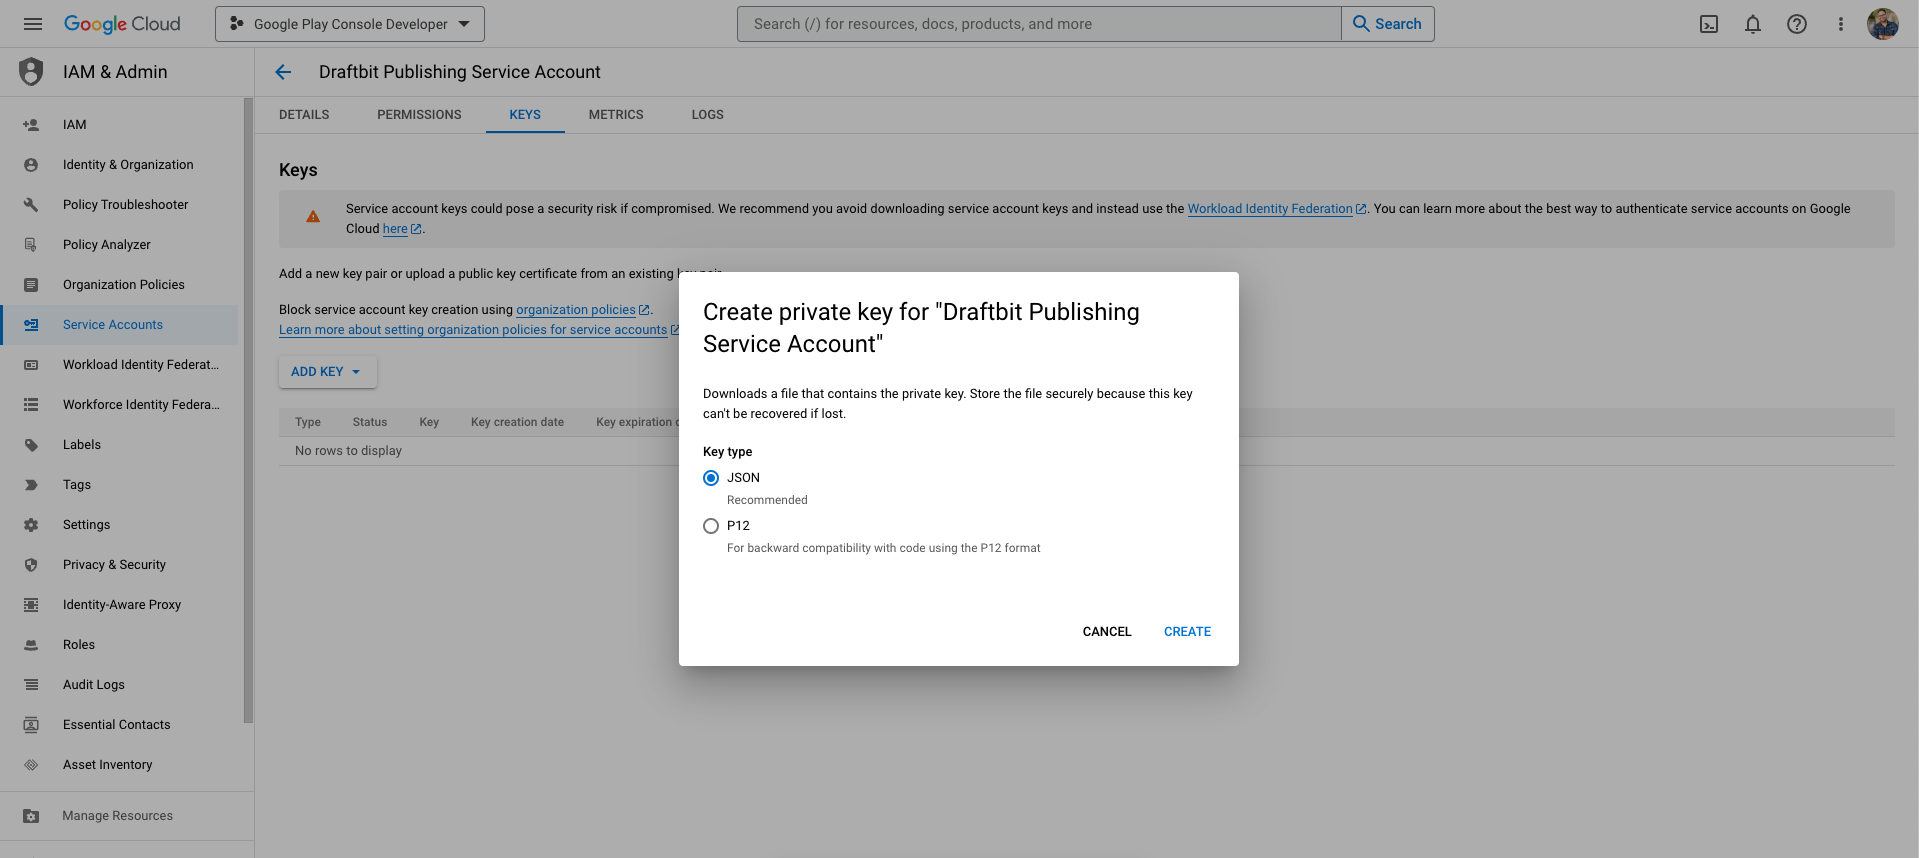
Store your private key in a safe placeThe JSON file you download at this step won't be available for you to download again in the future, so ensure you keep it somewhere secure and easy for you to find in the future.
Adding your Google Service Account Key to Draftbit
- In the Draftbit builder, open your Draftbit Google Play Store Settings and upload the JSON file that was generated when you created your new Service Account Key.

Setting up Account permissions in Google Play Console
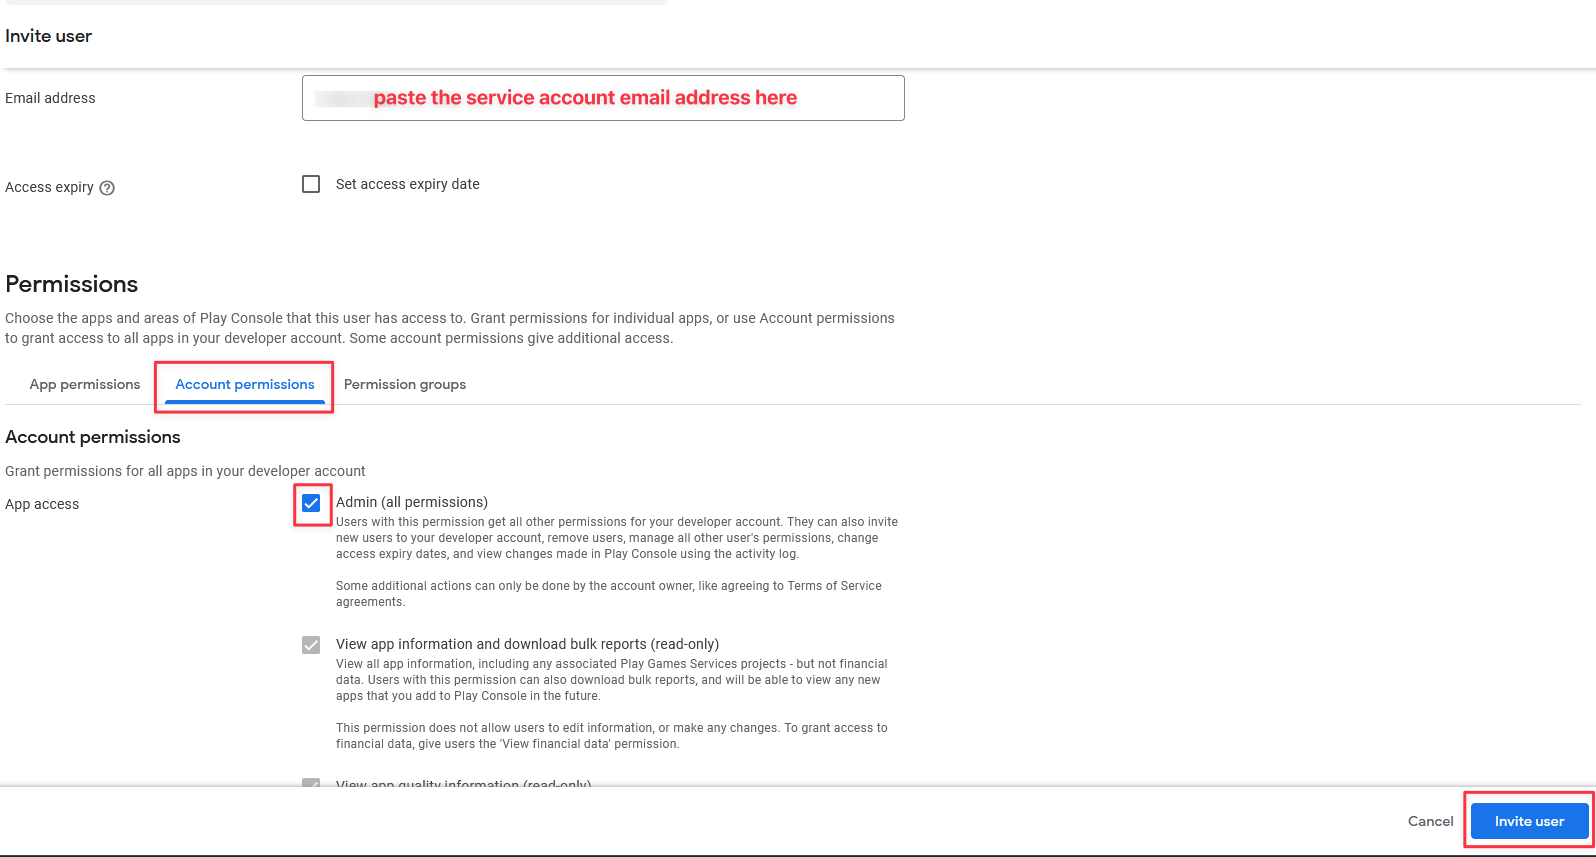
- Now in the Google Play Console go to the Users and permissions page and select Invite new users option.
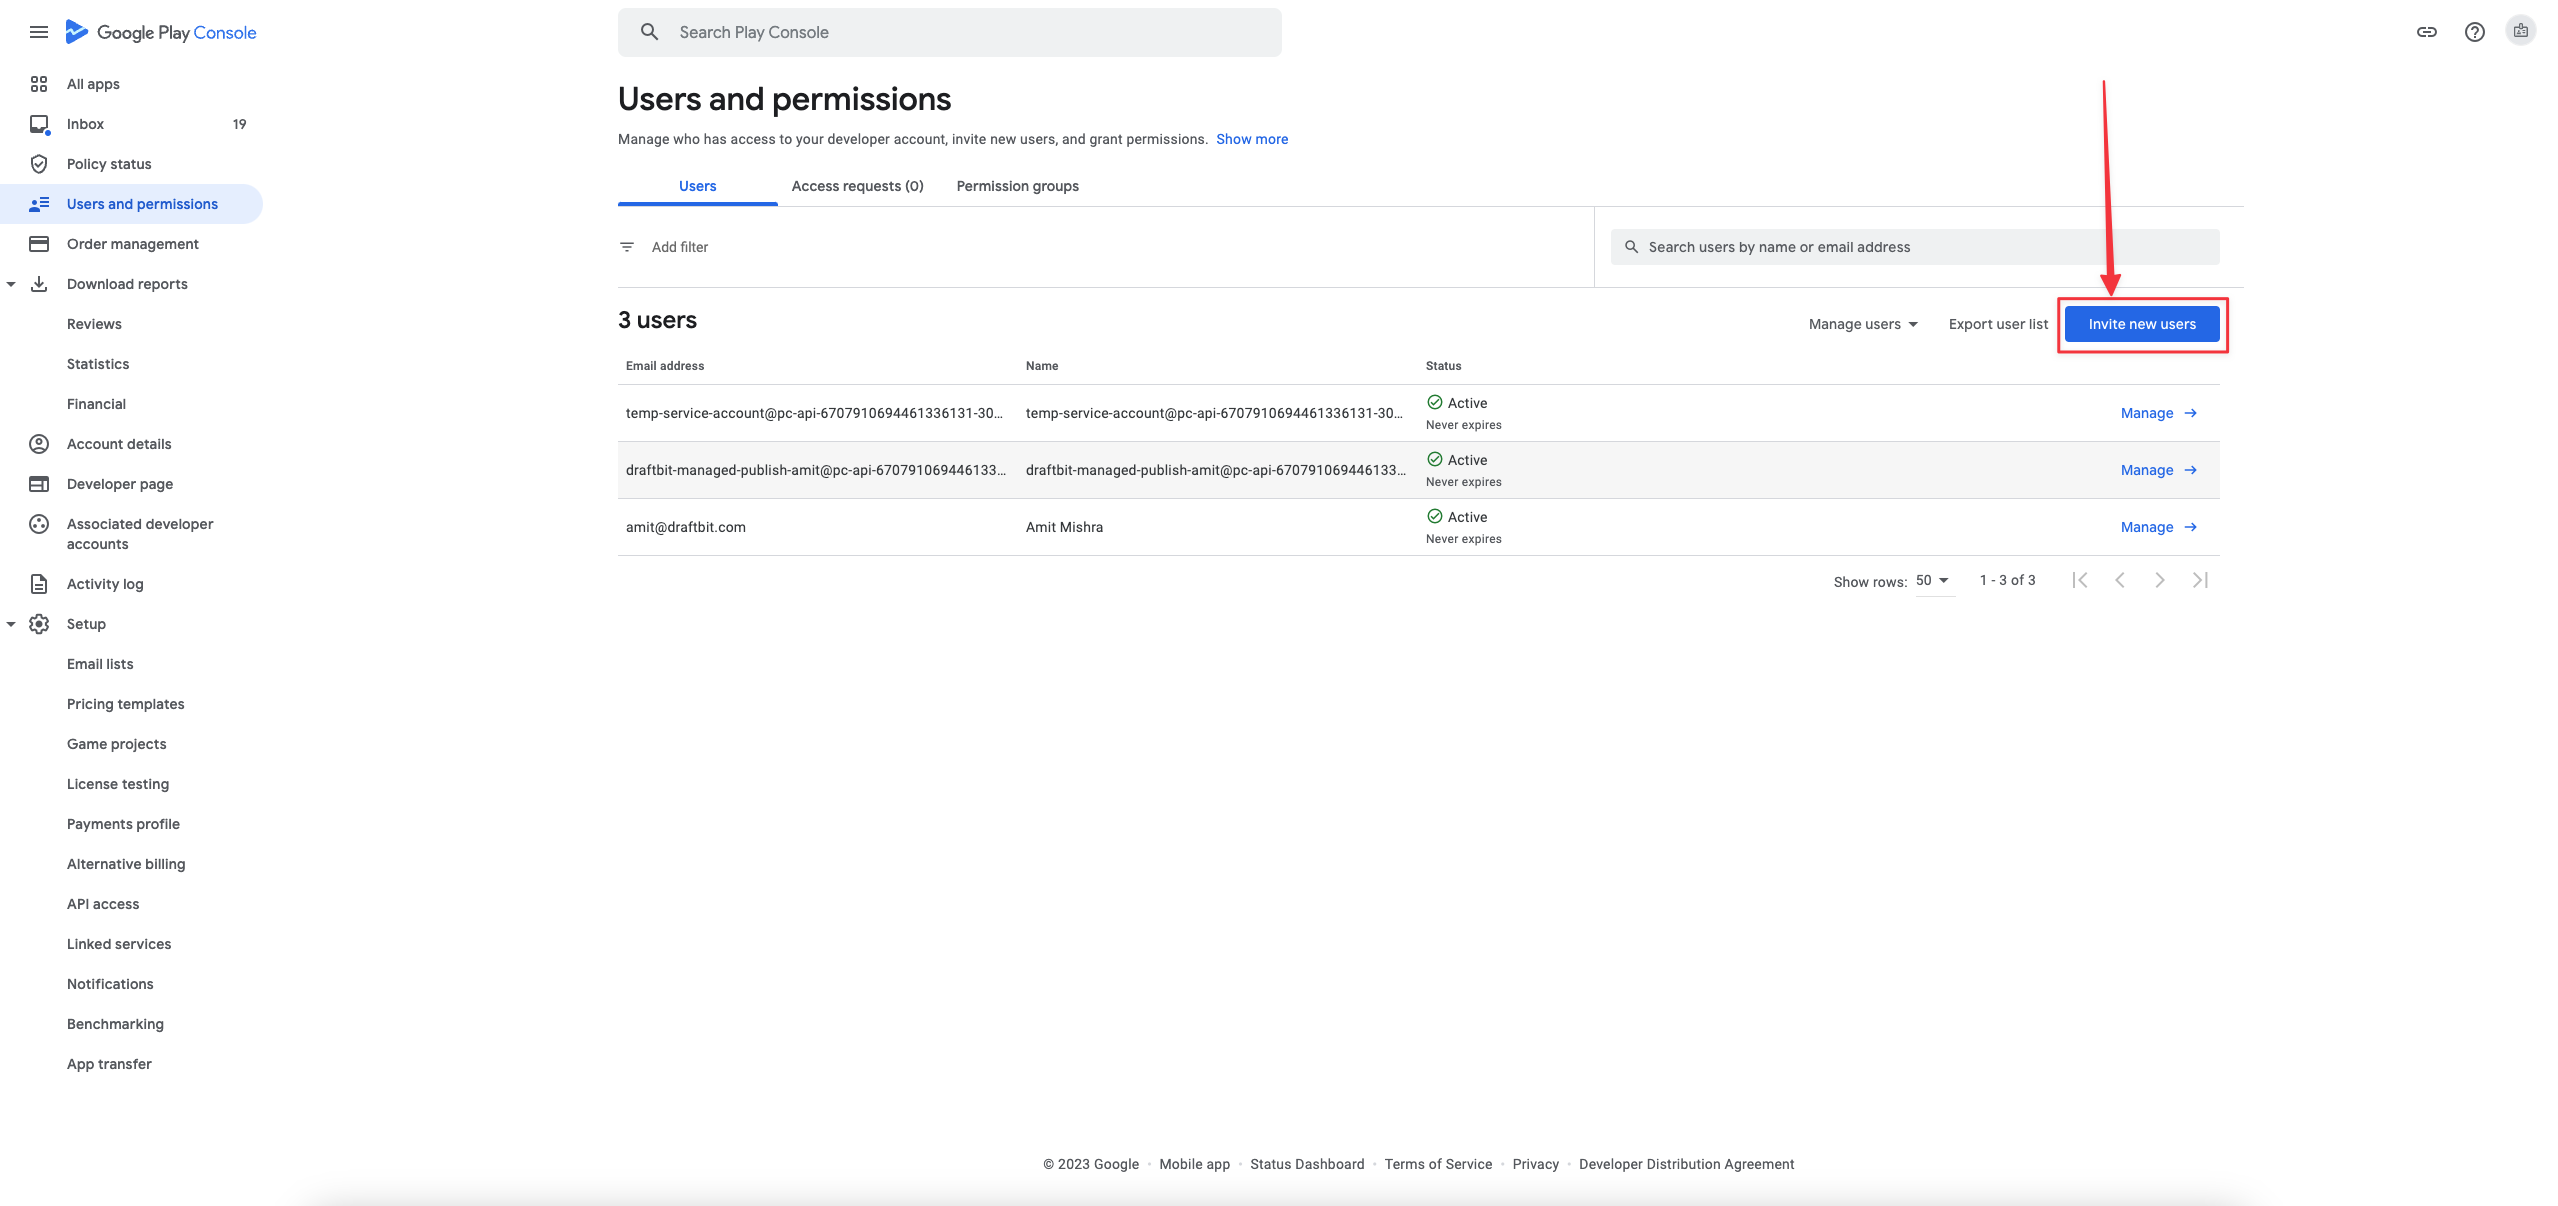
- Paste the copied email address at the beginning of the key generation process and then select the account permissions.
- In Account permissions, you should choose Admin for enabling all the permissions. Then click Invite User.
Now you are all set to Publish your app:In the builder you can hit the Publish button to start building process.
Uploading your First Android App Binary (.aab)
Now that you have a successful build , you would need to submit it. When submitting your Android app to Google Play Store for the first time, Google requires that you manually upload it in the Google Play Console. As a result, when you first request an Android publish from Draftbit for a new app, we'll send you your app binary (.aab) and you'll need to upload it via your Google Play Console account. Future publishes for that app will be uploaded automatically by Draftbit
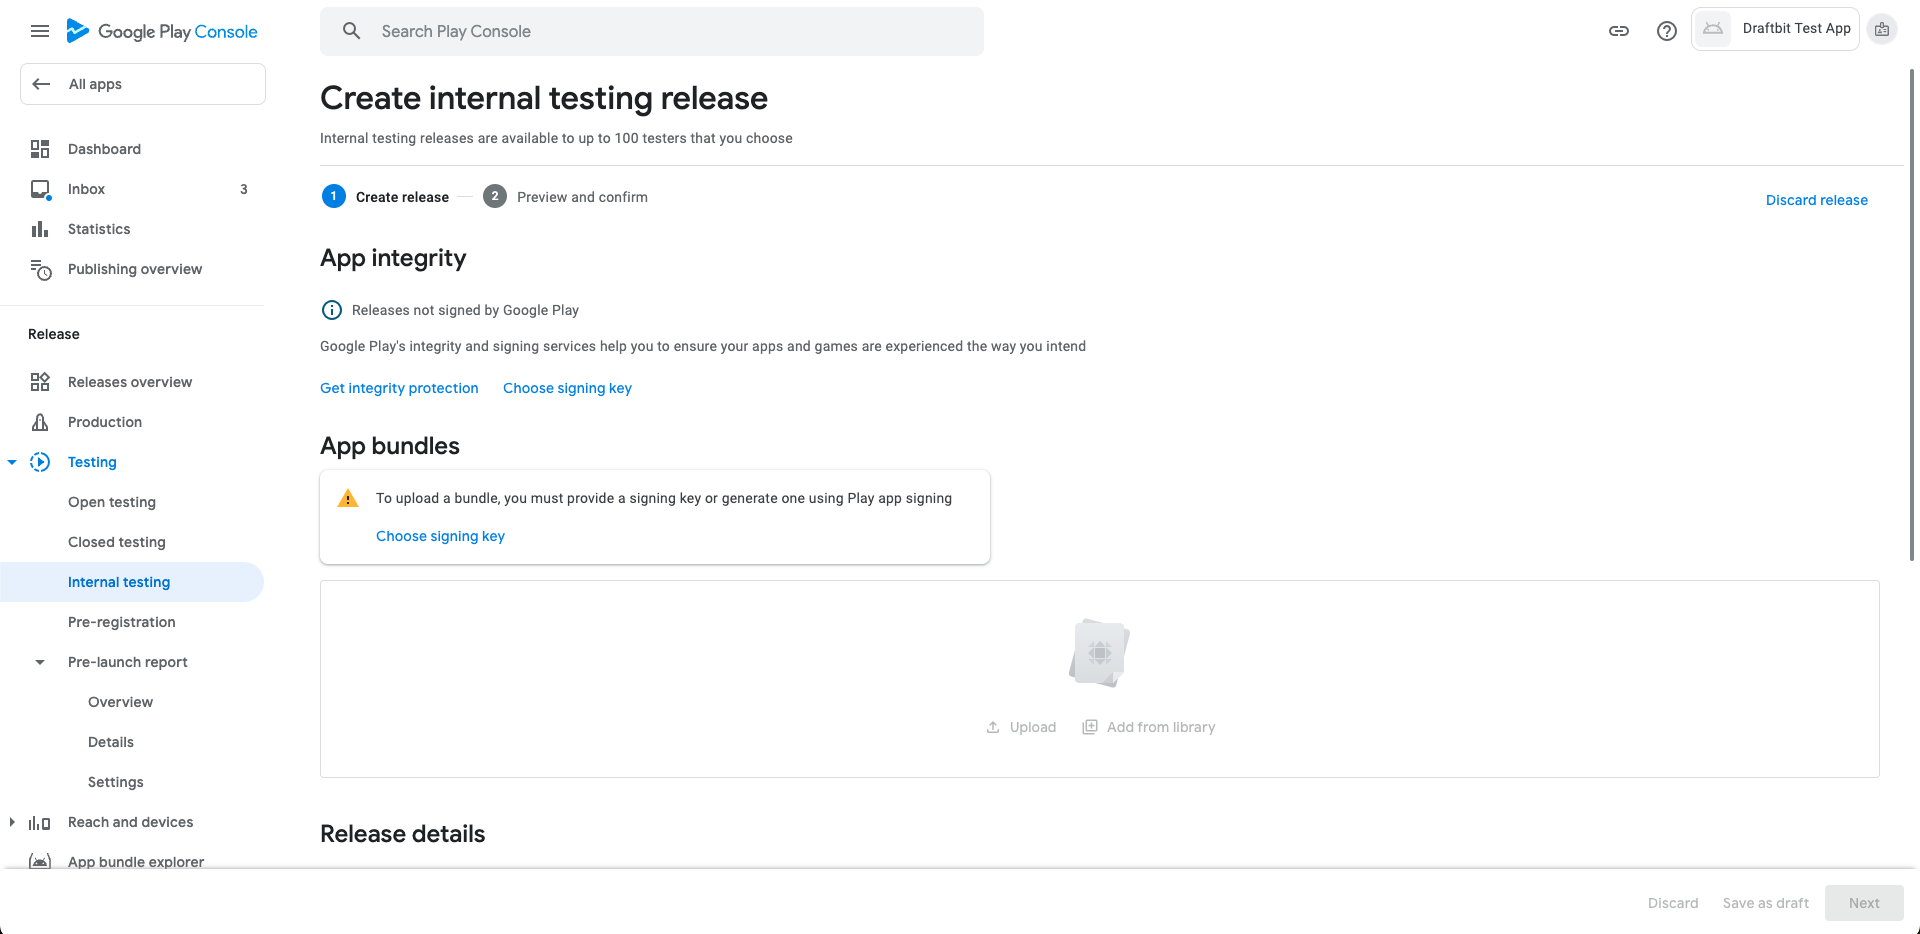
- Start on your App's Dashboard. Click on Testing in the left-hand sidebar, then select Internal testing.

- Click the Create new release button

- App signing by Google Play.
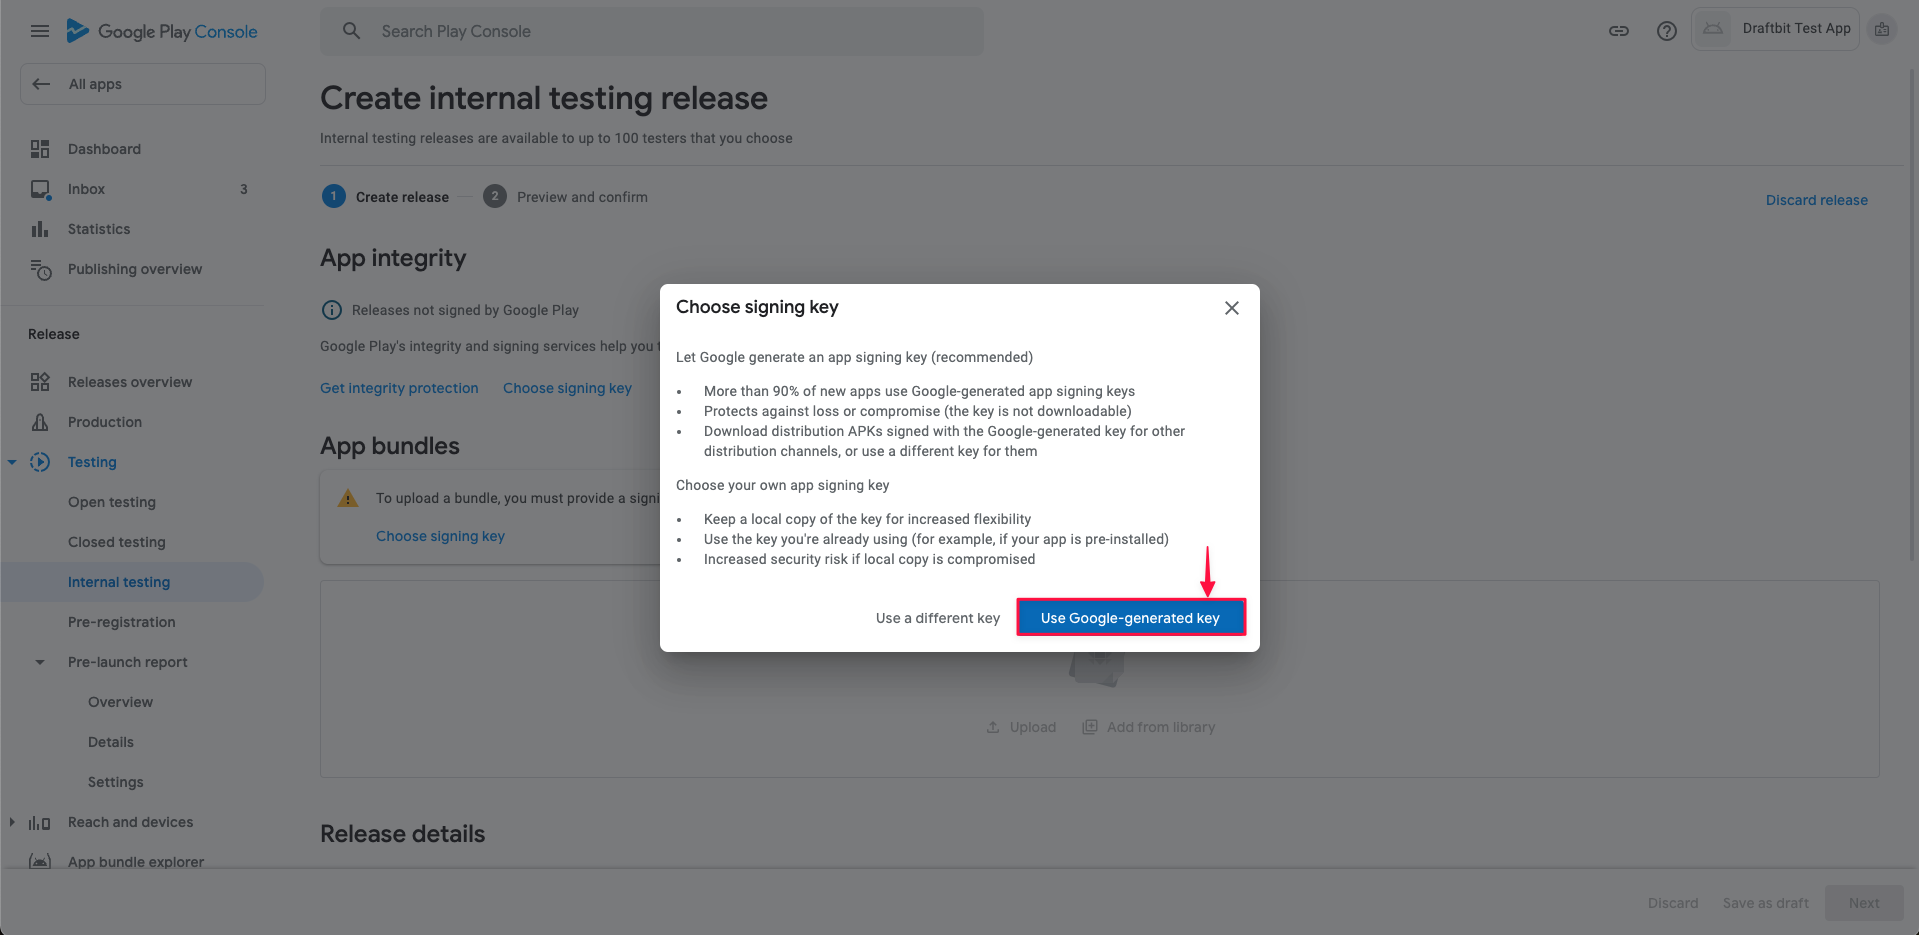
- In the appearing modal select use Google-generated key option. This is critical to allow Draftbit publish future app for you.
- Then, enter your Release name, enter any relevant Release notes and click Review release.

- You'll then be navigated to the Review summary view. At the top, you'll see the Errors section. If there are errors, click Show more to view the details.
What to do about errors in your app build.If you see errors in your app at this step, they could have several causes. Some could be issues with your app code itself, some could be related to the app settings you provided us, etc.
If you're confused about the errors you're seeing and don't know how to resolve, please...
Adding a Privacy Policy to Your App
Google requires that all apps in the Play Store have an associated Privacy Policy. If you don't have one, you may have noticed a resulting error when you uploaded your binary/.aab file the first time.
Here's how to add one:
- Return your App's Dashboard in the Google Play Console.
- In the left-hand sidebar, click App content. You'll see a Privacy Policy section at the top of that page - Click Start in that section.

- Enter your Privacy Policy link in the prompt and click Save

- Navigate back to the Internal testing page and click the Edit button for your App. You should no longer see the Privacy Policy error on the Review Summary page for your App.
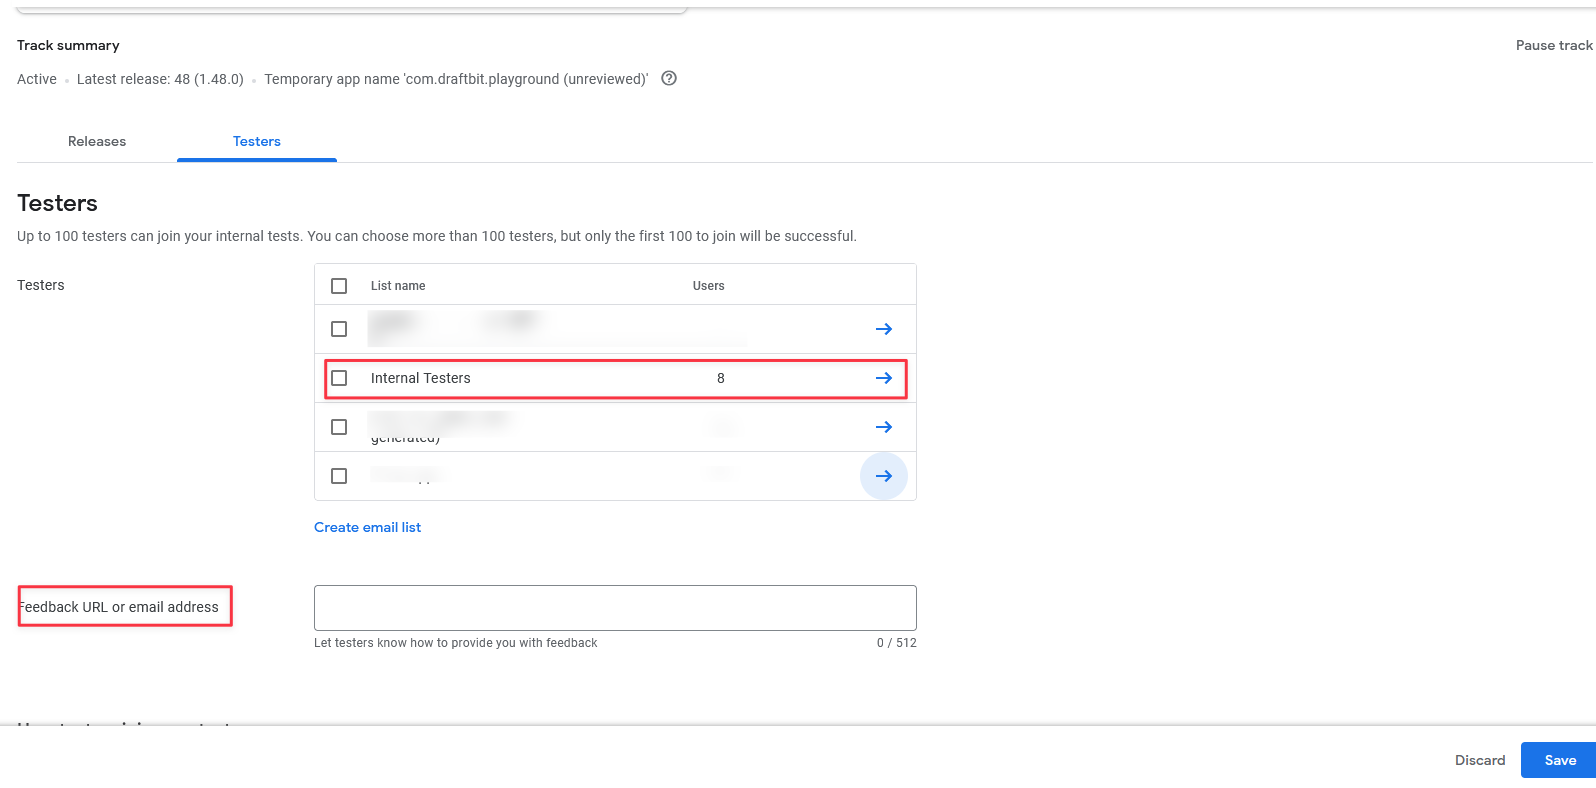
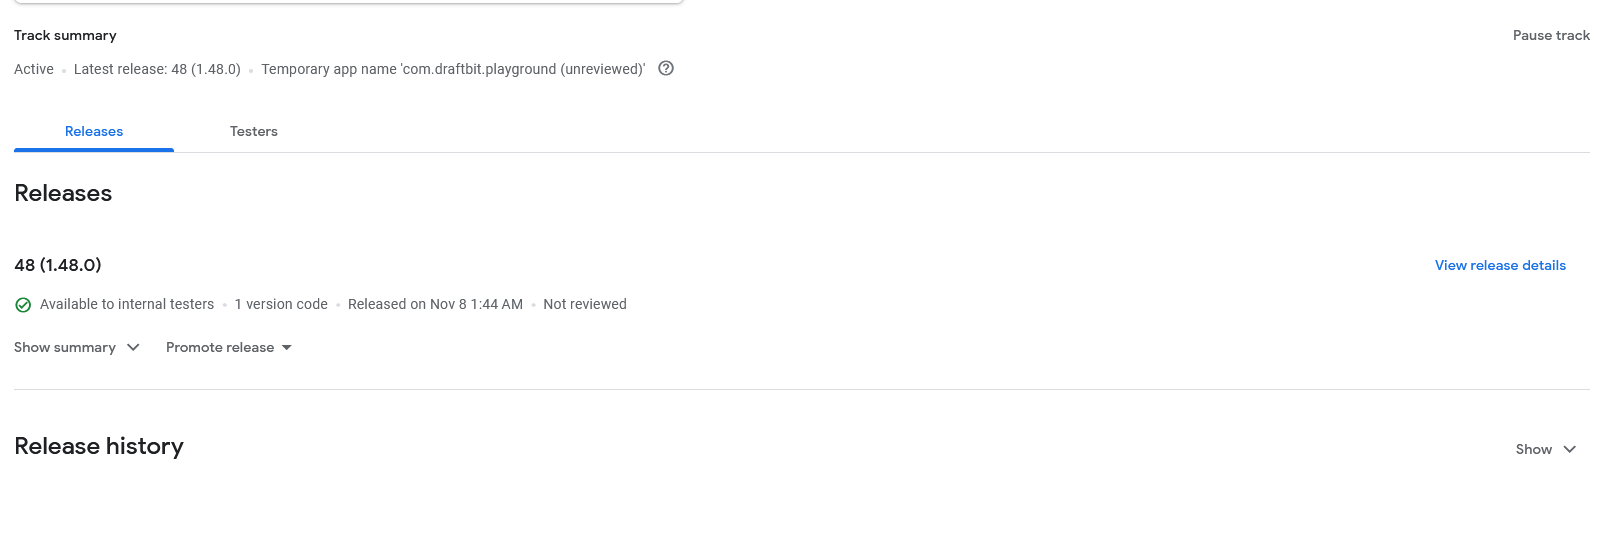
Adding Testers for Your App
- On your Play Console account go to the Internal testing page by clicking on Testing > Internal testing.
- In the upcoming page select the Testers tab.
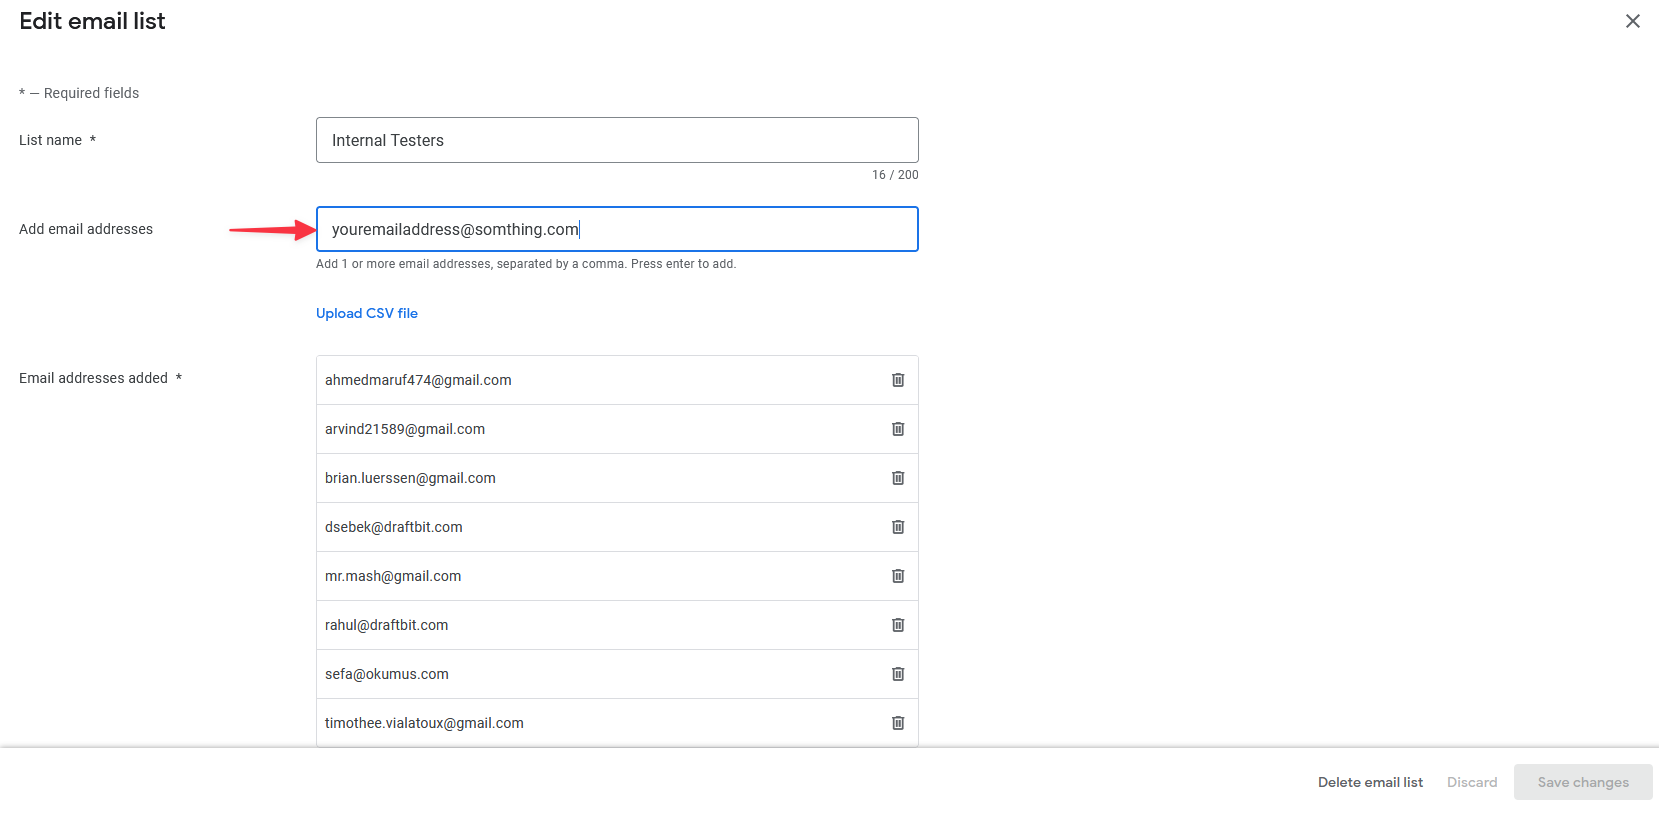
- Under "Testers," you are able to create an email list for testers.
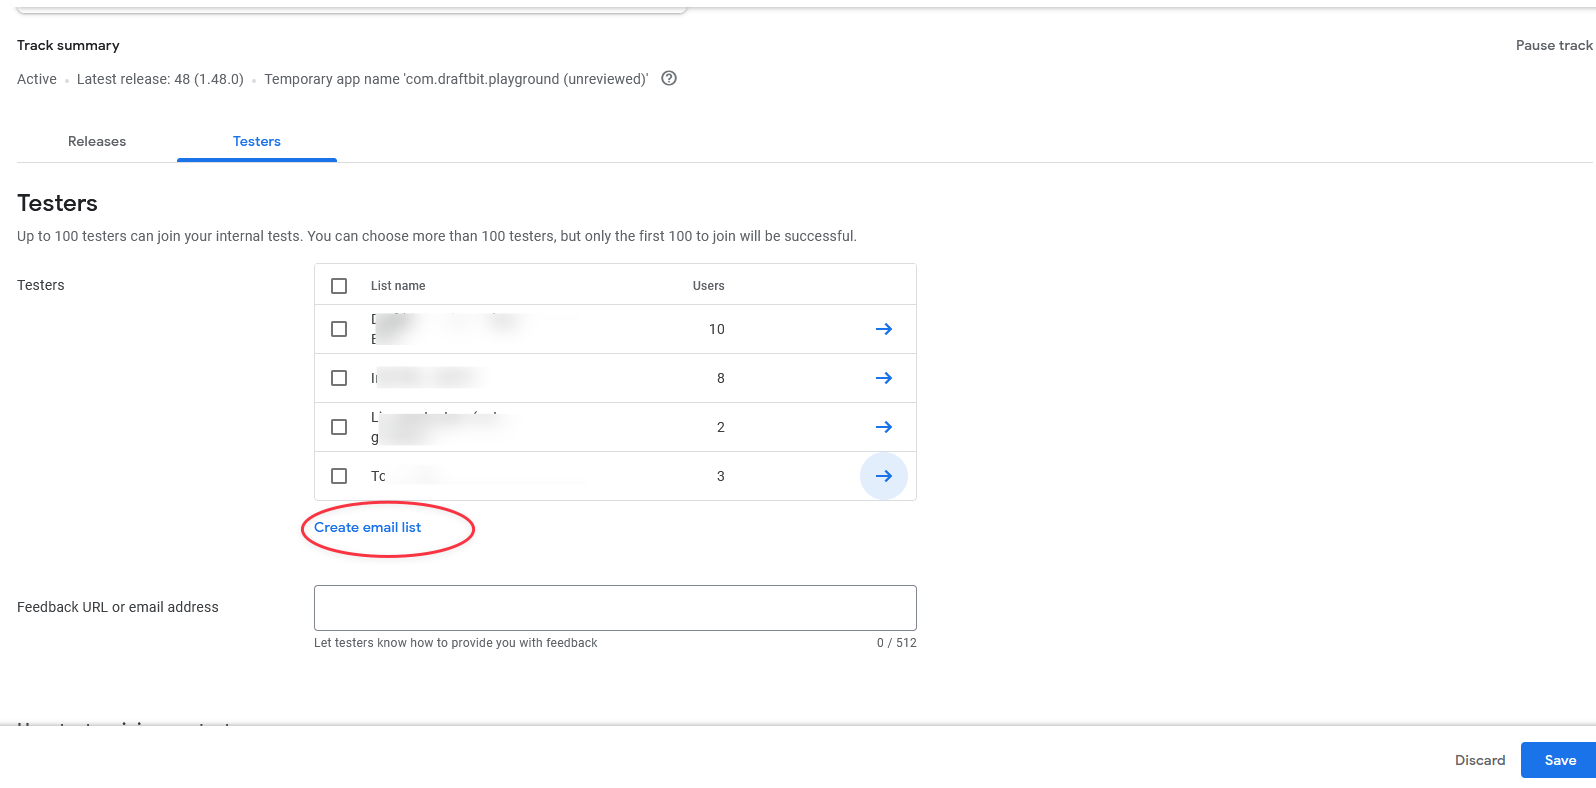
- Enter a list name and add email addresses you wish to add. You can also upload CSV file that includes listed testers. Then select Save changes, then Create.
- In the "Testers" tab, you can select the user lists you want to test your release.
- In the below, to gather feedback from testers, you can provide a feedback URL or email address.
- Copy the shareable link to share the release with testers and save the changes