Screen
A Screen is used to enclose the components together to display related data or information in the mobile app.
Adding a Screen to the app
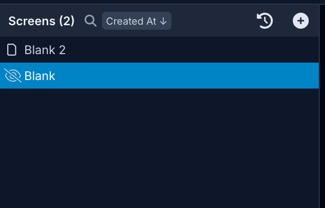
To add a Screen to the app:
- Select the
Blank Screen
from the Screen collection. You can open the list of screens by clicking the + button next to Screens. - Select the added screen in the screens list.
- Go to the Config tab (2nd tab) in the Properties Panel to add a Name to the screen.
Renaming a Screen
The screen can be renamed by double-clicking it.
Once the name has been changed, we need to hit 'Enter' to save the new name.
Configuration Properties
Basic
Property | Description |
---|---|
Name | To alter the name of the screen. The name is reflected in the screen list at the top left in the builder. Defaults to 'Blank'. |
Description | to add a description of the screen. |
Status Bar Color | To set the colour of Status Bar on the screen. Options: 'Default, 'Dark' & 'Light' Defaults to 'Default'. |
Scrollable | if enabled, screen height will increase as per the content within it and will be scrollable to show the content in the visible area . Defaults to 'false'. |
Advanced
The purpose of SafeAreaView is to render content within the safe area boundaries of a device. It is currently only applicable to iOS devices with iOS version 11 or later.
SafeAreaView renders nested content and automatically applies padding to reflect the portion of the view that is not covered by navigation bars, tab bars, toolbars, and other ancestor views. Moreover, and most importantly, Safe Area's paddings reflect the physical limitation of the screen, such as rounded corners or camera notches (i.e. the sensor housing area on iPhone 13).
Property | Description |
---|---|
Safe Area View | Should be Enabled in case of no navigation headers and the bottom tabbar used on the screen. |
Top Safe Area View | Should be Enabled in case of no navigation headers are used on the screen. |
Bottom Safe Area View | Should be Enabled in case of no bottom tabbar is used on the screen. |
Top Safe Area
Top Safe Area View should only be enabled if you've explicitly removed or hidden the header from Stack Navigator within the Navigation config.
Data Configuration
Name | Description |
---|---|
Navigation params | To receive data when navigating to this screen. Can add new parameters by entering the name and clicking the button with the checkmark icon. |
Deep linking | Deep Linking allows you to open a specific screen from a website or other app. Need to turn the toggle 'ON' to enable the Deep linking setting for the screen. Defaults to 'false'. |
DEEP LINKING PREVIEW
In order to access this screen from a different app, type the following URL into a web browser. This will only work if you're using the Draftbit app or if you export your project
Interactions
Triggers
Trigger Name | Description |
---|---|
On Screen Focus | Runs every time the screen comes into focus |
Actions
Actions can be used on a screen in your Draftbit app that has an On Screen Focus Trigger or a component like Fetch in addition to components that support interactions like Button, Touchable, Action Sheet Item, etc.
Action Name | Description |
---|---|
API Request | Make API requests after a button is pressed. Learn how to configure in this article: Sending Data. |
Conditional Stop | Requires a value to be checked whether it evaluates to true or false. When it evaluates to true, no further actions will be performed in the list of "Actions". |
Extract Key | Chained with API Request action. Use this action to extract a key from an object or array. To construct the Path, use dot (.) or square bracket notation ([]) to traverse deeply nested objects. For example, use .fields.Name to extract the value of Name from the following object: { "fields": { "Name": "Some Value" } } |
Log to Console | An action that is used as a debugging tool. You can pass the result of an action (for example, an API request or a Custom function, or any type of action that returns a result) to a preview response. The result triggered by this action is shown in the Console Logs tab in the Bottom Panel. This is similar to the browser's Developer Tools and for quick previewing is now available in Draftbit. Using Log to Console action with API requests |
Navigate | In the dropdown, select a screen in the current navigator or a different navigator to navigate to. (Stack Navigator only: Aside from screens and navigators, a Go back option is in the dropdown which takes you to the previous screen in the stack.) Navigating between screens using "Navigate" action |
Open App link | Accepts a URL Scheme to open links to other applications. For example, you can open the telephone, messages, maps, or the browser. On iOS and Android, this will take users out of your application and into another, exiting your application. You can only open an application that the local system supports. |
Open Browser | Accepts the URL for a website. This action allows you to open any http:// or https:// URL in the system's web browser. On iOS and Android this will open the URL and when the user is finished will return them to the application. On the web, this will open the URL in a new window. |
Open Camera | Opens a device's Camera to take a picture or record a video to upload. Returns image data in Base64 format. Can be chained with the "Run a Custom Function" action to upload the data to a cloud service. The image data returned can also be stored in a Variable to upload to a backend service (only if the backend service allows uploading images/videos in Base64 format). How to use Open Camera Action in Draftbit |
Open Image Picker | Opens a device's media library to select a photo or a video to upload. Returns image data in Base64 format. Can be chained with the "Run a Custom Function" action to upload the data to a cloud service. The image data returned can also be stored in a Variable to upload to a backend service (only if the backend service allows uploading images/videos in Base64 format). How to upload images to Airtable from a Draftbit app using the Open Image Picker action. |
Refetch Data | An action that is used to re-trigger a specific endpoint to fetch the data updates from it. You will use this type of action, for example, when you want to allow fetching data updates manually within the application. To use it, add it as an action, for example, on a Button component. There are a couple of requirements to remember when using this action: - The component that triggers this action must be nested inside the Fetch component. - The endpoint you are re-fetching the data for, needs to have a Role and an Object type configured already. |
Run a Custom Function | Run a function you've created in the Custom Code. |
Set Variable | Set the value of a defined Global Variable. (For example, from the response of an API Request). |
Get Expo Push Token | Action that returns a unique token associated with the device for Expo push notifications. It is usually chained with a "Run a Custom Function" action to upload the data to a cloud service or to store the value of the token in a database. |
Update Map Location | Action that allows you to focus on a specific region of the map when triggered. It requires longitude and latitude coordinates as input values. This action also requires a Map component on the app screen to reference. |
Get Map Location | An action that requests permission and saves an object with the location information of the device. The result saved can be assigned a name so that you can re-use the result or save it in an App or a Device Variable. The location object returned by this action contains the following fields: js { coords: { accuracy: 20.6185685750211, altitude: 43.04912245369878, altitudeAccuracy: 6.938014590198416, heading: 180.40493651139974, latitude: 30.747315, longitude: -85.088285, speed: 0 }, timestamp: 1634698876011.571 } |
Dismiss KeyBoard | Action that is used on touch or button components to dismiss the Keyboard (when already opened). An example to use this action is with the Keyboard Aware Scroll View component when the Allow Touch Events has set its value to always. |
Get Notification Count | Gets the current notification badge count. See docs for more. |
Set Notification Count | Gets the current notification badge count. See docs for more |
Select File | Action that opens the device's file picker. Encode Selected File to Base64: If this option is enabled, the result will be a base64 string representation of the selected file. Good for uploading to a database or object storage. When not enabled, the result returns a DocumentResult object |
Show Alert | Action that displays a platform-native alert dialogue. Accepts a Title, Message, and Button Text. Note: On the web, only Message is displayed. |
Declare Variable | Declare a new constant with the given name with a value derived from runtime data. |
Updated about 1 month ago