Custom Code
Use custom JSX components in your app
The Custom Code component works together with Custom Files to allow you to use custom JSX components in your app
How to use
The Custom Code component is used to render custom JSX on your Screen. It works together with Custom Files to allow you to create your own JSX components, or import and use JSX components from third-party React Native and Expo packages.
Custom Files
In Custom Files you can import packages that you've added to your app and use their JSX components or create your own composite components from the base React Native components, for instance.
Basically, you'll export a named component from your Custom File which you can then reference in the Custom Code component's JSX expression input.
See the Files documentation for more.
Custom JSX
Once you have exported a component from a Custom File, you can then add that file as an import for your Custom Code component making it available in the JSX expression input.
See the JSX documentation for more.
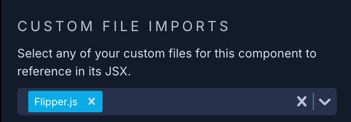
Custom File Imports
In this section, you can import your Custom Files that contain your exported custom JSX components so that they can be used in the Expression input to render the components on your Screen.

Select the file from the dropdown list and it will be imported at the top of your Screen's code and made available to the use.
Expression
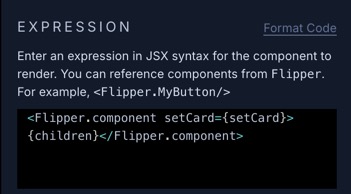
This is where you use the actual custom component that you've exported from your Custom File. If for example your Custom File is named Flipper and the exported named component in that file is component, then you would render that component in the Expression field as follows:
<Flipper.component />
Nesting Children
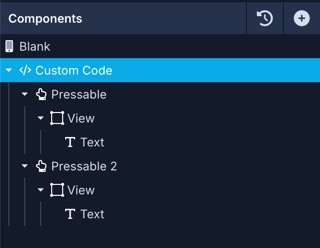
You can nest other built-in components such as a Text or Image inside the Custom Code component in the component tree and they can be passed as children to your custom JSX component.

You can pass in the children like this:
<Flipper.component>
  { children }
</Flipper.component>
In the example above, all the child components will be passed into the JSX component in your Custom File where you can then render them wherever you need to.
export const component = ({ children }) => {
  return (
    <CardFlip>
      { children }
    </CardFlip>
  );
};
Passing Screen Variables
Screen Variable getters and setters and Screen Functions are directly available to your custom JSX in the Expression input.
For instance, if we have a Screen Variable named 'chartData', then our getter (chartData) and setter (setChartData) can both be passed as arguments to the JSX component.
In the example below, we have a Screen Variable named 'chartData' that we are passing into the Chart.component JSX as the argument for the data prop.
<Chart.component data={chartData}>Other Options
| Name | Description |
|---|---|
| Preview Children | Custom components can't be shown in Preview mode. However when this setting is enabled, the page will render this component's child components. |
| Capture Errors | Capture errors within a custom component by wrapping it in a React error boundary. |
Conditional Display
You can conditionally display a component based on a given condition. Learn more about conditionally displaying components in the Conditional Display doc.
Updated about 1 year ago
