
Push Notifications for Android
1. Get a Firebase account
Google's Firebase Cloud Messaging (FCM) service is used to send push notifications on Android. Sign up for an account here: https://firebase.google.com
2. Create a Firebase project
You'll need a Firebase project for your app. You can create one from the Firebase console.
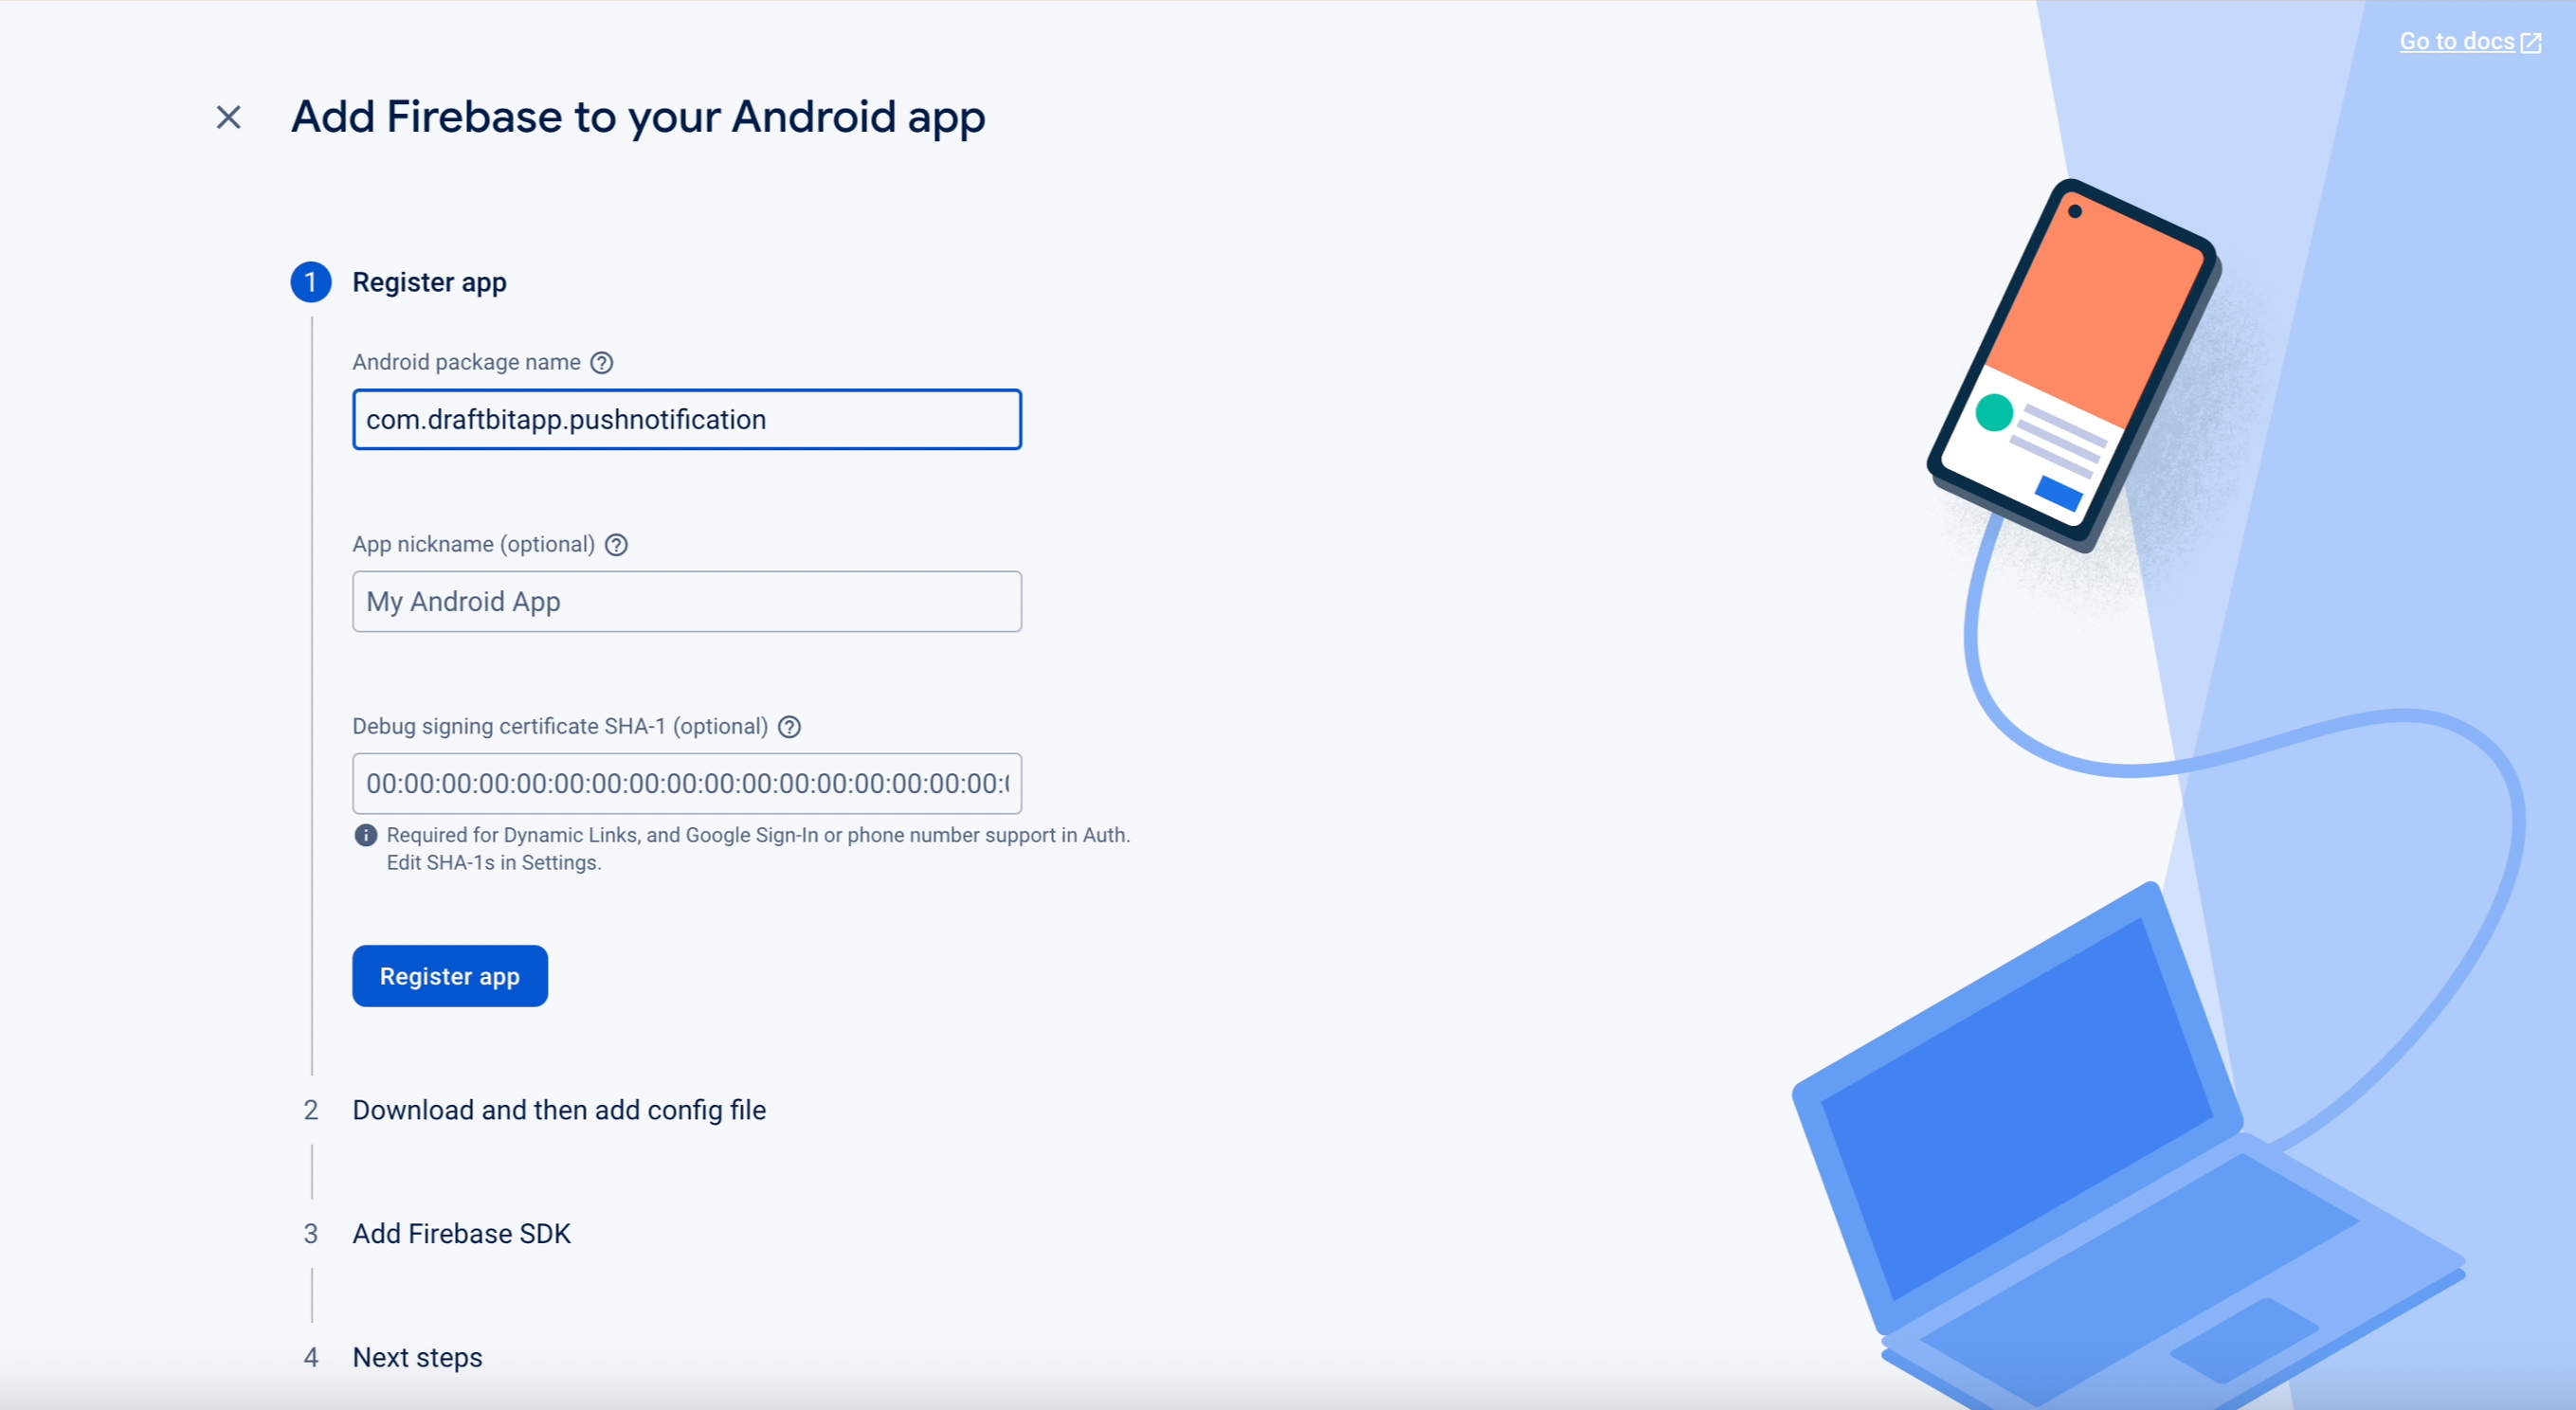
3. Add an Android App
For each Firebase project, you add the types of apps you're building. In this case, you'll need to add an Android app to your Firebase project.
Make sure that the Android package name you enter matches the package name you have set in your Draftbit project at Project Settings > Google Play Store > Package name (docs)
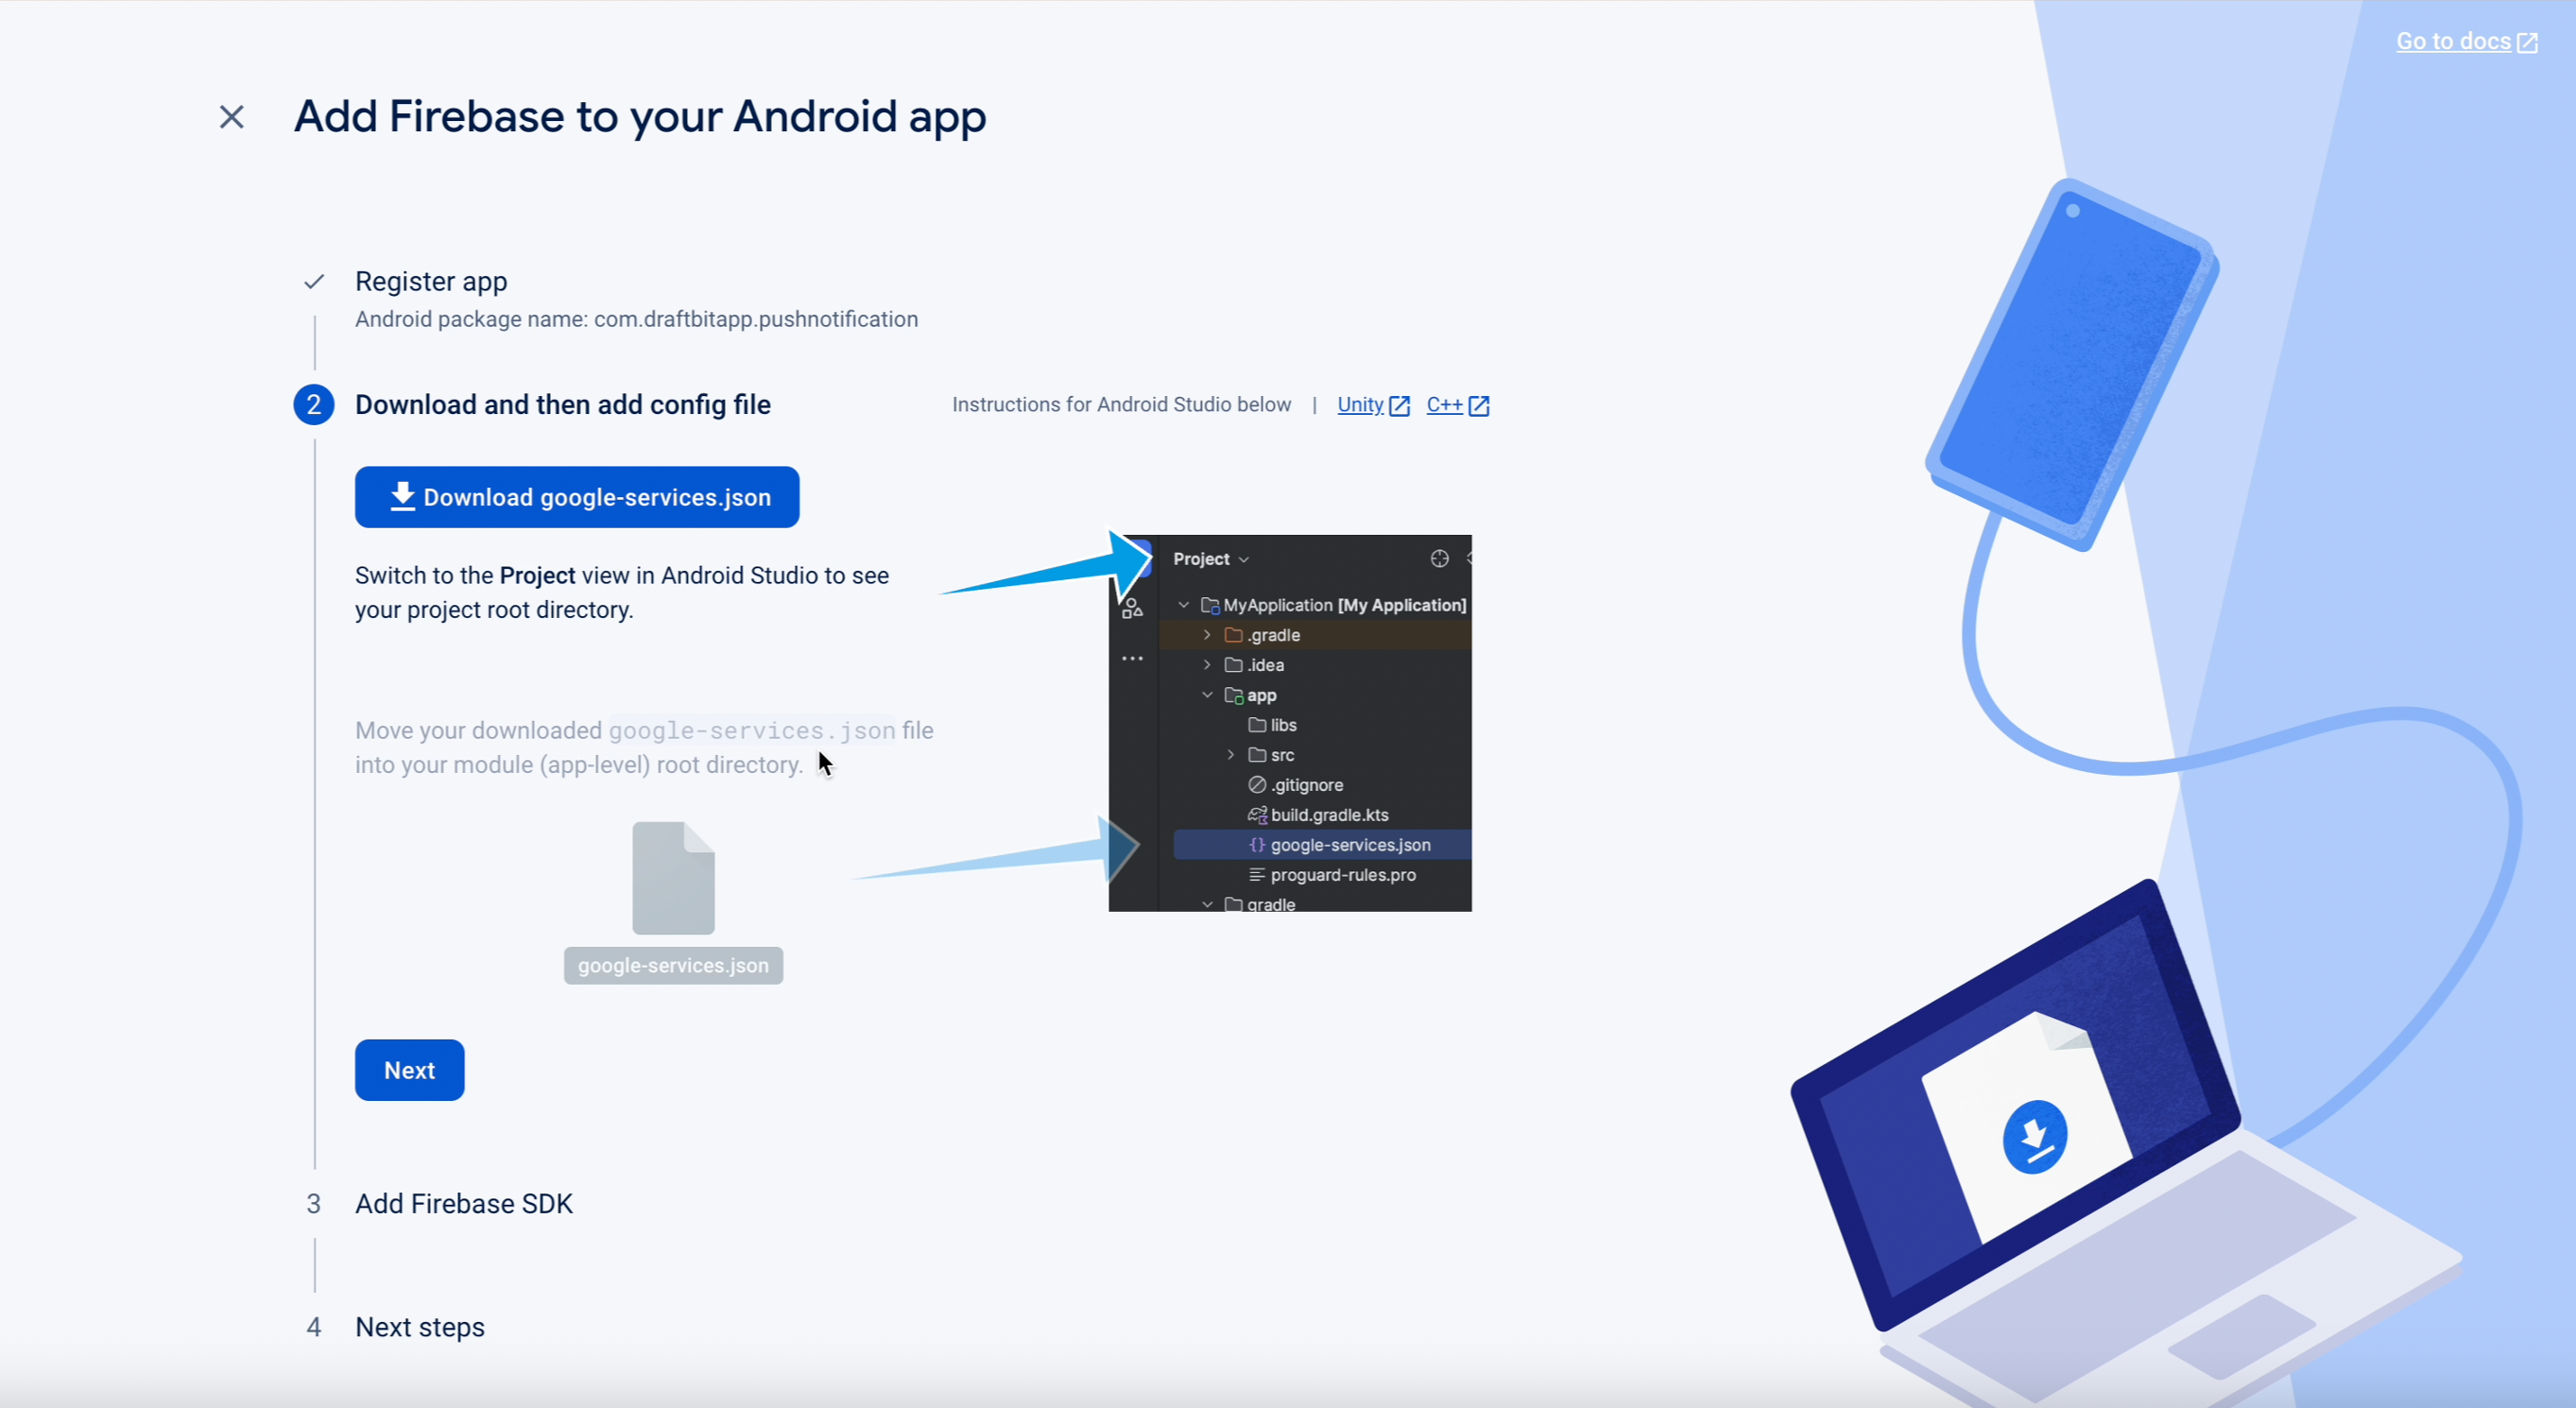
4. Download google-services.json file
When you get to the Download config file step, download the google-services.json file to your computer making note of its location.
5. Generate Google Service Account Key
In the Firebase console, open Project settings >Service accounts for your project.
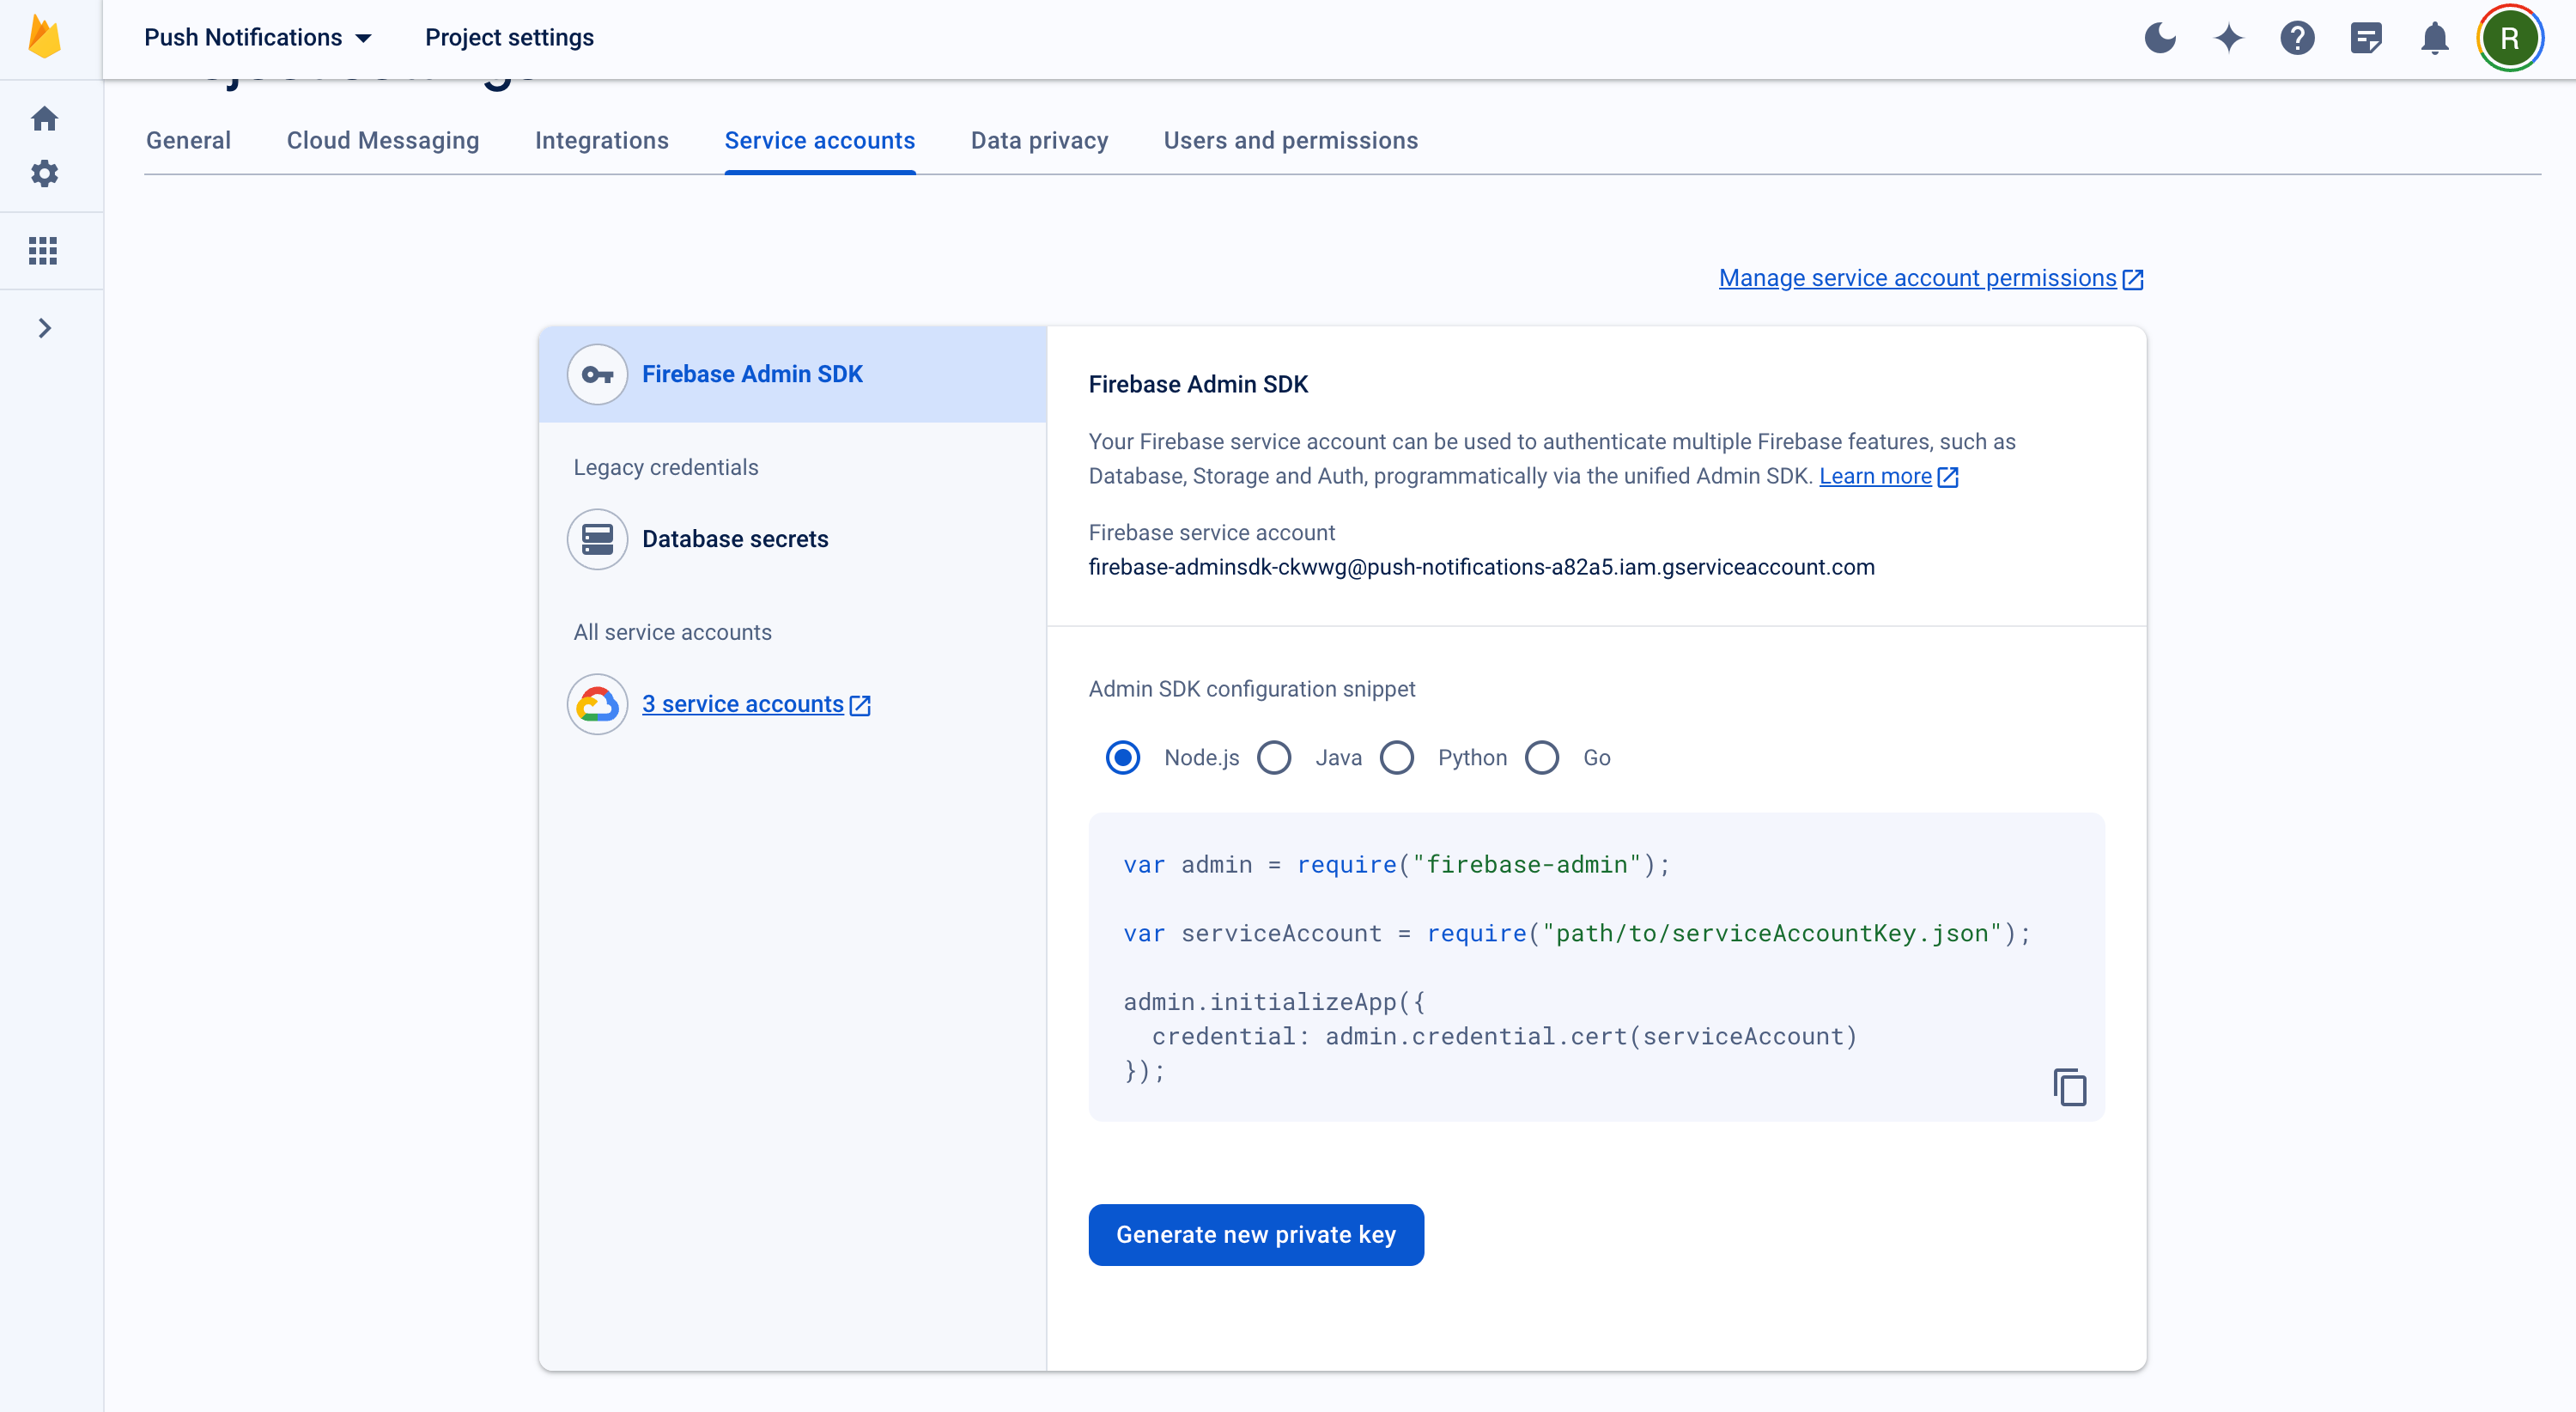
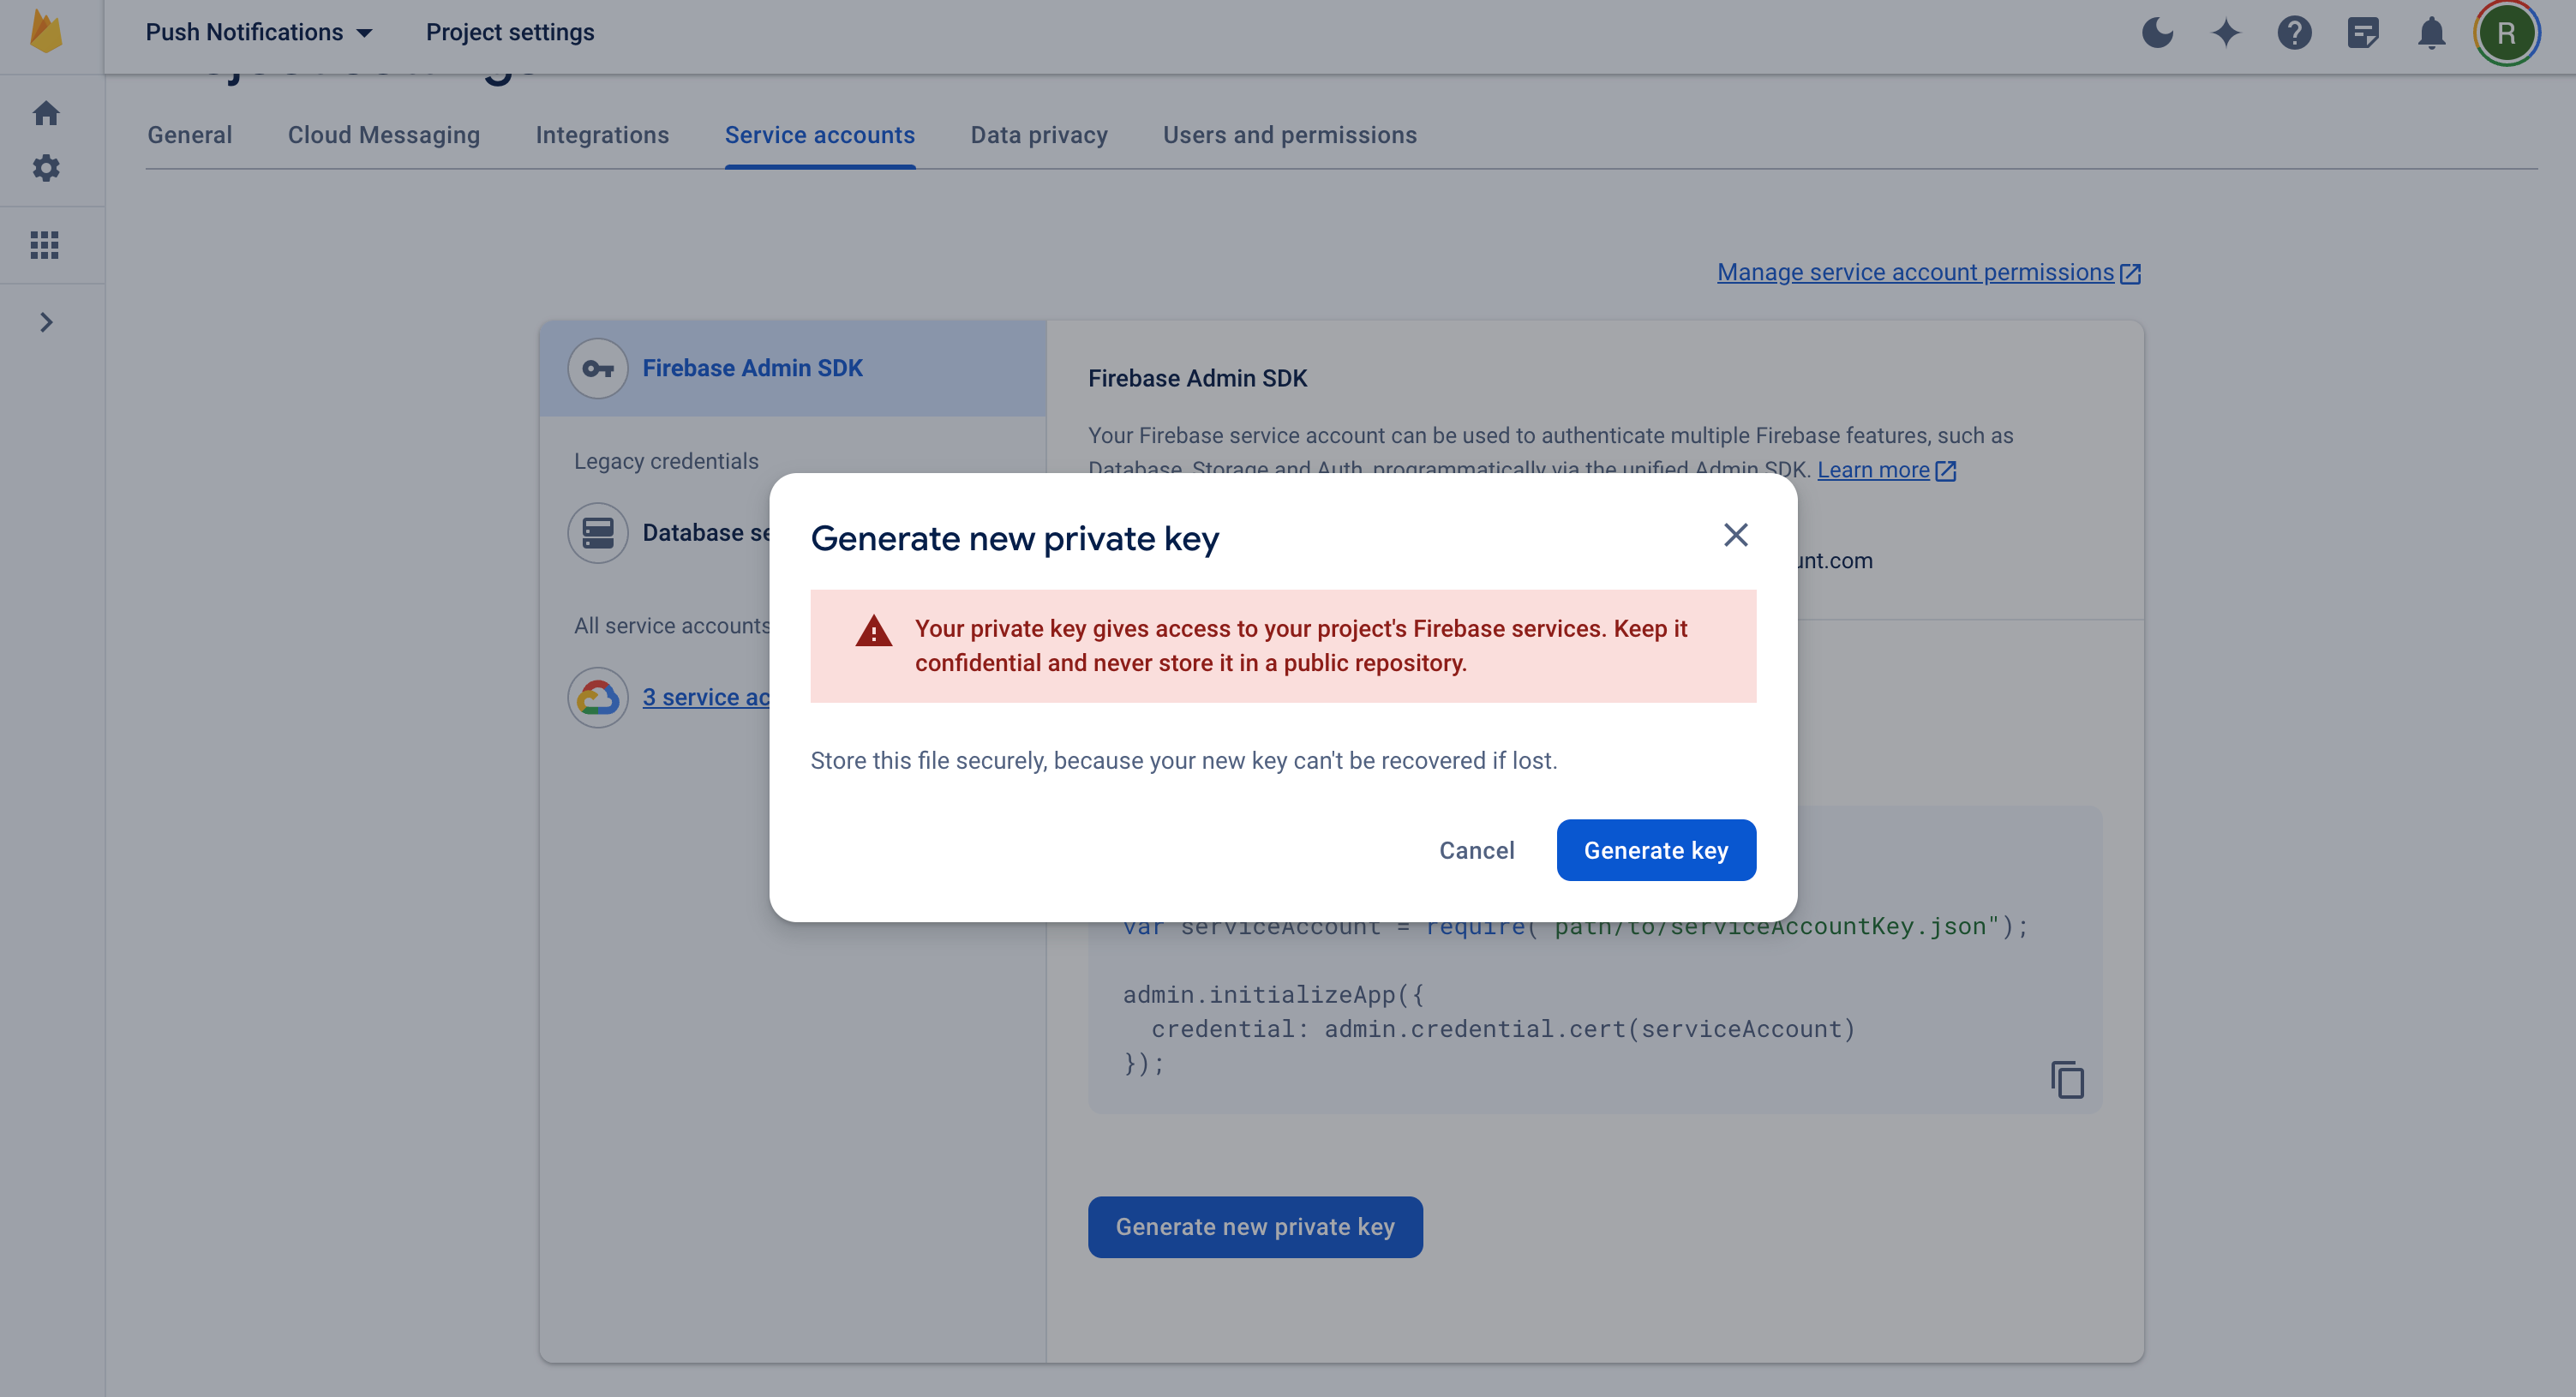
Then, click Generate New Private Key, then confirm by clicking Generate Key. Securely store the JSON file containing the private key.
6. Send credentials to Draftbit
Once you have your apps google-services.json file and the Server Key, contact us through Intercom and provide the credentials. We will add them to your Draftbit app.
Once your credentials have been added, your app will be ready to receive push notifications.
Google is discontinuing the FCM Legacy protocol on June 20, 2024. To keep sending Android notifications seamlessly, you'll need to switch to the new FCM V1 credentials. If your push notifications are already set up, please generate a new Service Account Key and provide it to us. Follow the instructions below:
1. Disable Cloud Messaging API
- Go to the Project settings in your existing Firebase Project where you created your Android app.
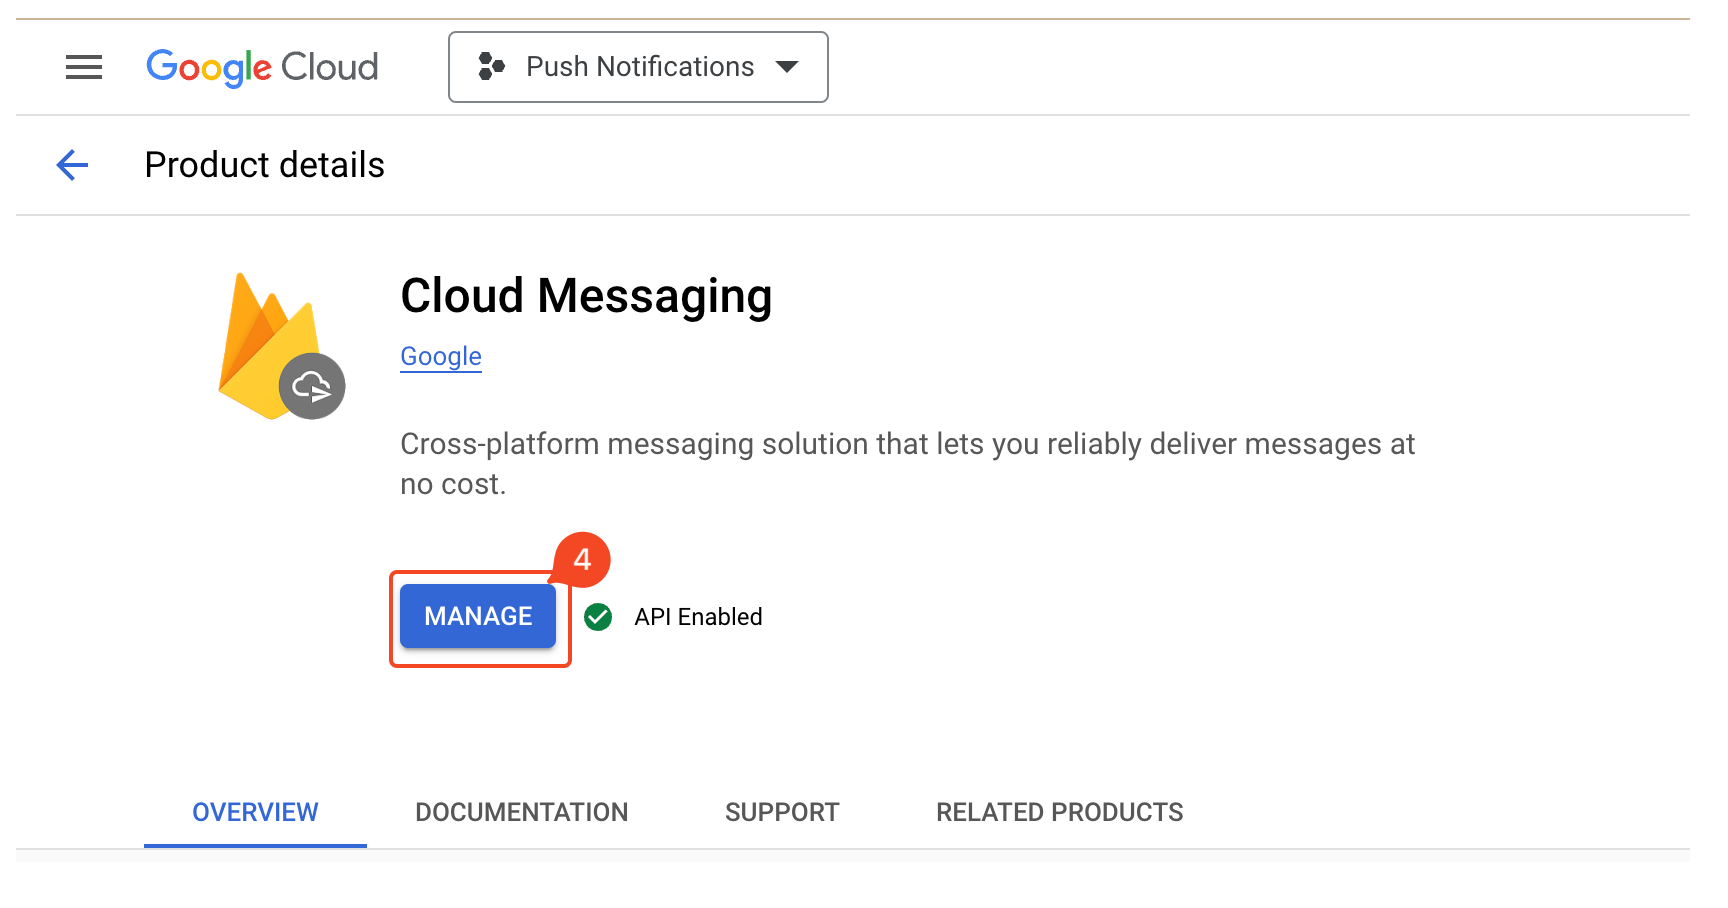
- There, click on the Cloud Messaging tab and then on the three-dot menu at the corner of the Cloud Messaging API (Legacy) option. Here, you can see your existing Server key.
- Click on the Manage API in Google Cloud Console tooltip.

- You will be directed to Google Cloud Console. Here, click on Manage button.
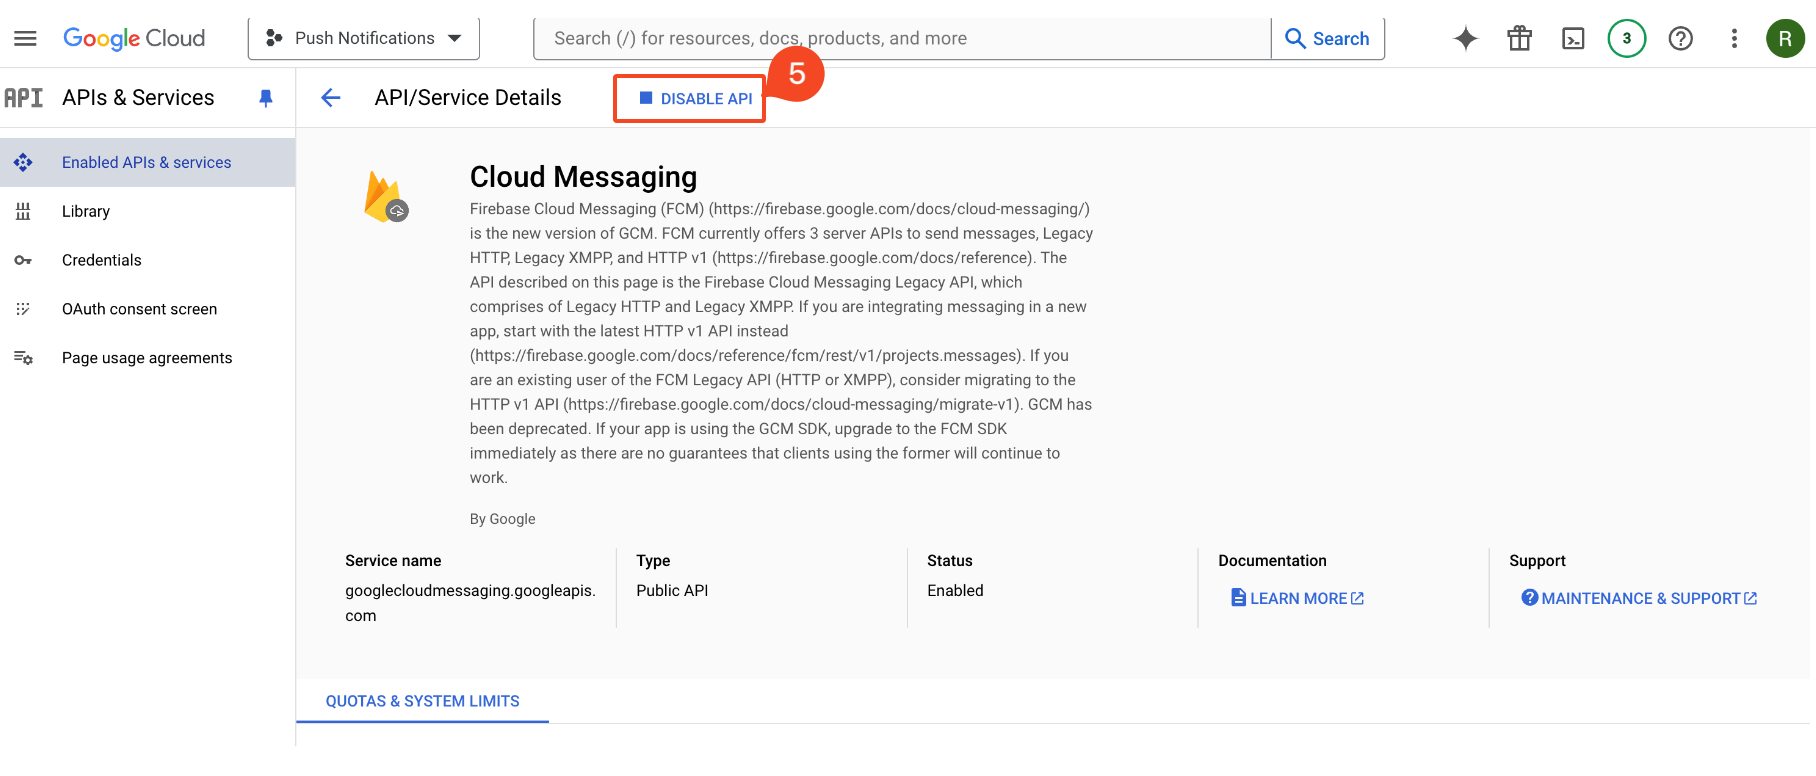
- In the upcoming APIs & Enabled Services page click on Disable API option at the top section.
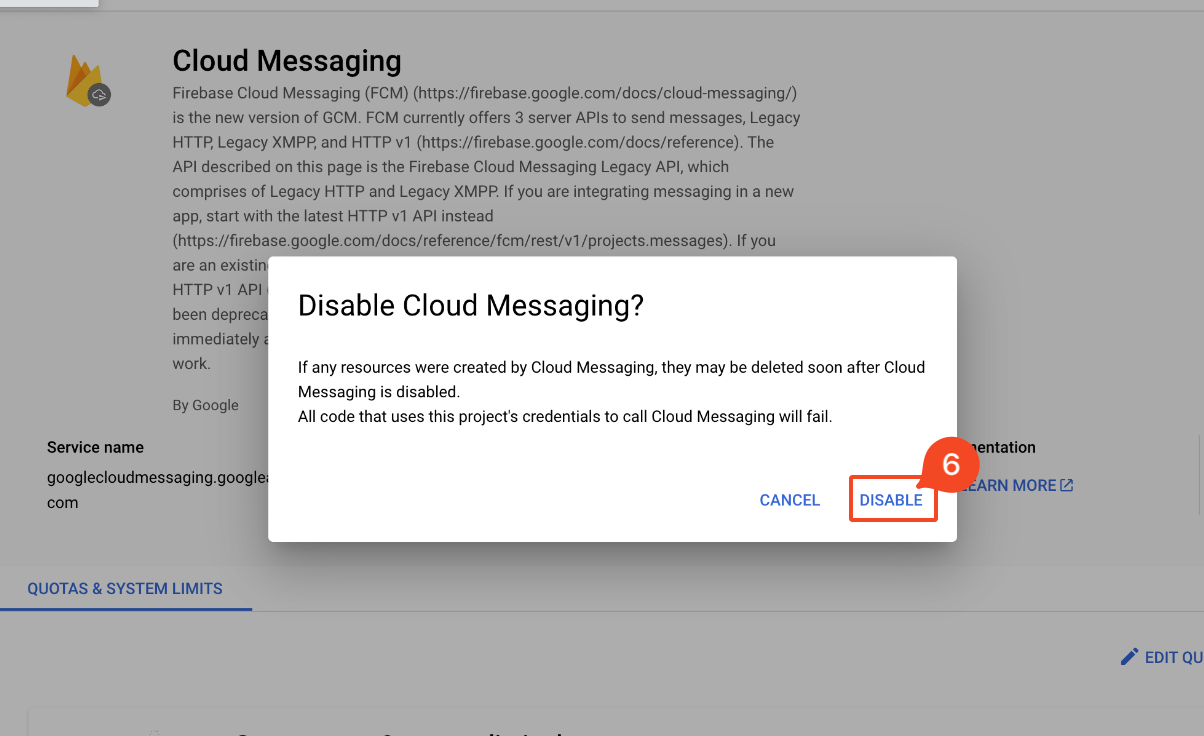
- Select Disable in the pop-up that appears.
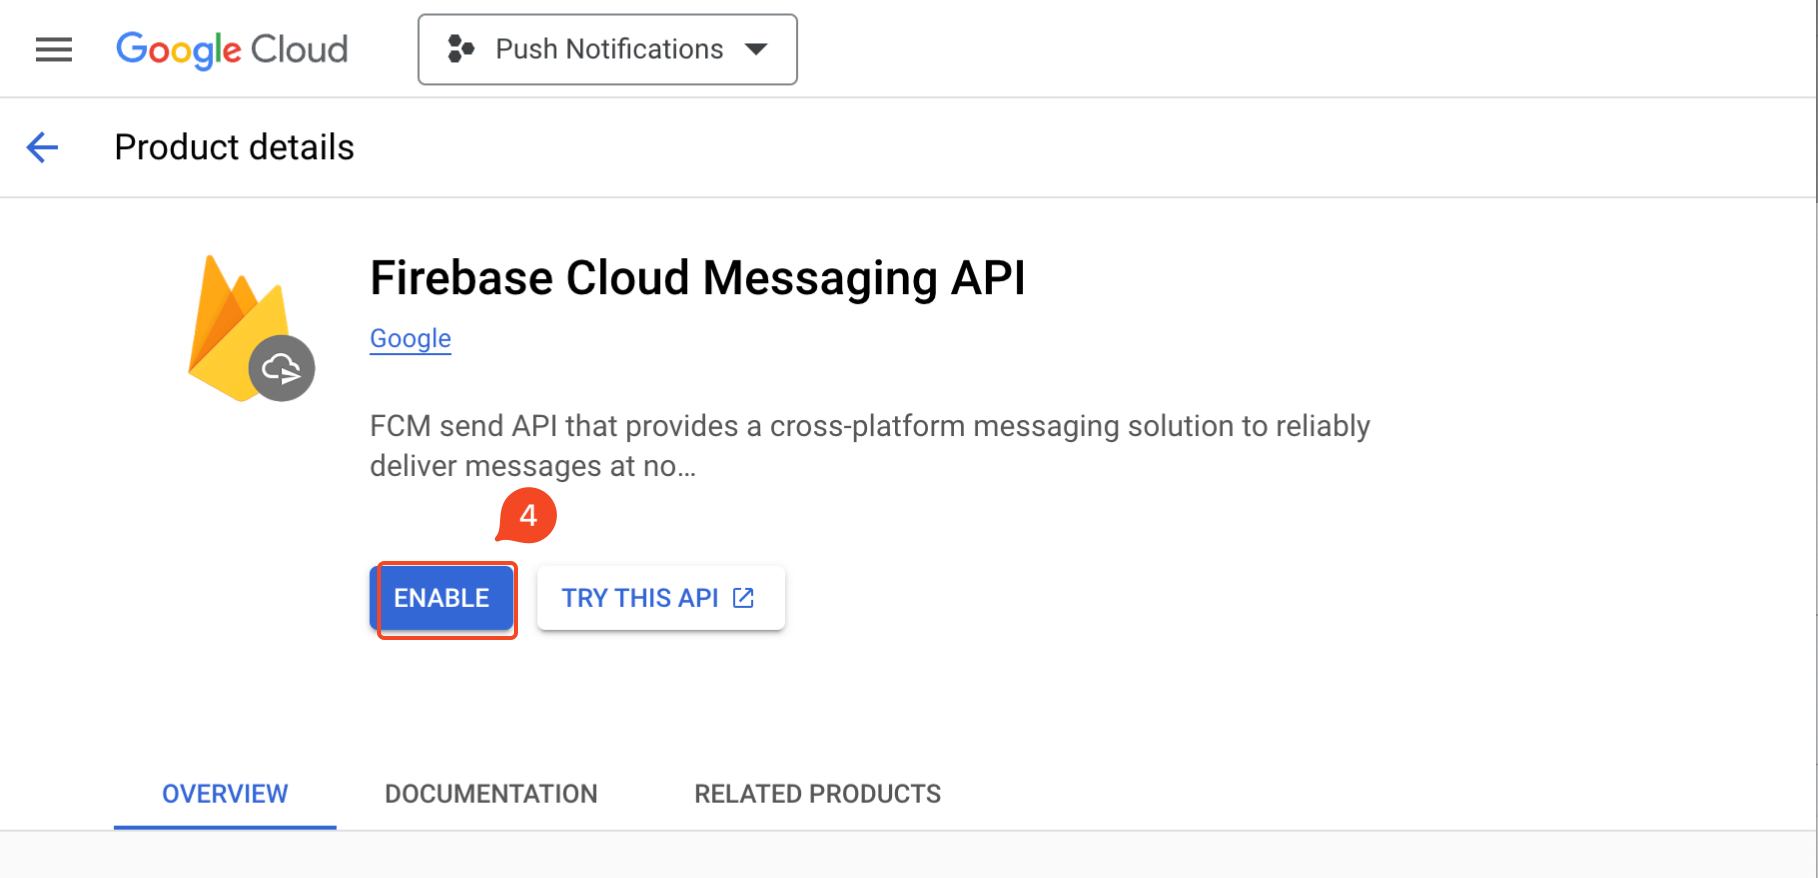
2. Generate new Private key
- Go to your Project settings in your Firebase Project.
- Select the Cloud Messaging tab.
- Click on three-dot menu of the Firebase Cloud Messaging API option and click on the Manage API in Google Cloud Console tooltip.
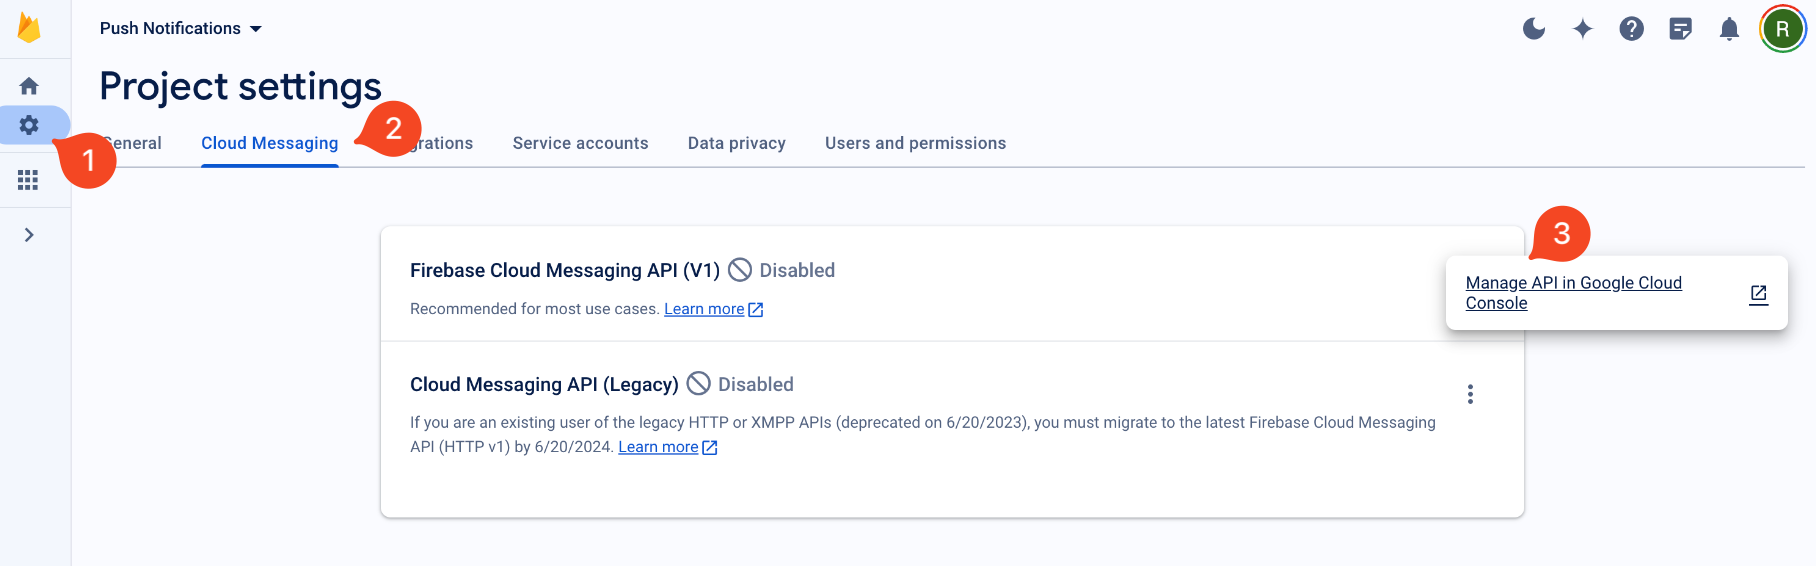
- You will be directed to Google Cloud Console. Here, click on Enable button.
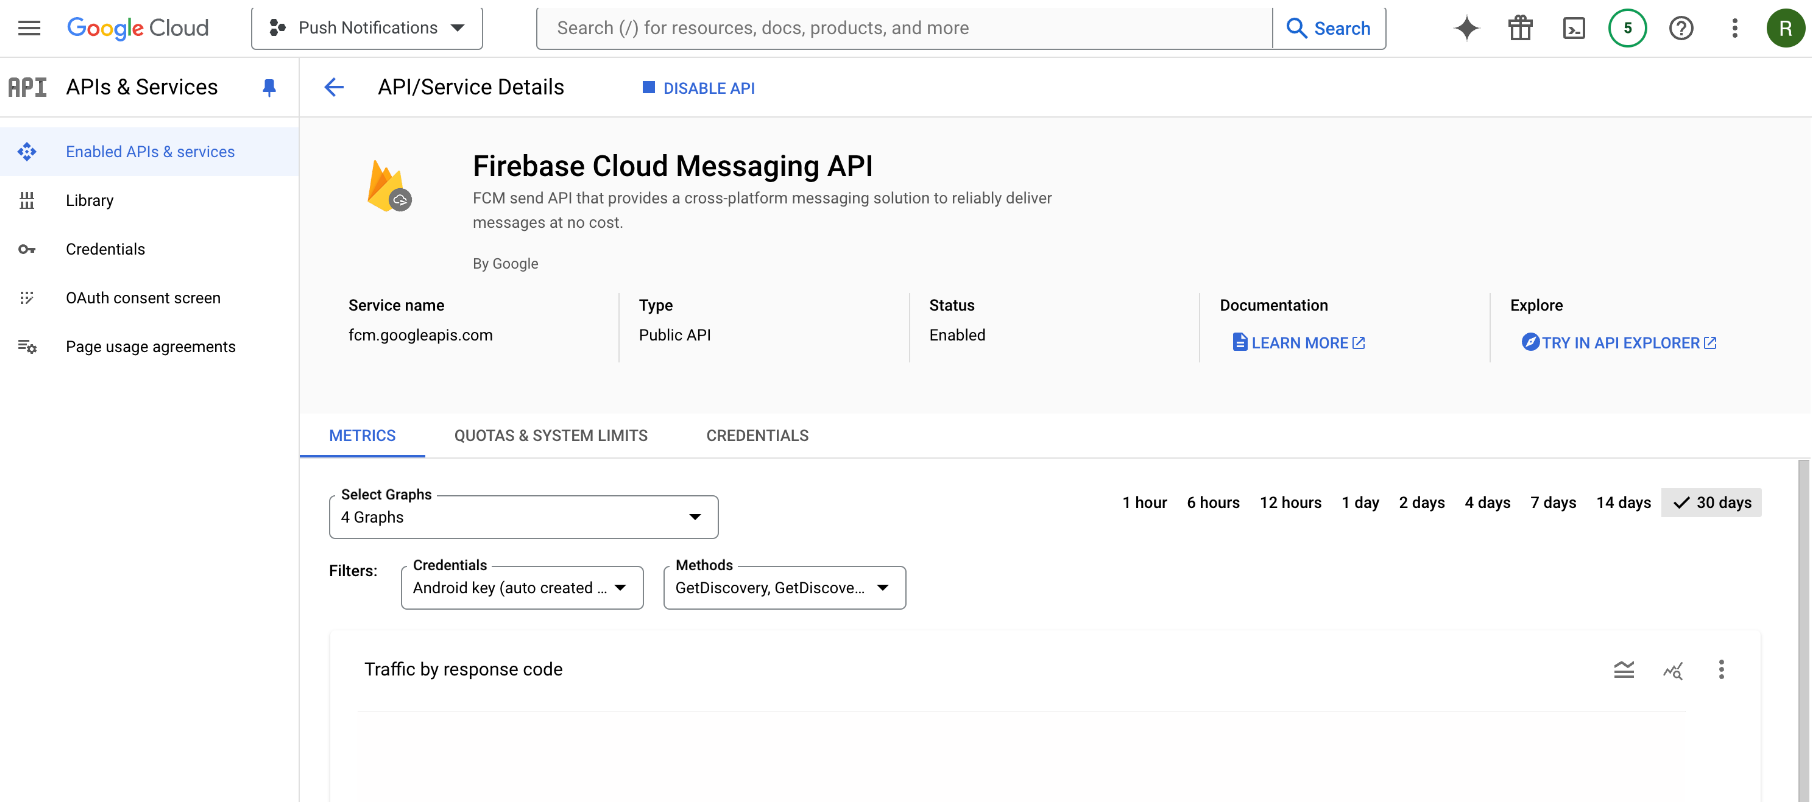
You can now see in the Google Cloud Console, Firebase Cloud Messaging (FCM) API has been enabled.
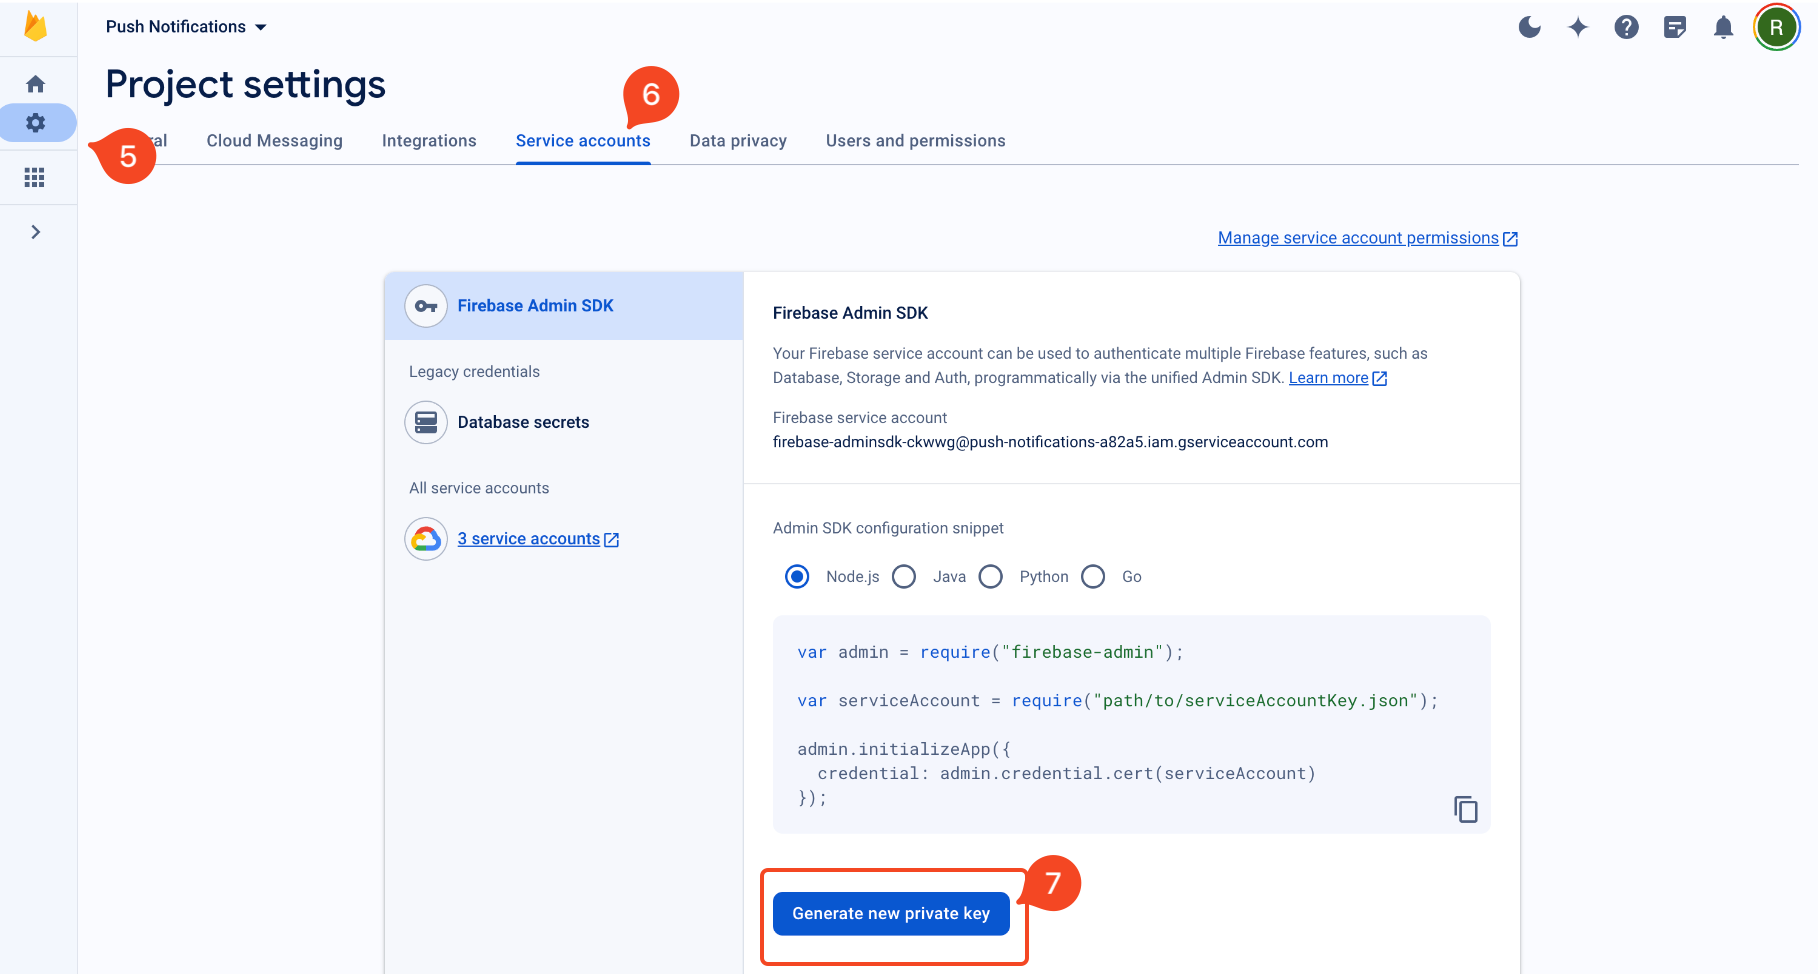
- Go back to the Project settings in your Firebase Project.
- Select the Service accounts tab from the top.
- Click on Generate new private key button.
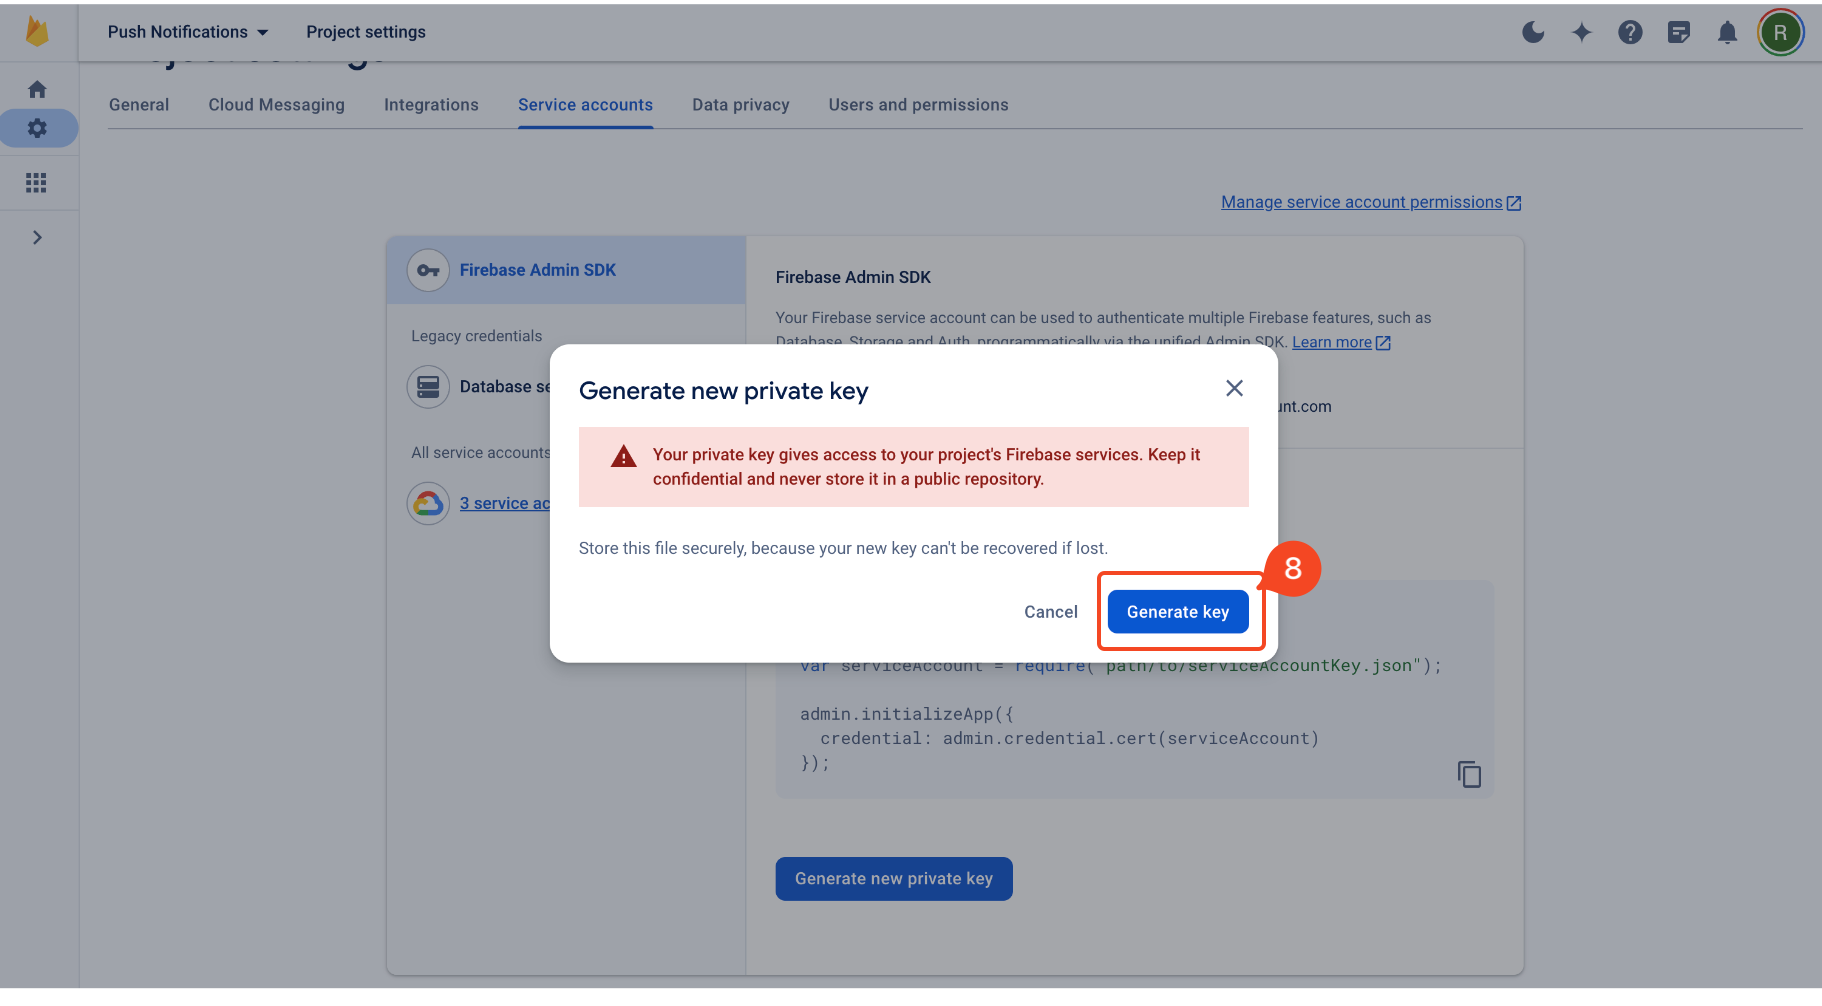
- Then confirm by clicking Generate Key. Securely store the JSON file containing the private key.
3. Send credentials to Draftbit
Once you have completed these steps, contact our Support team via chat or email and provide the new Server key along with your project name, and let us know that you are already using push notifications. We will then add it to your Draftbit app.
After your credentials have been updated, your app will be ready to continue with push notifications setup.