Webflow CMS
Webflow is a SaaS application that allows building responsive websites with browser-based visual editing tool with data. In short, it is a web design tool, CMS, and hosting platform. The CMS lets you structure content types you’ll publish over and over again — like blog posts, product pages, etc. — by combining modular “fields”.
Integrate Draftbit & Webflow CMS
Section titled “Integrate Draftbit & Webflow CMS”Setup steps in Webflow
Section titled “Setup steps in Webflow”If you do not have a Webflow account, create one here.
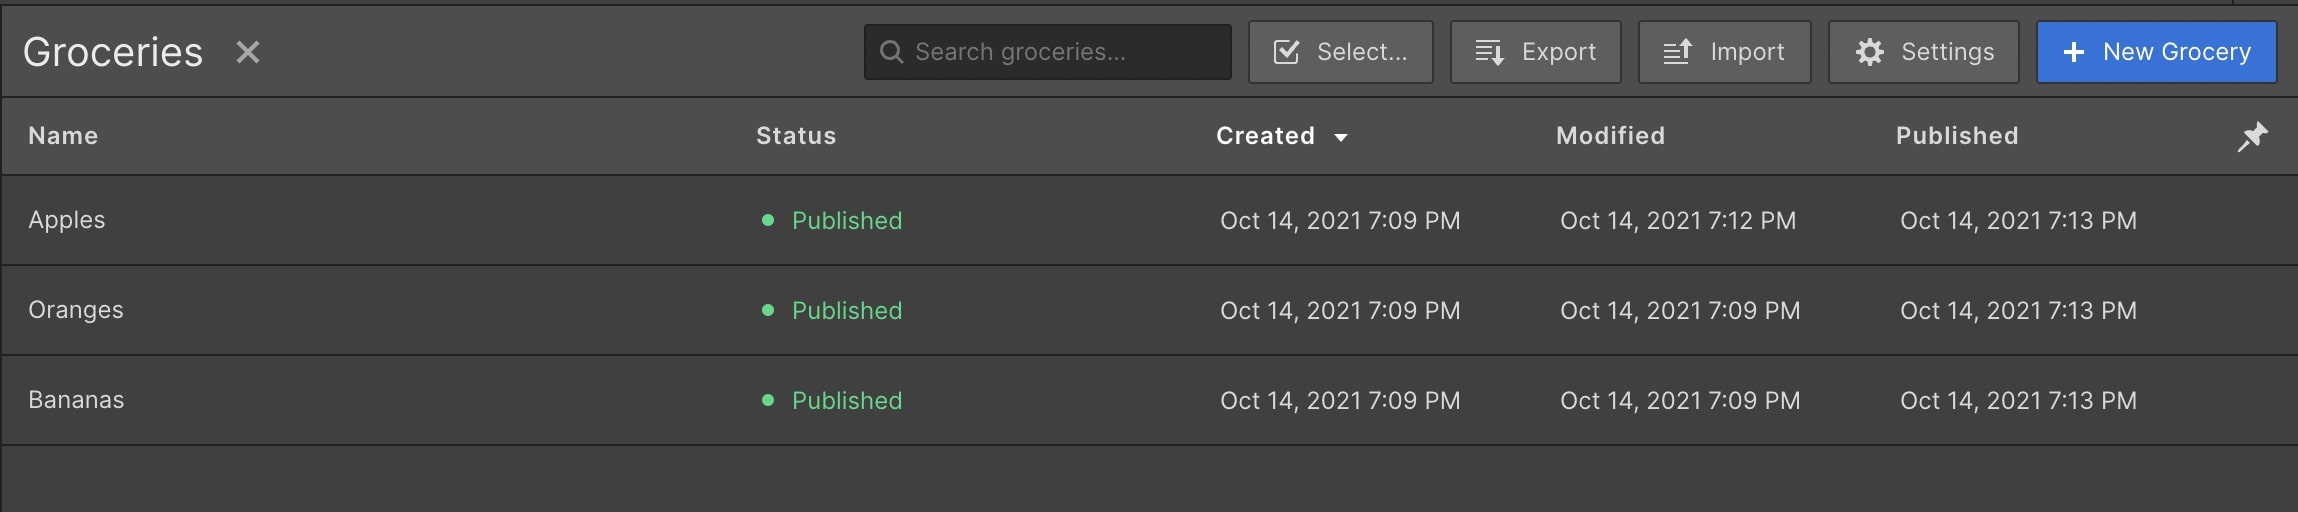
To use Webflow CMS outside the Webflow dashboard you need to make sure you have created at least one collection with appropriate data in form of fields. Both of them are required when accessing the REST API URL.
For this example, we are creating a new Webflow project from scratch with our own data set:
Get your REST API URL
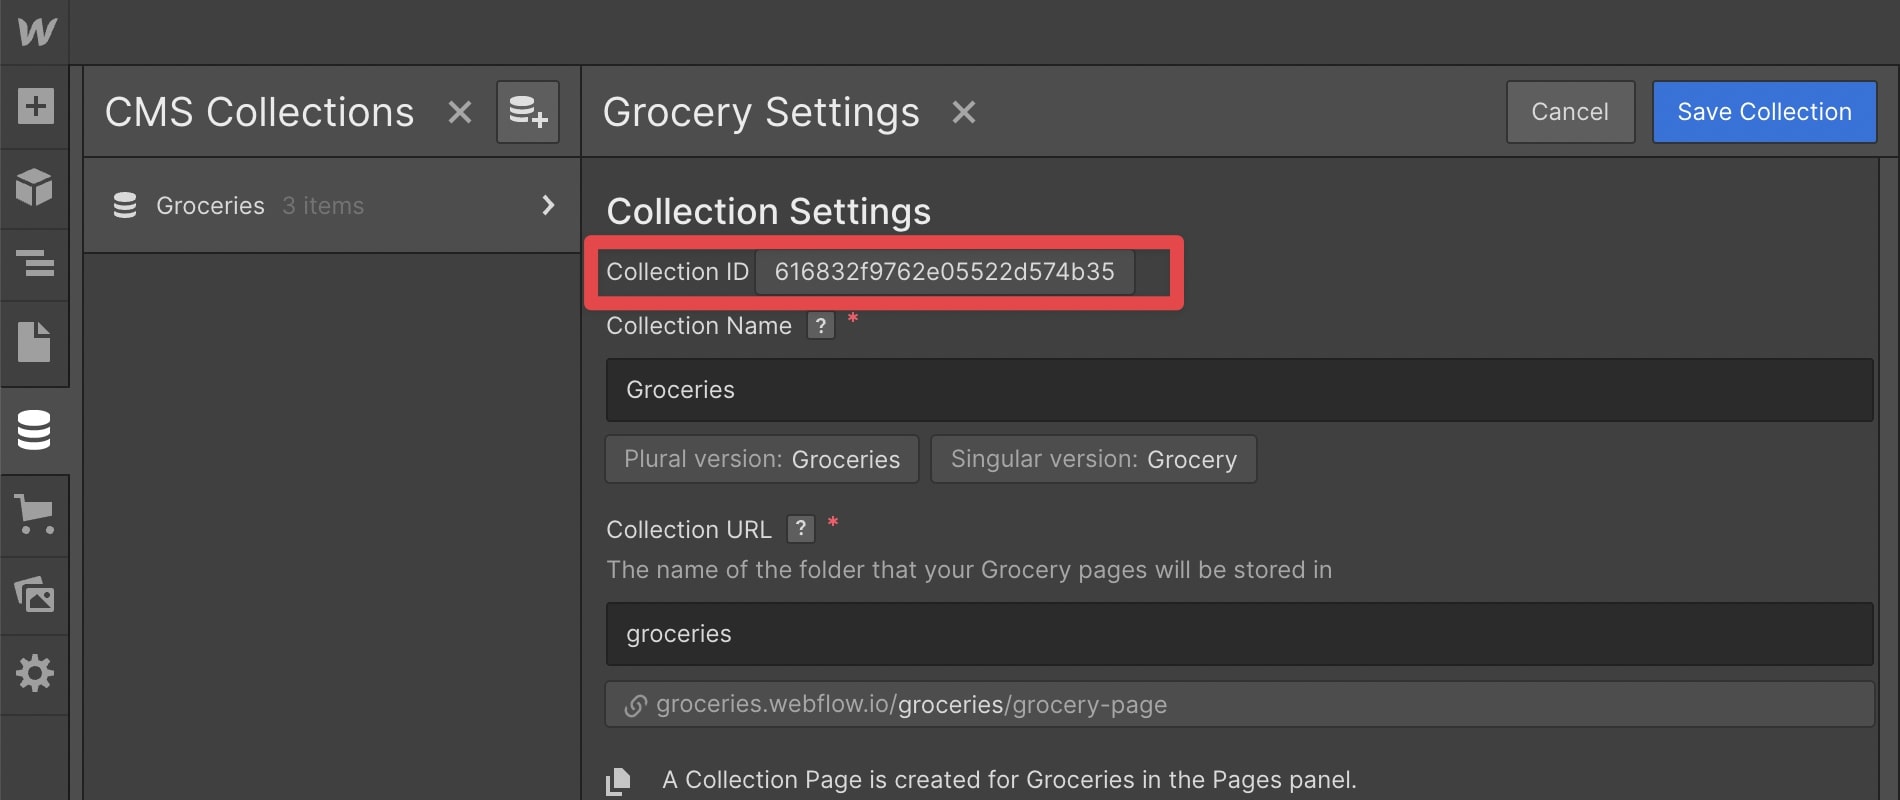
Section titled “Get your REST API URL”To perform read and write operations on a Webflow CMS API is done via the Base URL: https://api.webflow.com/v2/collections/your-collection-id. This Base URL requires you to specify a collection ID to start with. This value can be accessed when creating or modifying a collection in the CMS:
- From the sidebar on the left click the
CMStab. - On the collection name, click the settings icon or gear icon to modify under
CMS Collections. - Copy and save
{YOUR_COLLECTION_ID}listed as the value ofCollection ID.
Get Authentication Token
Section titled “Get Authentication Token”The Webflow CMS API allows read and write operations to the Base URL only if there is an Authorization header is passed with the value of Bearer access_token. To get the access_token:
- From the
Projectsdashboard screen, click the menu icon and then clickSettings. - Go to the
Integrationstab and go to theAPI Accesssection. - Click on the button
Generate API tokento generate a newaccess_token. - Copy and save the
access_tokengenerated here because you won’t be able to access it later. This going to be used in the next section
Setup steps in Draftbit
Section titled “Setup steps in Draftbit”Save Access Token and Version Number as Global Variables
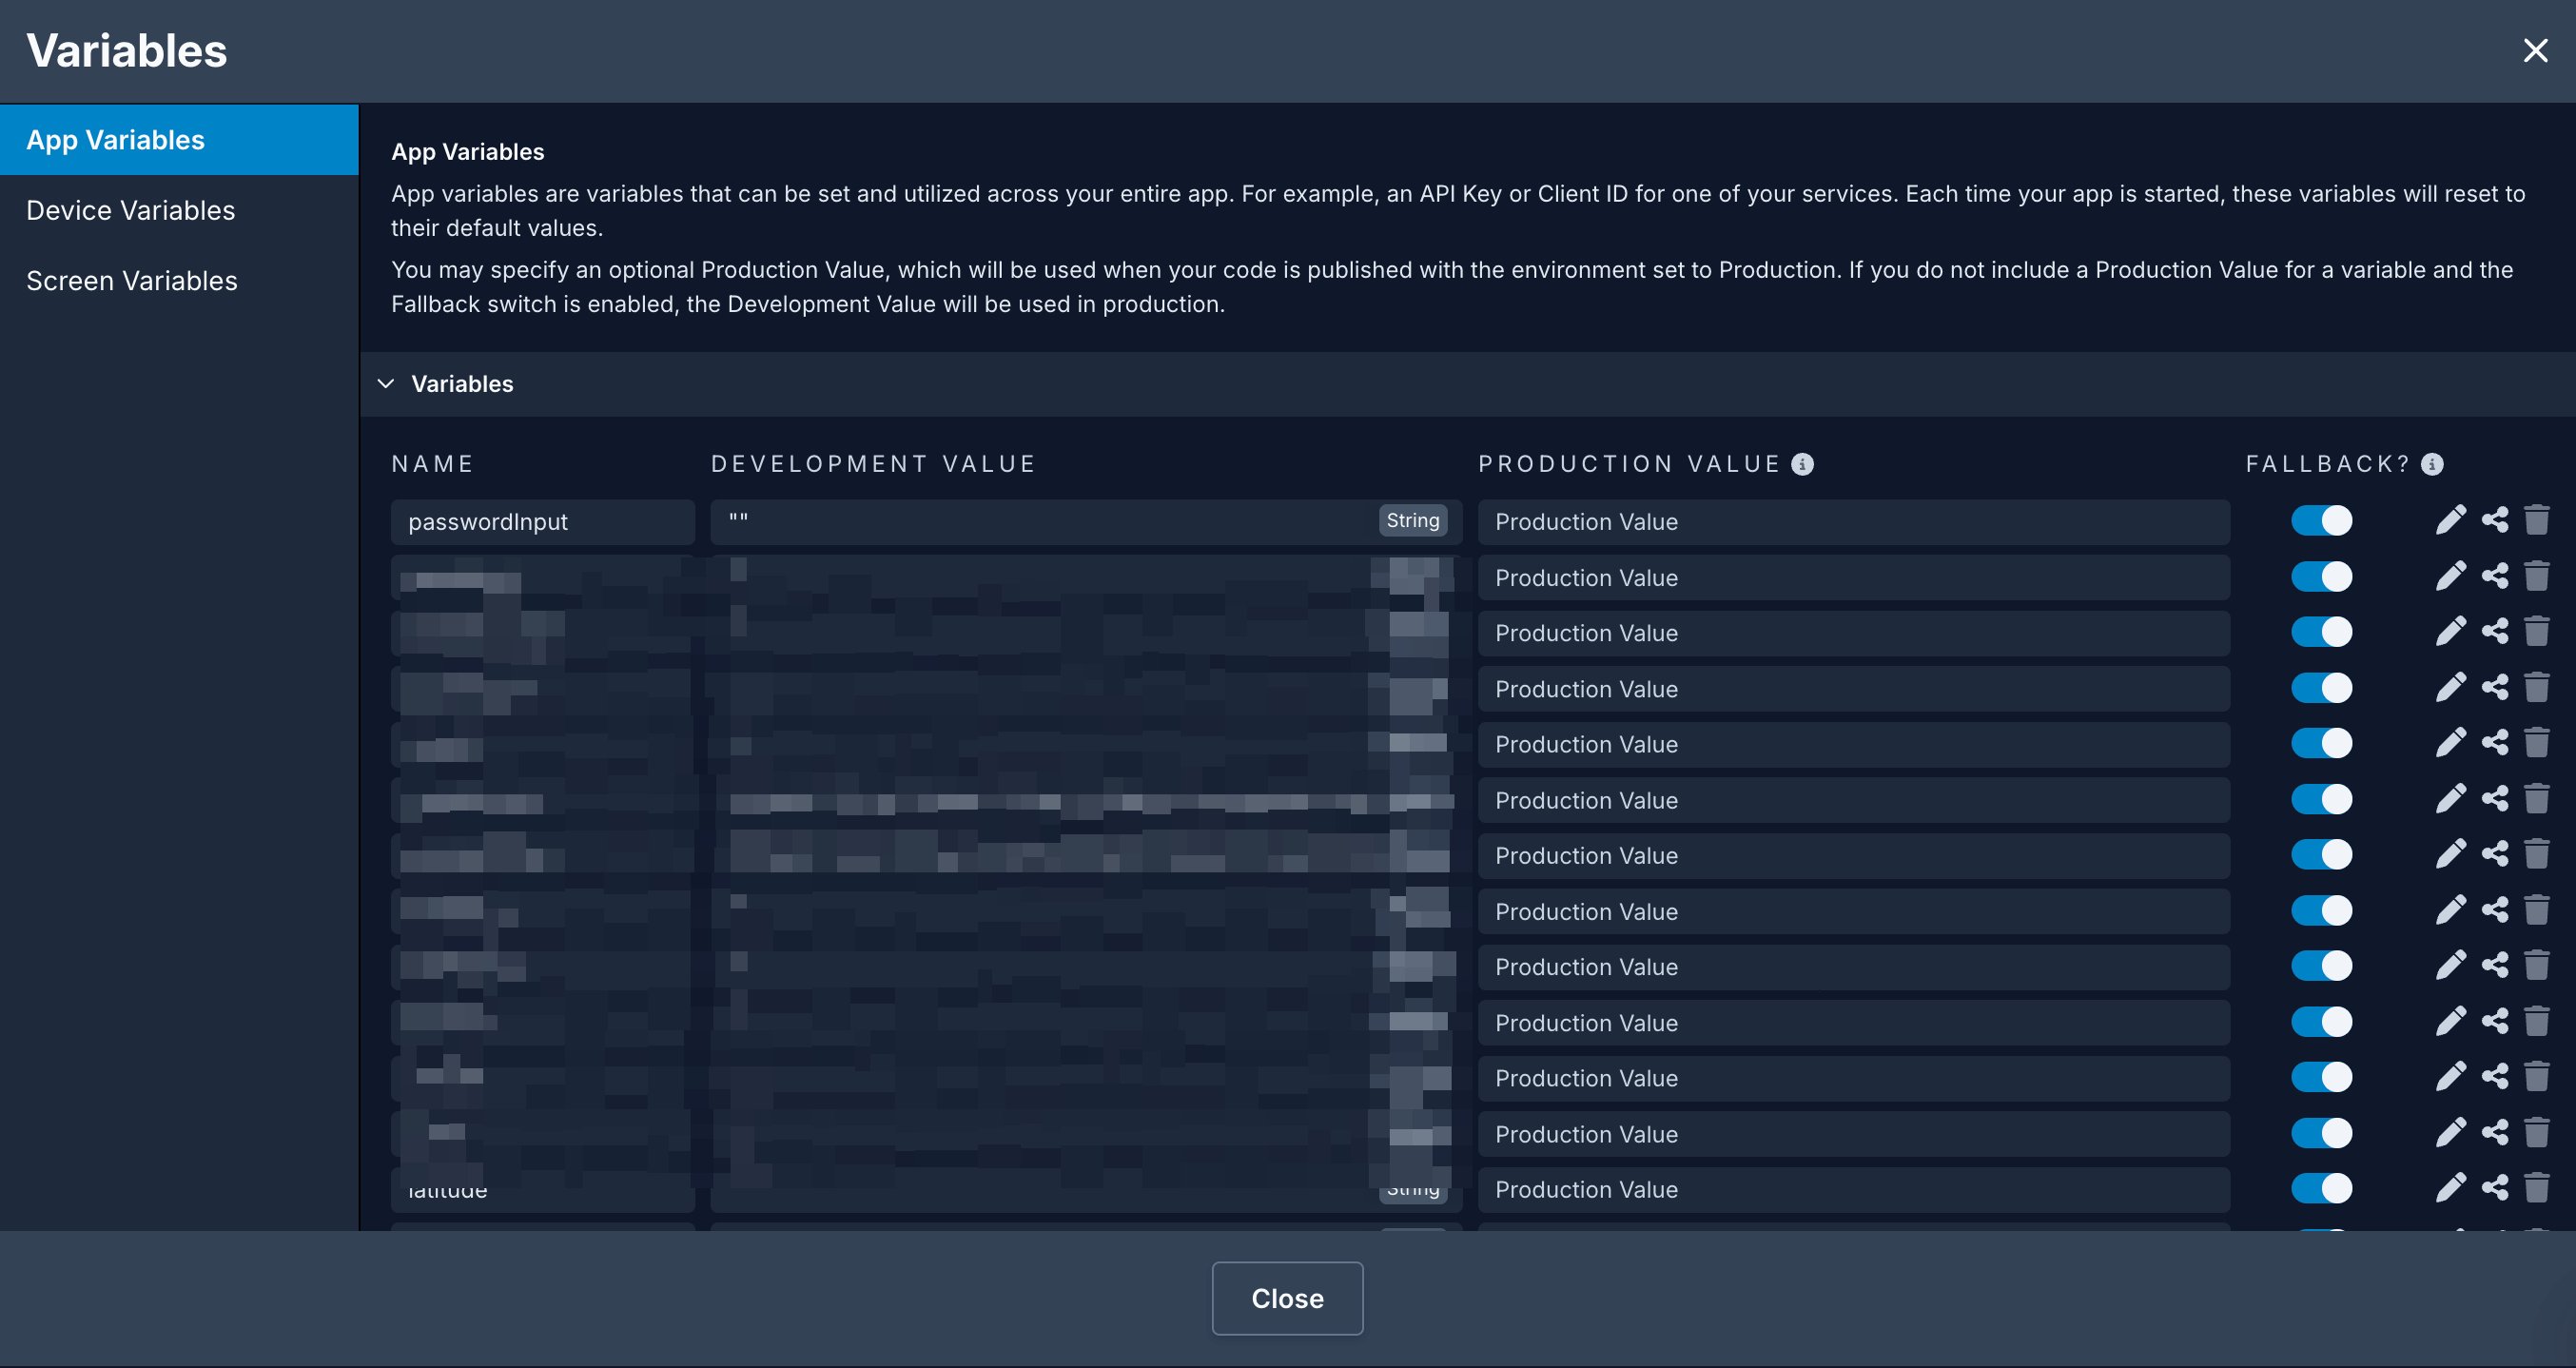
Section titled “Save Access Token and Version Number as Global Variables”Each request sent to Webflow CMS requires a valid access token. In the previous step, you learned to get the access token.
- From the left bar menu, open the Variables panel and navigate to App Variables
- Enter a
nameto access the API Key and the value for it. For example,Authorization_Header. - The value of this key requires you to enter an authorization token that starts with syntax is
Bearer access-token(the space betweenBearerand access-token` is required). - In place of paste your own `access-token (from the previous section) and then click Add.
- Click Save.
Add the Base URL
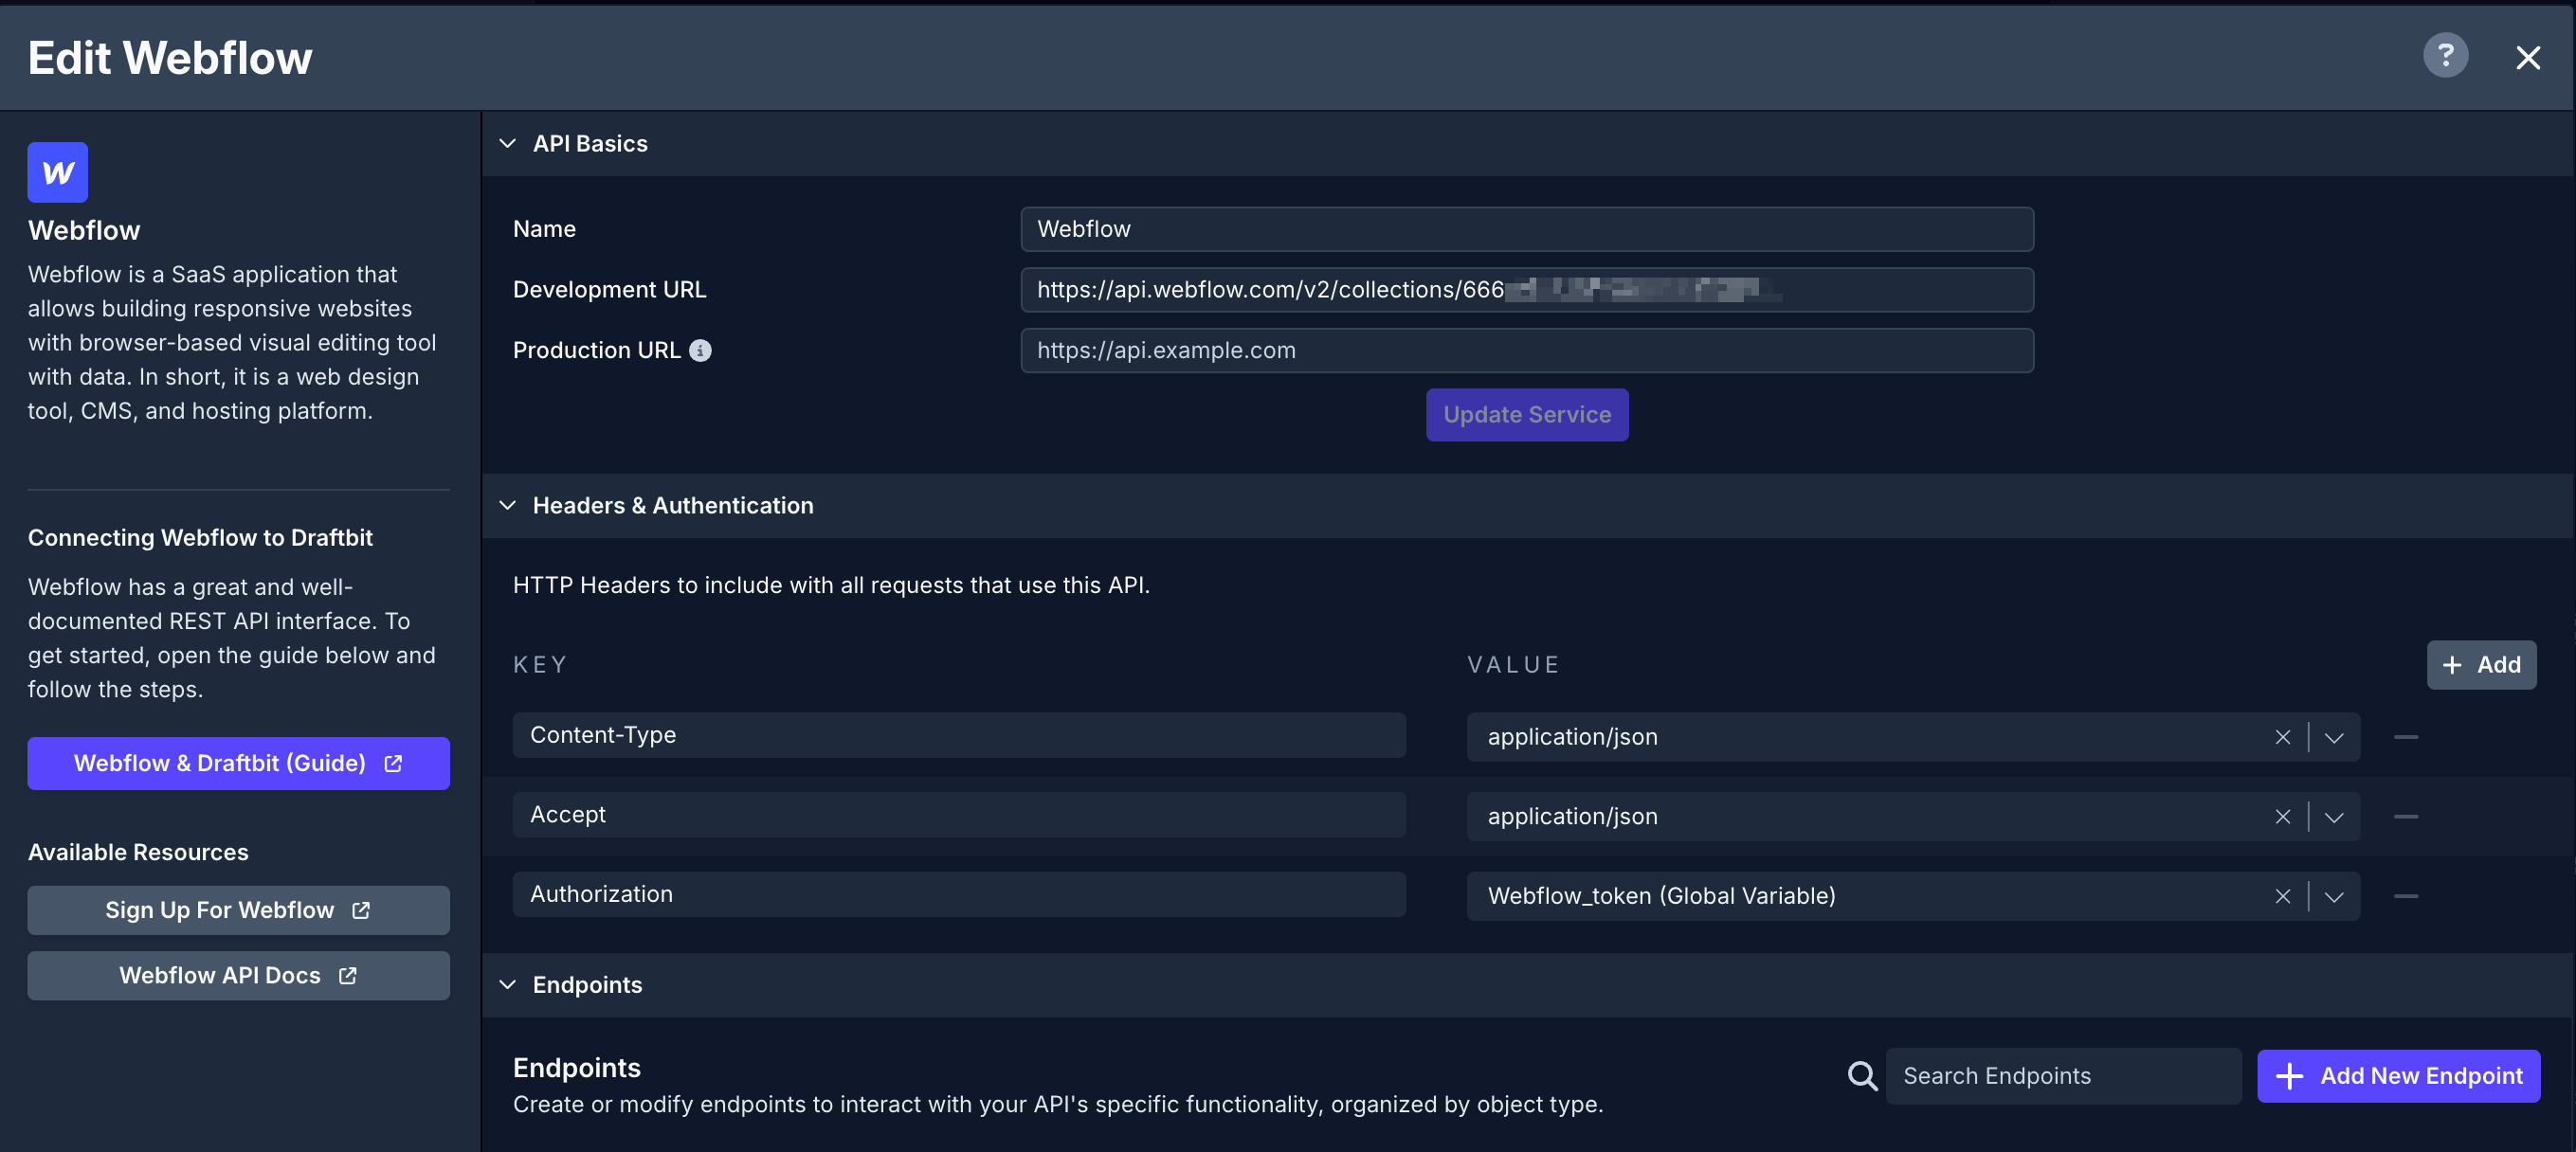
Section titled “Add the Base URL”- Open the Data modal from the left menu bar
- From the Connect a service menu, click on Webflow.
- In Step 1: Enter a name for your REST API. Then, paste your
Dev URLorProd URL(from the previous section) into the Base URL field. - In Step 2: Under Key* add:
Authorization. Under Value**, select the global variable (from the previous section) for the appropriate header. - Click Save.
Using Webflow CMS with Draftbit
Section titled “Using Webflow CMS with Draftbit”GET request to fetch all items
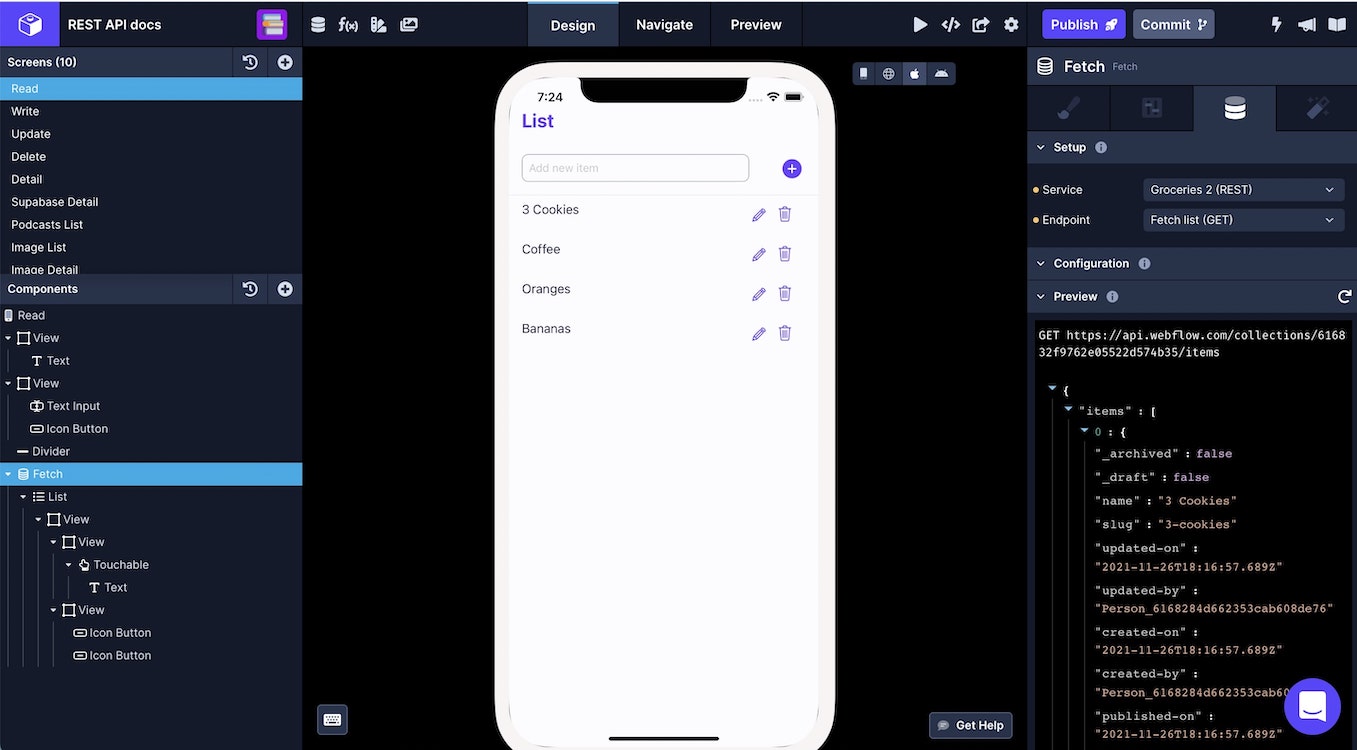
Section titled “GET request to fetch all items”In this section, let’s populate a Fetch component with all the data from a simple Webflow CMS collection and then display the data fetched in a List component.
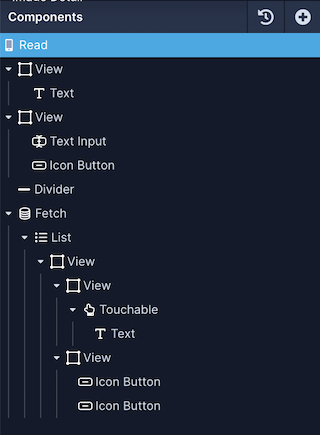
For reference, here is a how the Components tree looks like for this screen:
The next step is to create an endpoint. Let’s try fetching the data using a GET HTTP request. Open the API & Cloud Services modal, select the service, and then:
- Click Add endpoint.
- In Step 1: enter the name for the endpoint. Make sure the Method select is
GET. - Set the Role to
Get Manyas the endpoint is fetching a list of items. Set the Object Type toitemsfor this example. - In Step 2: add the
/itemspath. - In Step 4: click the Test button next to the Endpoint input to verify the response coming from the service.
- Click Save.
On app screen:
- Select the Fetch component in the Components tree and go to the Data tab from Properties Panel.
- For Service, select the name of the Service.
- For Endpoint, select the endpoint you want to fetch the data from.
- Select the List component in the Components tree and go to the Data tab from Properties Panel.
- In Data, select
itemsfrom the dropdown menu. - Then, select the Text component in the Components tree and then go to the Data tab from the Properties Panel.
- Add a
{{varName}}value (inside the curly braces) to represent a data field from the service endpoint. For example, we add{{title}}to represent the field name from the Webflow CMS. - Under Variables, you will see the variable name defined in the previous step. From the dropdown menu, select the appropriate field that represents the data field.
GET request to fetch single item
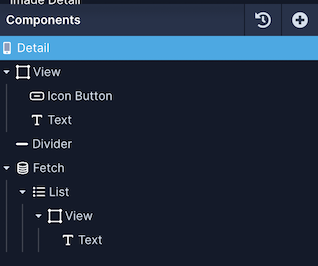
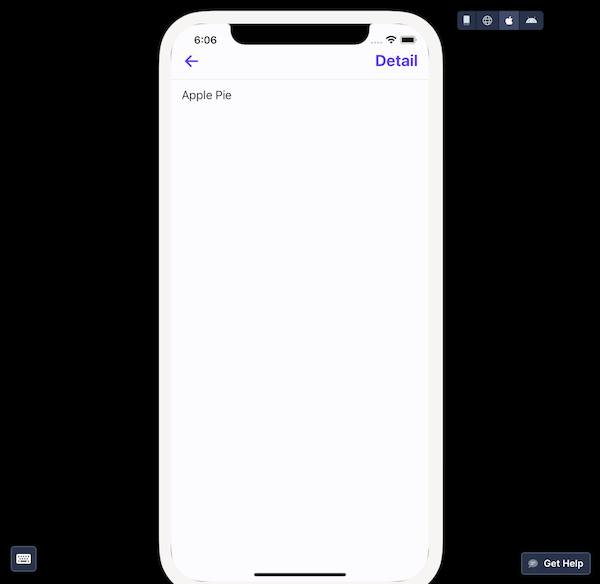
Section titled “GET request to fetch single item”To a blank screen in Draftbit, add a nested Fetch component, View component, and a Text component so that your Layer Tree looks like this:
Also, from the List screen, we are sending the id of each list item as a navigation parameter when an action is triggered on the Touchable/Button component. This action will let you navigate to the screen where a single record is fetched and its details are shown.
To fetch a single post, you’ll have to specify a record id that is coming from the navigation parameters.
Data is fetched using a GET HTTP request. Open the API & Cloud Services modal from the top menu, select the service, and then:
- Click Add endpoint.
- In Step 1: enter a name for the endpoint.
- Set the Role to
Get Oneas the endpoint is fetching a single item. Set the Object Type toitemsfor this example. - In Step 2: add the
/base-name/{{id}}variable. For the example below, it’s/items/{{id}}. Then, add a Test value for the{{id}}. - In Step 4: click the Test button next to the Endpoint input to verify the response coming from the Webflow.
- Click Save.
On app screen:
- Select the Fetch component in the Components tree and go to the Data tab from Properties Panel.
- For Service, select the name of the Service.
- For endpoint, select the endpoint you want to fetch the data from.
- Set the value for the
idin the Configuration > URL Structure section to Navigation > id. - Select the List component in the Components tree and go to the Data tab from Properties Panel.
- In Data, select
itemsfrom the dropdown menu. - Then, select the Text component in the Components tree and then go to the Data tab from the Properties Panel.
- Add a
{{varName}}value (inside the curly braces) to represent the data field. For example, we add{{title}}to represent the field and value from the Webflow CMS. - Under Variables, you will see the variable name defined in the previous step. From the dropdown menu, select the appropriate field that represents the data field.
POST request to submit new data
Section titled “POST request to submit new data”Submitting new Data from the Draftbit app to a REST API requires the request to be sent using the HTTP POST method.
Your component needs to have:
- accepts user input
- has a
Data Sourceprop
You can use any component that contains a Data Source prop to log user input and submit data. This list of components currently includes:
Once you have the necessary component(s) on your screen, you’ll need to create a new endpoint in your Webflow service:
- Click Add endpoint.
- In Step 1: enter a name for the endpoint and select the Method to
POST. - Set the Role to
Createas the endpoint is used to create a new record. Set the Object Type toitemsfor this example. - In Step 2: enter the base name as path:
/items. - In Step 3: add a valid Body structure to submit a
POSTrequest. Add one or many{{variable}}for test values. Click Body Preview to validate the structure of the Body in the request. - Below is a general breakdown of what the body of the POST request will look like. You’re able to add multiple fields to a request, just make sure you include a comma after each field. Passing
isArchivedandisDraftfield with a boolean value is mandatory. Also you need to passcmsLocaleIdwhich is different from the Site locale identifier and is listed ascmsLocaleIdin the GET response.
{ "cmsLocaleId": {{cmsLocaleId}}, "isArchived": false, "isDraft": false, "fieldData": { "name": {{name}}, "slug":{{slug}}, }}- In Step 5: click the Test button next to the Endpoint input to verify the response coming from the Webflow.
- Click Save.
Using a Touchable/Button component, you can trigger the action API Request to submit the data to the endpoint.
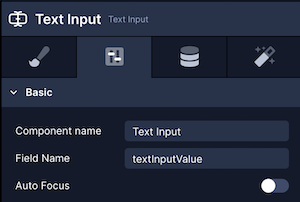
The textInputValue passed in the above example is the value of the Data Source property on the Text Input component:
PATCH request to update a data item
Section titled “PATCH request to update a data item”The PUT request is used to update the single entry in the Webflow CMS. It accepts similar input components as mentioned in the previous section and the API Request is triggered using a Touchable/Button component.
Your component needs to have:
- accepts user input
- has a
Data Sourceprop to update data using an API Request
You can use any component that contains a Data Source prop to log user input and submit data. This list of components currently includes:
Once you have the necessary component(s) on your screen, you’ll need to create a new endpoint in your service:
- Click Add endpoint.
- In Step 1: enter a name for the endpoint and select the Method to
PUT. - Set the Role to
Update. Set the Object Type toitemsfor this example. - In Step 2: enter the base name as path:
/items/{{id}}. - In Step 3: add a valid Body structure to submit a
POSTrequest. Add one or many {{variable}} for test values. Click Body Preview to validate the structure of the Body in the request. Below is a general breakdown of what the body of the update request will look like.
{ "cmsLocaleId": {{cmsLocaleId}}, "isArchived": false, "isDraft": false, "fieldData": { "name": {{name}}, "slug": {{slug}}, }}- In Step 5: click the Test button next to the Endpoint input to verify the response coming from Webflow.
- Click Save.
Using a Touchable/Button component, you can trigger the action API Request to submit the data to the endpoint.
DELETE request to delete a data item
Section titled “DELETE request to delete a data item”The DELETE request is to the Webflow CMS API with a field’s id to remove that particular record from the table.
For example, once you have the necessary component(s) on your screen, you’ll need to create a new endpoint in your service. In the new endpoint you’ll need to:
- Click Add endpoint.
- In Step 1: enter a name for the endpoint and select the Method to
DELETE. - Set the Role to
Delete. Set the Object Type toitemsfor this example. - In Step 2: add
/items/{{id}}whereidis provided as a test value of an existing record when testing the endpoint. In your app, you will have to pass theidof a single record, for example, as a navigation parameter. - In Step 4: click the Test button next to the Endpoint input to verify the response from Webflow.
- Click Save.
Using a Touchable/Button component or an Icon Button, you can add the API Request action to trigger the DELETE request.