Example Data
What is Example Data Service?
Section titled “What is Example Data Service?”Example Data Service is a REST API service provided by Draftbit to start building a data-driven app without having to create a backend. It uses real-looking seeded data that can help you make better design decisions along the way. There are 100+ collections of data to build a prototype or a Minimum Viable Product (MVP): Books, Articles, Products, Orders, Podcasts, Product Reviews, People, and many more. See the full list and API reference at example-data.com/docs.
Setup steps in Example Data Service
Section titled “Setup steps in Example Data Service”You do not need to create an account to use Example Data Service. It is open and available to be used as a REST API from any REST client or tool like Draftbit.
Setup steps in Draftbit
Section titled “Setup steps in Draftbit”To add the Example Data Service to your Draftbit app:
- Click the Data tab from the left menu.
- In the API & Cloud Services modal, click Rest API button.
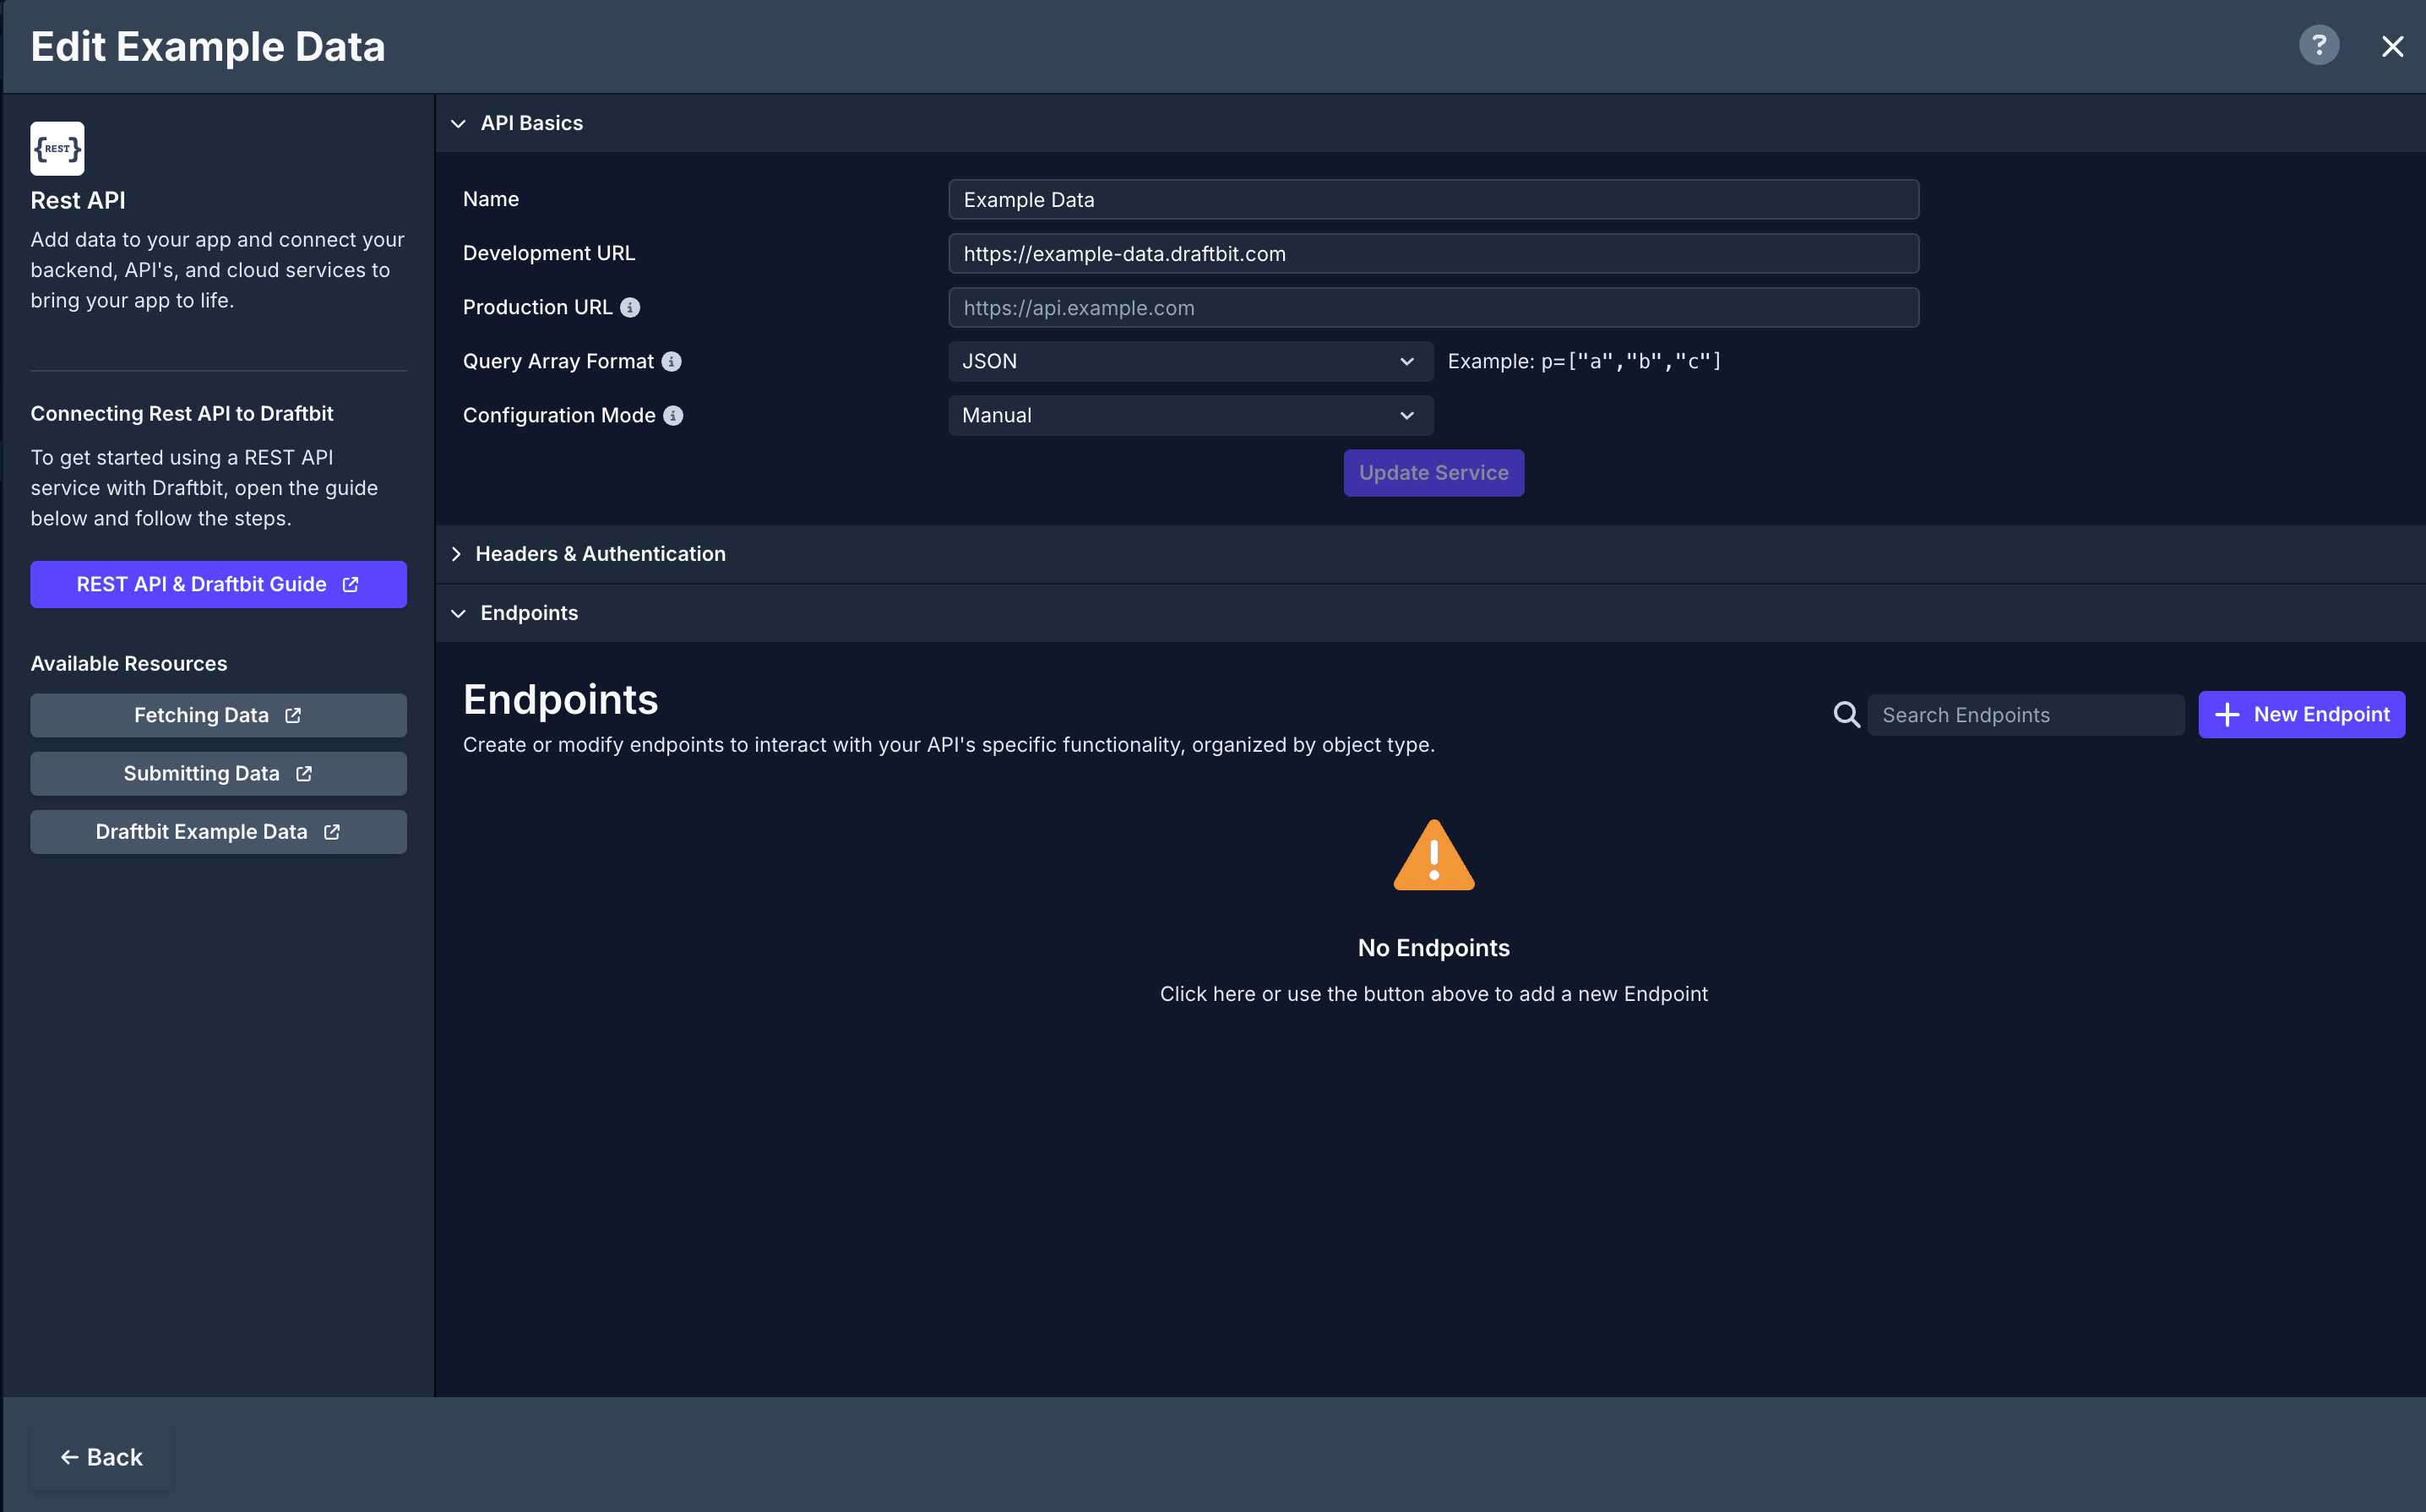
- Step 1: under Name, enter the name of the REST API service.
- Then, add the Dev URL:
https://example-data.com/api/v1. - For Example Data Service, you do not have to modify configuration under Step 2 and Step 3.
- Click
Save.
Using Example Data API with Draftbit
Section titled “Using Example Data API with Draftbit”GET request to fetch all records
Section titled “GET request to fetch all records”In this section, let’s populate a Fetch component with all the data from the API Service and then display it in a List component.
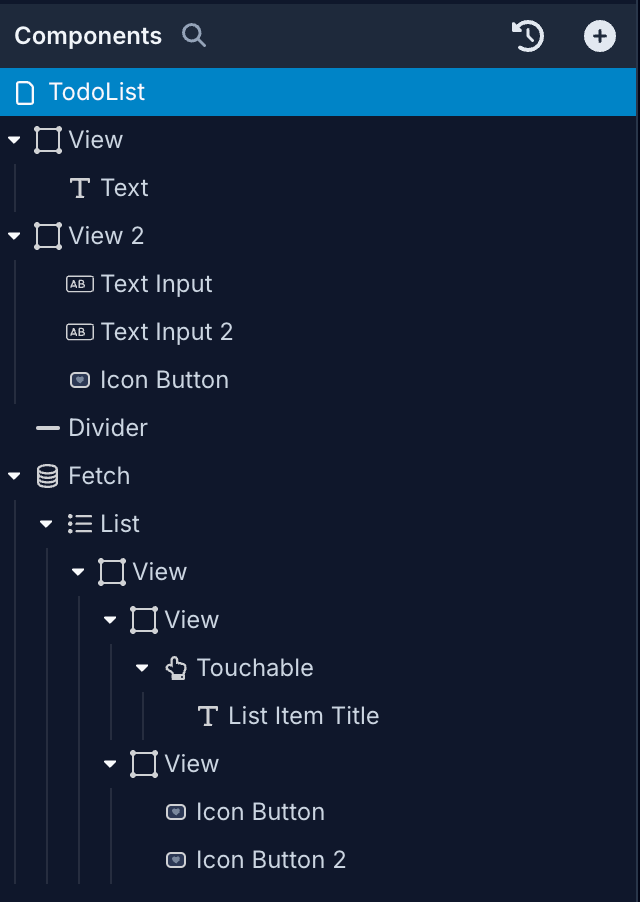
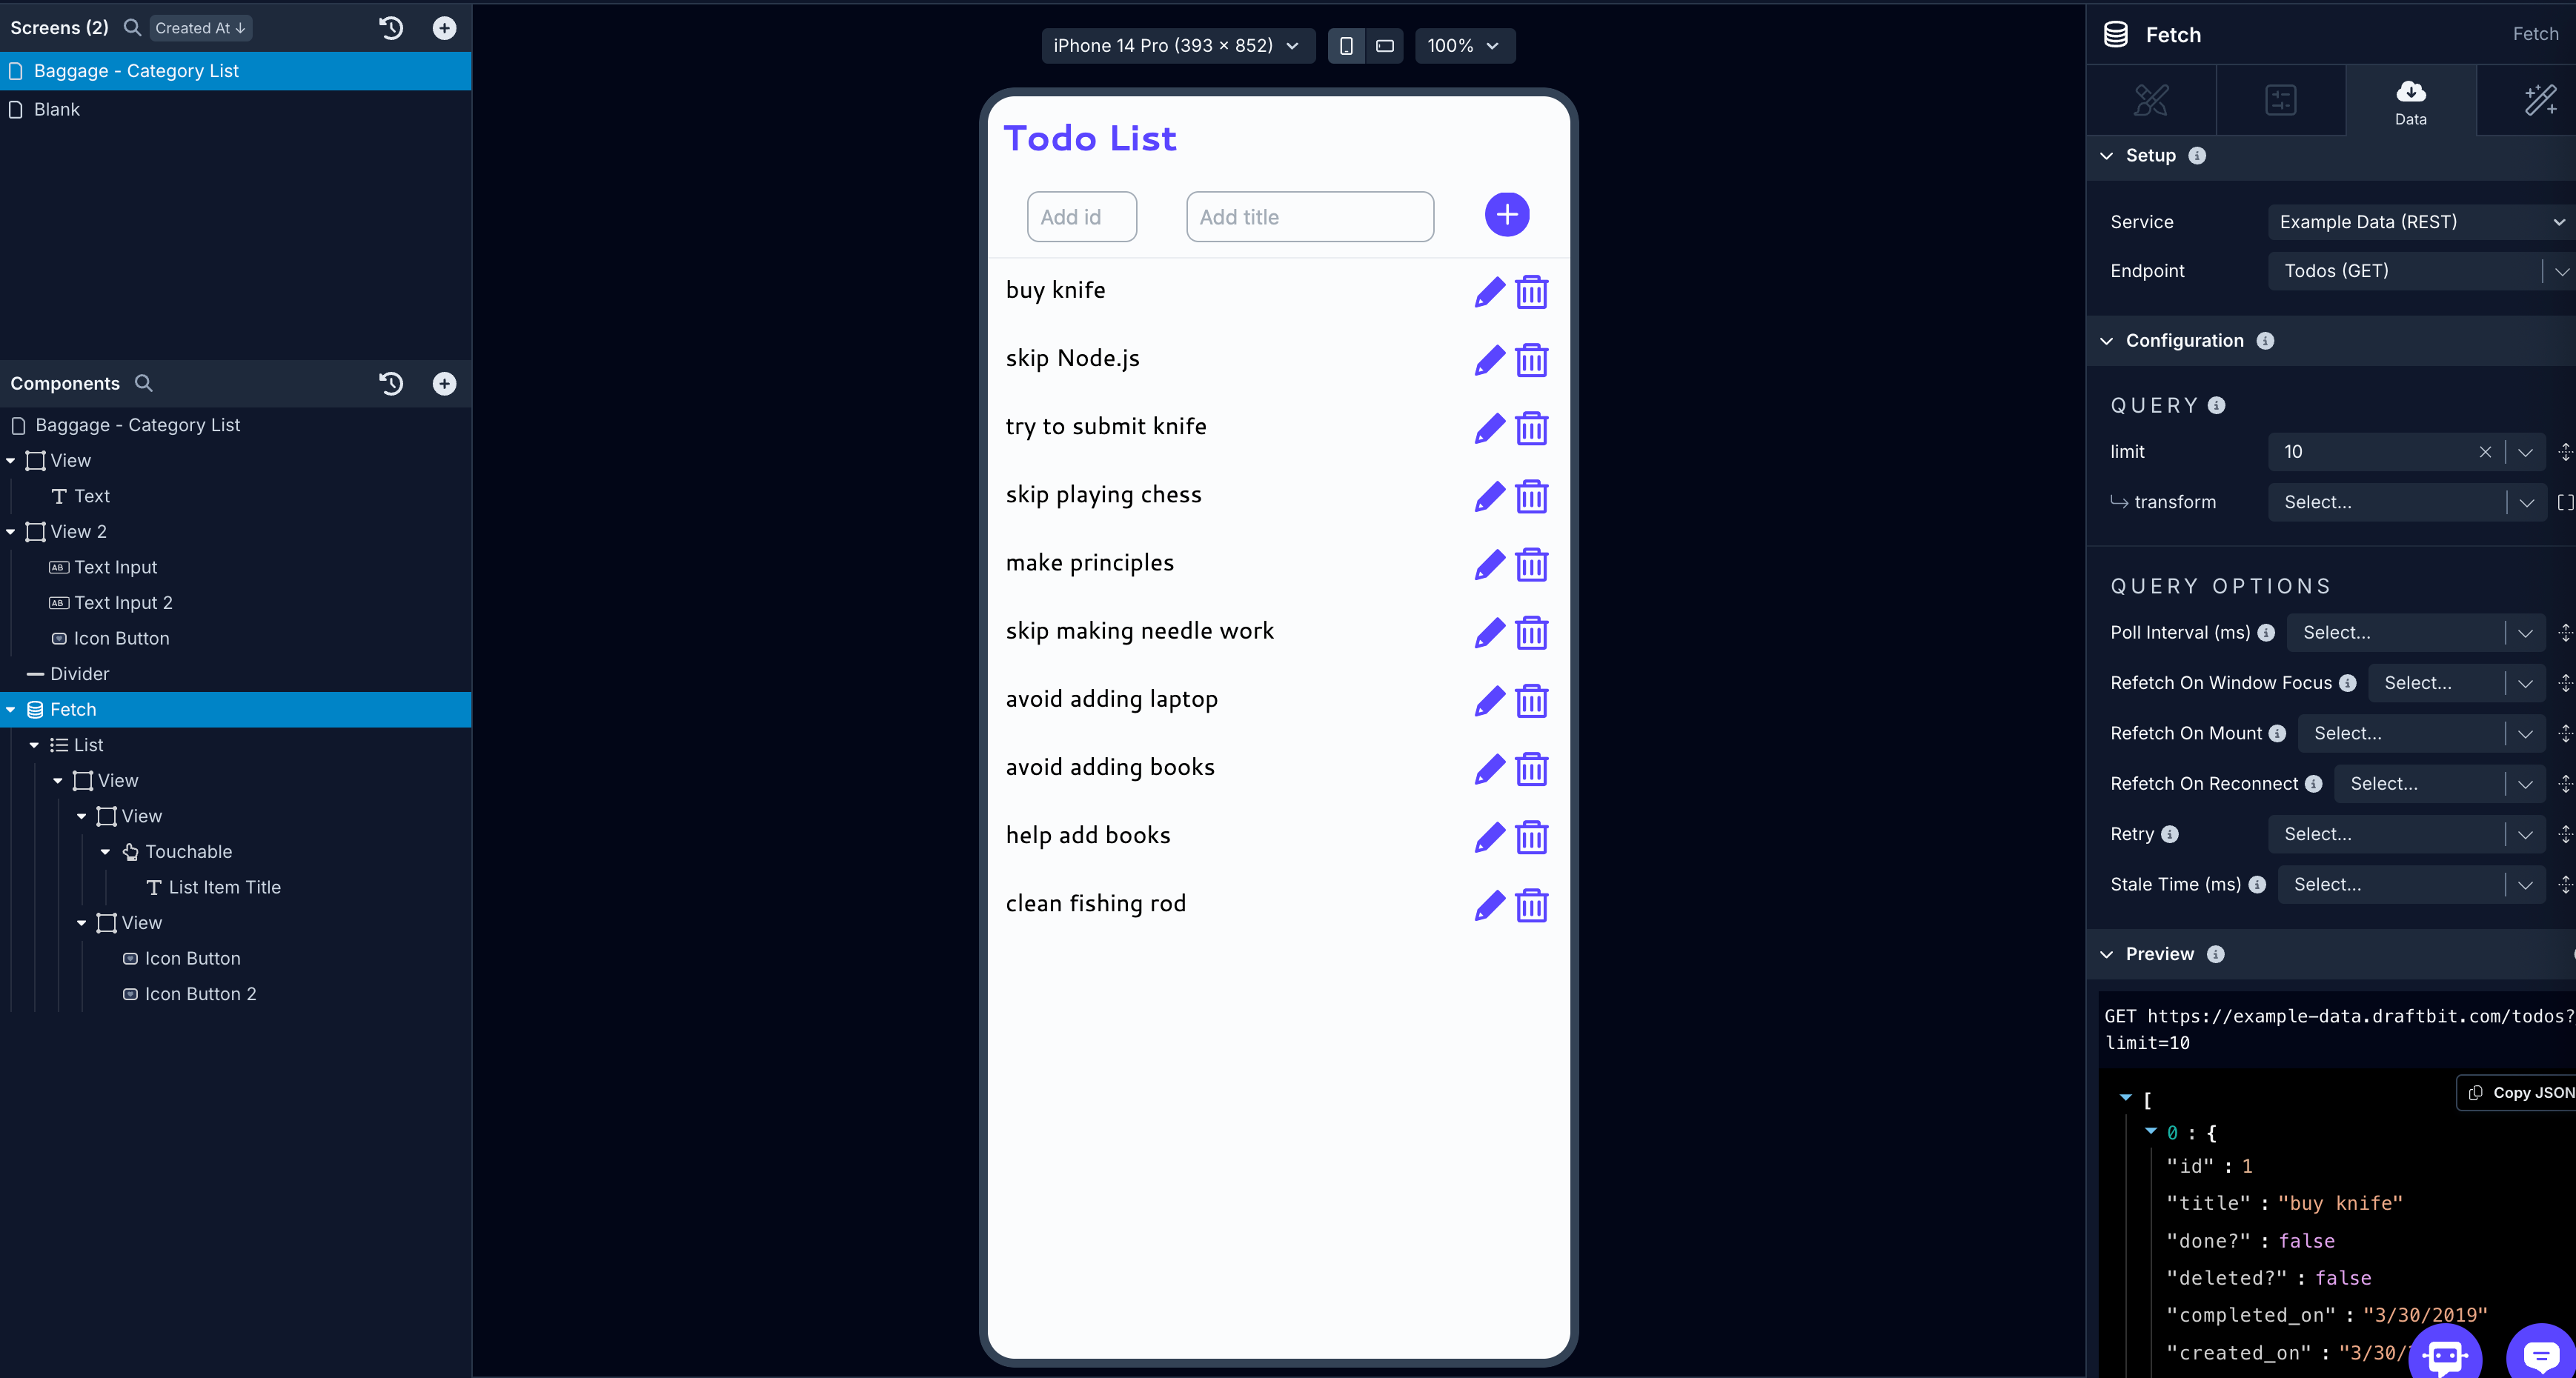
For reference, here is a how the Components tree looks like for this screen:
The next step is to create an endpoint. Let’s fetch the data using a GET HTTP request. Open the API and Cloud Services modal from the top menu bar, select the Example Data service, and then:
- Click
Add endpoint. - In Step 1: enter the Name for the endpoint and set the Method to
GET. - Set the Role to
Get Manyas the endpoint is fetching a list of items. Set the Object Type totodosfor this example. - In Step 2: optionally, add the base name path:
/base-name. Example Data Service has different collections that can be used as a base name. You can also add the query parameters here such as/?limit={{value}}. - For this example, we’re using the
/?limit={{value}}endpoint with the value being10. - In Step 4: click the Test button next to the Endpoint input to verify the response coming from the API service.
- Click Save.
On app screen:
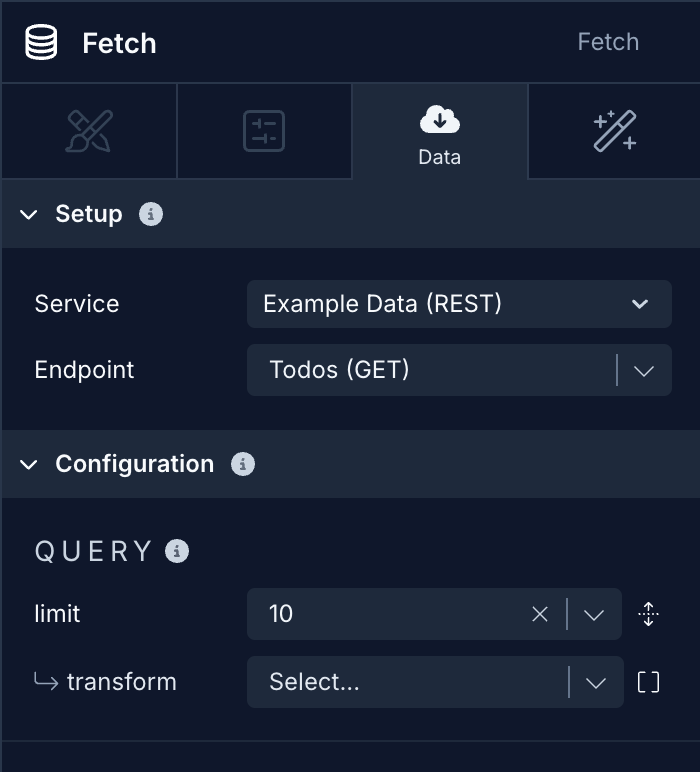
- Select the Fetch component in the Components tree and go to the Data tab from Properties Panel.
- For Service, select the name of the API Service.
- For Endpoint, select the endpoint you want to fetch the data from.
- In Configuration add a value for the query parameter defined during the configuration of the endpoint.
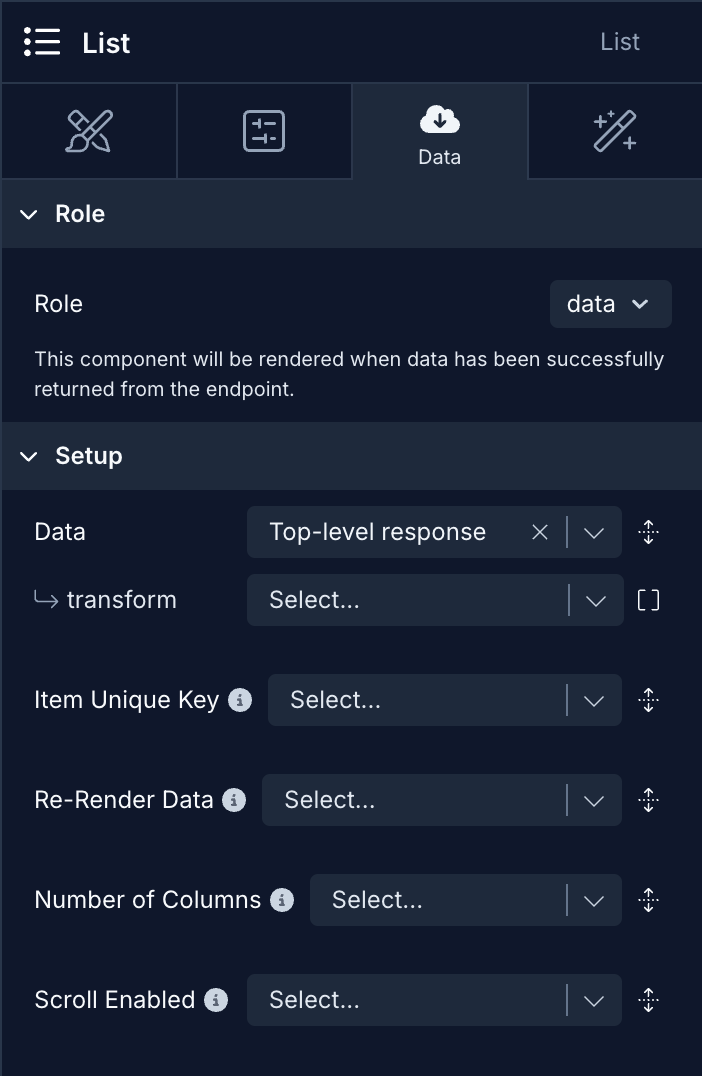
- Select the List component in the Components tree and go to the Data tab from Properties Panel. In Data, select the
datafield from the dropdown menu — Example Data Service list responses wrap the records in a{ data, meta, links }envelope.
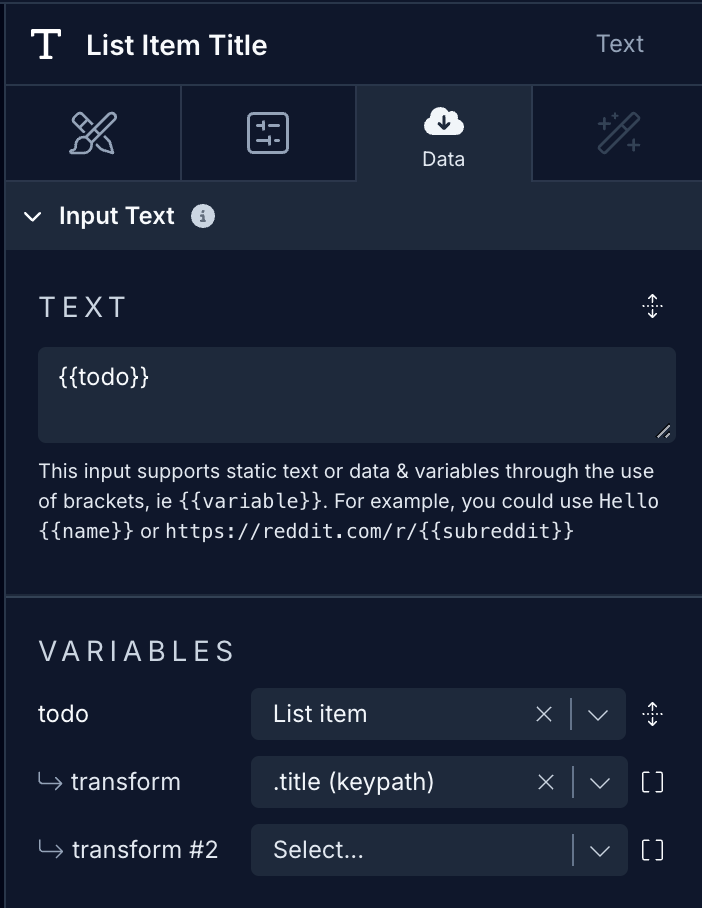
- Then, select the Text component in the Components tree and then go to the Data tab from the Properties Panel.
- Add a
{{varName}}value (inside the curly braces) to represent a data field from the API service. For example, we add{{propertyName}}to display the name of properties.
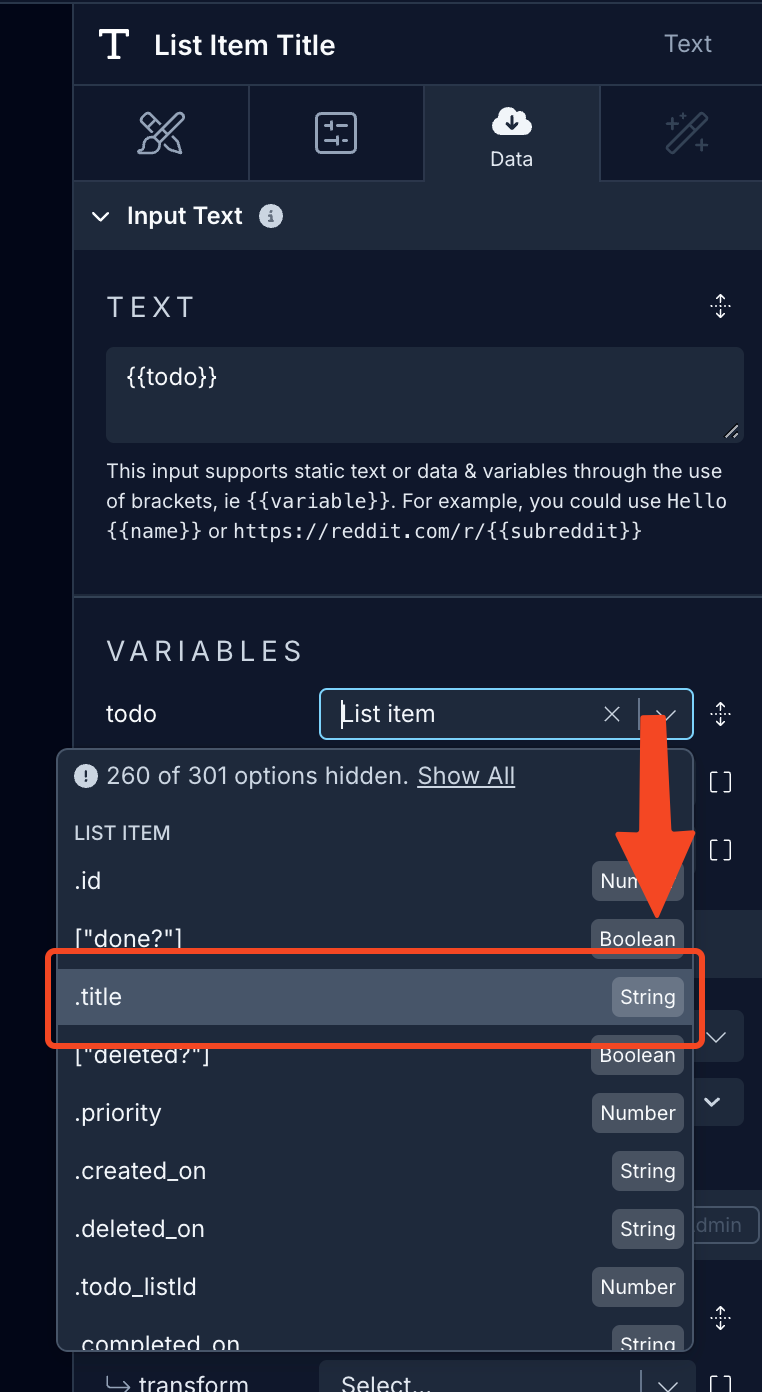
- Select the appropriate List item key from the dropdown. In this case we choose
.title
GET request to fetch a single record
Section titled “GET request to fetch a single record”In this section, let’s populate a Fetch component with a single record from Example Data. For reference, here is a how the Components tree looks like for this screen:
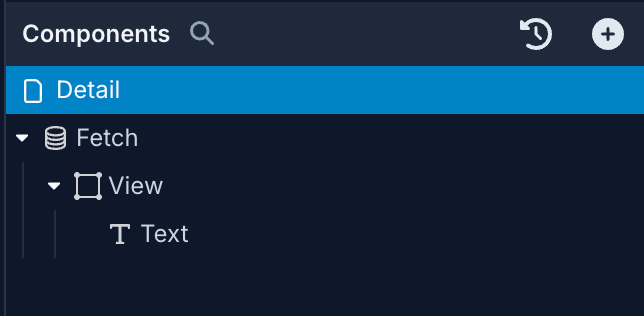
Data is fetched using a GET HTTP request. Open the Data modal from the left menu, select the Example Data service, and then:
- Click Add endpoint.
- In Step 1: enter the Name for the endpoint and set the Method to
GET. - Set the Role to
Get Oneas the endpoint is fetching a single item. Set the Object Type totodosfor this example. - In Step 2: add the
/{{id}}variable. Then, add a Test value for the{{id}}. - In Step 4: click the Test button next to the Endpoint input to verify the response coming from the API service.
- Click Save.
On app screen:
- Select the Fetch component in the Components tree and go to the Data tab from Properties Panel
- For Service, select the name of the API Service.
- For Endpoint, select the endpoint you want to fetch the data from.
- Set the value for the
idin the Configuration section.
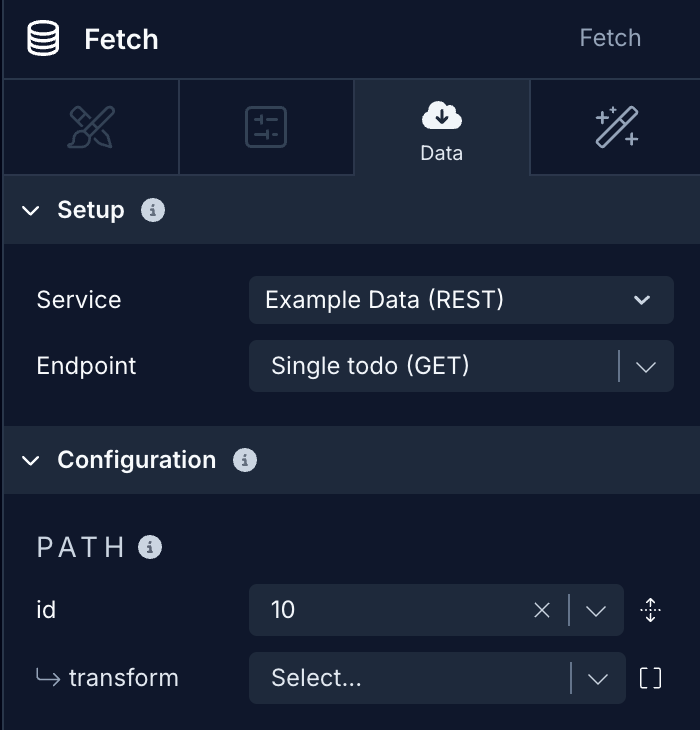
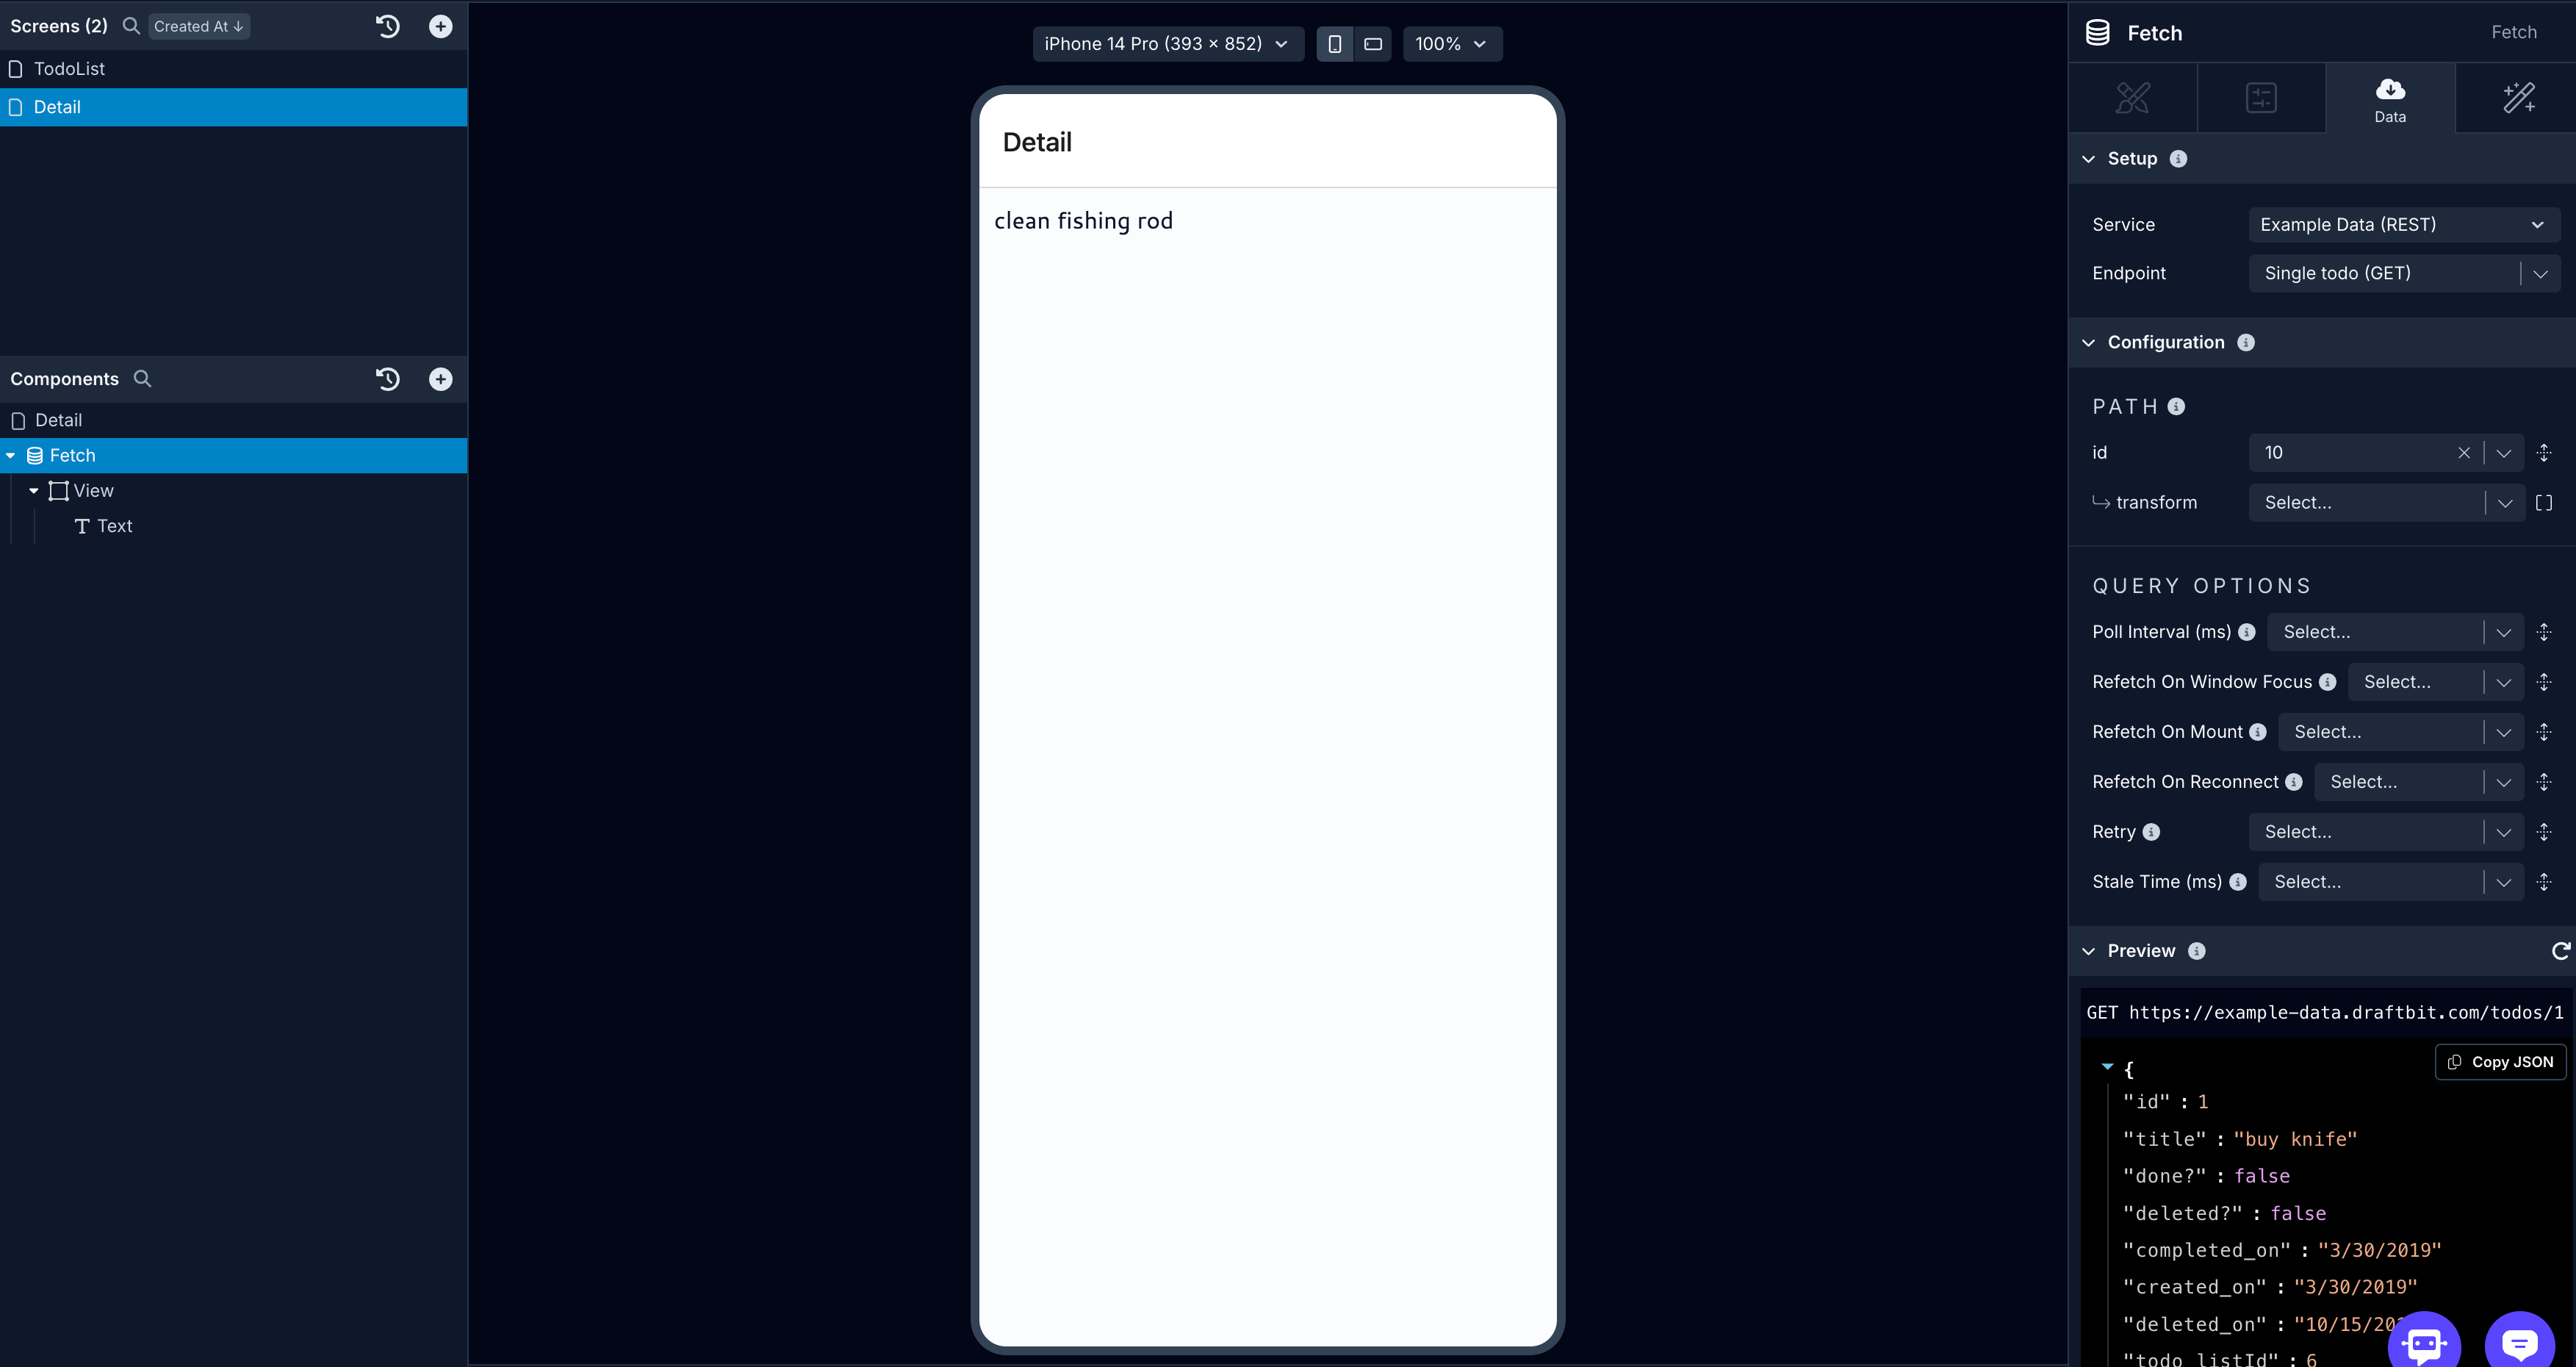
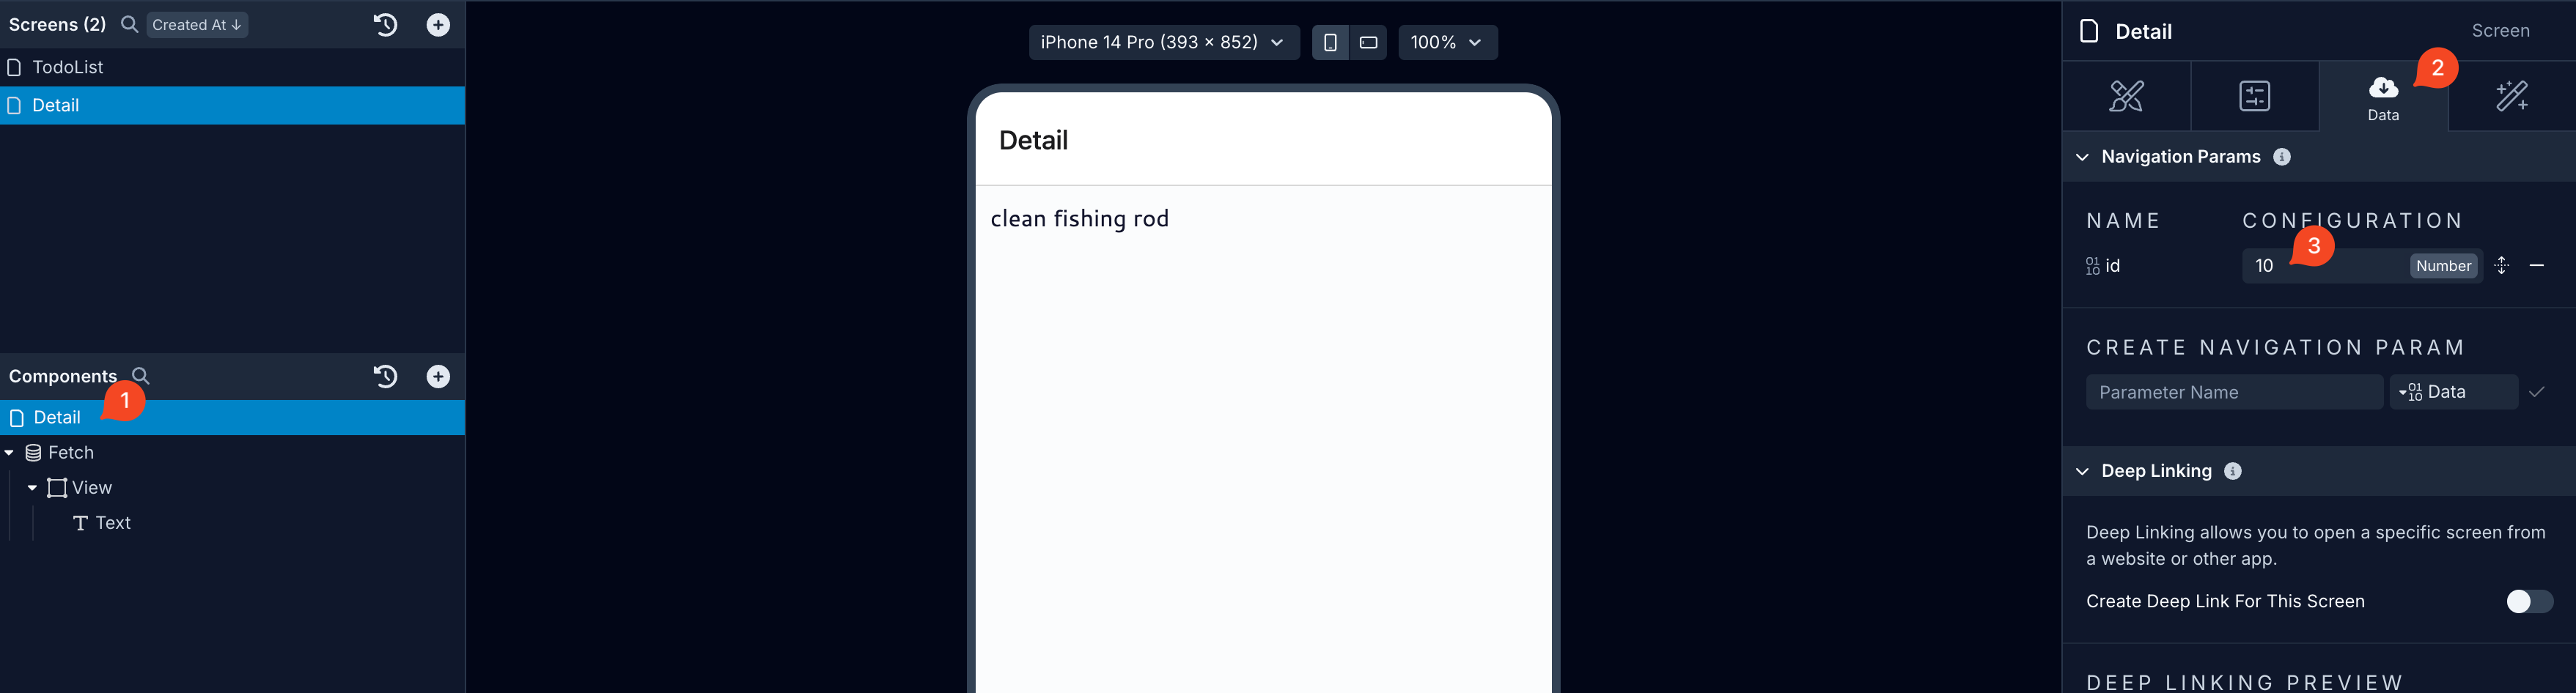
To fetch a single post that is chosen from the another screen that Lists multiple items and to display the selected one on another screen dynamically, you’ll have to specify a record id that is coming from the navigation parameters.
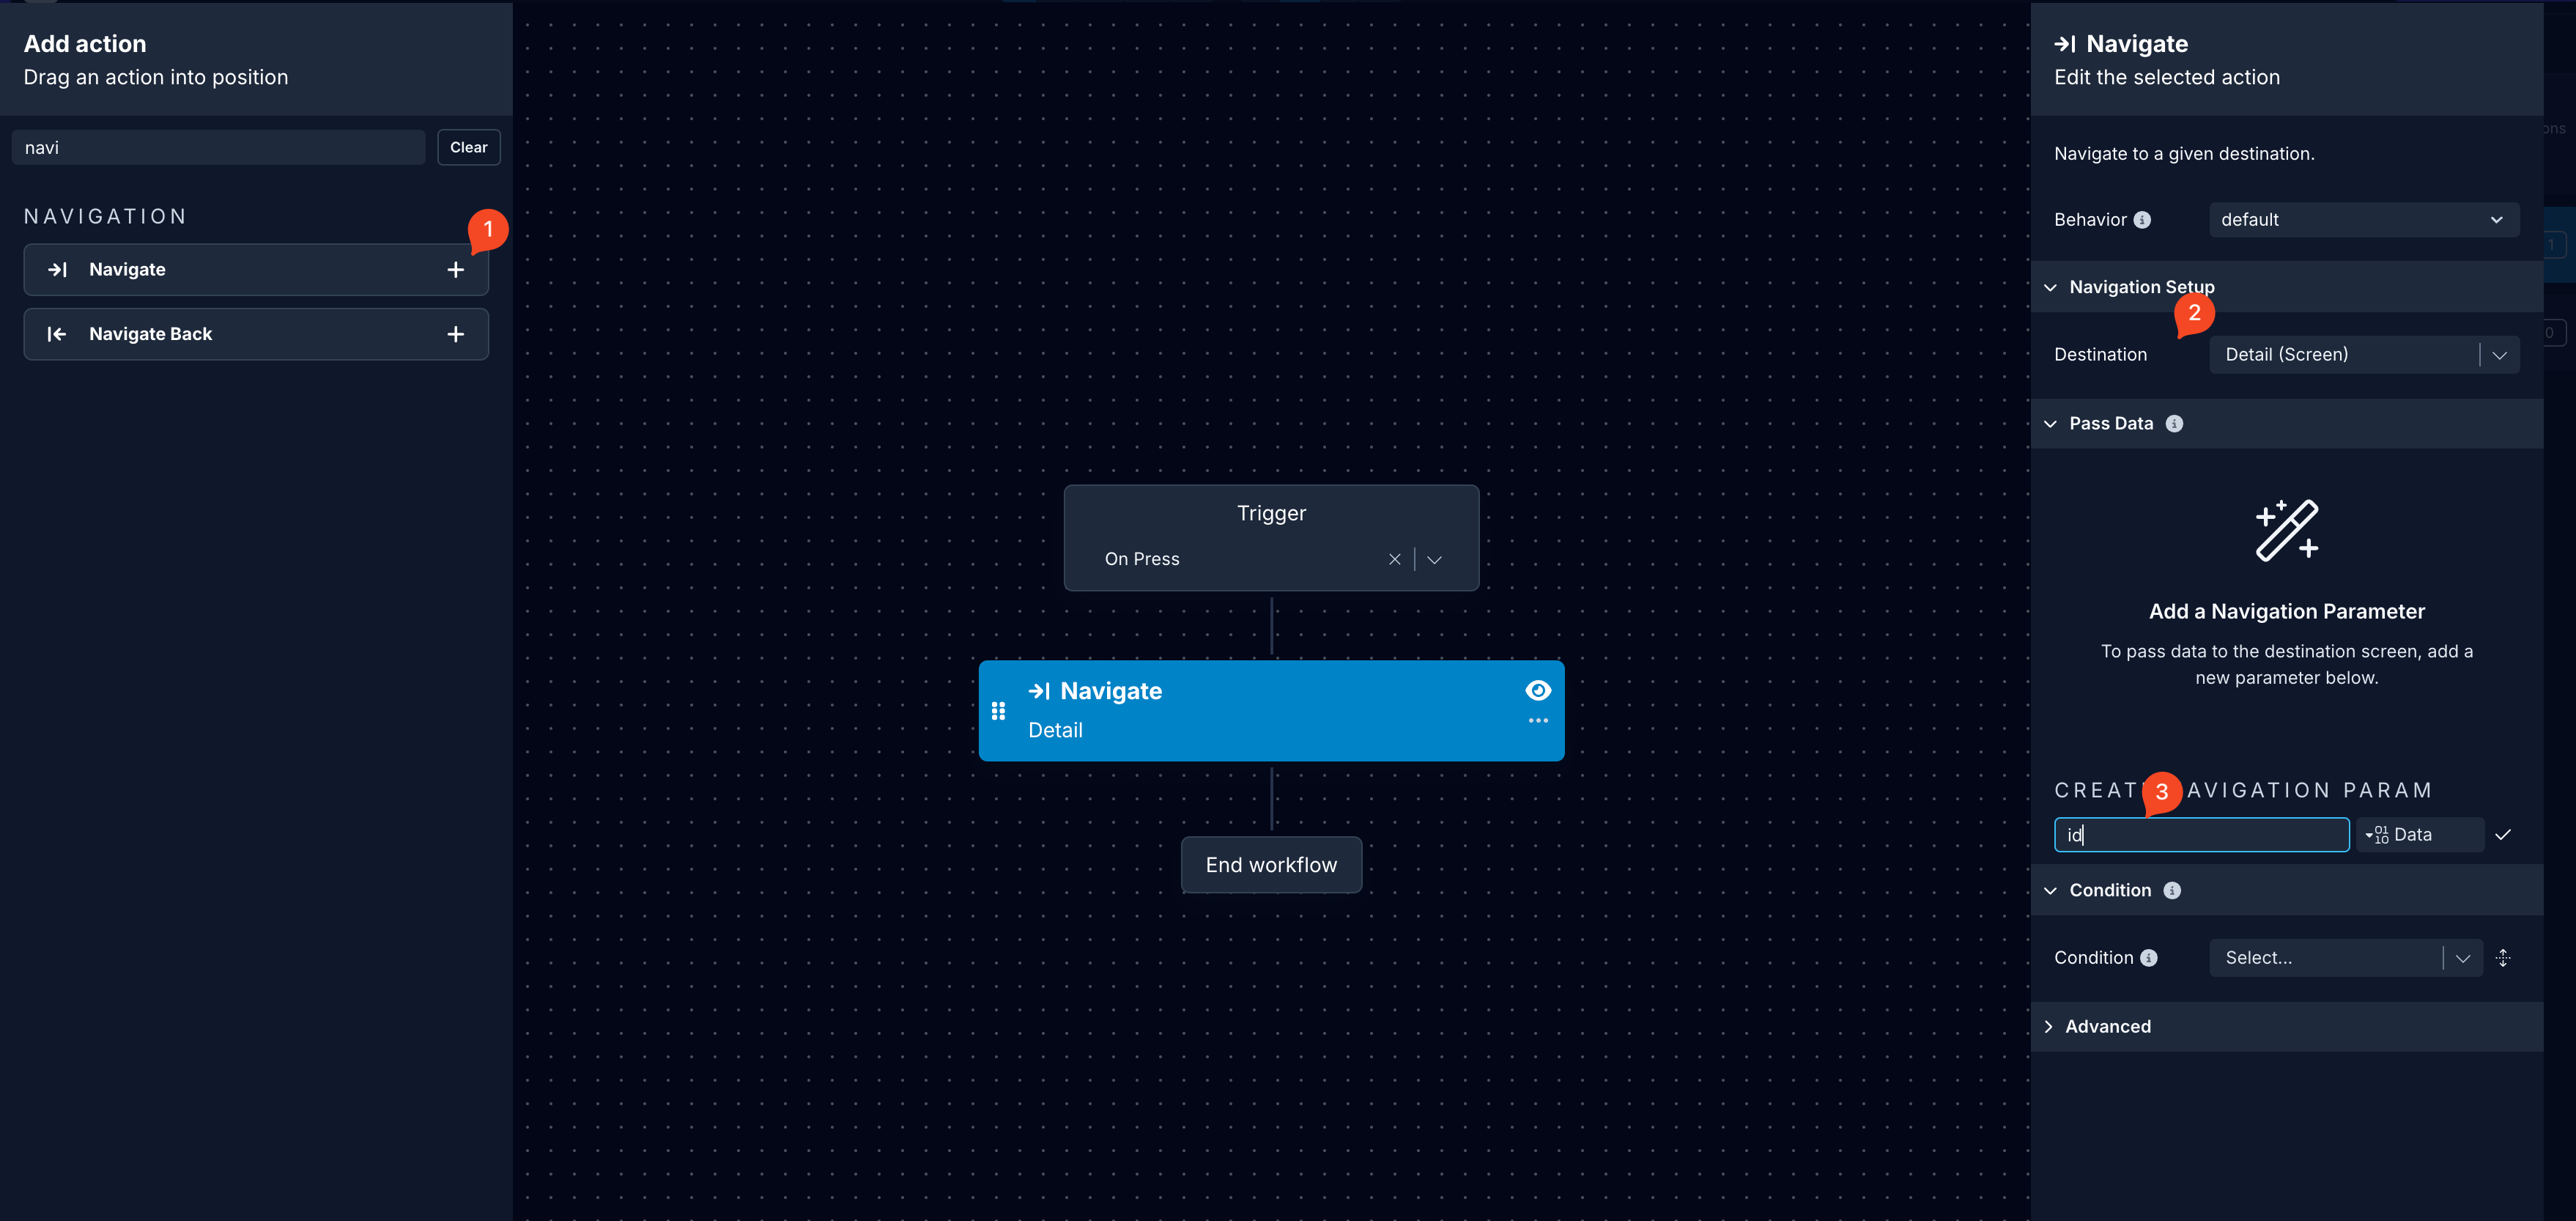
- In the
TodoListscreen, select theTouchablecomponent that wraps the items in your list. - Go to the
Interactionstab in the Properties Panel on the right-hand side and select theOnPresstrigger to open the Action Editor.
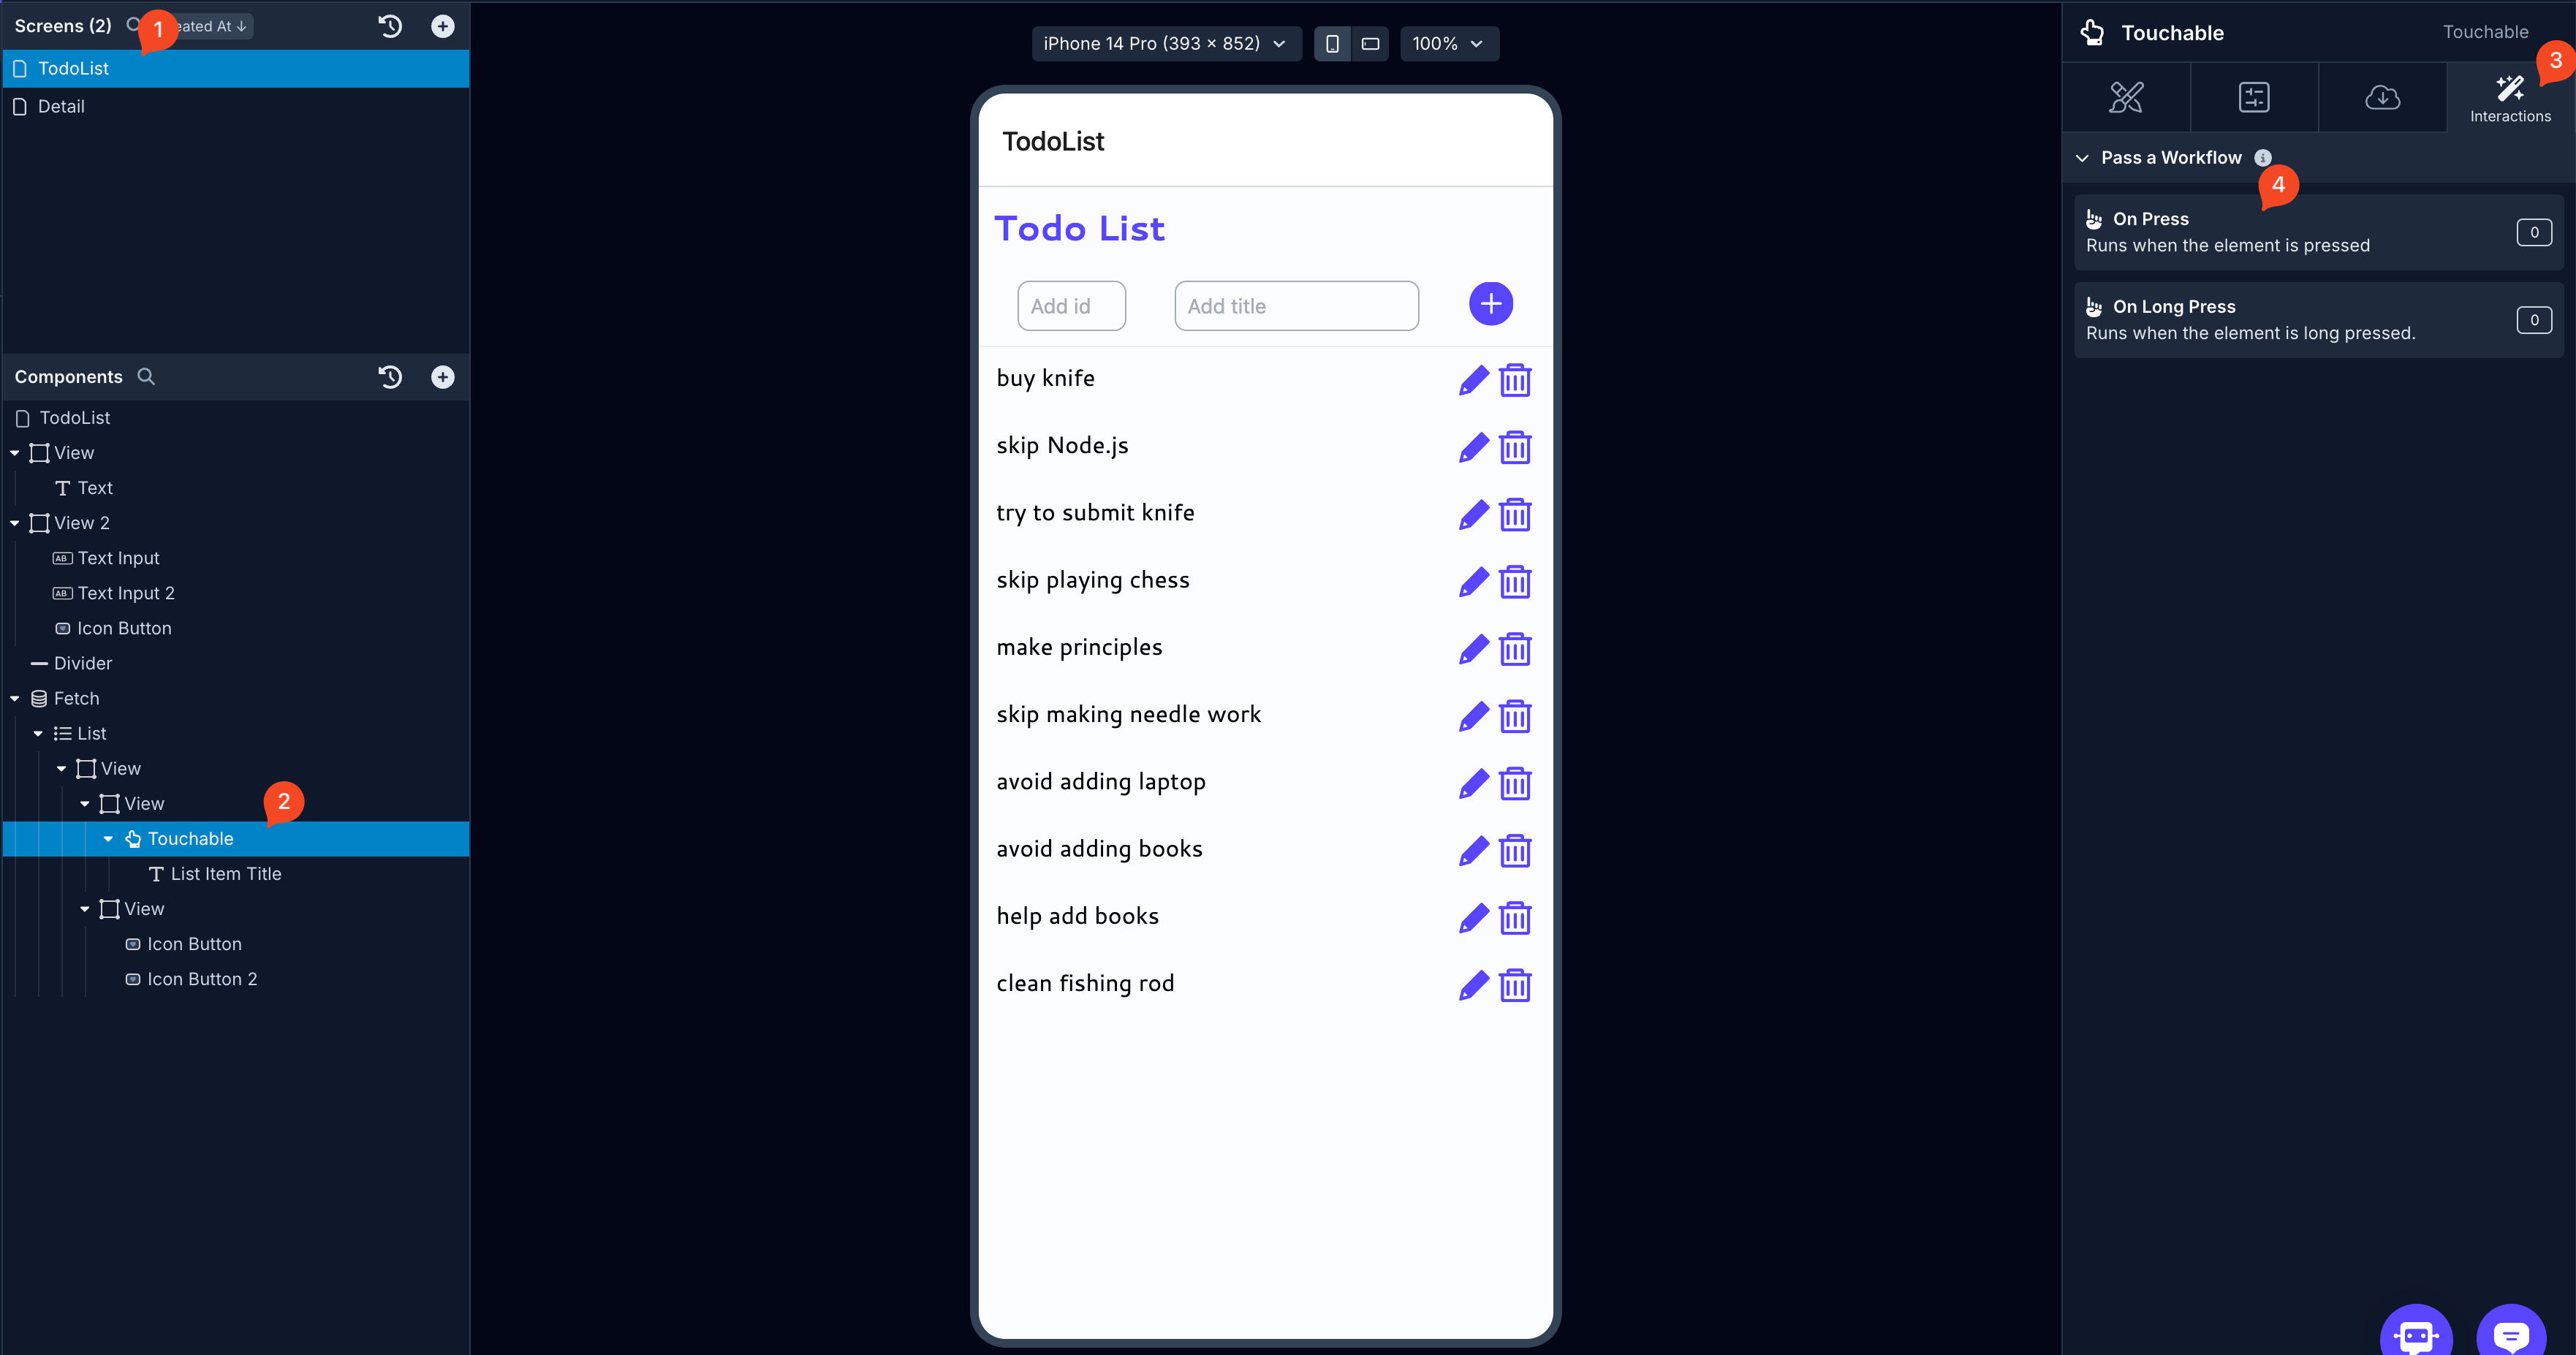
- On the left-hand side, search for the
Navigateaction and add it to your action stack. - Select the Destination as the
DetailScreen where you will display the selected item’s details. - Below that, create a Navigation Parameter called
id. This will automatically create a navigation parameter that will be available for the Detail Screen.
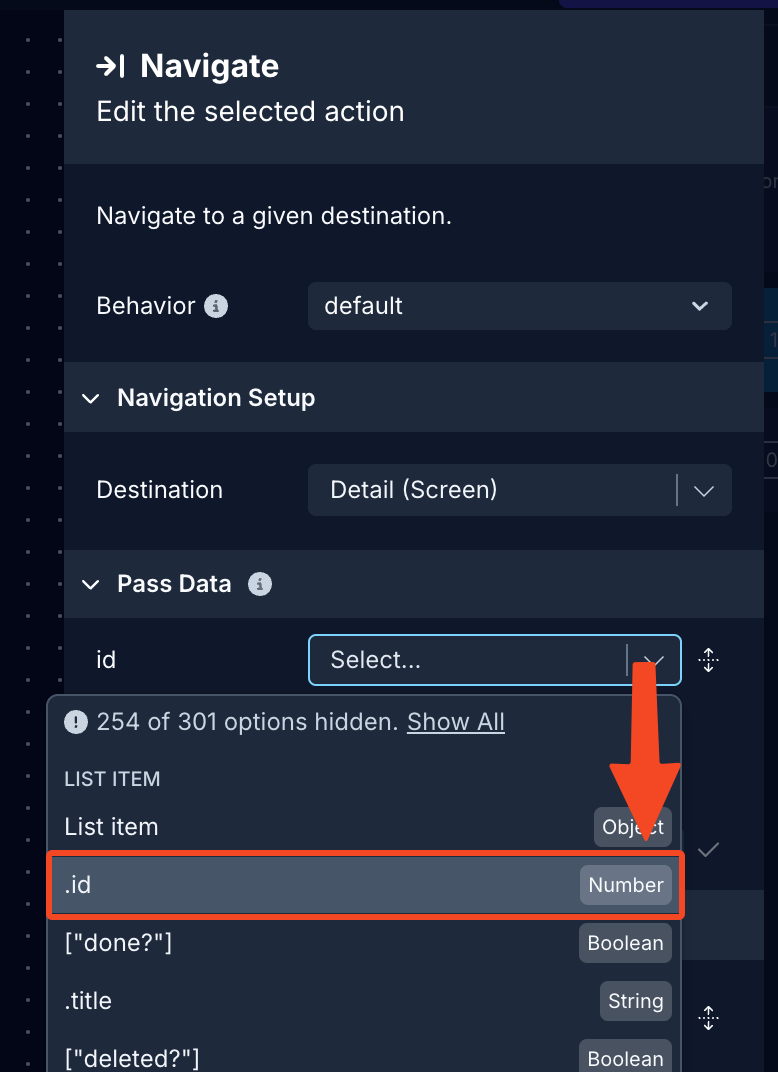
- From the dropdown, select the id of your list item as the value for the navigation parameter.
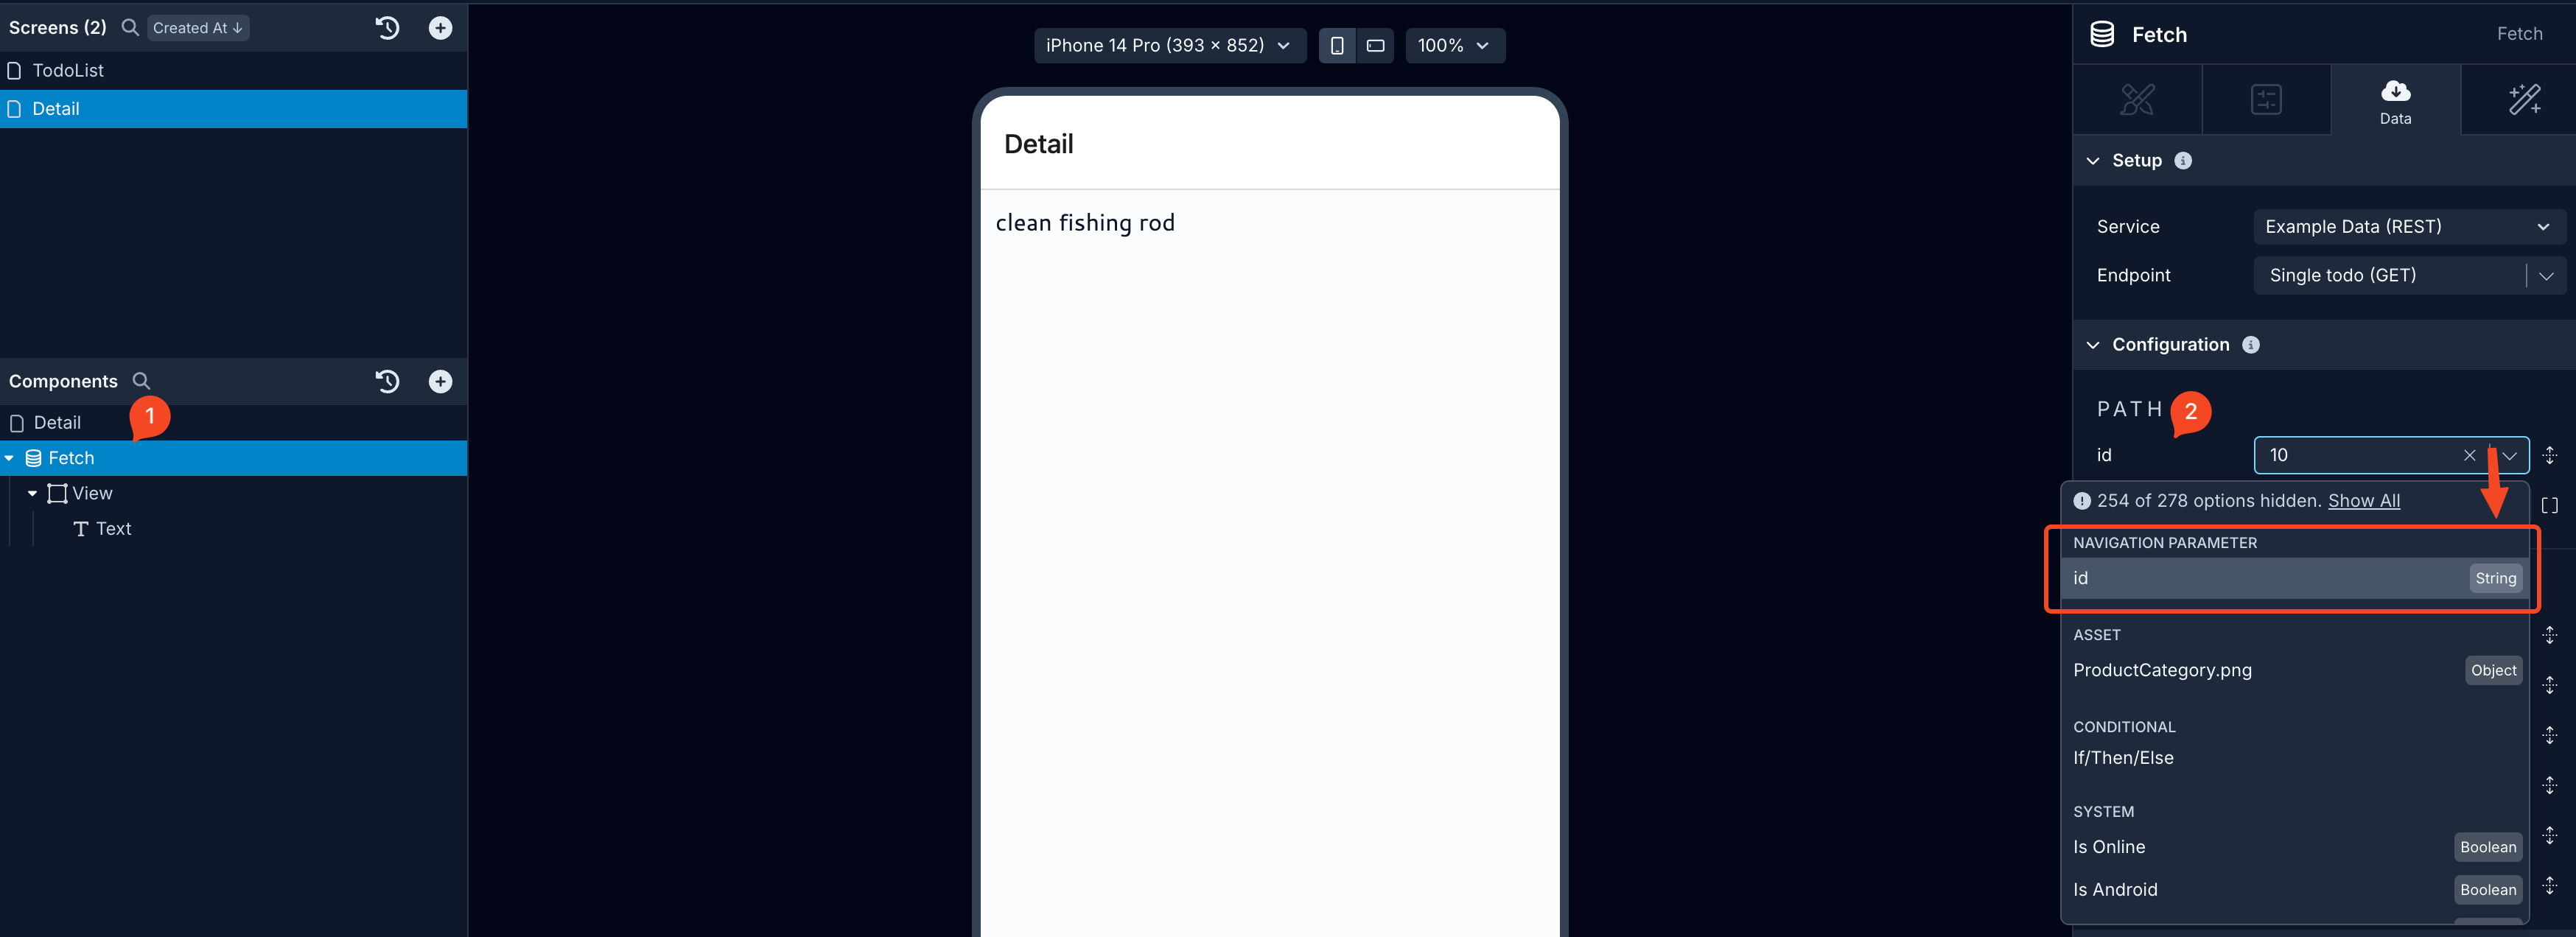
- Now, go to the Detail Screen, and in the Fetch component’s Configuration section, select the Navigation Parameter
id.
- To display default data during development, you can define a default value for your Navigation Parameter in the Detail Screen. To do this, select the Screen Component, go to the Data tab in the Properties Panel, and provide a valid id as the default value for your navigation parameter.