

Exporting Your Project
Prerequisities
Section titled “Prerequisities”In order to export or publish your Draftbit app, you will need the following tools installed on your local machine:
- Nodejs
- Expo CLI
- Git
- Watchman for macOS users
- Yarn use this over
npm installwhen installing dependencies - EAS CLI
Installing Node.js
Section titled “Installing Node.js”You can install Node by going to the website directly and clicking the side that says “Recommended For Most Users”. This will guide you through the process.
Once Node has been installed, run the following on the command line to make sure
it’s been installed correctly:
$ node -vIf you see the current version of Node in response, you’ve successfully
installed Node on your machine.
For example,
$ node -vv14.17.3Learn more about installing Nodejs
Installing Expo CLI
Section titled “Installing Expo CLI”You can install the Expo CLI using the following command. This is the one spot where npm install is required!
$ npm install -g expo-cliVerify that the installation was successful by running expo whoami. You’re not logged in yet, so you will see “Not logged in”. You can create an account by running expo register if you like, or if you have one already run expo login.
Learn more about Expo CLI here.
Installing EAS CLI
Section titled “Installing EAS CLI”Later on, when you will be publishing your app for iOS and Android app stores, you will require to use a service created by Expo called EAS.
EAS Build is a service that takes everything good about the Expo build service (expo build:[ios|android]) and makes it available to all React Native apps.
Open the terminal window and run the following command to install the EAS CLI.
npm install -g eas-cliMake sure to login into your EAS account from the terminal by running the command eas login. It will ask for your Expo account’s credentials.
Learn more about EAS CLI here.
Add your Bundle Identifier
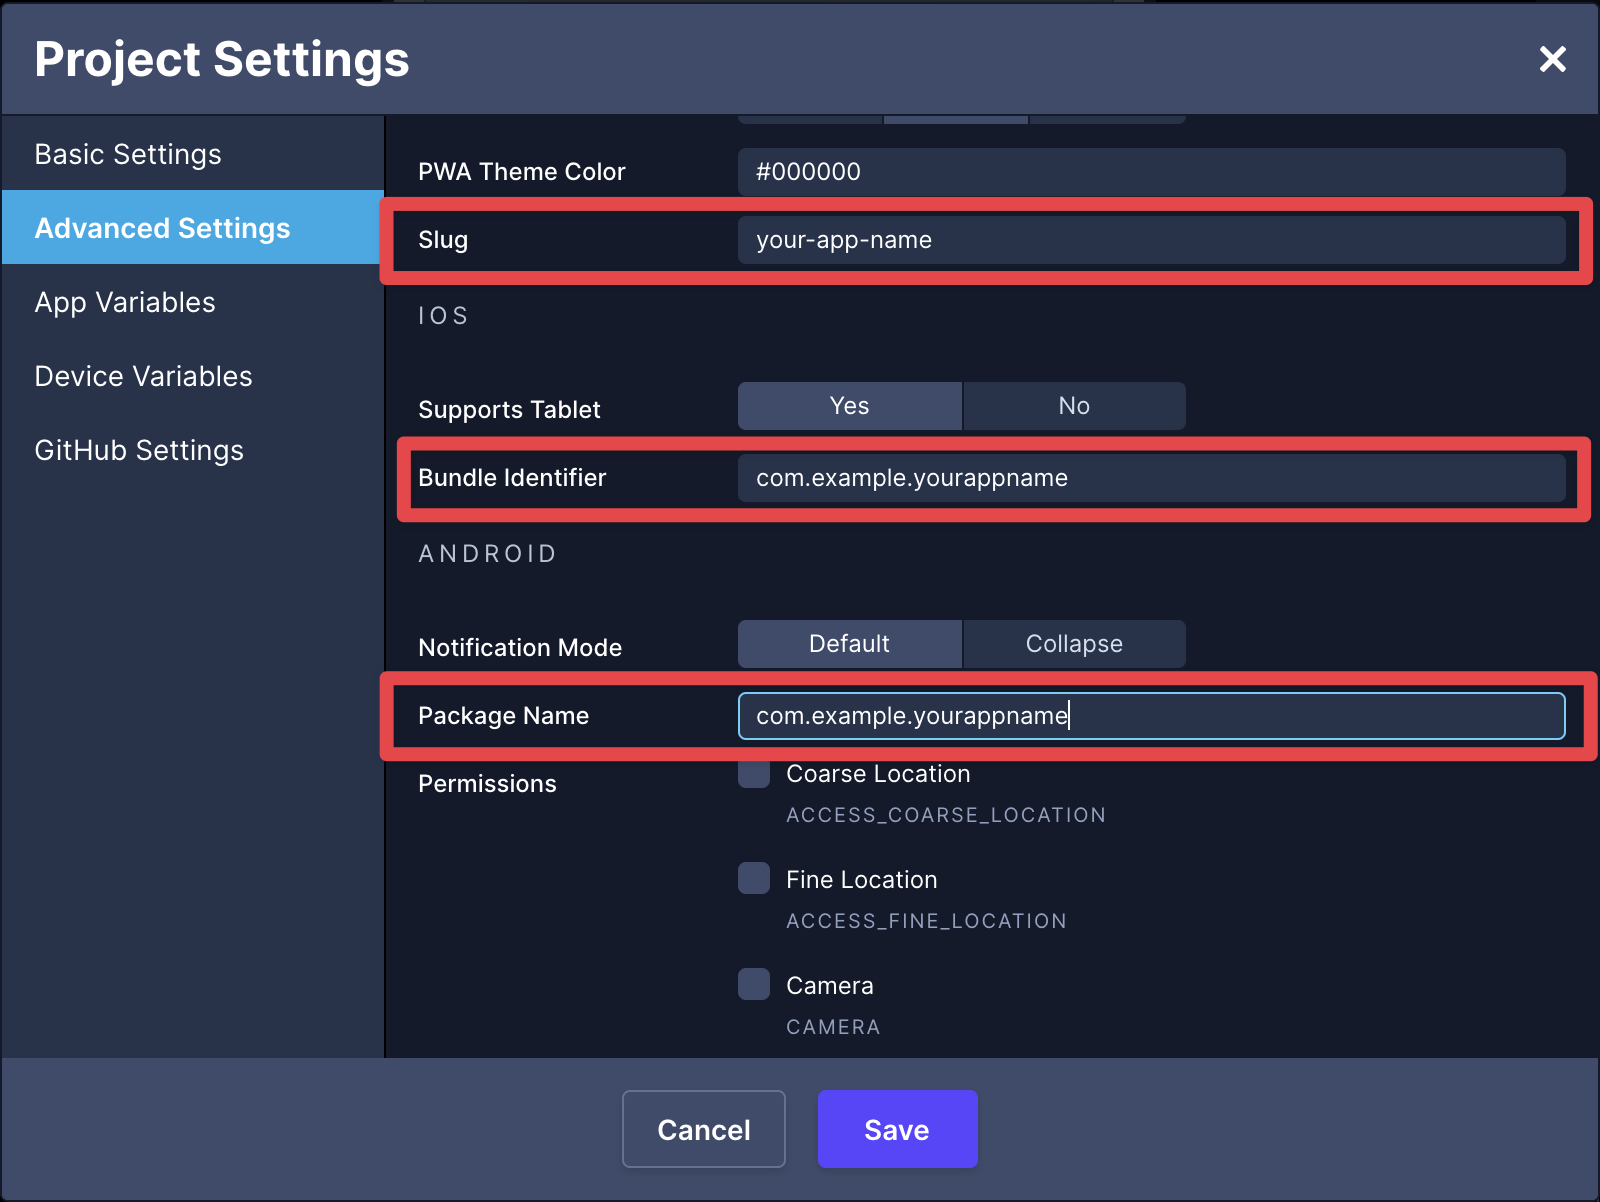
Section titled “Add your Bundle Identifier”Before exporting your app, make sure to modify three properties in Project Settings:
- slug: used to refer to your app. It is often in the format
name-of-your-app. - iOS Bundle Identifier: also known as bundle ID is used to uniquely identify an application in Apple’s ecosystem. It is of the format
com.company-name.appname. - Android Package Name: used to uniquely identify an application in Google’s ecosystem. It is of the format
com.company-name.appname.
Export Your Project
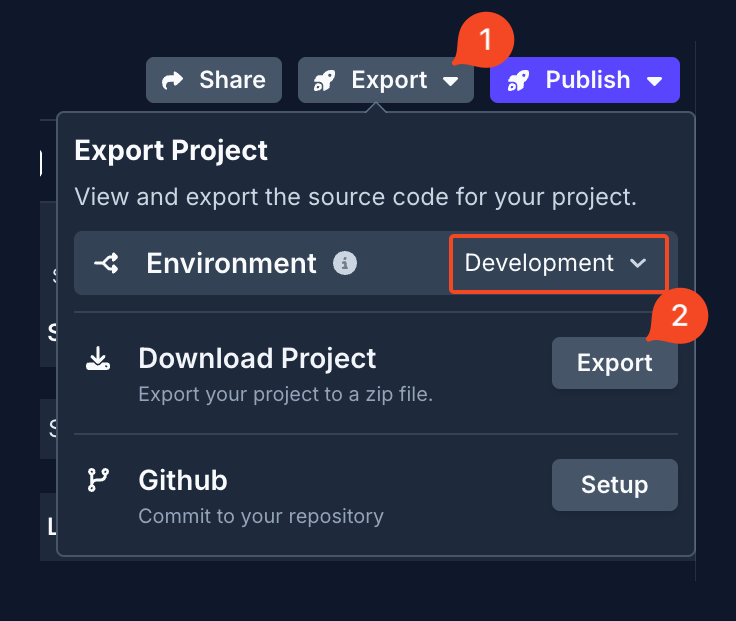
Section titled “Export Your Project”Once you’ve built your app, it’s time to export your project out of Draftbit and onto your own machine. Once you click the purple Set Project Live button in the top bar menu, you will see the Export and Share buttons become enabled next to it. Click on the Export button to download your project from the desired publishing environment, which can be either Development or Production.
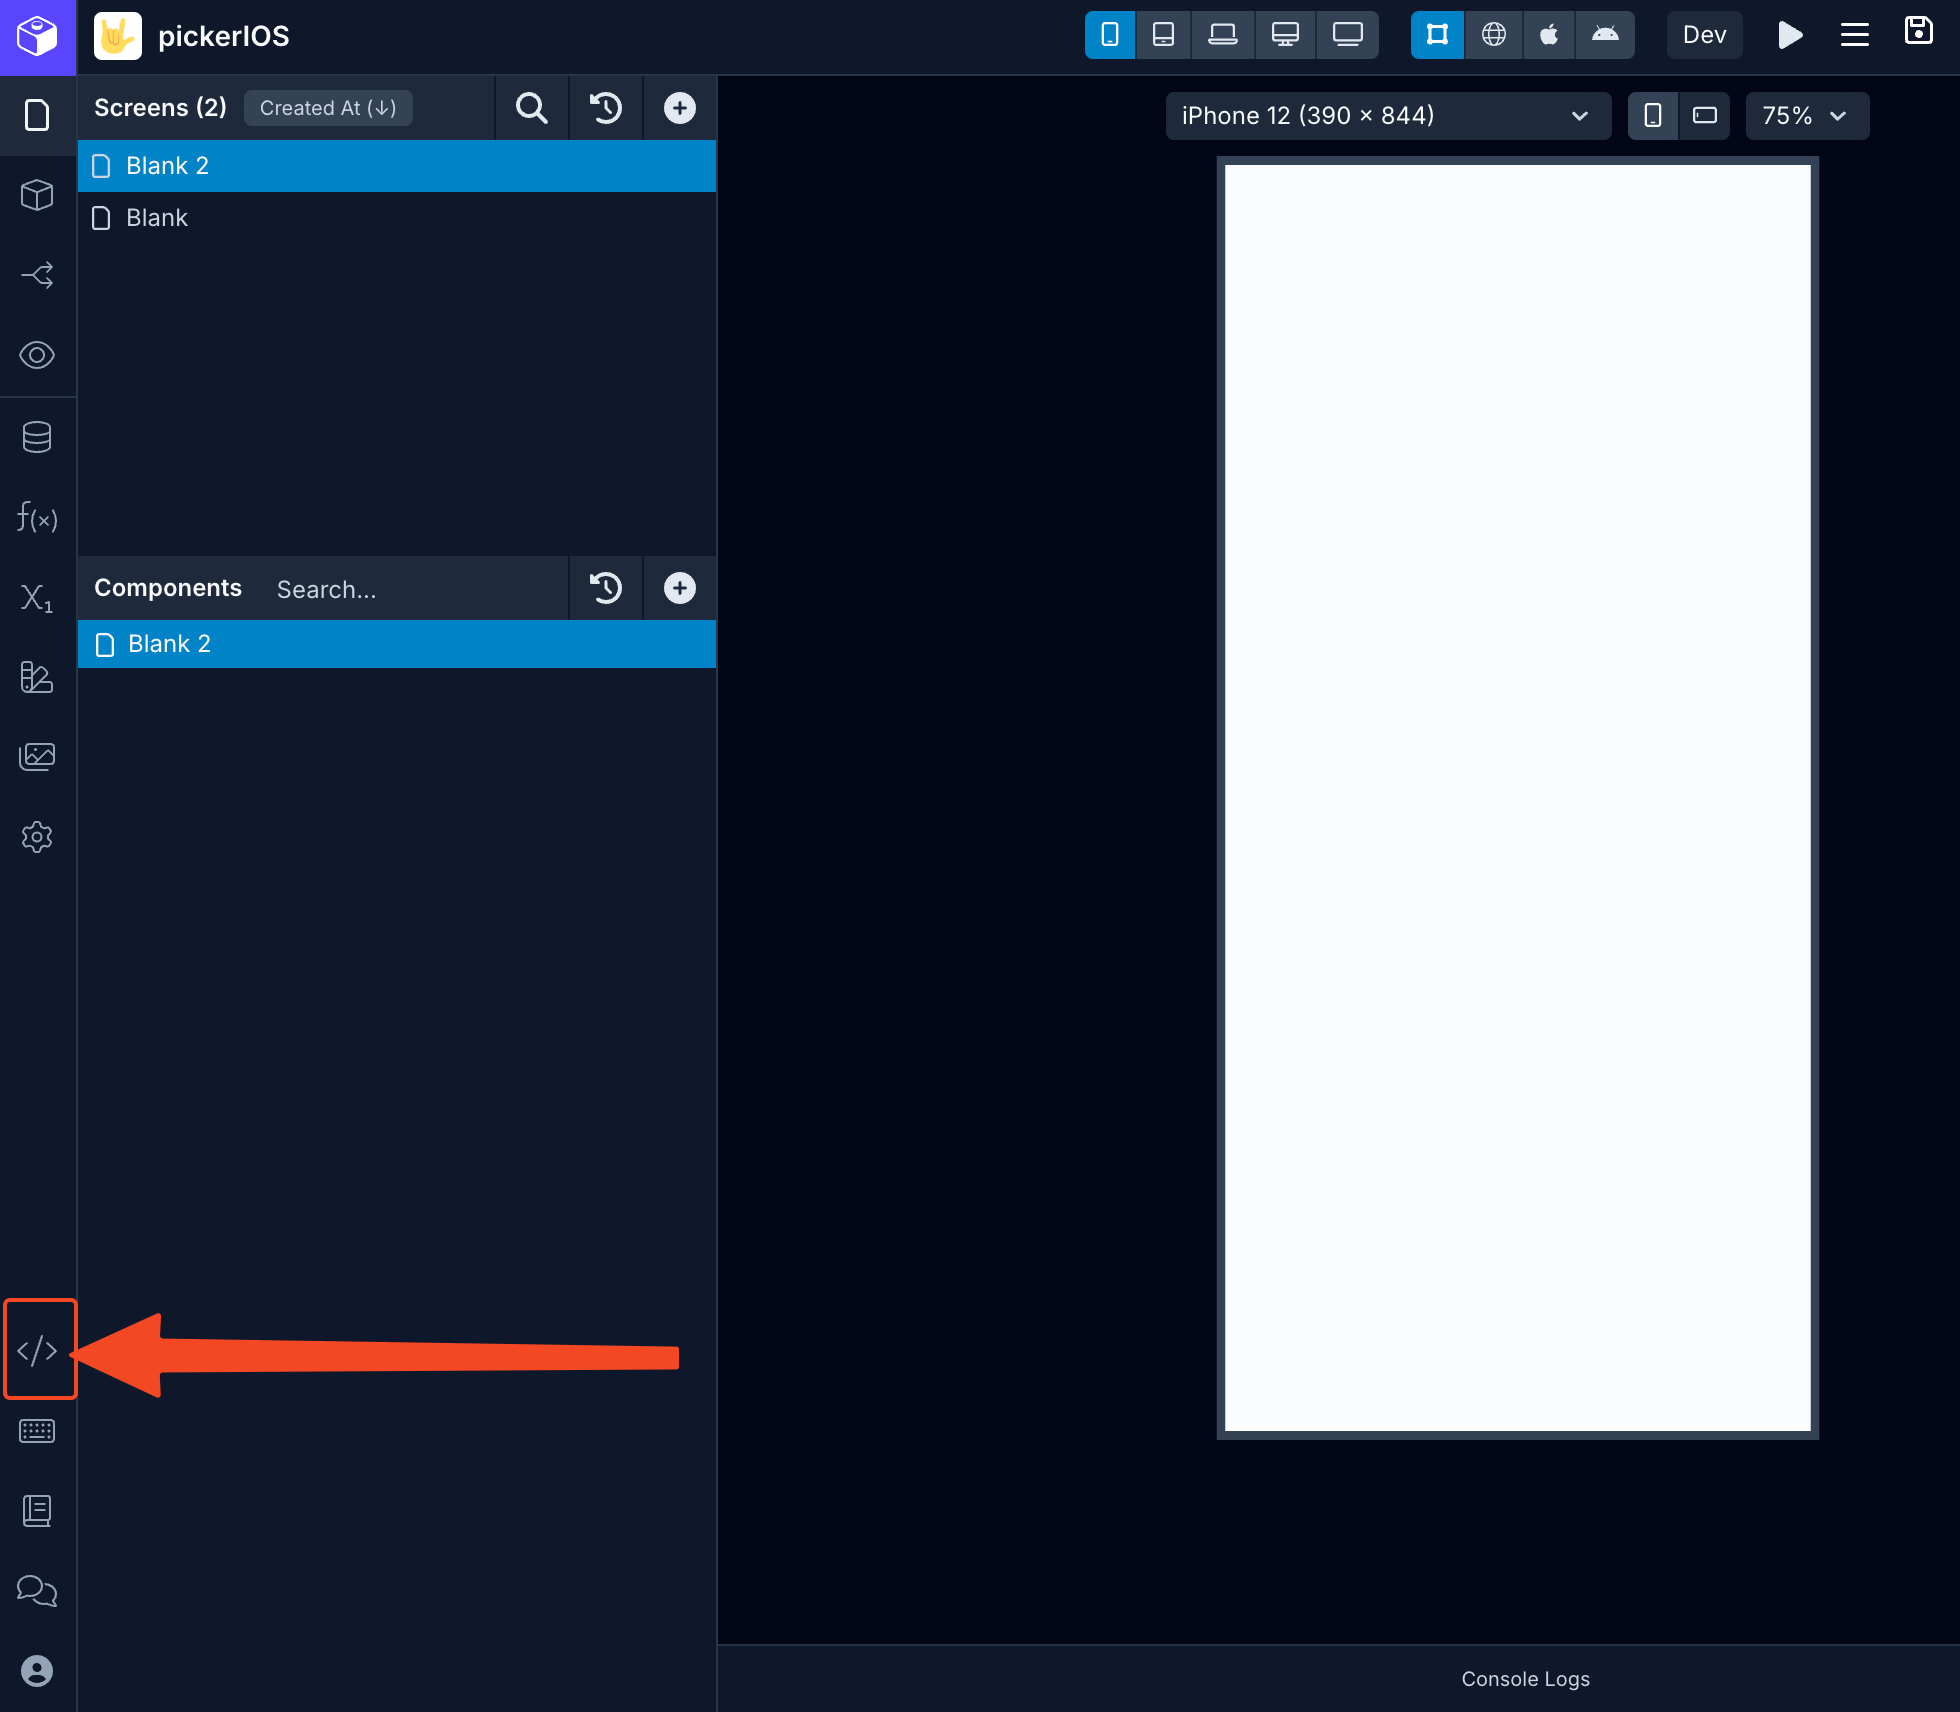
Alternatively, you can click Code* from the left menu bar and then click Export App.
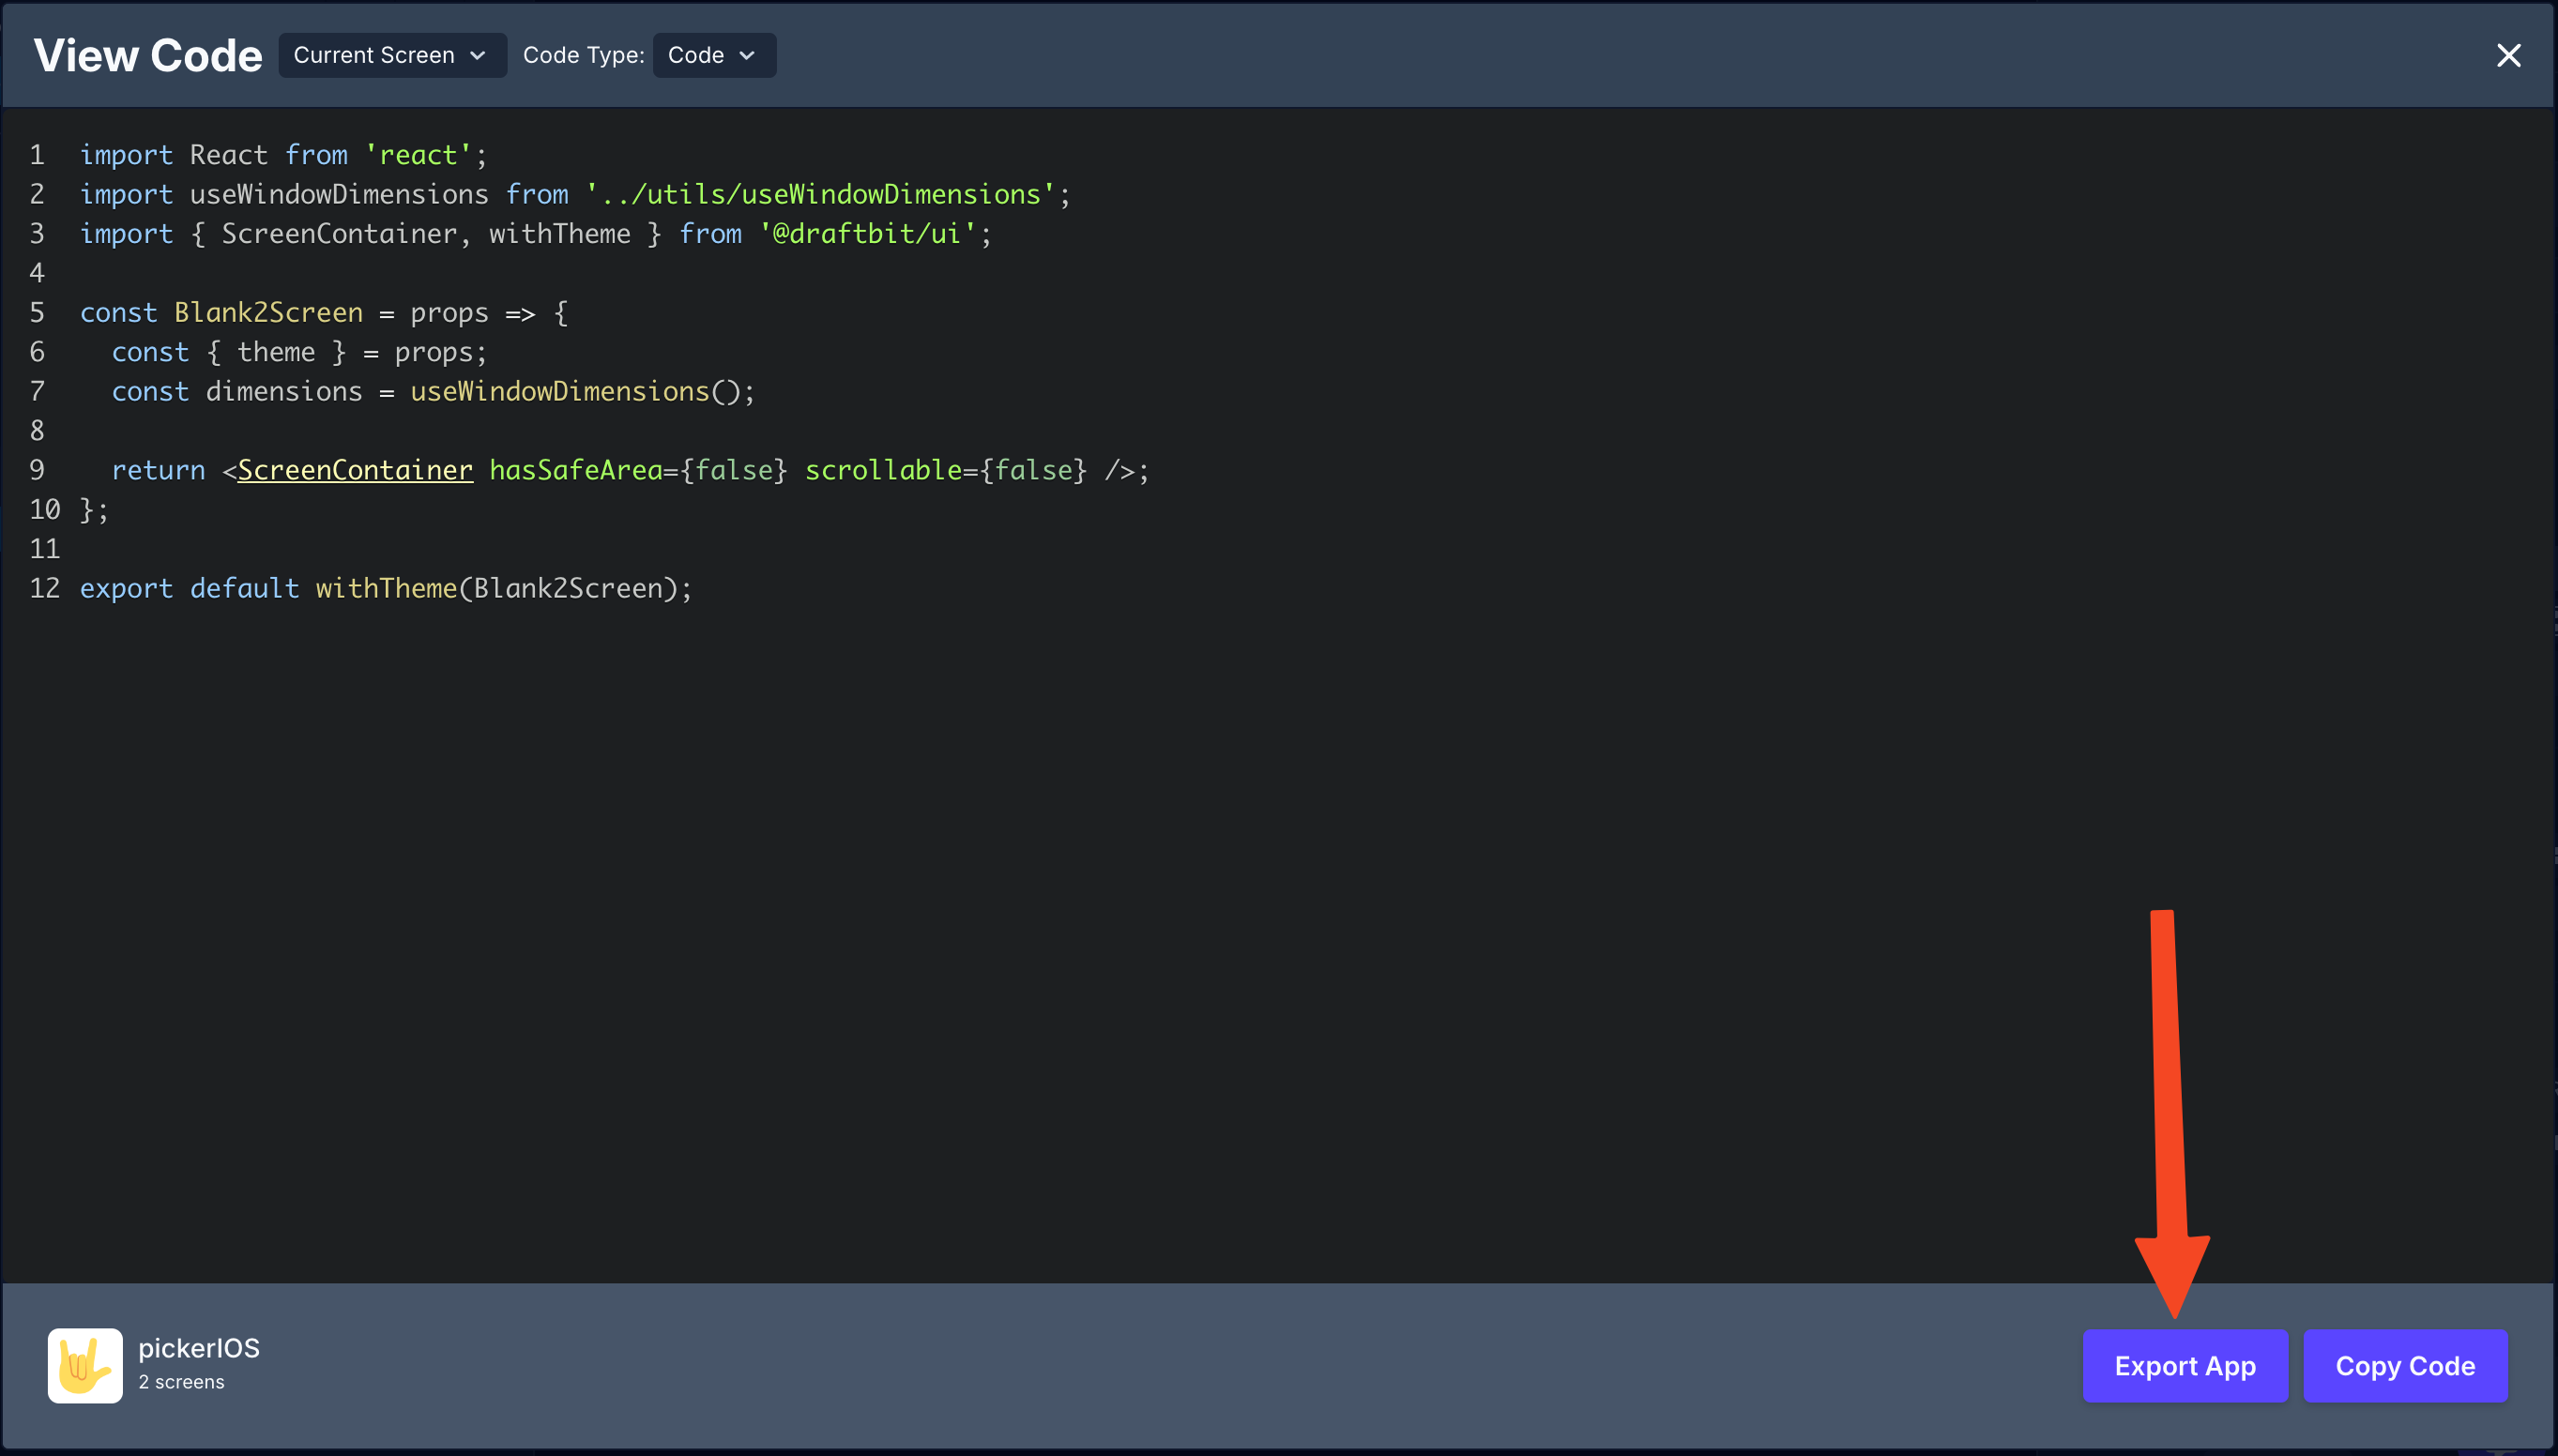
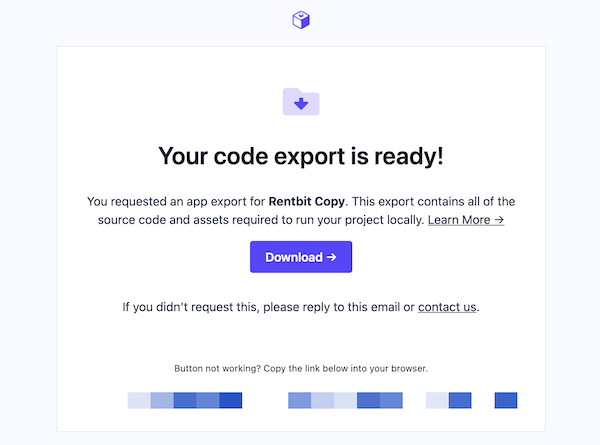
After clicking the Export App button, you will receive an email from Draftbit (at the email registered with your Draftbit account). In the email, you will find the link to download the source code of your Draftbit app.
Install Project Dependencies
Section titled “Install Project Dependencies”First, navigate to the project directory. The .zip will likely be in your downloads folder, so extract the .zip and move it to the desired location before proceeding.
Now, run the following commands to install the project dependencies (note that you’ll need an internet connection to do so).
cd Desktop/draftbit-appyarnThe cd command above takes you into the project directory so you can install the correct dependencies. You should replace Desktop/draftbit-app with the actual path to your unzipped project folder.
Post steps after exporting your app
Section titled “Post steps after exporting your app”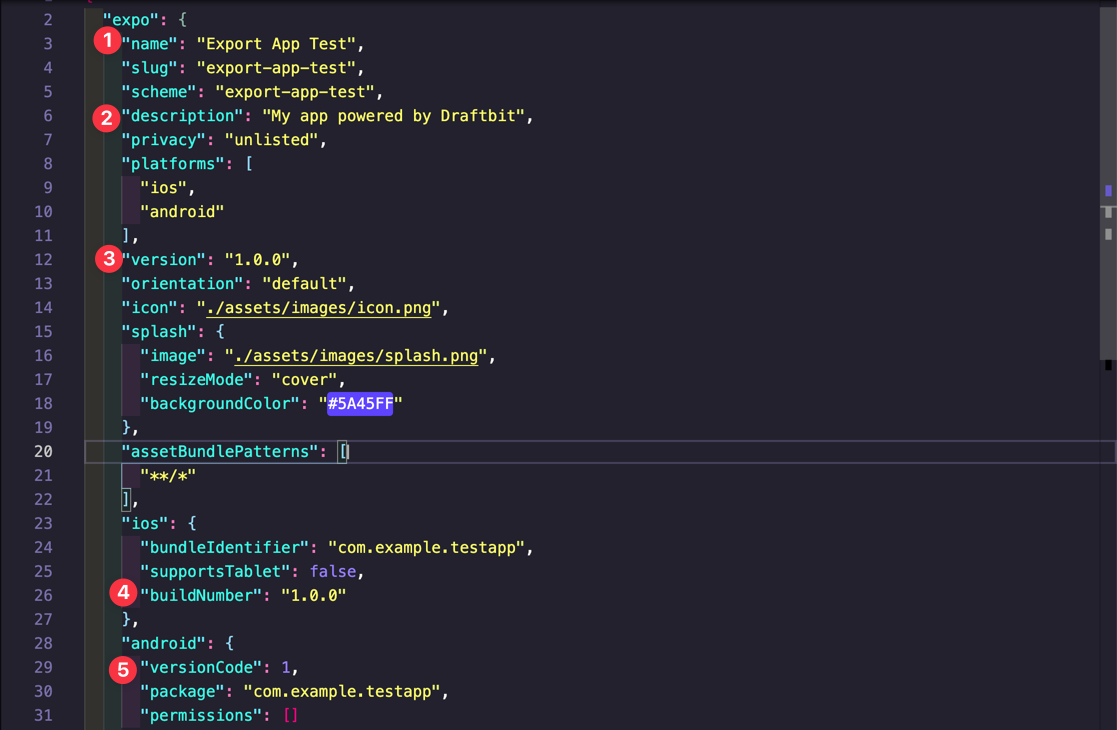
Modifying the name and description of your app
Section titled “Modifying the name and description of your app”To modify the name and description of your app, open the app project folder in a code editor. Then, open the file app.json in the editor.
- Inside this file, to modify the name of your app edit the value of the property
name. - To modify the description of your app, edit the value
description.
Setting up your app version
Section titled “Setting up your app version”You can also set the versioning of your app for each platform.
- The property
versioninapp.jsondetermines the overall version of the app. - In addition to this field, you can also set
ios.buildNumberandandroid.versionCode.
Later, when you are updating your app and releasing those updates to the app store, you can increment the values for these versions related properties.
Running Your Project Locally
Section titled “Running Your Project Locally”The fastest way to get up and running is to use the Expo Go app on your iOS or Android device. Expo Go allows you to open up apps that are being served through Expo CLI by scanning a QR code.
- 🤖 Android Play Store - Android Lollipop (5) and greater.
- 🍎 iOS App Store - iOS 11 and greater.
To run the project on your local machine, you need to execute the command below:
expo startThis should open the Expo developer tools in a browser tab. It will give you a QR code to scan to view your project on your phone.
Additionally, you can click Run on Android device/emulator or Run on iOS simulator and Expo will start the project in Android Studio or XCode if they are installed on your computer.
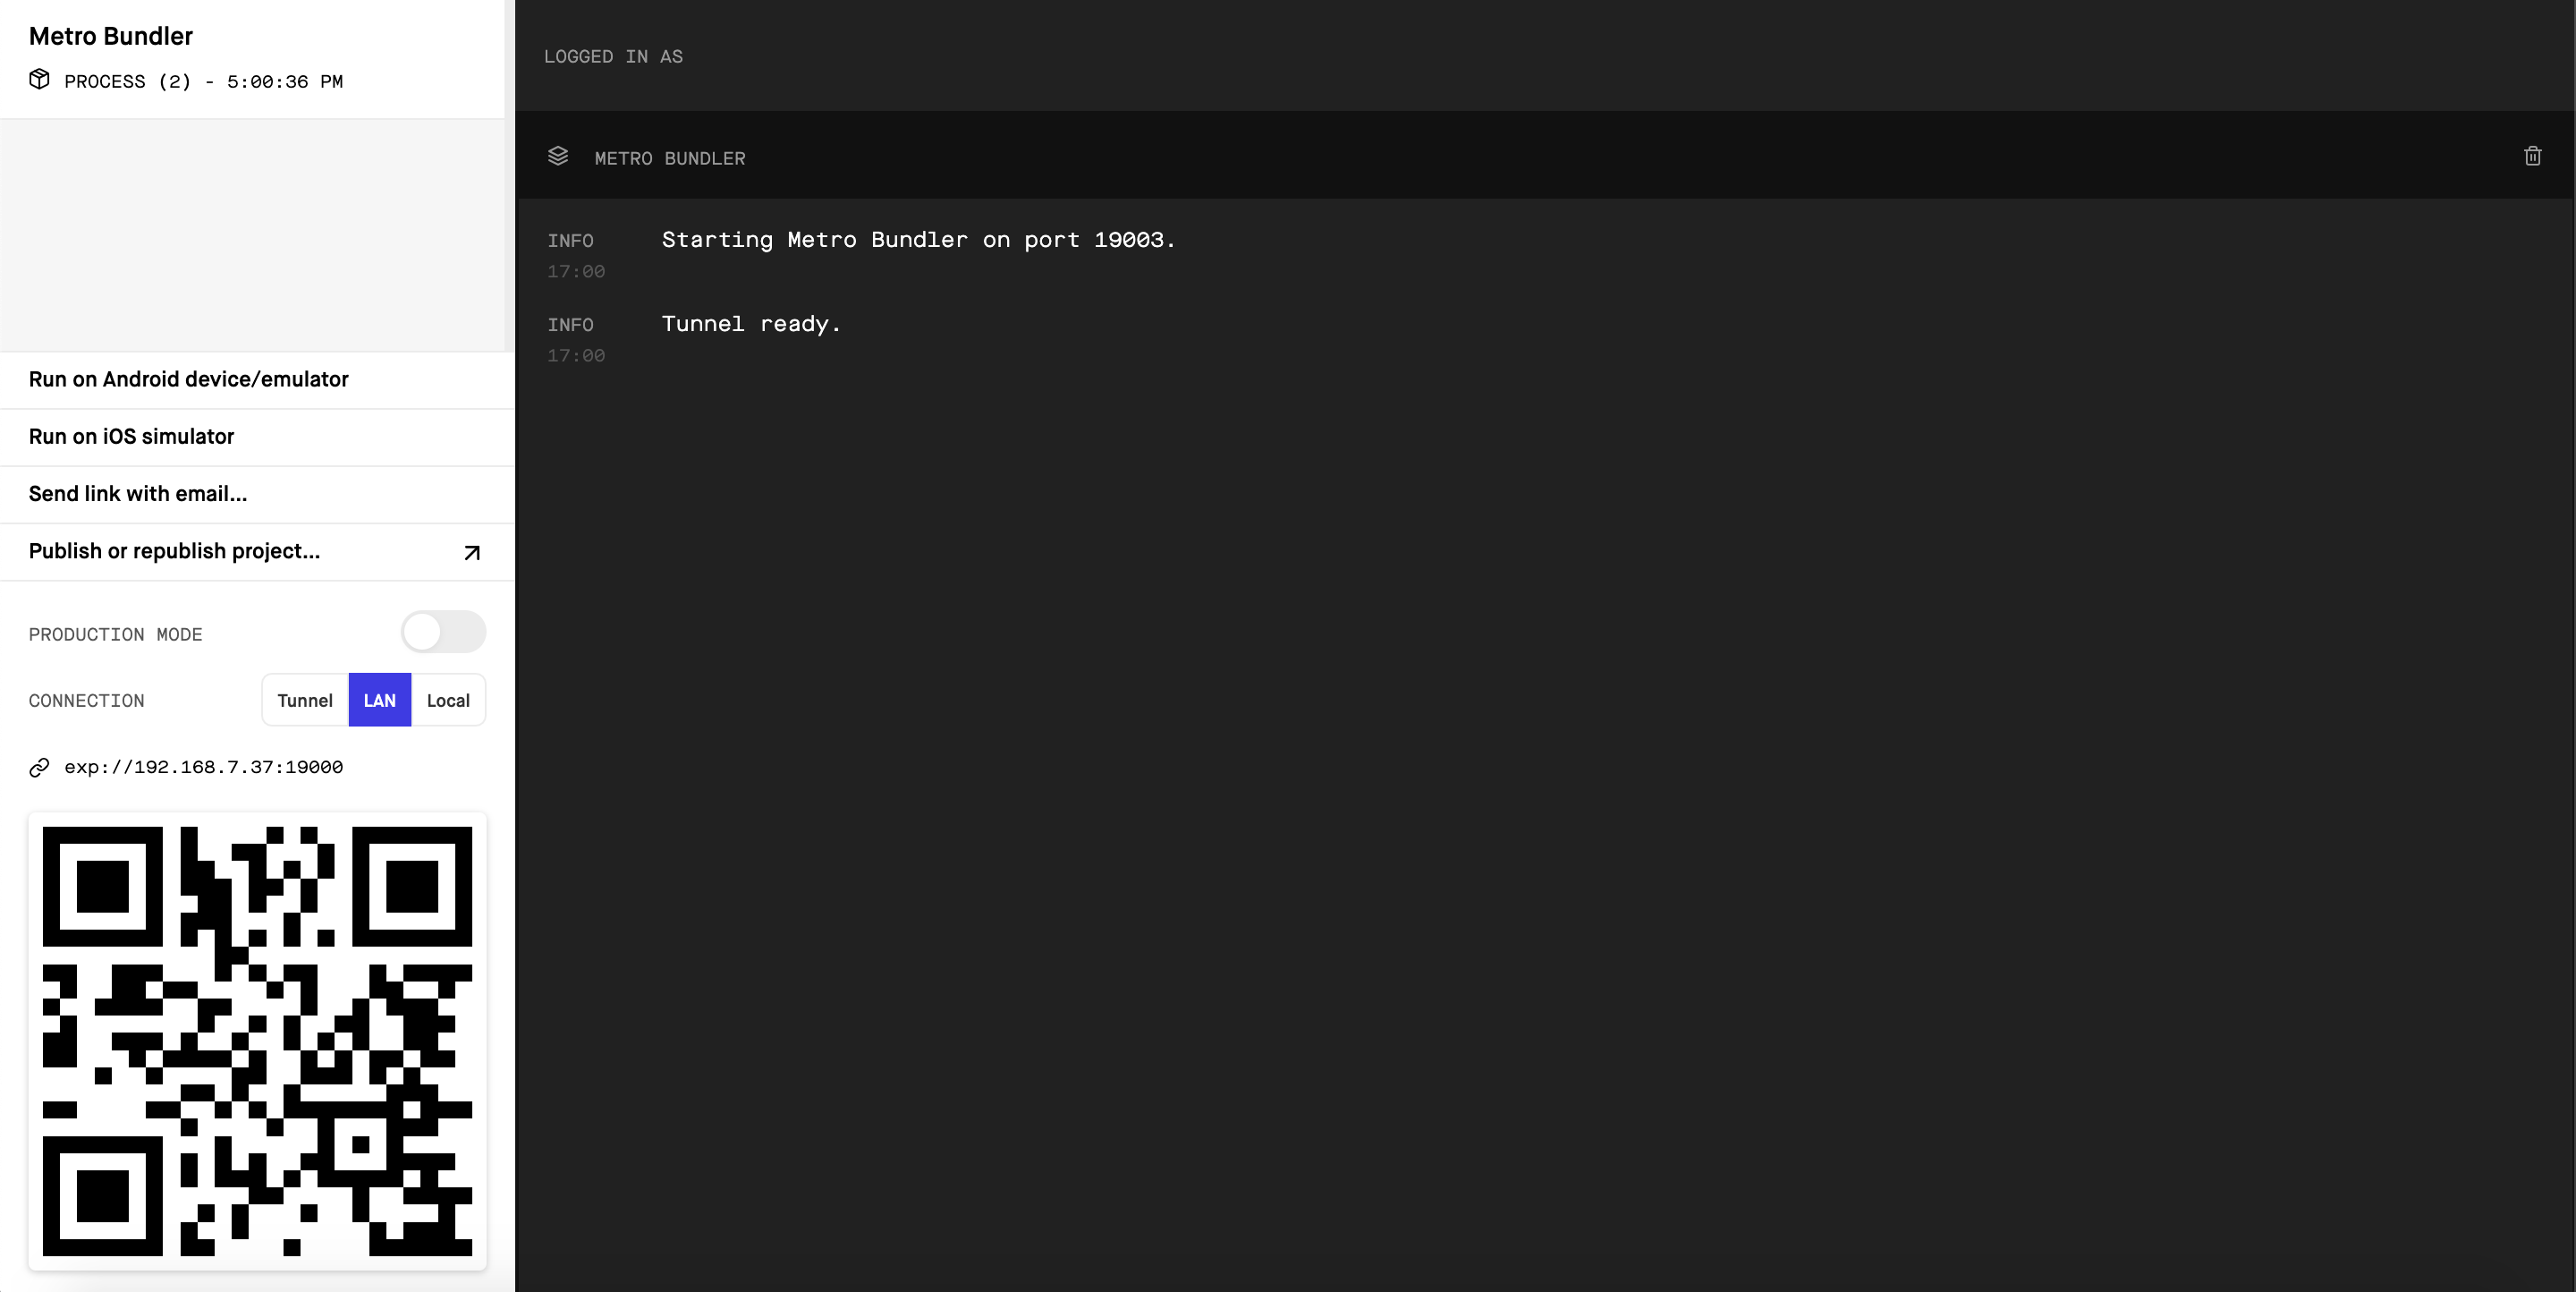
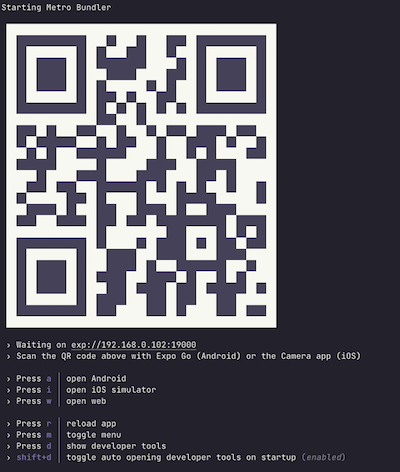
The QR code will also be generated in the terminal along with a menu of options.
Running on a simulator/emulator
Section titled “Running on a simulator/emulator”You can run your app on your mobile device, on the iOS simulator (if you have a Mac), or on the Android emulator. If you’d prefer to run your app on an emulator, see the installation instructions below.
{/* remove this once a publishing guide is live */}
Publishing your Project
Section titled “Publishing your Project”To publish your project, run the command expo publish in your project’s directory in the terminal. You can read more on publishing in Expo’s docs.
Additional Resources
Section titled “Additional Resources”Expo has provided a list of best practices to follow when preparing your app for deployment that you may want to take a look at and confirm before you begin your app’s build.