

Sheety
What is Sheety?
Section titled “What is Sheety?”Sheety allows you to use Google spreadsheets as a database and use the information stored in the spreadsheet as a REST API. The API can be used to create prototypes and apps. For Sheety to serve your spreadsheet as an API, it needs to be in a particular format. With a few tweaks to your spreadsheet, you can make it compatible with Sheety.
Integrating Draftbit & Sheety
Section titled “Integrating Draftbit & Sheety”Setup steps in Sheety
Section titled “Setup steps in Sheety”If you don’t have a Sheety account, create on here. To get familiar with Sheety, check out their getting started guide.
Before you start with Draftbit, make sure you have a Google apreadsheet created. To create a new spreadsheet:
- From docs.google.com/spreadsheets, under the
Start a new spreadsheetsection, click on theBlanktemplate. - You can start from scratch or start from an existing template (in this case, make sure to follow Sheety guidelines to format data in the spreadsheet).
For this guide, we will use a Google Spreadsheet created from scratch.
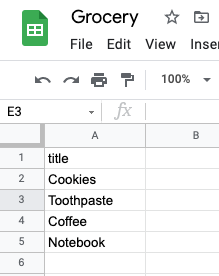
Get your REST API URL
Section titled “Get your REST API URL”- From the Sheety dashboard, click on the
New Projectdrop-down menu and selectFrom Google Sheet. - Paste the Google Sheet URL
- On success, it will read the Sheet name. This gives you chance to verify that the data to be used is coming from the correct sheet in the spreadsheet
- Click
Create Projectto generate a Sheety API project. - On creating a new project, API documentation is generated as well as the REST API endpoint.
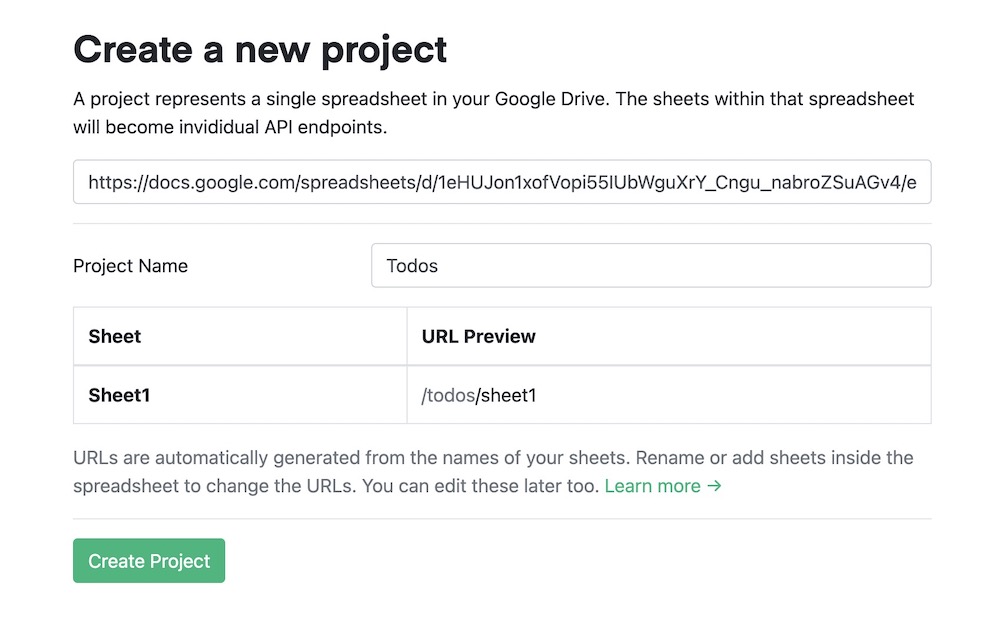
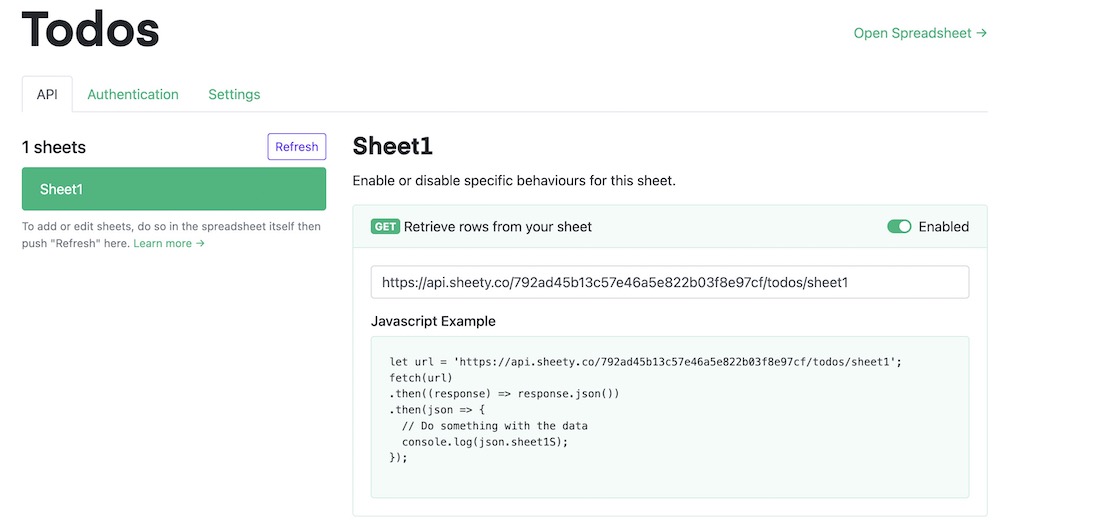
Get Authentication Token
Section titled “Get Authentication Token”Sheety allows you to generate your Authentication token. It is required to access the API.
- From the
APItab, go to theAuthenticationtab. - From the left-sidebar that says
Type, select the authentication type toBearer (Token). - Then add a custom
Tokenin the input field and save theAuthorization Headervalue which is to be used in the next section. - Click
Save Changesfrom the left-sidebar.
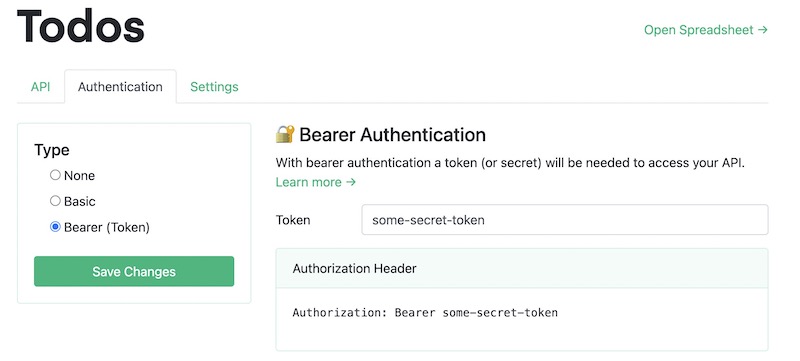
Setup steps in Draftbit
Section titled “Setup steps in Draftbit”Save Bearer token key as Authorization Header
Section titled “Save Bearer token key as Authorization Header”To access the API in the Draftbit app, you need the pass the Authentication token as the value for the Authorization header and define the header as the global variable.
- Open the **Variables** panel from the left menu bar.
- In App Variables, add a key for the Authorization header. Add the
Bearertoken value you saved in the Sheety dashboard as the value of this header key. - Enter a
nameto access the API Key and the value for it. For example,Authorization_Header. - The value of this key requires you to enter an authorization token that starts with syntax is
Bearer <your-token>(the space betweenBearerand<your-api-key>is required). - Click Save.
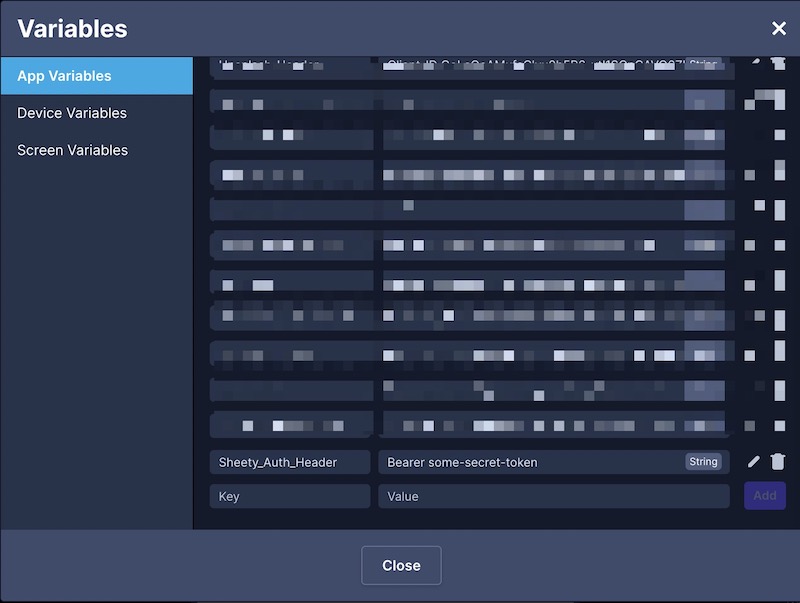
Add the Sheety API URL in the Draftbit app
Section titled “Add the Sheety API URL in the Draftbit app”- Open the Data modal from the left menu bar
- From the
Adda service menu, click onRest API. - Enter a name for your REST API.
- Paste your REST API URL into the
Dev URLorProd URLinput field. - Click the
+from theHeaderssection to add a new Header. - Type
Authorizationfor the Key. - Select the Global Variable for
Authorization_Header(from the previous section). - Click
Save.
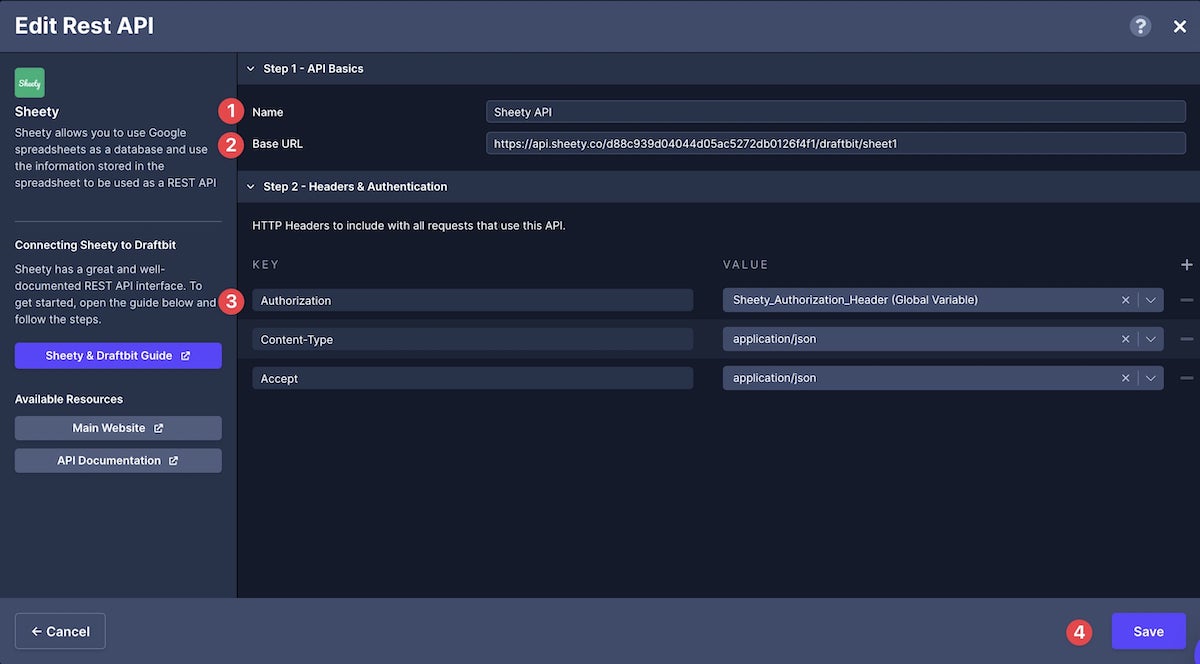
Using Sheety with Draftbit
Section titled “Using Sheety with Draftbit”GET request to fetch all records
Section titled “GET request to fetch all records”In this section, let’s populate a Fetch component with all the data from a simple Google spreadsheet and then display the data fetched from the Sheety API in a List component.
For reference, here is a how the Components tree looks like for this screen:
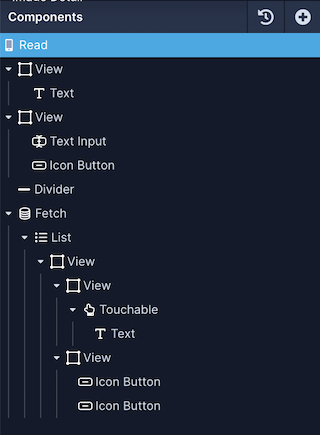
The next step is to create an endpoint. Let’s try fetching the data using a GET HTTP request. Open the Data modal, select the API service, and then:
- Click Add endpoint.
- In Step 1: enter the name for the endpoint. Make sure the Method select is
GET. - Set the Role to
Get Manyas the endpoint is fetching a list of items. Set the Object Type togroceriesfor this example.
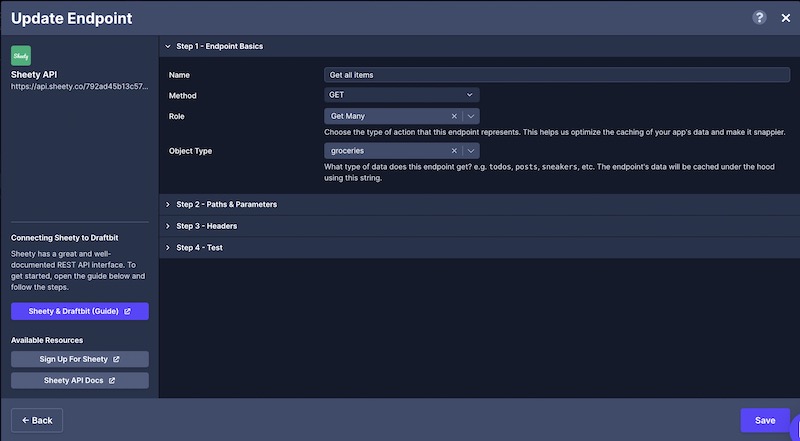
- In Step 4: click the Test button next to the Endpoint input to verify the response coming from the Google spreadsheet.
- Click Save.
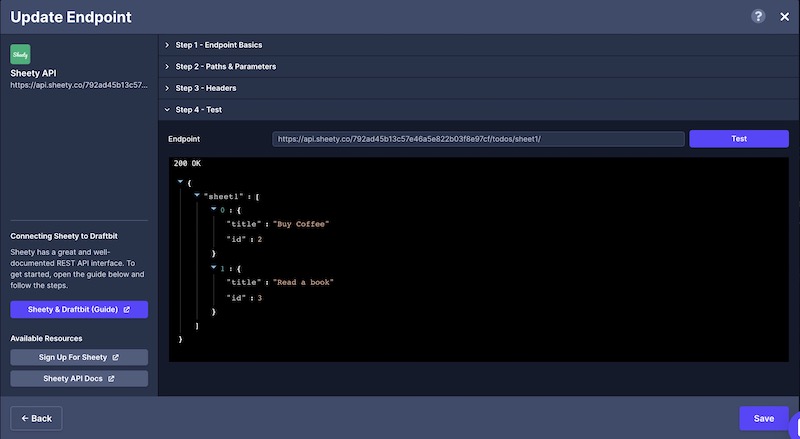
On app screen:
- Select the Fetch component in the Components tree and go to the Data tab from Properties Panel.
- For Service, select the name of the Sheety API Service.
- For Endpoint, select the endpoint you want to fetch the data from.
- Select the List component in the Components tree and go to the Data tab from Properties Panel.
- For Data, select
recordsfrom the dropdown menu. - Then, select the Text component in the Components tree and then go to the Data tab from the Properties Panel.
- Add a
{{varName}}value (inside the curly braces) to represent a data field from the Google spreadsheet. For example, we add{{title}}to represent the column name from the Google spreadsheet. - Under Variables, you will see the variable name defined in the previous step. From the dropdown menu, select the appropriate field that represents the data field.
GET request to fetch a single record
Section titled “GET request to fetch a single record”In this section, let’s populate a Fetch component with a single record from the Google spreadsheet. For reference, here is a how the Components tree looks like for this screen:
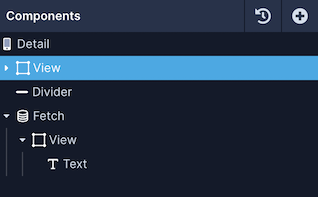
Also, from the List screen, we are sending the id of each list item as a navigation parameter when an action is triggered on the Touchable/Button component. This action will let you navigate to the screen where a single record is fetched and its details are shown.
To fetch a single post from a Google spreadsheet, you’ll have to specify a record id that is coming from the navigation parameters.
Data is fetched using a GET HTTP request. Open the API & Cloud Services modal from the left menu bar, select the Sheety API service, and then:
- Click Add endpoint.
- In Step 1: enter a name for the endpoint.
- Set the Role to
Get Oneas the endpoint is fetching a single item. Set the Object Type togroceriesfor this example.
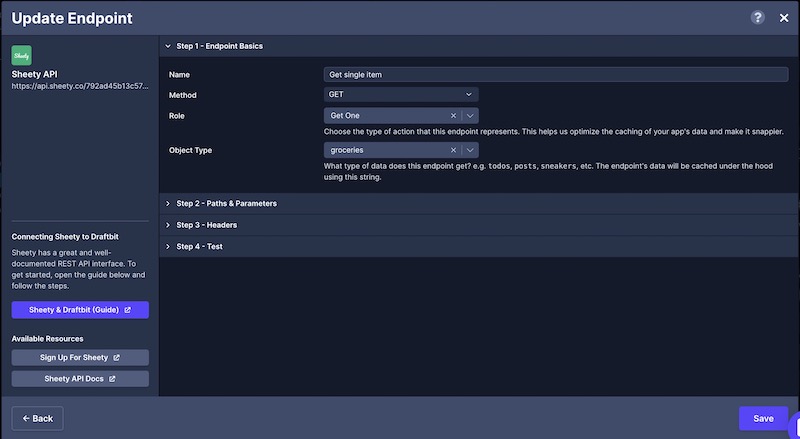
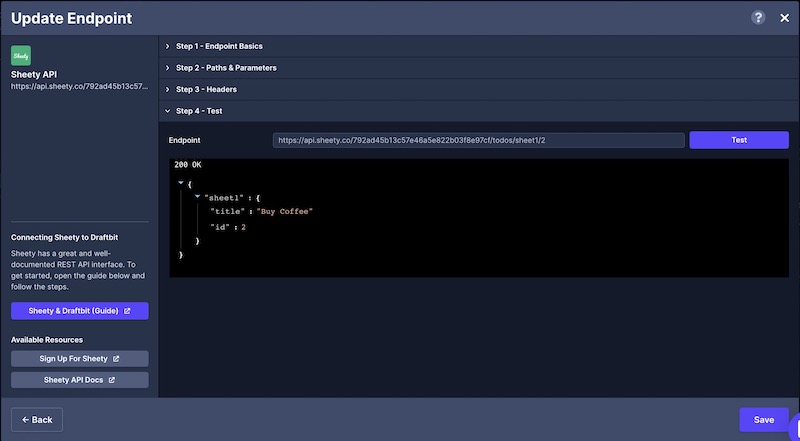
- In Step 2: add the
/{{id}}variable. Then, add a Test value for the{{id}}.
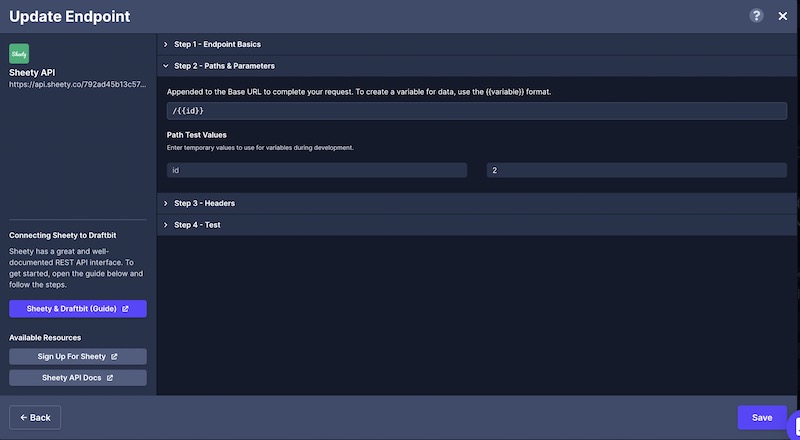
- In Step 4: click the Test button next to the Endpoint input to verify the response coming from the Google spreadsheet.
- Click Save.
On app screen:
- Select the Fetch component in the Components tree and go to the Data tab from Properties Panel.
- For Service, select the name of the Sheety API service.
- For Endpoint, select the endpoint you want to fetch the data from.
- Set the value for the
idin the Configuration > URL Structure section to Navigation >id. - Then, select the Text component in the Components tree and then go to the Data tab from the Properties Panel.
- Add a
{{varName}}value (inside the curly braces) to represent the data field from the Google spreadsheet. For example, we add{{title}}to represent the field and value from the Google spreadsheet. - Under Variables, you will see the variable name defined in the previous step. From the dropdown menu, select the appropriate field that represents the data field.
POST request to submit new data
Section titled “POST request to submit new data”Submitting new Data from the Draftbit app to a REST API requires the request to be sent using HTTP POST method.
Your component needs to have:
- accepts user input
- has a
Data Sourceprop
You can use any component that contains a Data Source prop to log user input and submit data. This list of components currently includes:
Once you have the necessary component(s) on your screen, you’ll need to create a new endpoint in your Sheety service:
- Click Add endpoint.
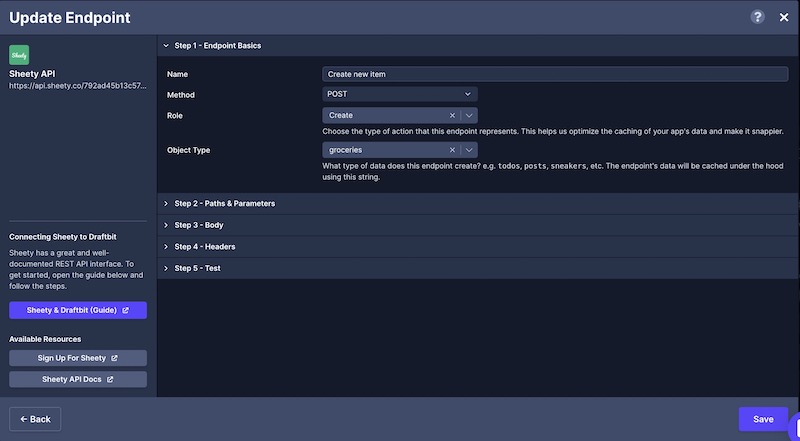
- In Step 1: enter a name for the endpoint and select the Method to
POST. - Set the Role to
Createas the endpoint is used to create a new record. Set the Object Type togroceriesfor this example.
- In Step 3: add a valid Body structure to submit a POST request. Add one or many
{{variable}}for test values. Click Body Preview to validate the structure of the Body in the request.
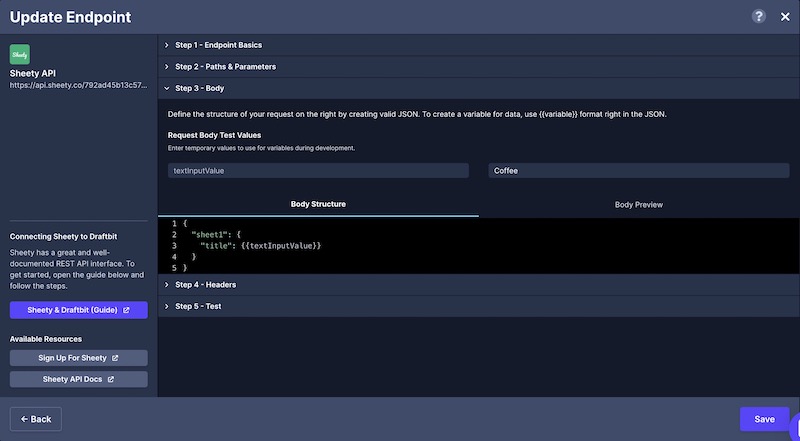
- Below is a general breakdown of what the request will look like. You’re able to add multiple fields to a request, just make sure you include a comma after each field.
{ "sheet1": { "title": {{textInputValue}} }}- In Step 5: click the Test button next to the Endpoint input to verify the response coming from the Google spreadsheet.
- Click Save.
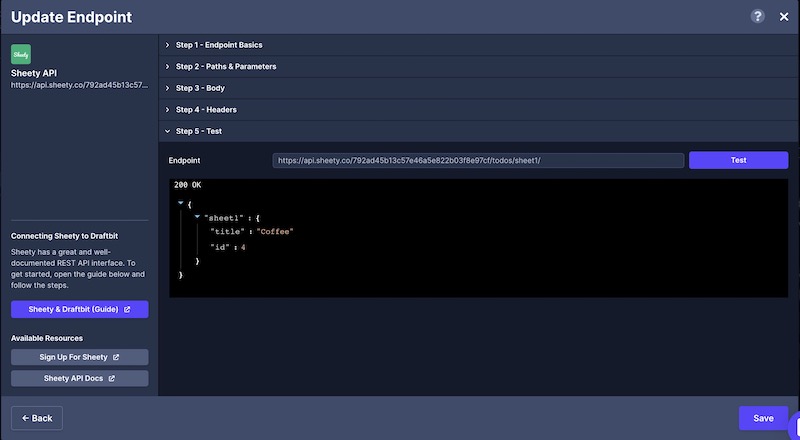
Using a Touchable/Button component, you can trigger the action API Request to submit the data to the endpoint.
PUT request to update data
Section titled “PUT request to update data”The PUT request is used to update the single entry in the Google spreadsheet. It accepts similar input components as mentioned in the POST request and the API Request is triggered using a Touchable/Button component.
Your component needs to have:
- accepts user input
- has a
Data Sourceprop to update data using an API Request
You can use any component that contains a Data Source prop to log user input and submit data. This list of components currently includes:
Once you have the necessary component(s) on your screen, you’ll need to create a new endpoint in your Sheety API service:
- Click Add endpoint.
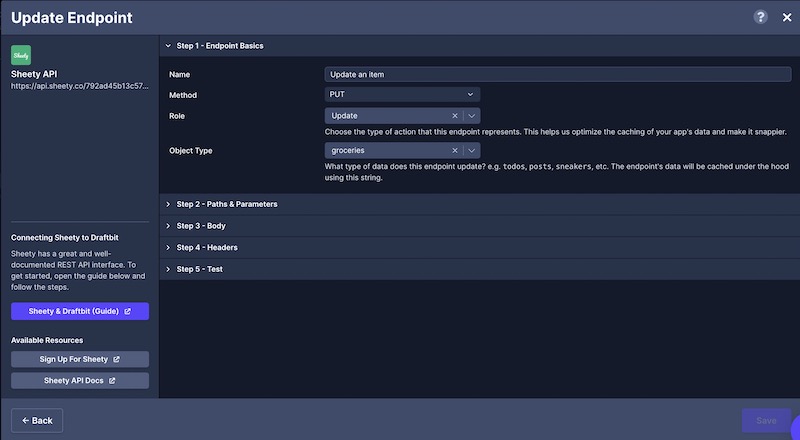
- In Step 1: enter a name for the endpoint and select the Method to
PUT. - Set the Role to
Updateas the endpoint is used to update an existing record. Set the Object Type togroceriesfor this example.
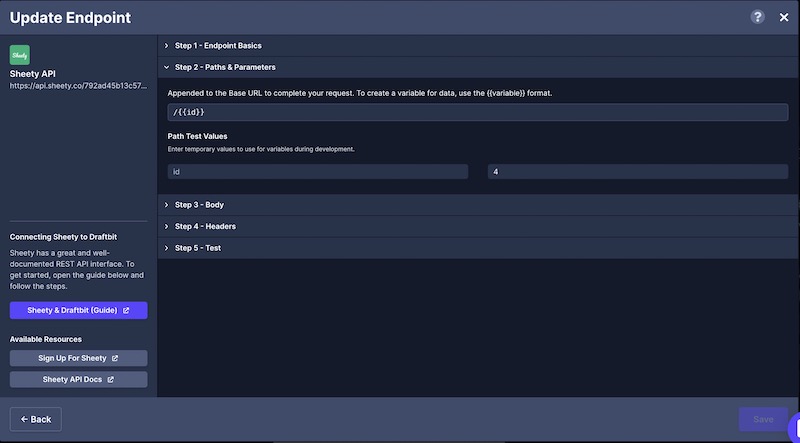
- In Step 2: add the
/{{id}}variable. Then, add a Test value for the{{id}}.
- In Step 3: add a valid Body structure to submit a
PUTrequest. Add one or many{{variable}}for test values. Click Body Preview to validate the structure of the Body in the request.
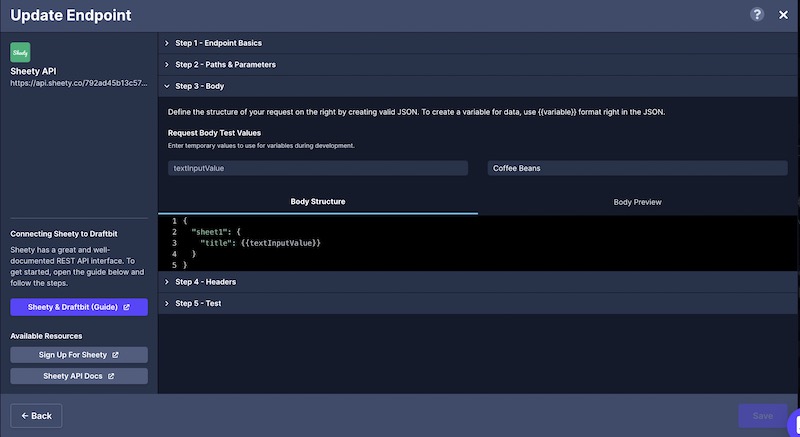
- Below is a general breakdown of what the request will look like. You’re able to add multiple fields to a request, just make sure you include a comma after each field.
{ "sheet1": { "title": {{textInputValue}} }}- In Step 5: click the Test button next to the Endpoint input to verify the response coming from the Google spreadsheet.
- Click Save.
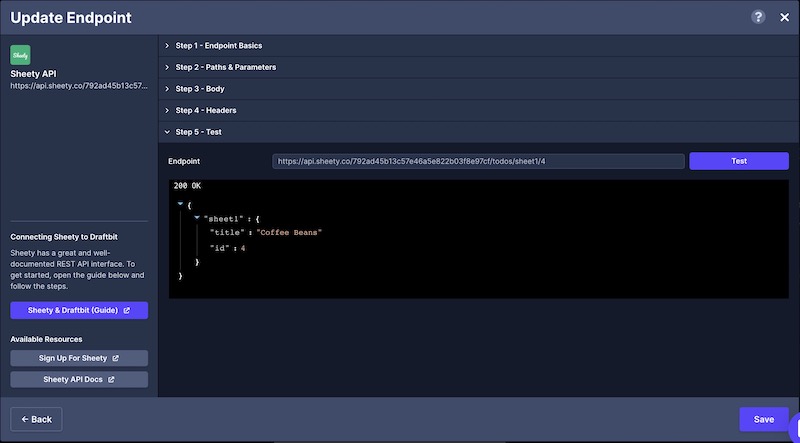
Using a Touchable/Button component, you can trigger the action API Request to update the data to the endpoint.
DELETE request to remove data
Section titled “DELETE request to remove data”The DELETE request is sent with an item’s id to remove that particular record from the table.
For example, once you have the necessary component(s) on your screen, you’ll need to create a new endpoint in your Sheety API service. In the new endpoint you’ll need to:
- Click Add endpoint.
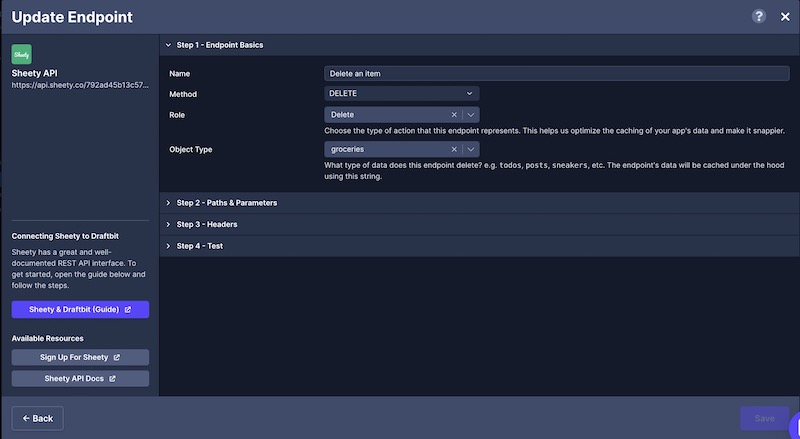
- In Step 1: enter a name for the endpoint and select the Method to
DELETE. - Set the Role to
Delete. Set the Object Type togroceriesfor this example.
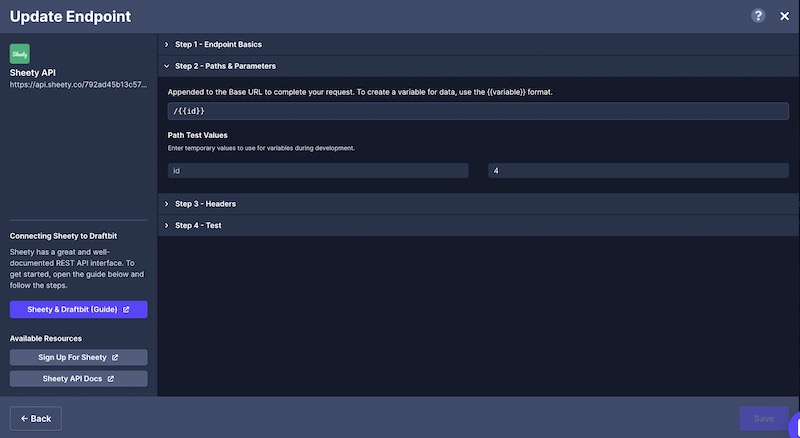
- In Step 2: add
/{{id}}whereidis provided as a test value of an existing record when testing the endpoint. In your app, you will have to pass theidof a single record, for example, as a navigation parameter.
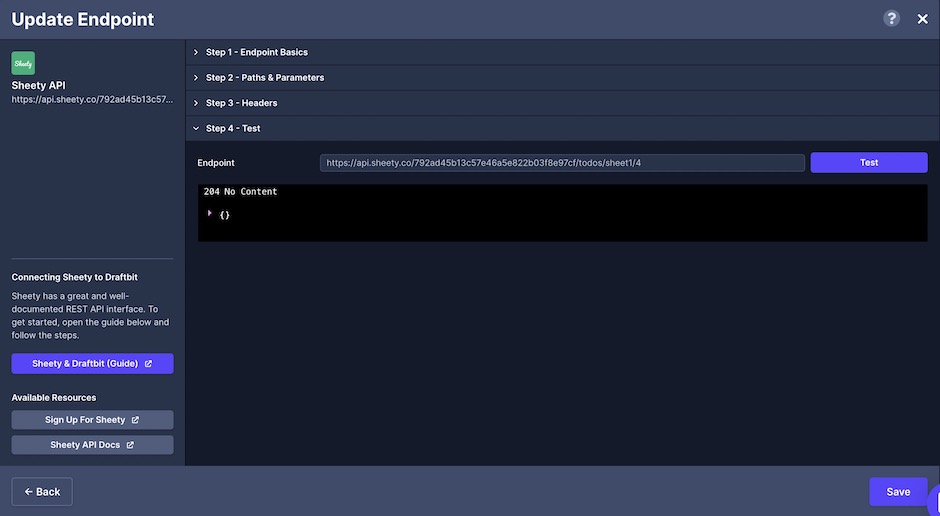
- In Step 4: click the Test button next to the Endpoint input to verify the response from the Google spreadsheet.
- Click Save.
Using a Touchable/Button component or an Icon Button, you can add the API Request action to trigger the DELETE request.