Laravel
This tutorial is aimed at developers already familiar with Laravel who are interested in creating a mobile app using Draftbit. We’ll walk through how to setup Laravel to provide authentication endpoints and then setup a login and home screen in Draftbit.
Getting Laravel Ready
Section titled “Getting Laravel Ready”For the purpose of this tutorial I will assume you already have a Laravel application setup. The only dependency requirement is the official Laravel Sanctum package which provides a token-based authentication system for SPAs, APIs, and mobile apps. If you are using Laravel Jetstream, then you already have Sanctum installed and ready to go!
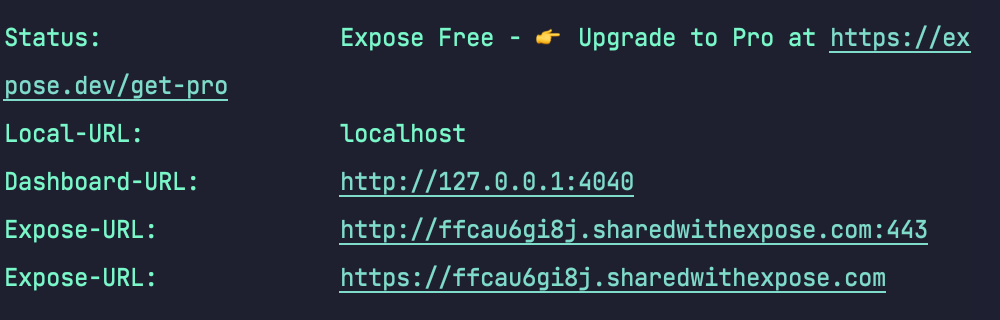
We’re also going to use Expose (free) in order to reach our local machine from Draftbit and the mobile app during development.
Authentication routes
Section titled “Authentication routes”We need to add two routes in our application - one to issue a device token and another to revoke a token. These endpoints can be whatever you like. Below I have added them to the default api routes file.
// generate new token and respond with userRoute::post('auth/token', [AuthController::class, 'login'])->name('api.login');
// authenticated routesRoute::middleware('auth:sanctum')->group(function () { // revoke user device token Route::delete('auth/token', [AuthController::class, 'logout'])->name('api.logout');});Authentication controller
Section titled “Authentication controller”Next we need to handle the incoming request. For this I have created a new AuthController file, but of course you can put this logic anywhere you like.
Although it’s possible to authenticate with any user configuration, I will assume in this tutorial that you have the default User model with name, email, and password attributes.
Handling requests to the login route
Section titled “Handling requests to the login route”Sanctum requires the user’s email, password, and a device name to associate with the issued token. If the user is successfully authenticated, then we create a new device token for the user and return it along with the basic user data.
public function login(Request $request){    // validate the request    $request->validate([        'email' => ['required', 'email'],        'password' => 'required',        'device_name' => 'required',    ]);
    // lookup the user    $user = User::where('email', $request->email)->first();
    // throw an error if the user doesn't exist    if (! $user) throw ValidationException::withMessages([        'email' => ["We couldn't find an account associated with the email you provided."],    ]);
    // throw an error if the password is invalid    if (! Hash::check($request->password, $user->password)) throw ValidationException::withMessages([        'password' => ['The password you entered is invalid.'],    ]);
    // create a new token for the user    $token = $user->createToken($request->device_name)->plainTextToken;
    // return the user and token    return response()->json([        'id' => $user->id,        'name' => $user->name,        'email' => $user->email,        'token' => $token,    ]);}
Handling requests to the logout route
Section titled “Handling requests to the logout route”In order to revoke a user’s token, thereby logging them out of the app, the user’s id and device token are required. If the request is valid then we revoke the user’s device token and return a simple success message.
public function logout(Request $request){    // validate the request    $request->validate([        'id' => 'required',        'device_token' => 'required',    ]);
    // lookup the user    $user = User::find($request->id);
    // delete the given token    $user->tokens()->where('token', $request->device_token)->delete();
    // return success message    return response()->json([        'message' => 'success',    ]);}
That’s it! This is all we need on the Laravel side. Next, let’s move over to Draftbit.
Getting Draftbit Ready
Section titled “Getting Draftbit Ready”Most of our work will be done here, but don’t worry - Draftbit makes it a breeze!
Screens & navigation
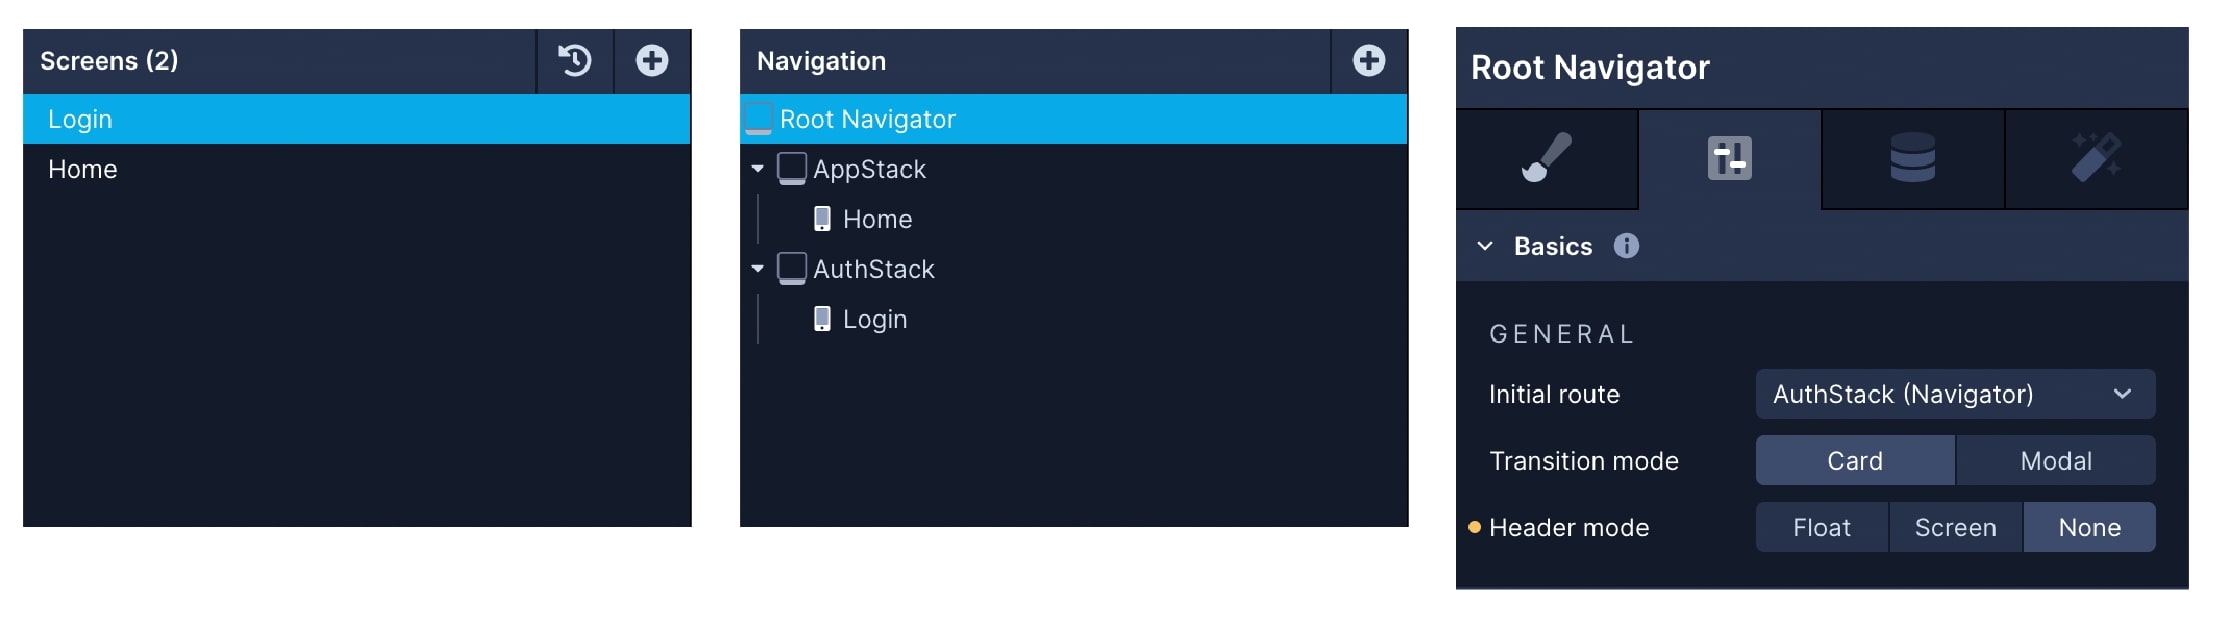
Section titled “Screens & navigation”For the purpose of this tutorial, we will have two Screens - Login and Home.
We will also have two Stack Navigators nested under our Root Navigator - AuthStack and AppStack - and move each screen under their respective stack.
And, we’ll set the Root Navigator’s initial route to AuthStack.
Global variables
Section titled “Global variables”Draftbit provides two different types of App Variables - App and Device. We’ll need to set a few for each of these.
App Variables
Section titled “App Variables”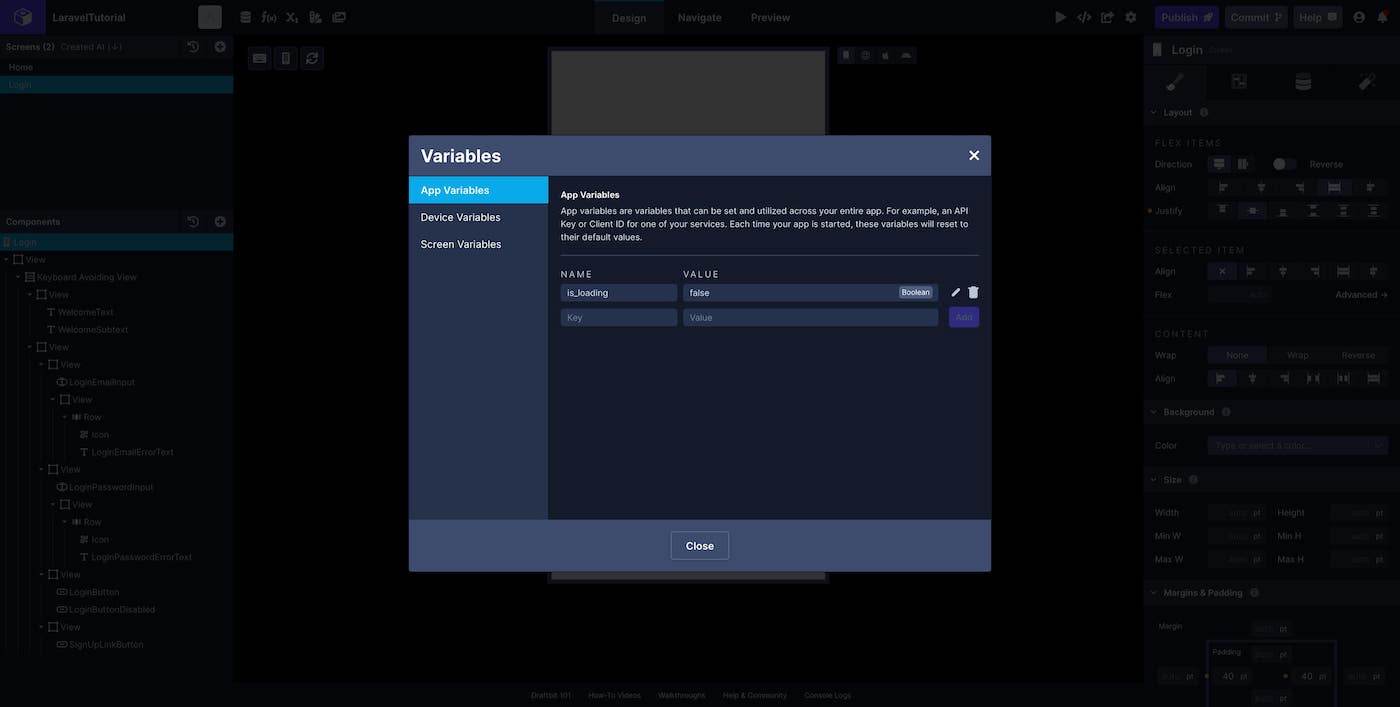
Device Variables
Section titled “Device Variables”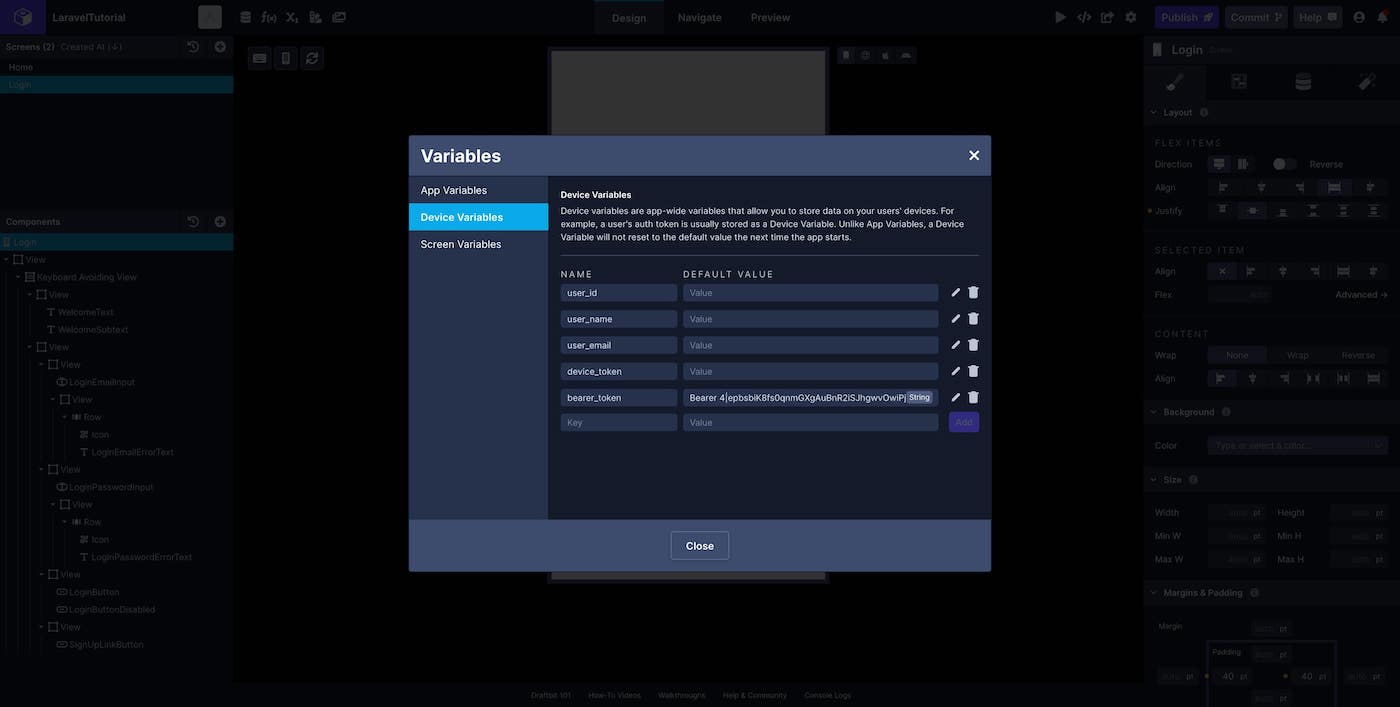
Custom API connection
Section titled “Custom API connection”Draftbit provides a pretty intuitive and simple way to setup custom API connections and endpoints, and that’s what we’re going to do now.
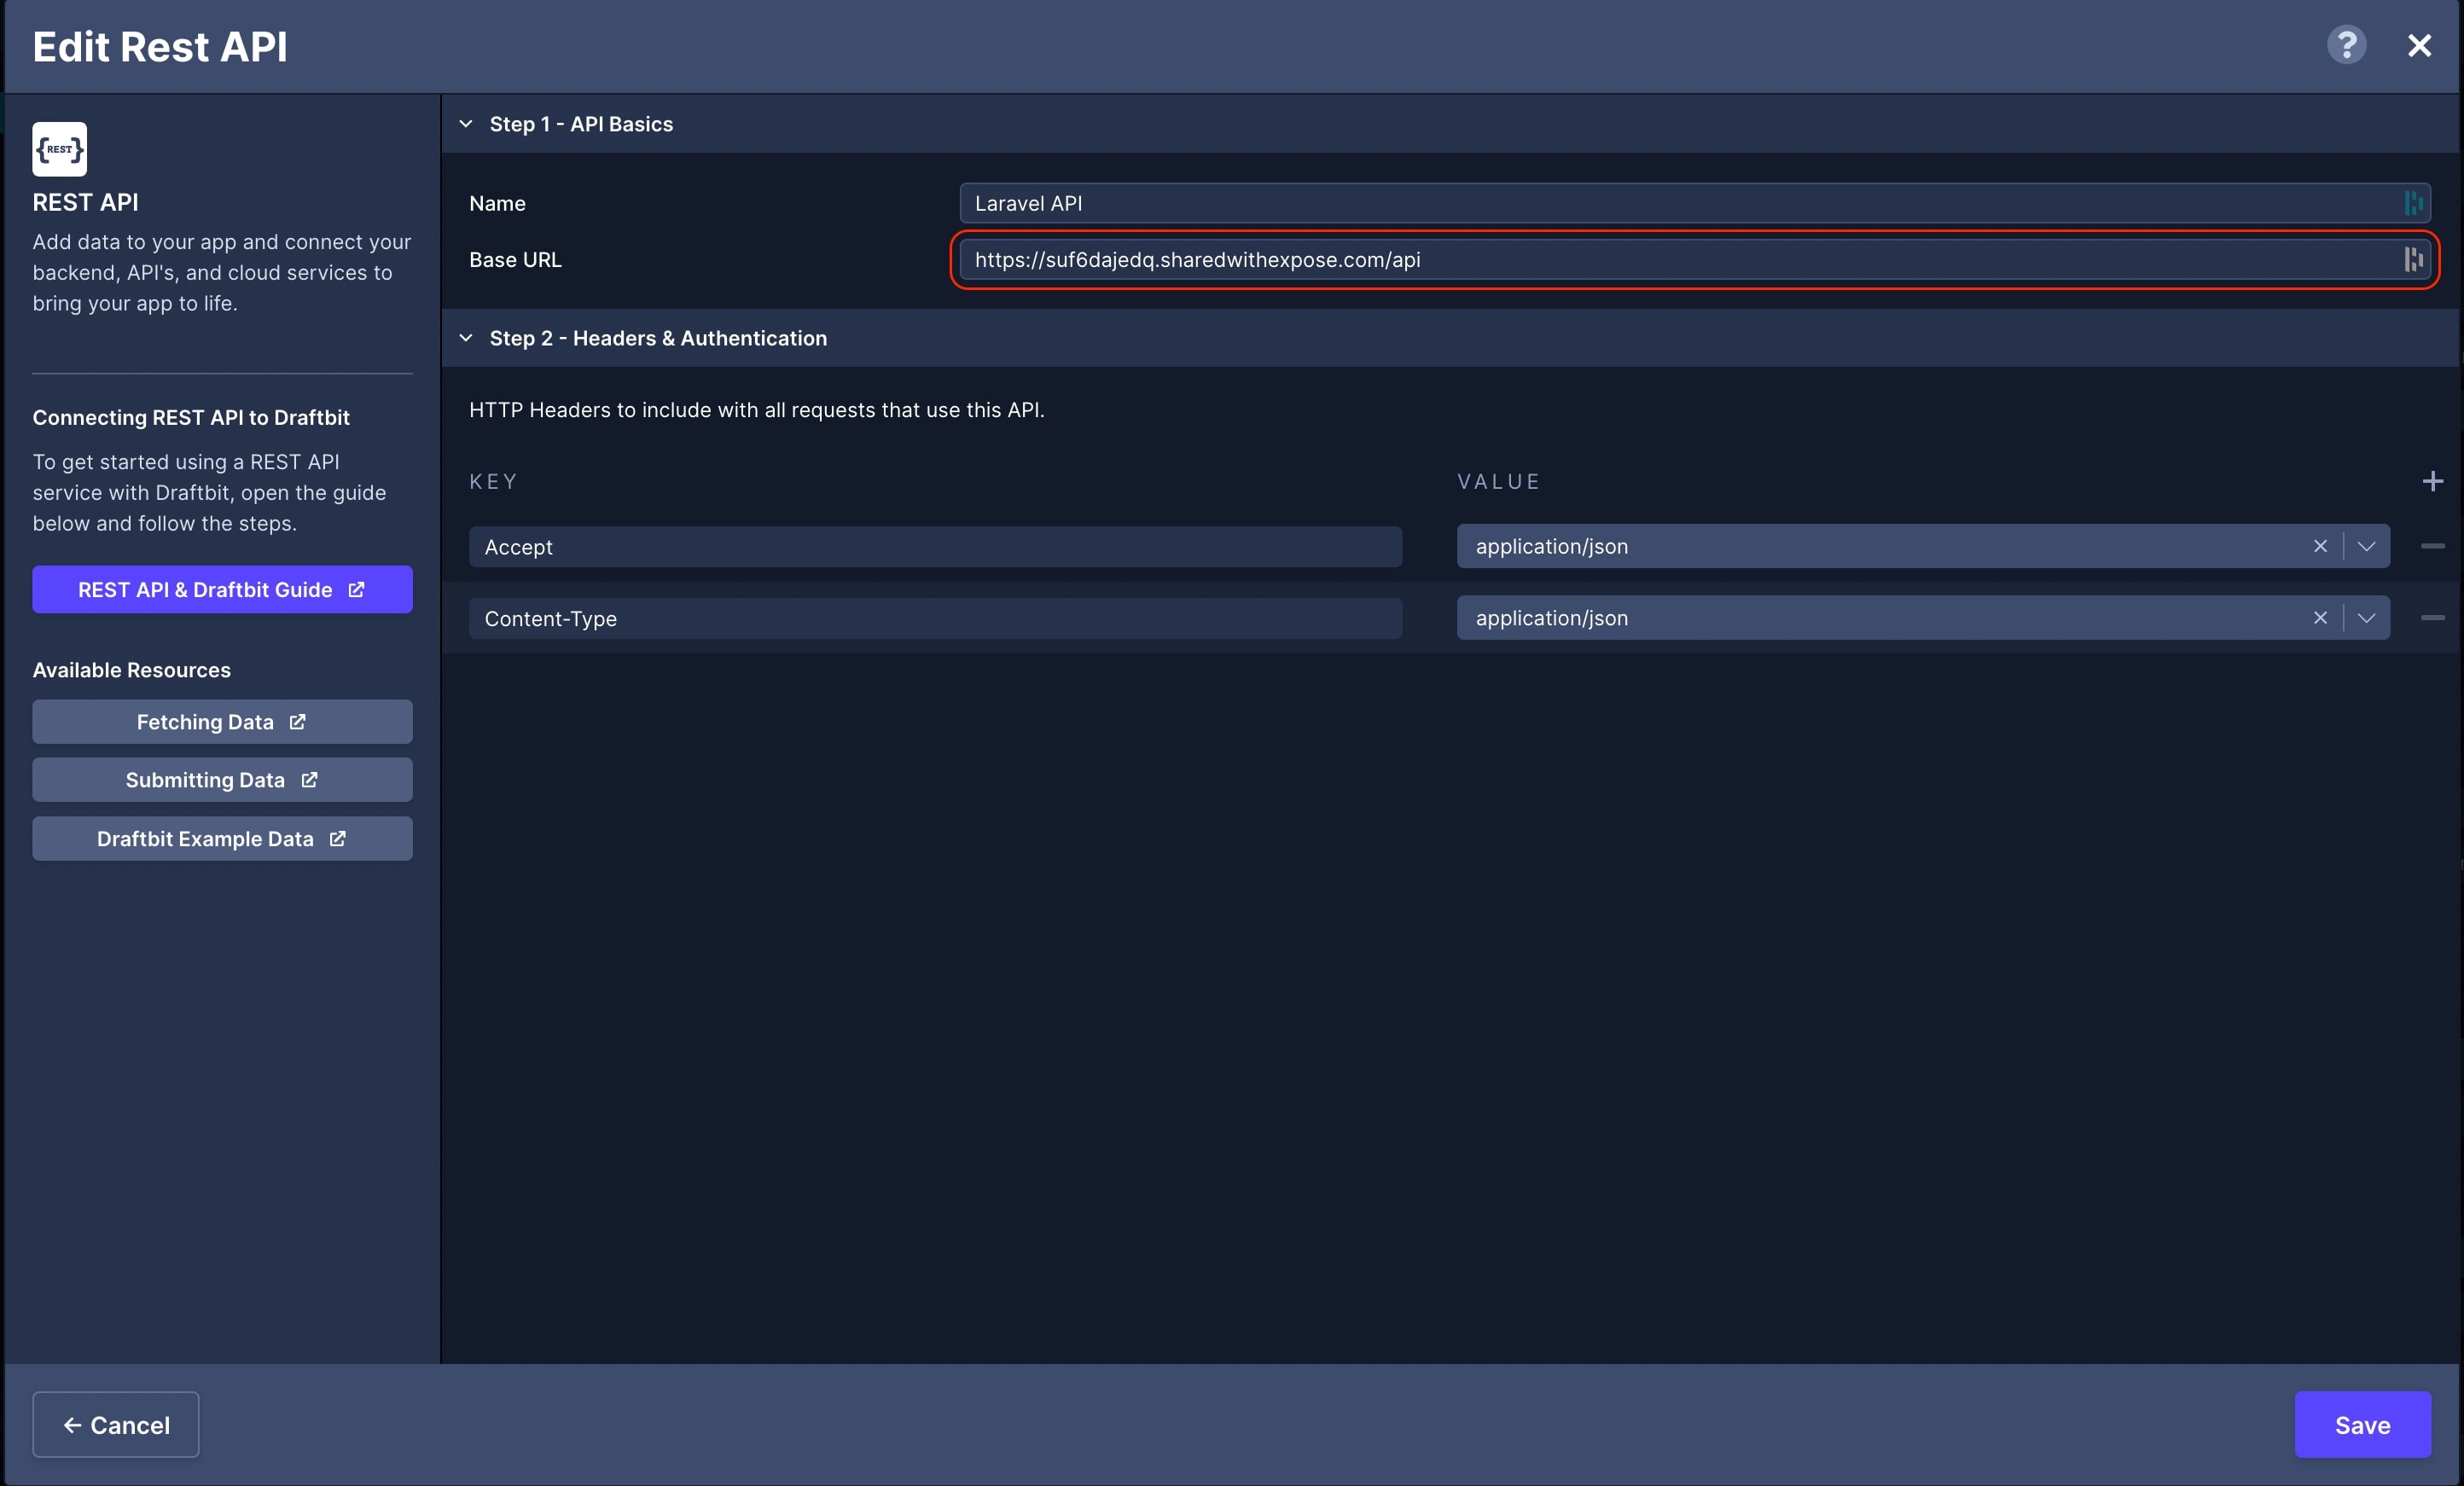
First thing we need to do is setup our base connection under the Data tab in Draftbit. This is where Expose comes in and you’ll need to have your site accessible via an Expose share link.
Give your new API connection a name and paste your Expose share link + your API base path into the Dev URL or Prod URL field. This can vary depending on how you setup your routes earlier in Laravel.
We’ll leave the default headers. Save the connection when finished.
Custom API endpoints
Section titled “Custom API endpoints”Next, we need to setup our Login and Logout endpoints.
Login Endpoint
Section titled “Login Endpoint”Endpoint Basics
Section titled “Endpoint Basics”- Name:
Login - Method:
POST - Role: Leave unset
- Object Type: Leave unset
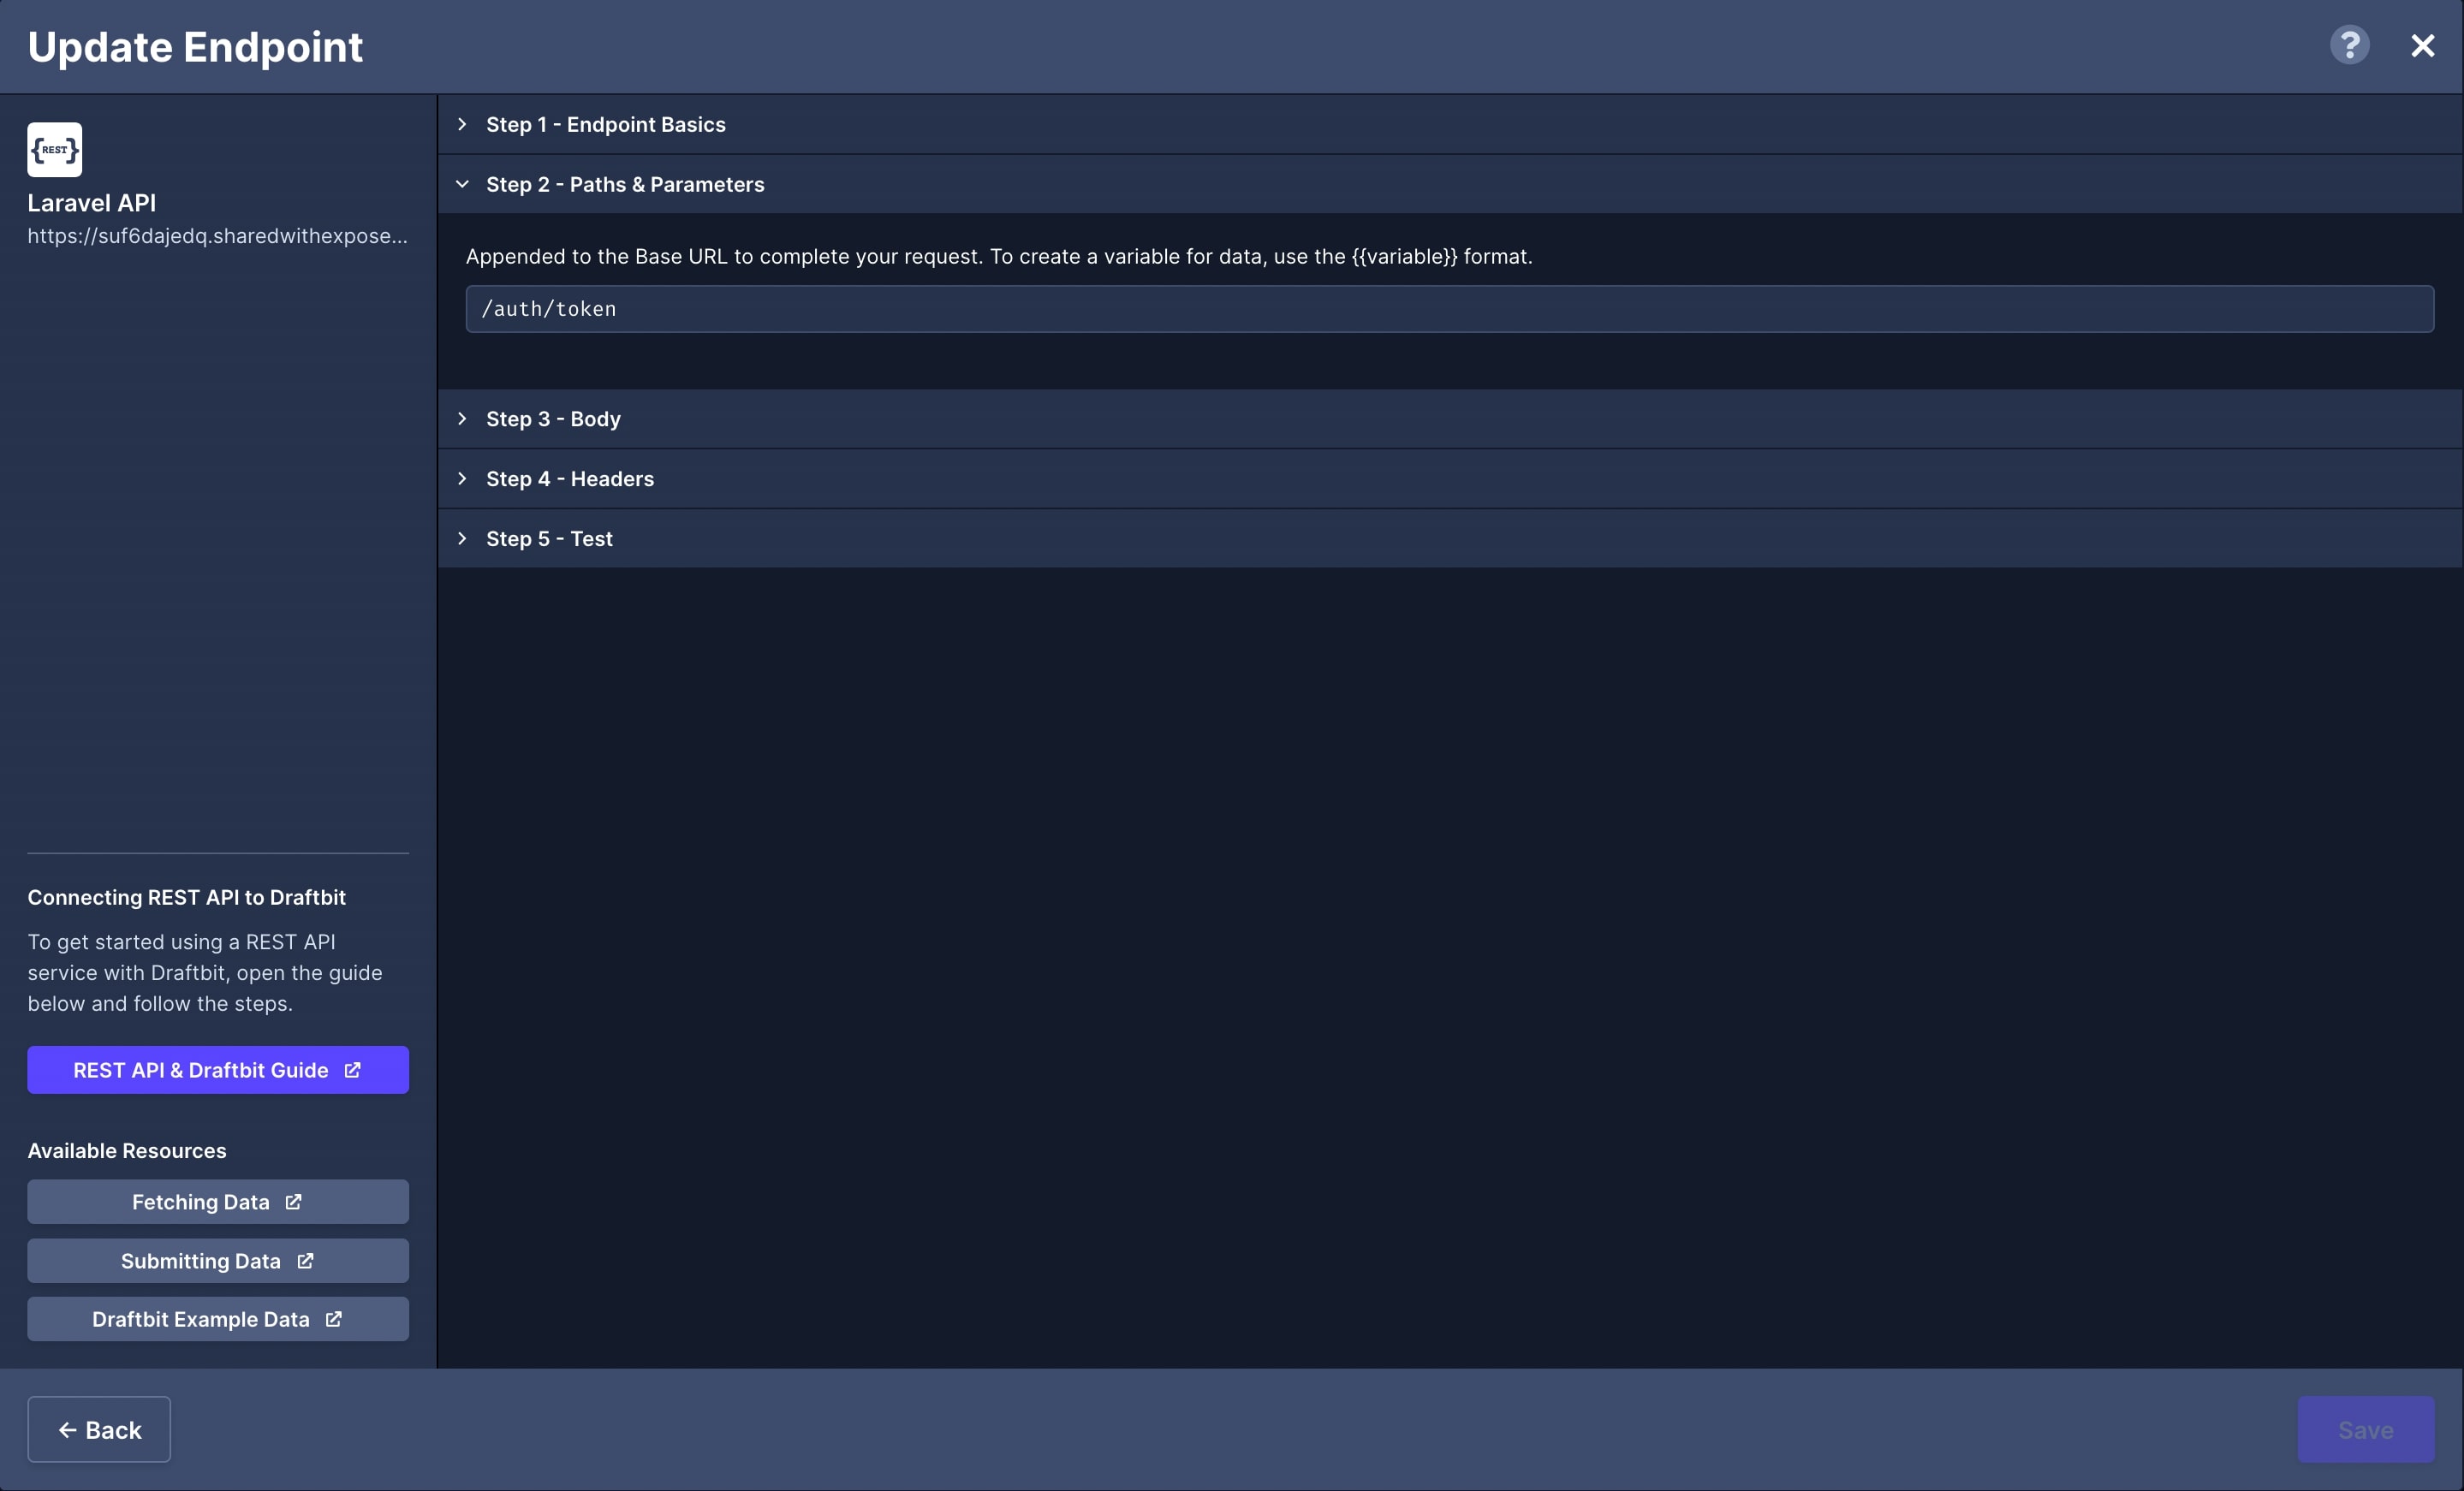
Path & Parameters
Section titled “Path & Parameters”- Path:
/auth/token
(may be different depending on how you setup your routes)
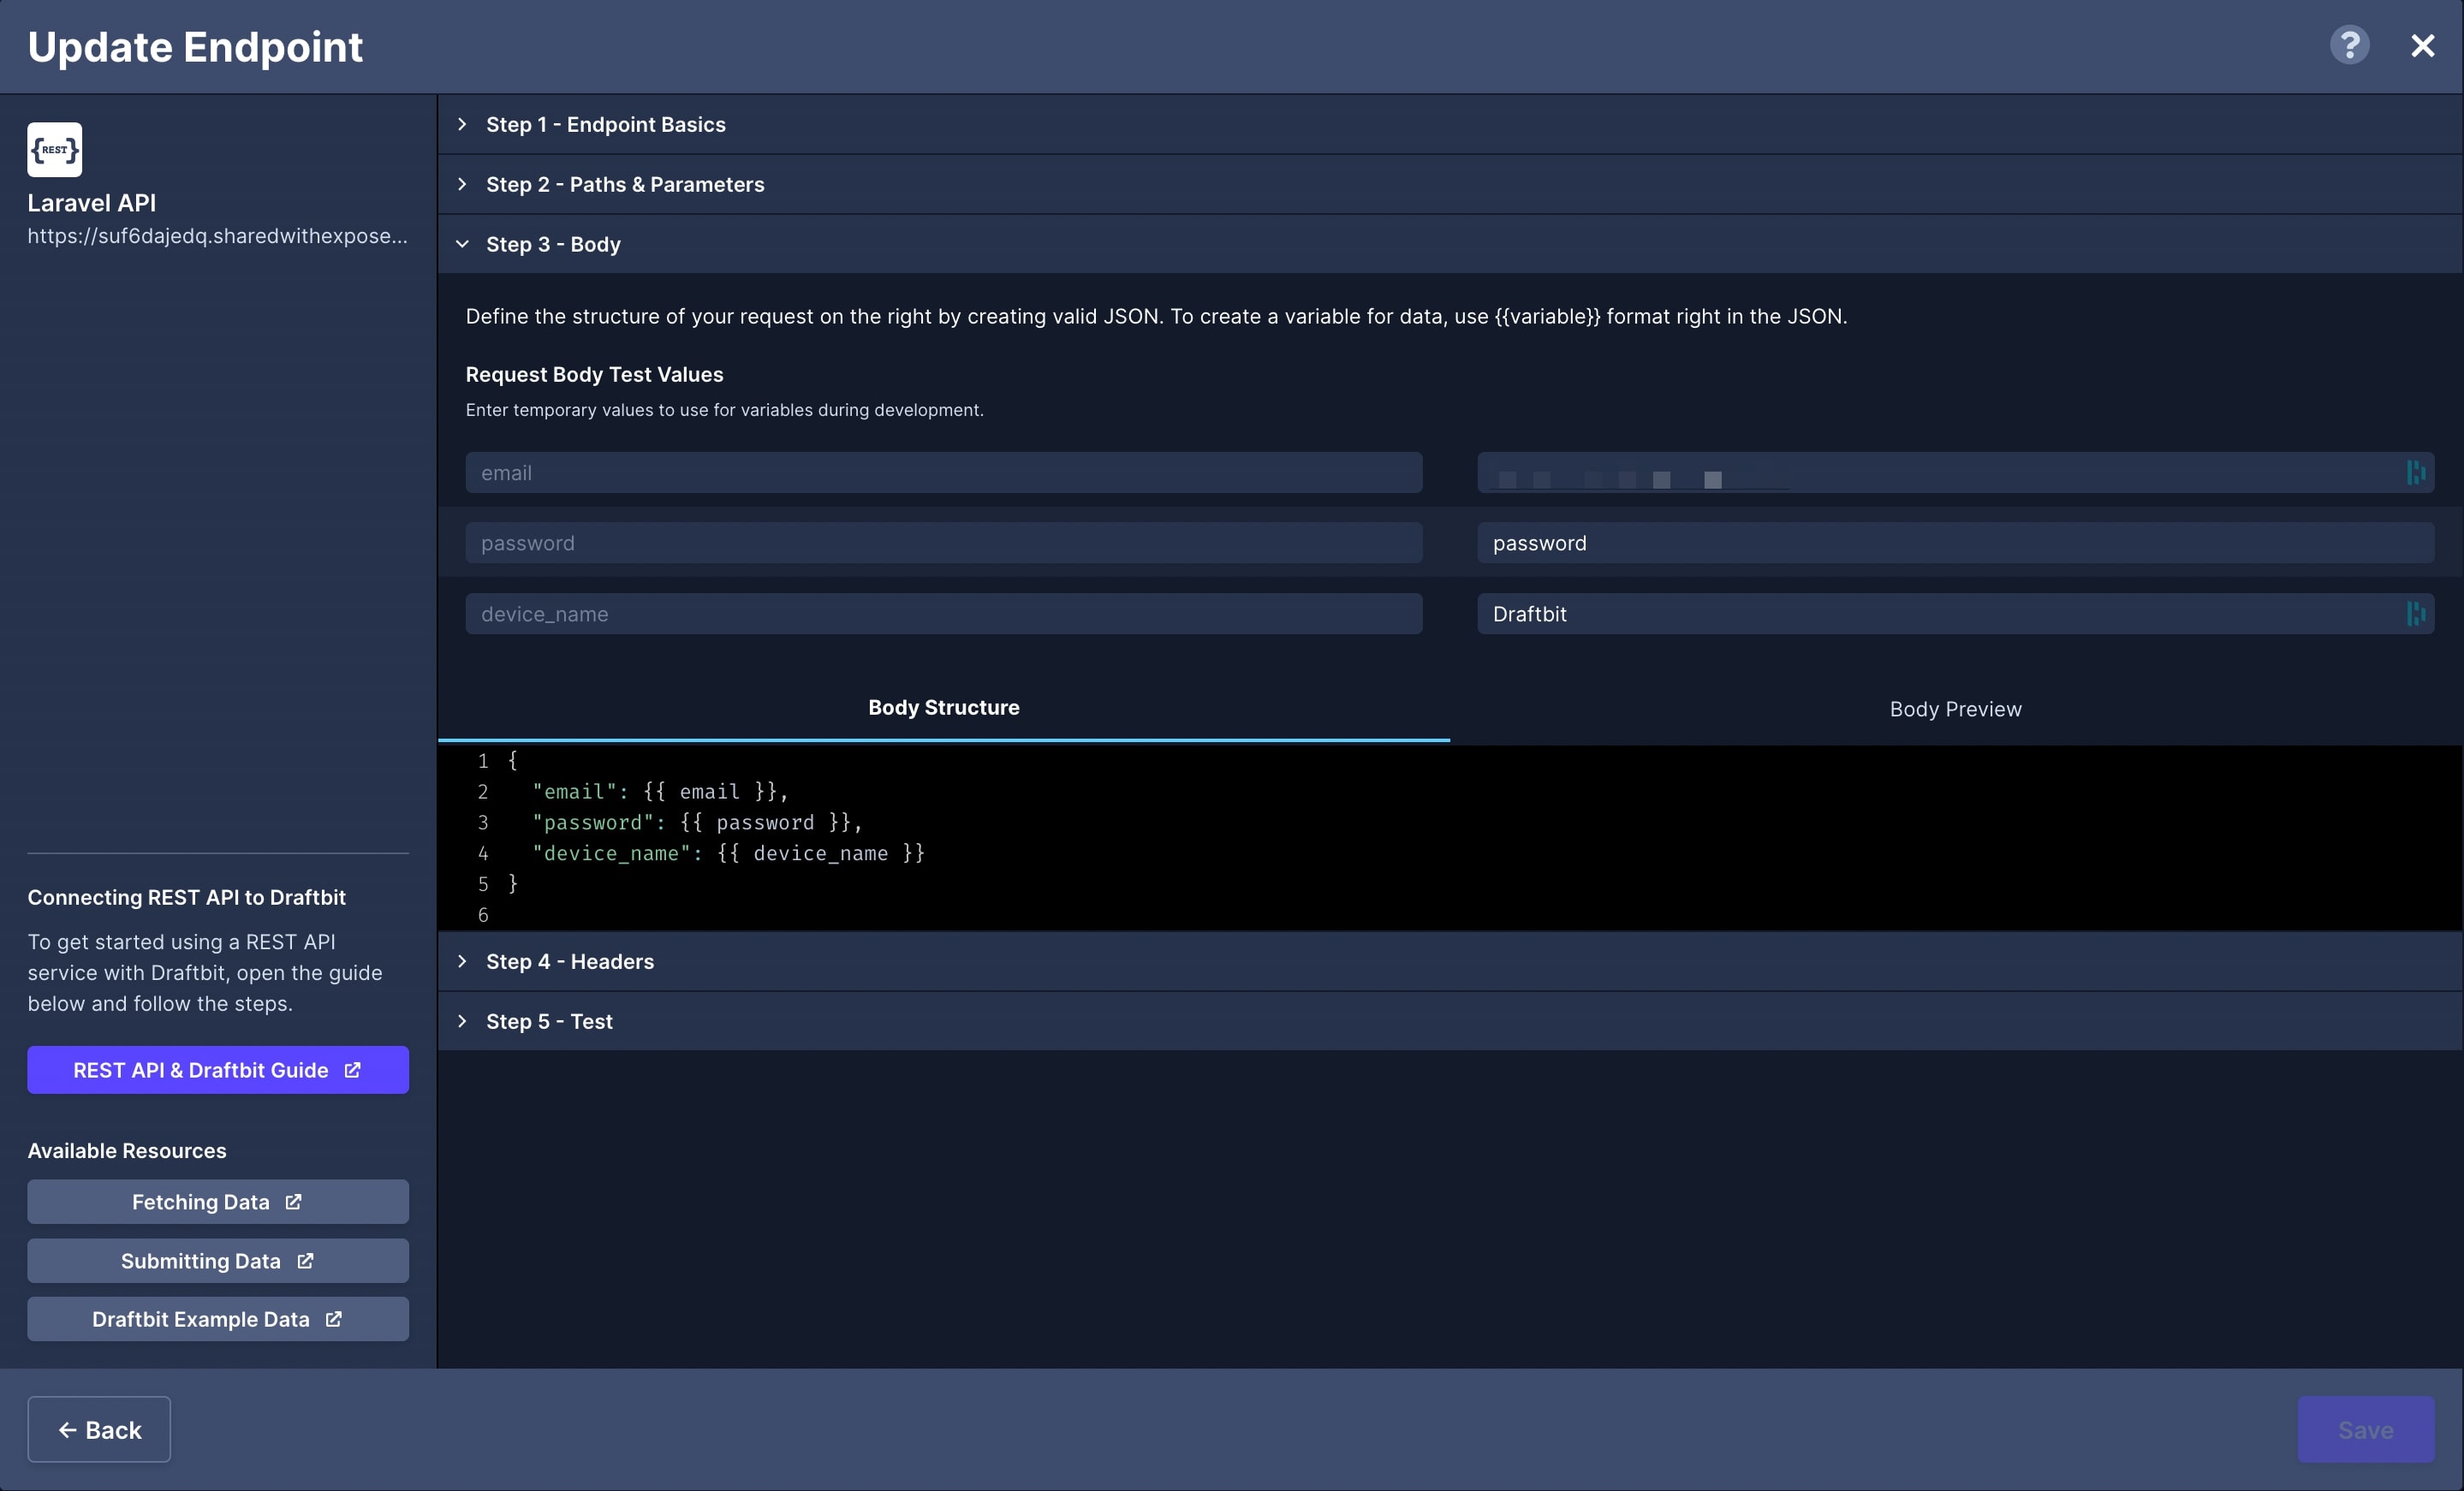
{ "email": {{ email }}, "password": {{ password }}, "device_name": {{ device_name }}}For the test values, enter a valid email and password for your Laravel application and a device name.
Headers
Section titled “Headers”We will keep the two default headers (Accept & Content-Type) set to application/json.
Double check that your endpoint looks correct and then click the ‘Test’ button. When successful, you should receive a response that looks like this:
{ "id": 1, "name": "Dave", "email": "noreply@draftbit.com", "token": "2|fYQelzPGFviDSxtz5Q5oY54QxnzBeuRKpJPO3jNF"}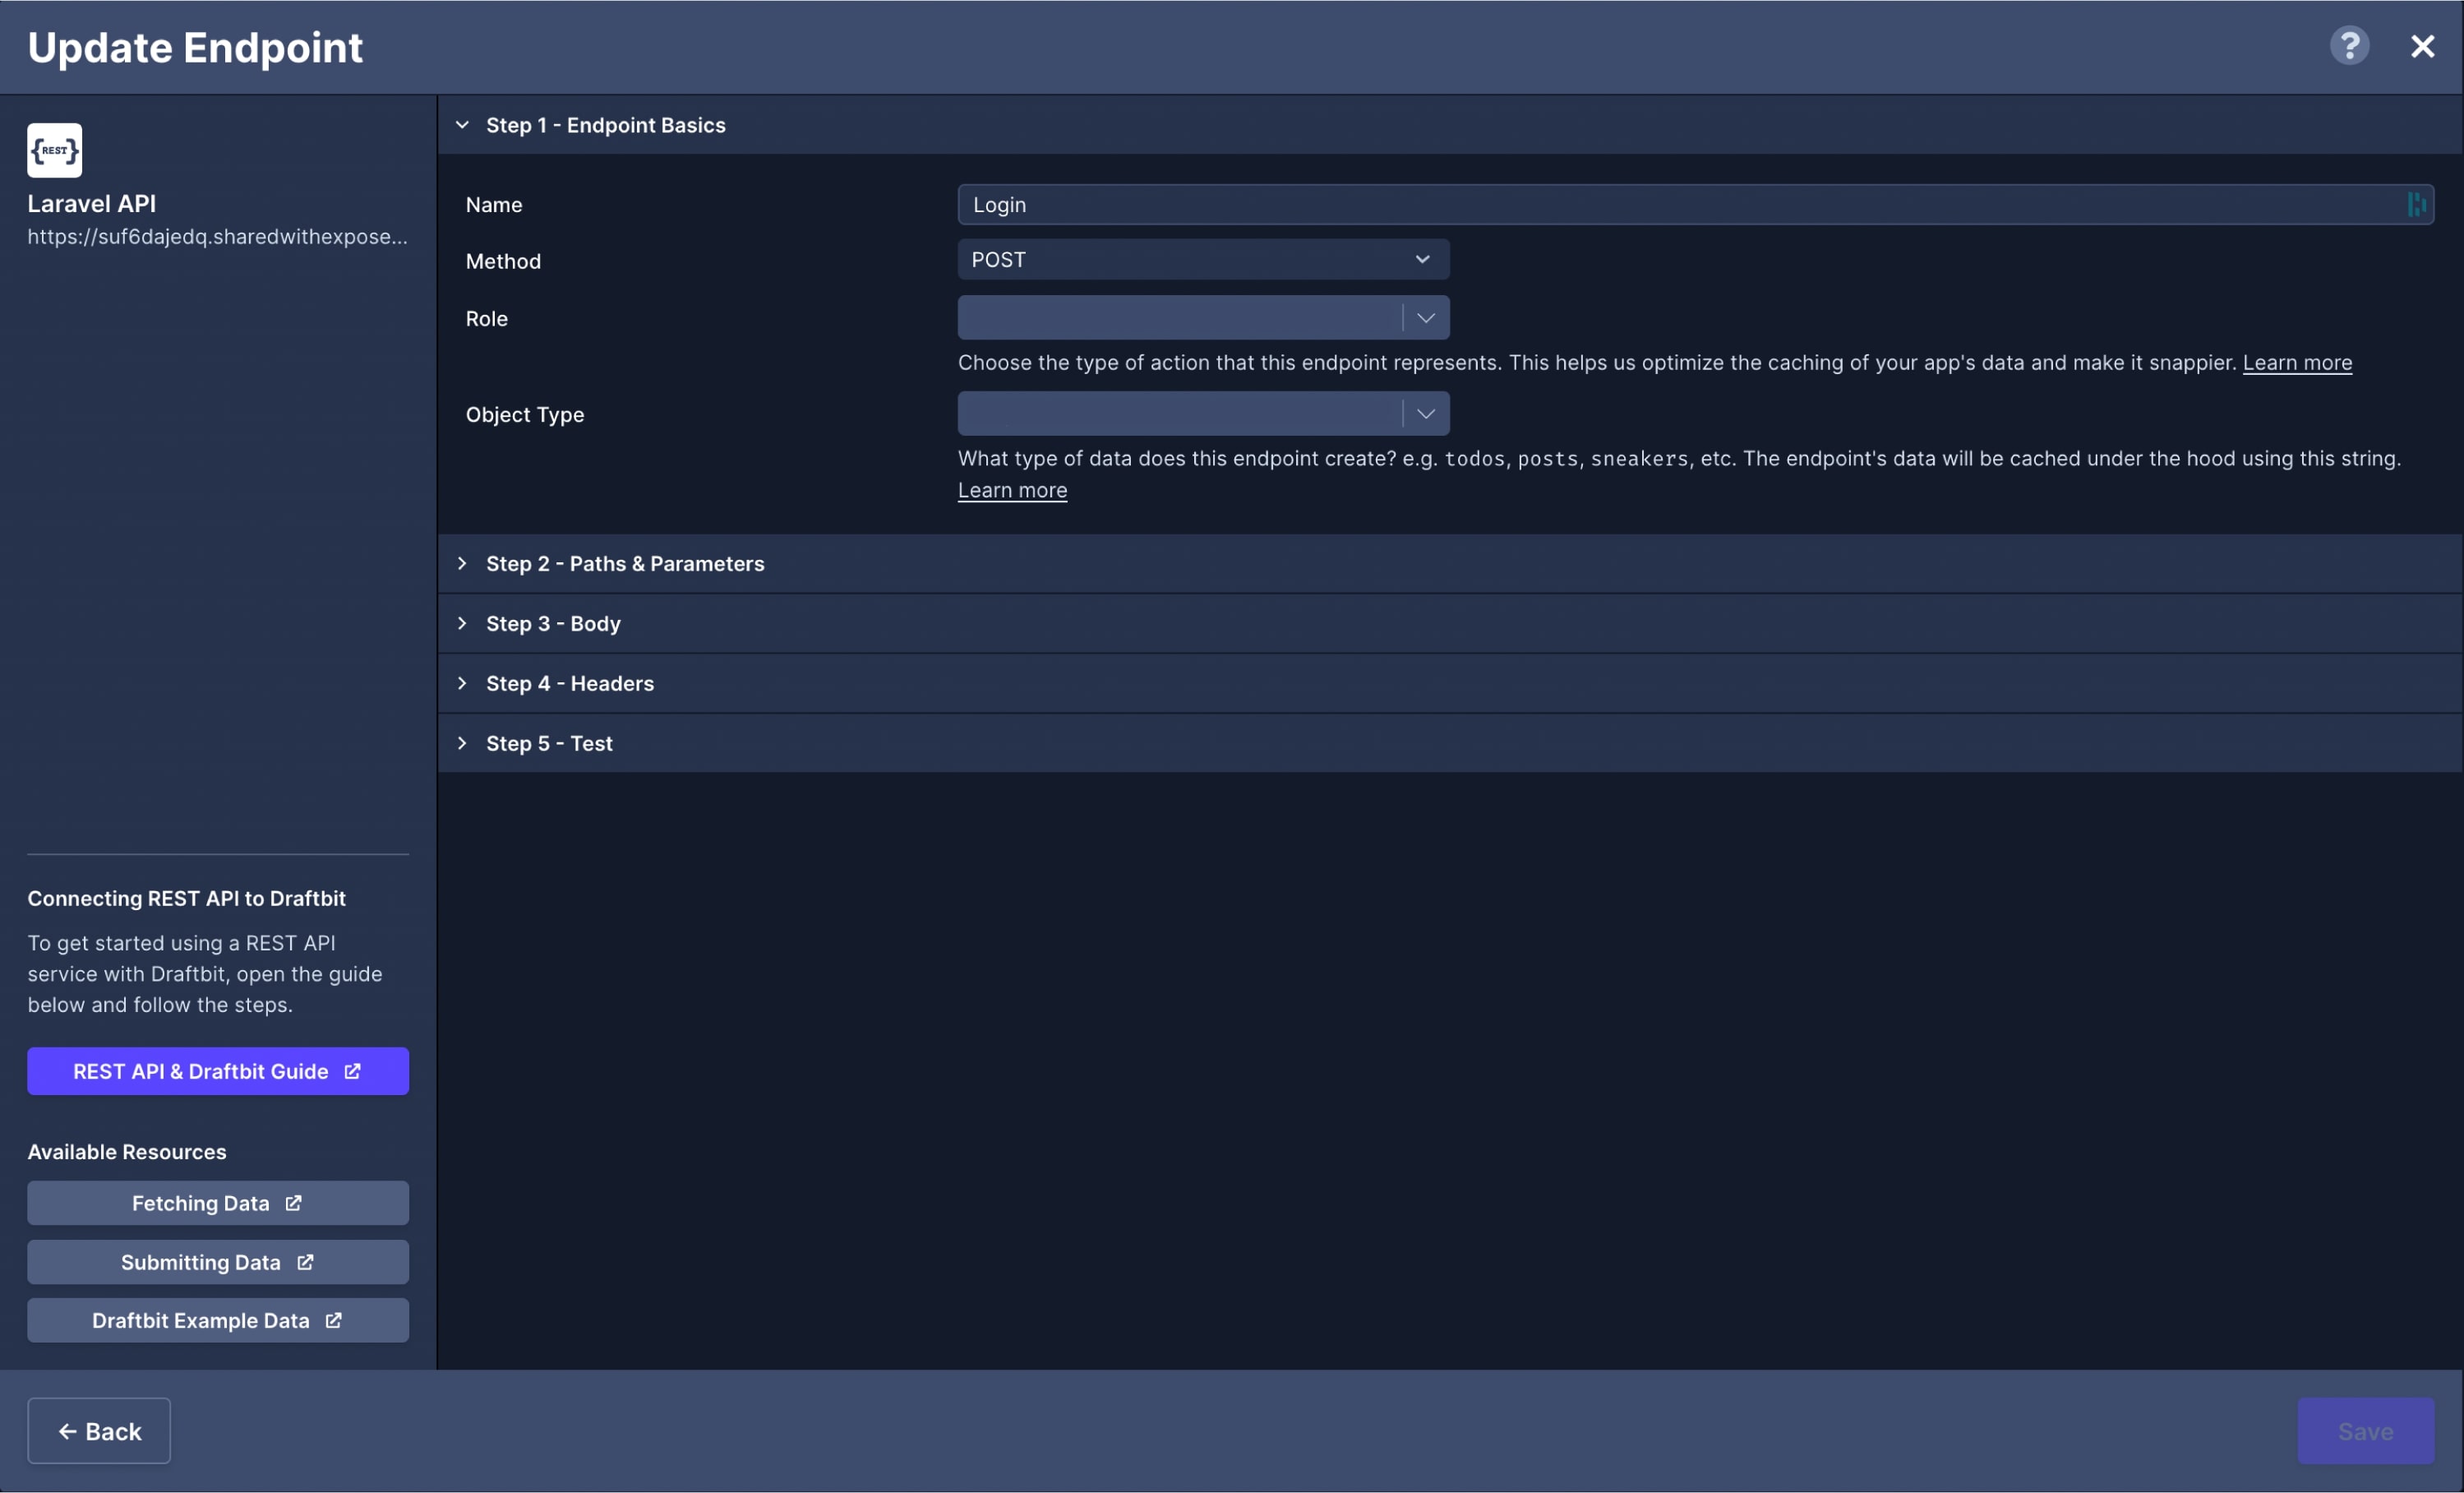
Update Device Variable
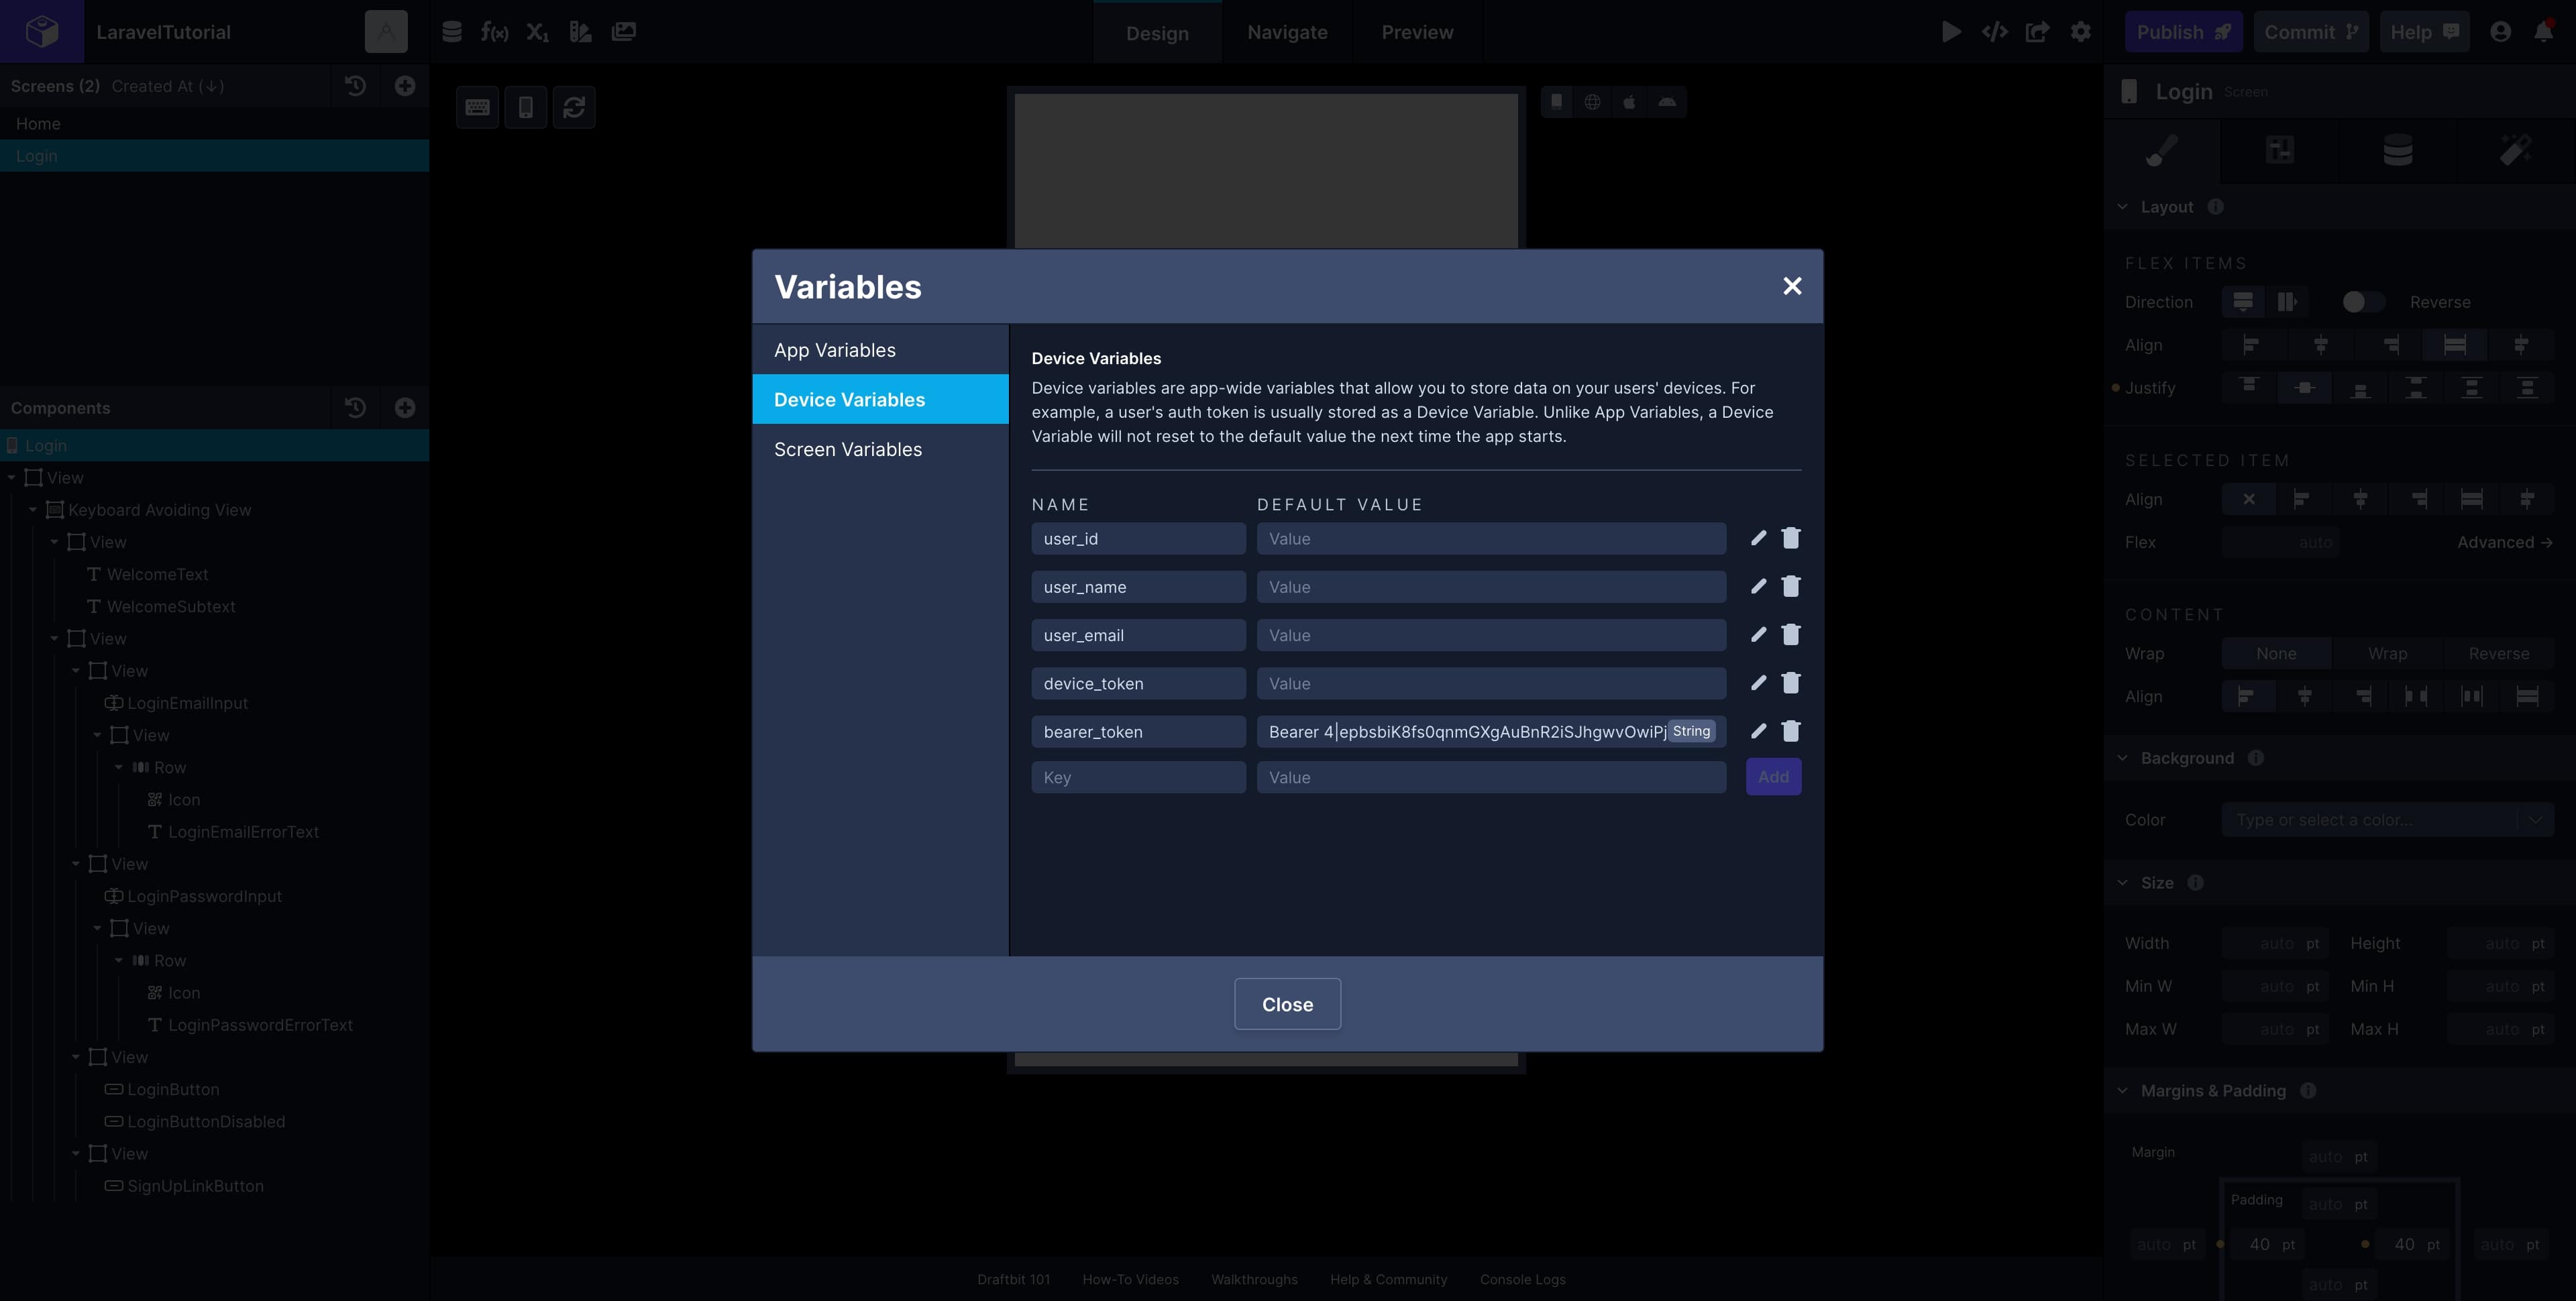
Section titled “Update Device Variable”Copy the returned token, open up the Device variables, and update the default value for our bearer_token variable with the token we just received prepended with Bearer. This will allow us to test our Logout endpoint which we will configure next.
Logout Endpoint
Section titled “Logout Endpoint”Endpoint Basics
Section titled “Endpoint Basics”- Name:
Logout - Method:
DELETE - Role: Leave unset
- Object Type: Leave unset
Path & Parameters
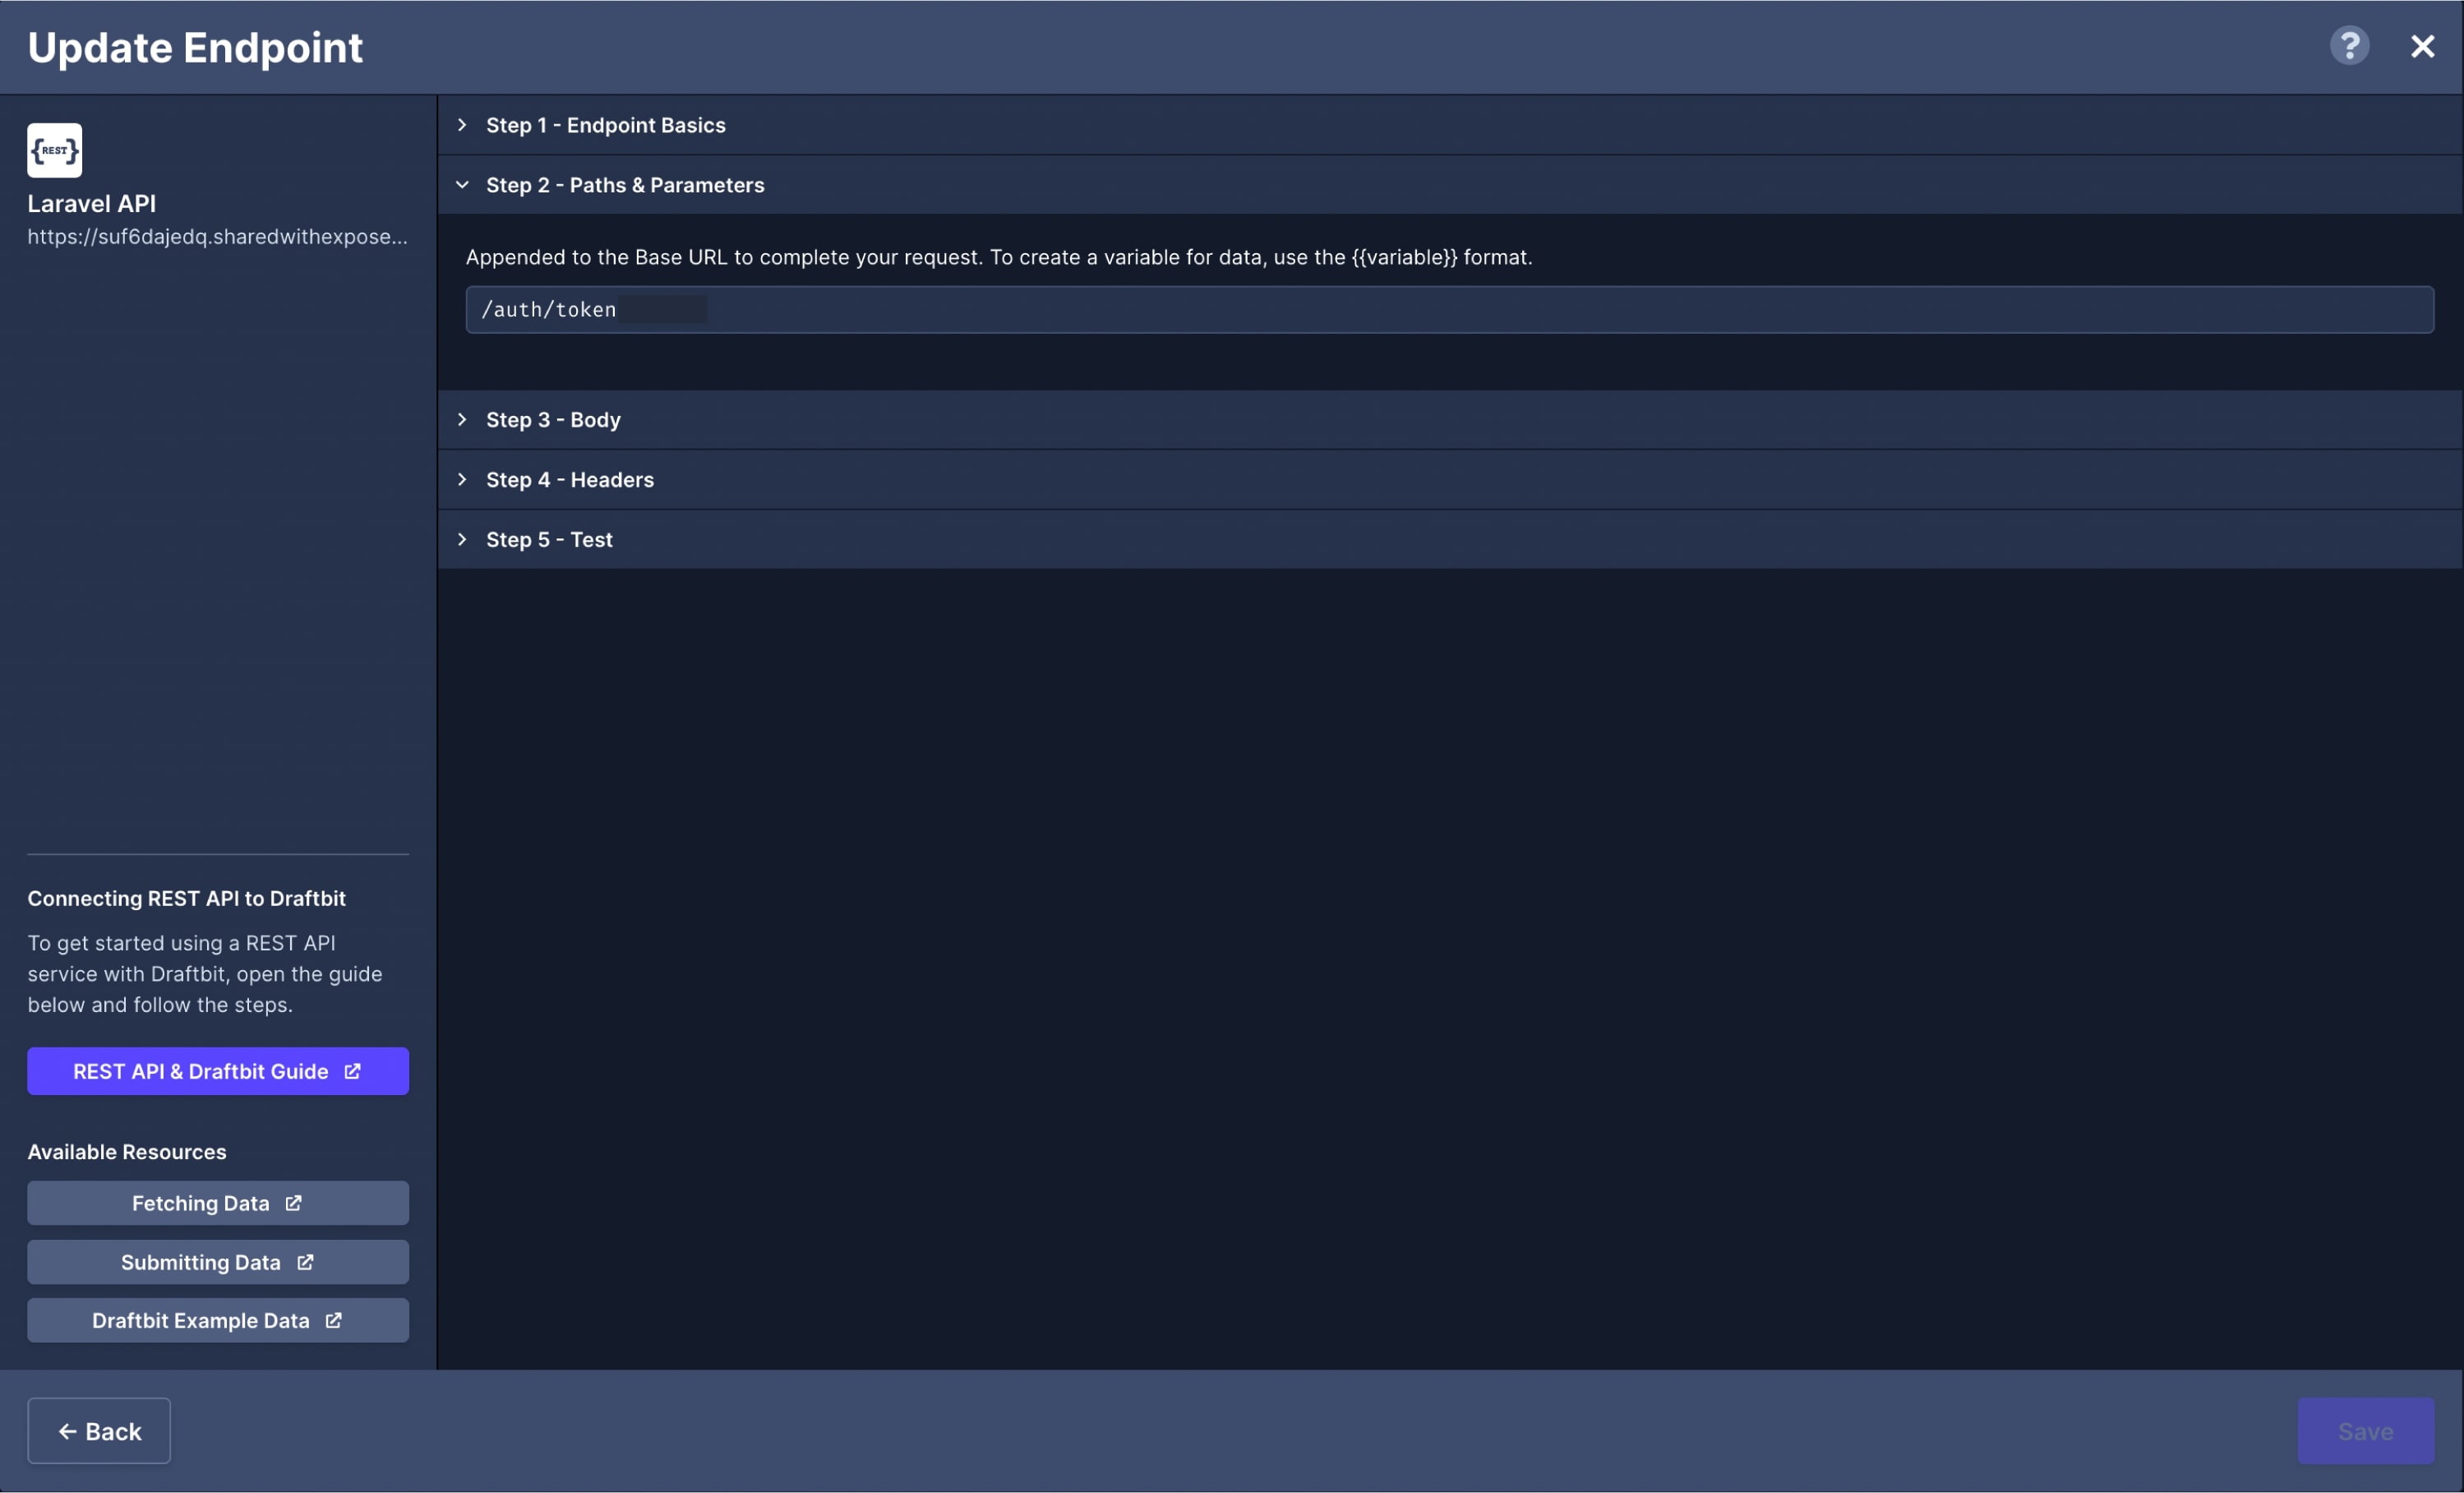
Section titled “Path & Parameters”- Path:
/auth/token
(may be different depending on how you setup your routes)
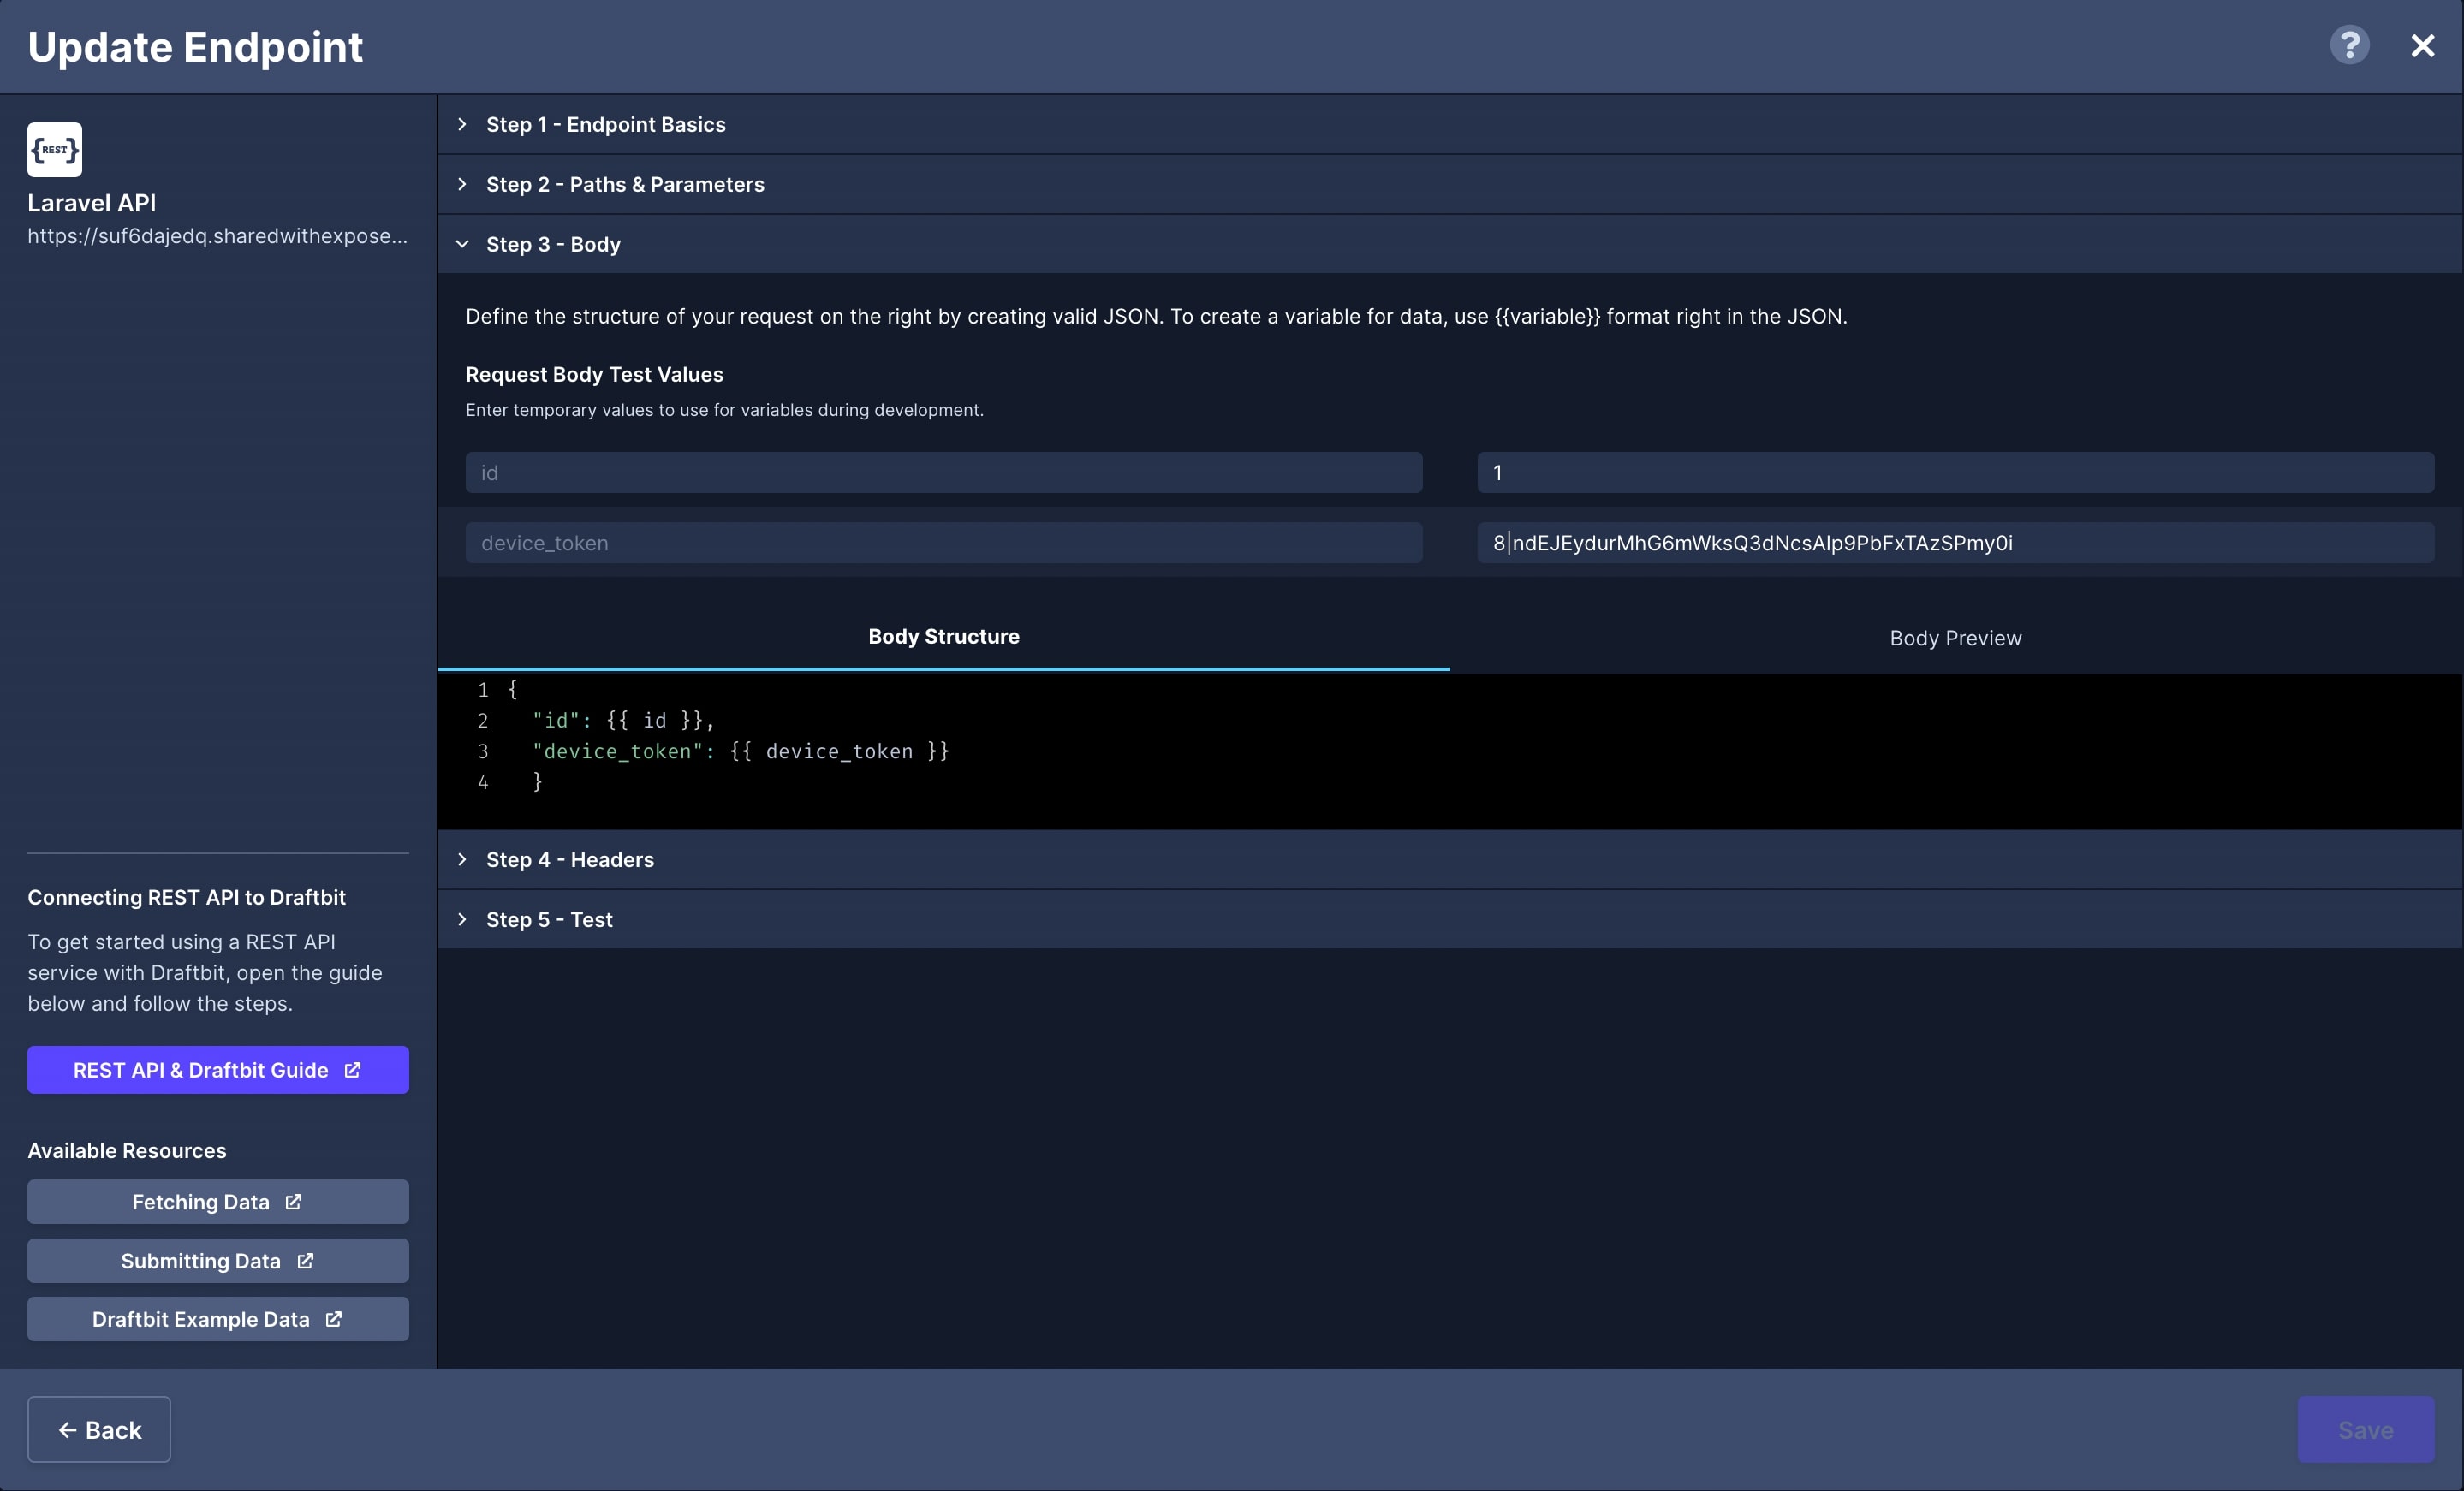
{ "id": {{ id }}, "device_token": {{ device_token }}}For the test values, enter the user id and token you received in the response from the Login Endpoint test.
Headers
Section titled “Headers”Here we’ll need to add an Authorization header and set the value to our bearer_token Global variable.
Double check that your endpoint looks correct and then click the ‘Test’ button. When successful, you should receive a response that looks like this:
{ "message": "success"}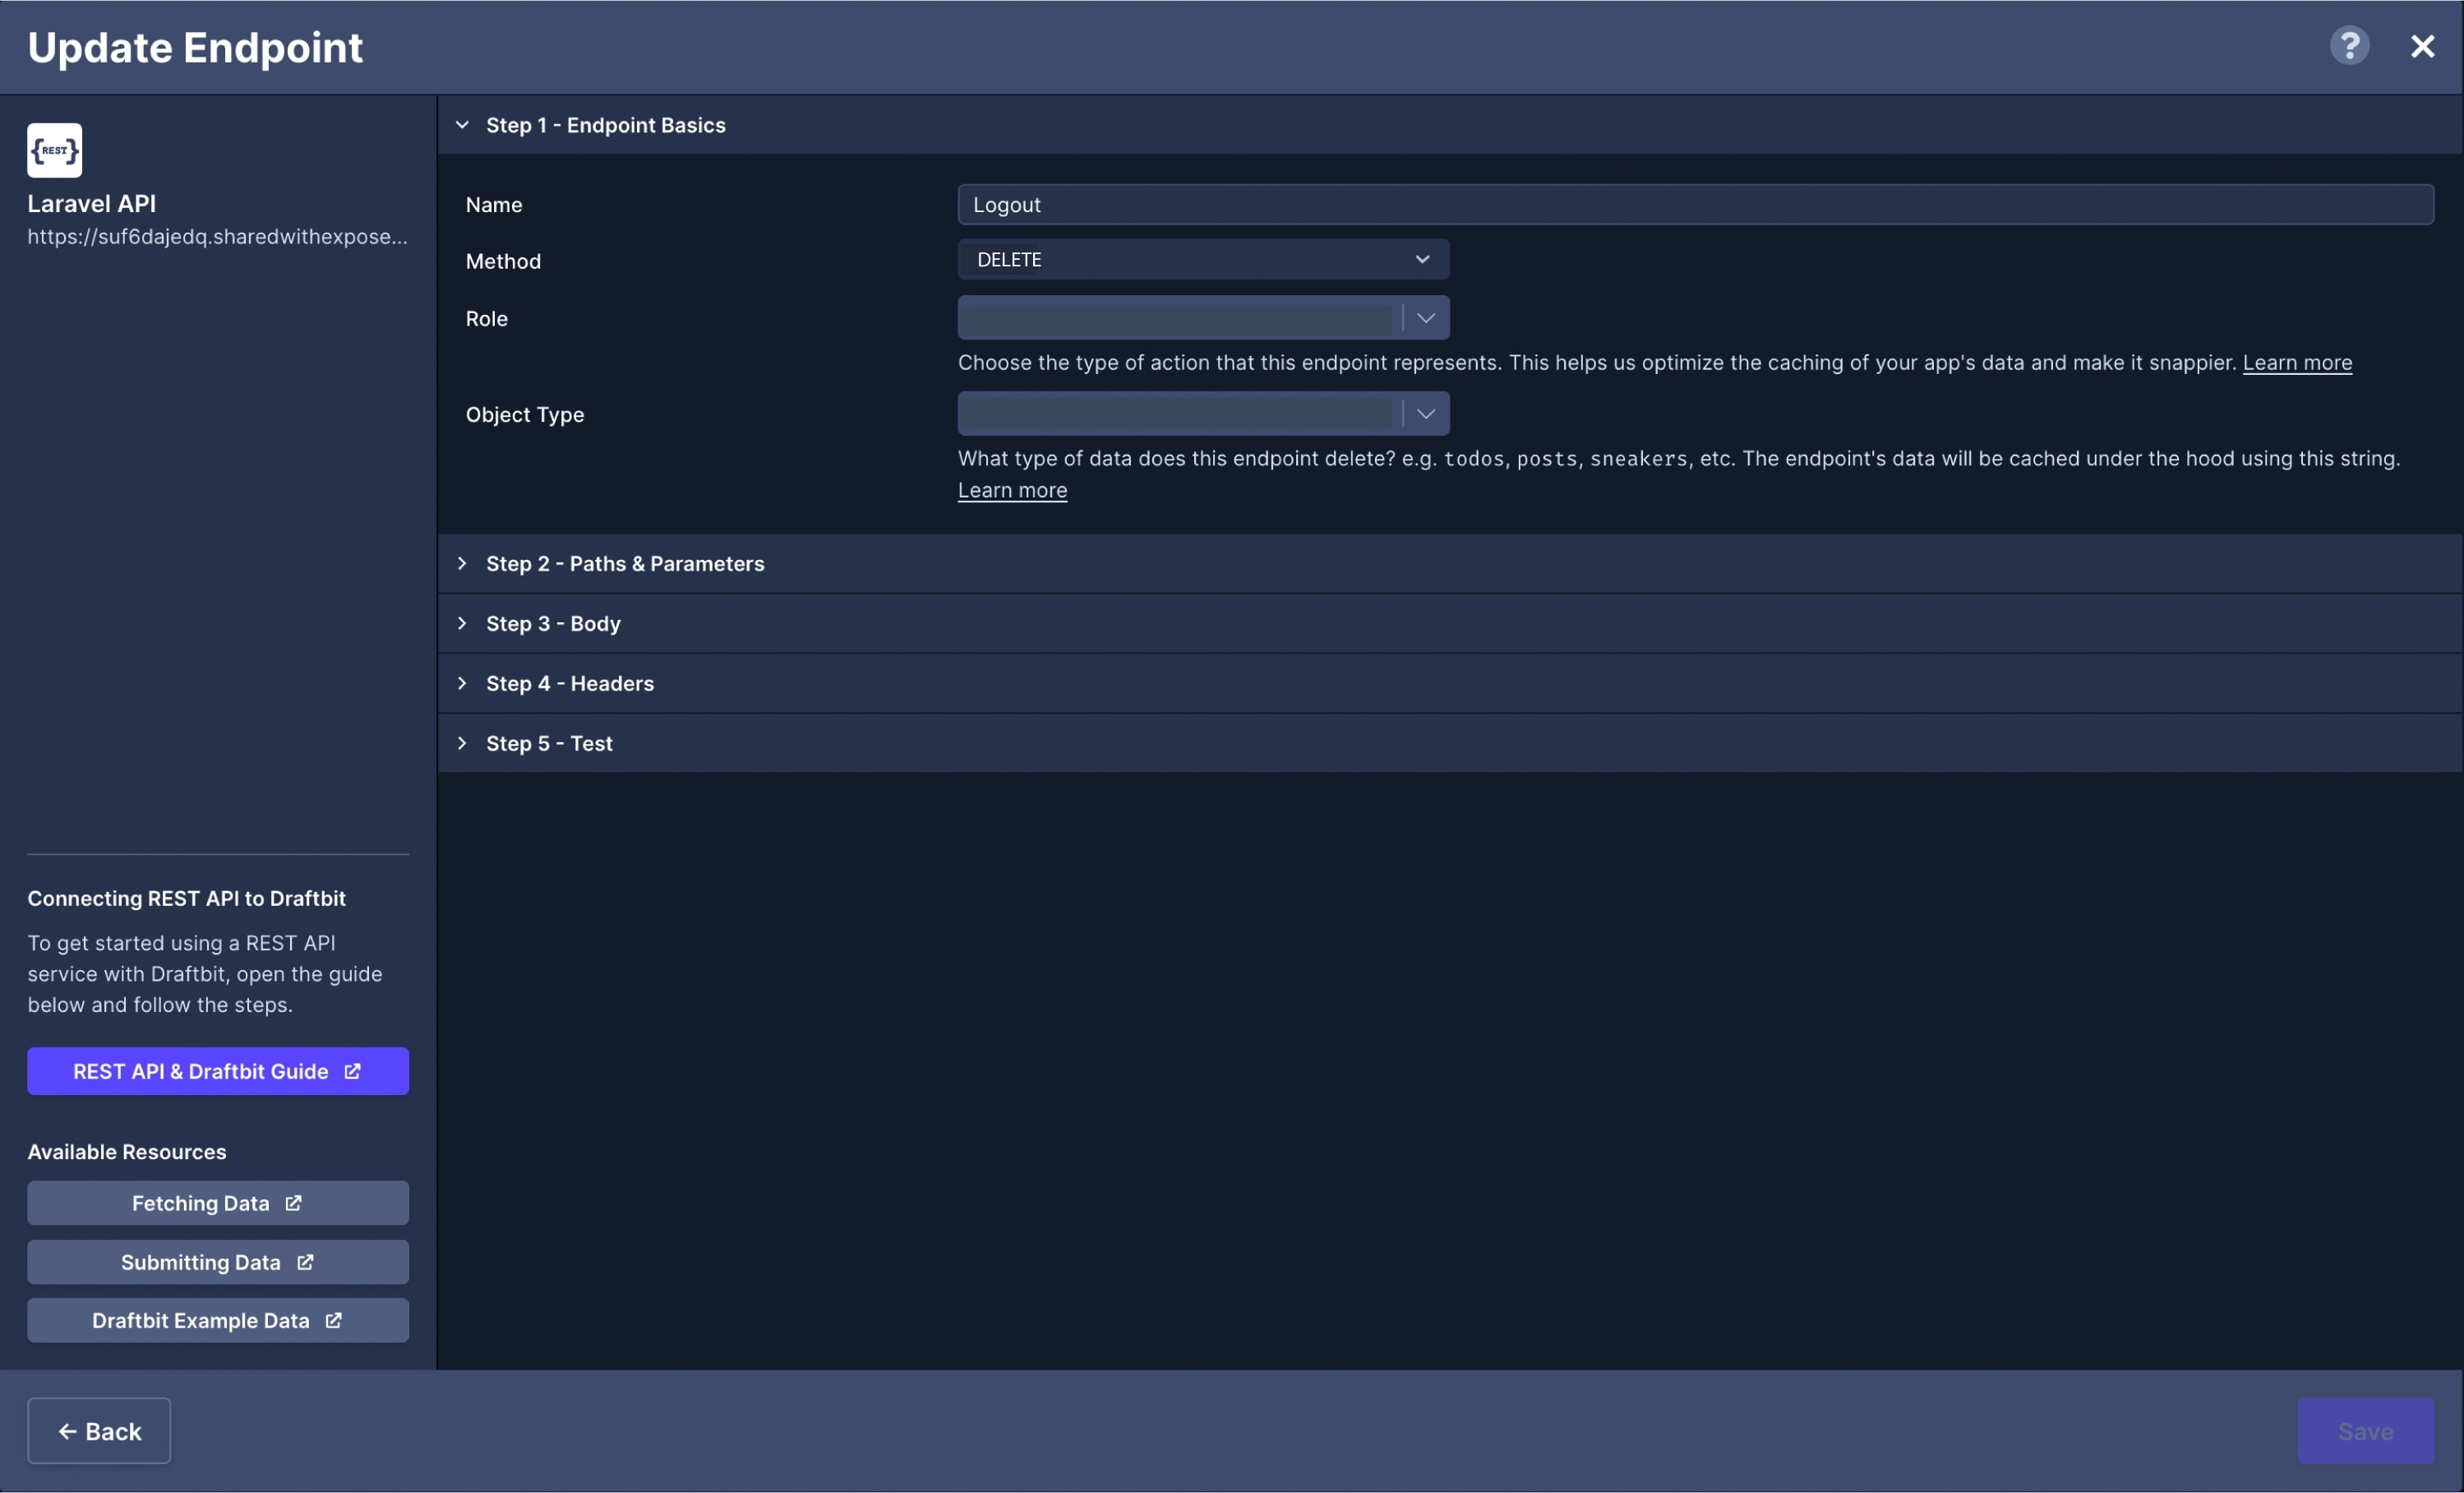
Login Screen
Section titled “Login Screen”Making progress! Ok, so now we need to setup our Login Screen’s components, custom code, and button actions.
Screen Components
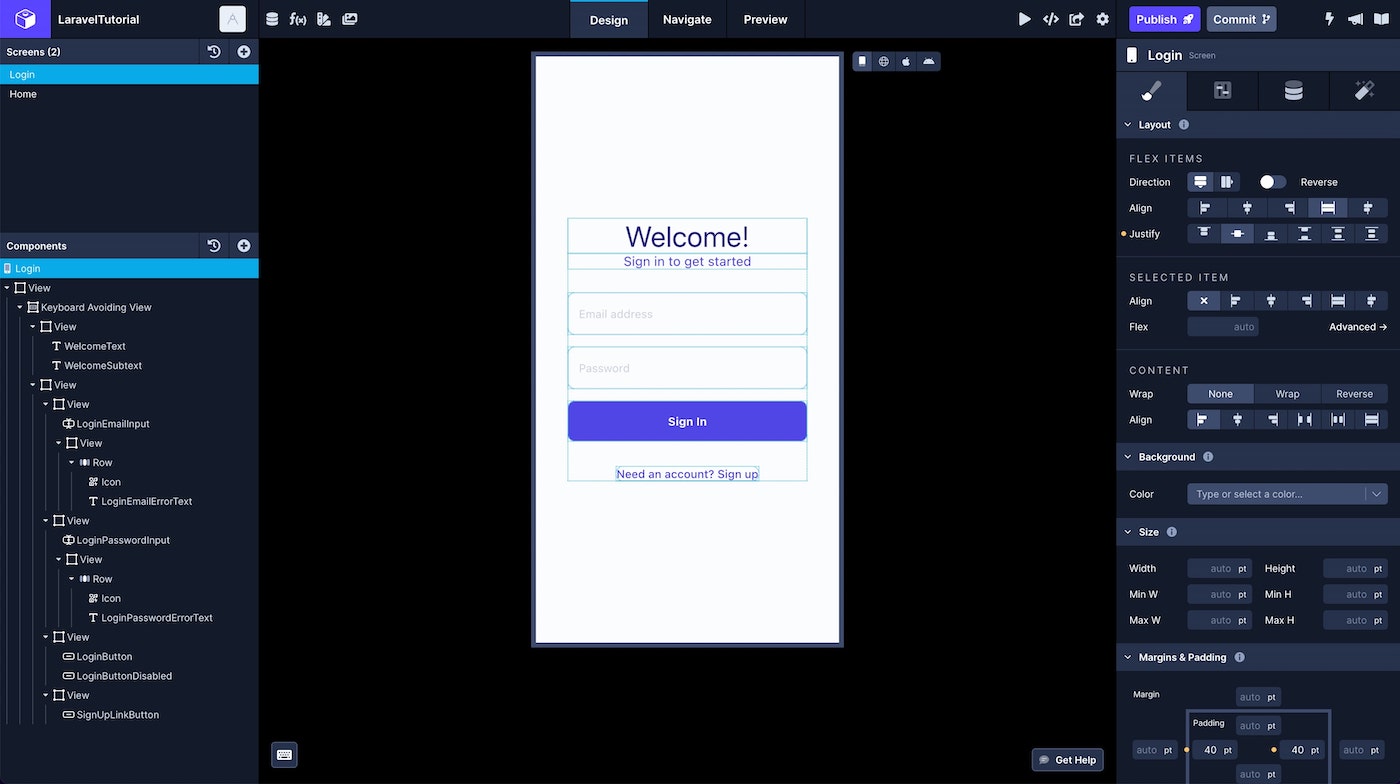
Section titled “Screen Components”We’ll need at least 5 components:
- Email input
- Password input
- Email error text
- Password error text
- Login button
You can name the components and fields however you prefer. We will come back to these components later and further configure them once we have setup our custom code and actions.
Here’s what mine looks like:
Custom Code
Section titled “Custom Code”Draftbit is able to do some things without writing code, but they also provide a way for you to add your own custom code when you require functionality that doesn’t have a built-in Action yet or just want to handle logic via code instead of an Action.
In fact, most of what we’re doing here with custom functions can be done using Draftbit’s built-in Actions, however I’ve moved some of that logic to the custom functions we’ll be using.
Accessing global variables
Section titled “Accessing global variables”In order to get and set the Global Variables we setup earlier, we’ll add the following line to our Custom Code Components:
export {useValues, useSetValue} from './config/GlobalVariableContext';Then we need to create a new Inline Code Custom Hook and add the following:
const variables = CustomCode.useValues();const setVariable = CustomCode.useSetValue();For more detailed information you can checkout this link in the Draftbit docs.
Redirecting an authenticated user
Section titled “Redirecting an authenticated user”Typically if a user is already authenticated you want to skip the Login screen and send them straight to the Home screen when they open the app.
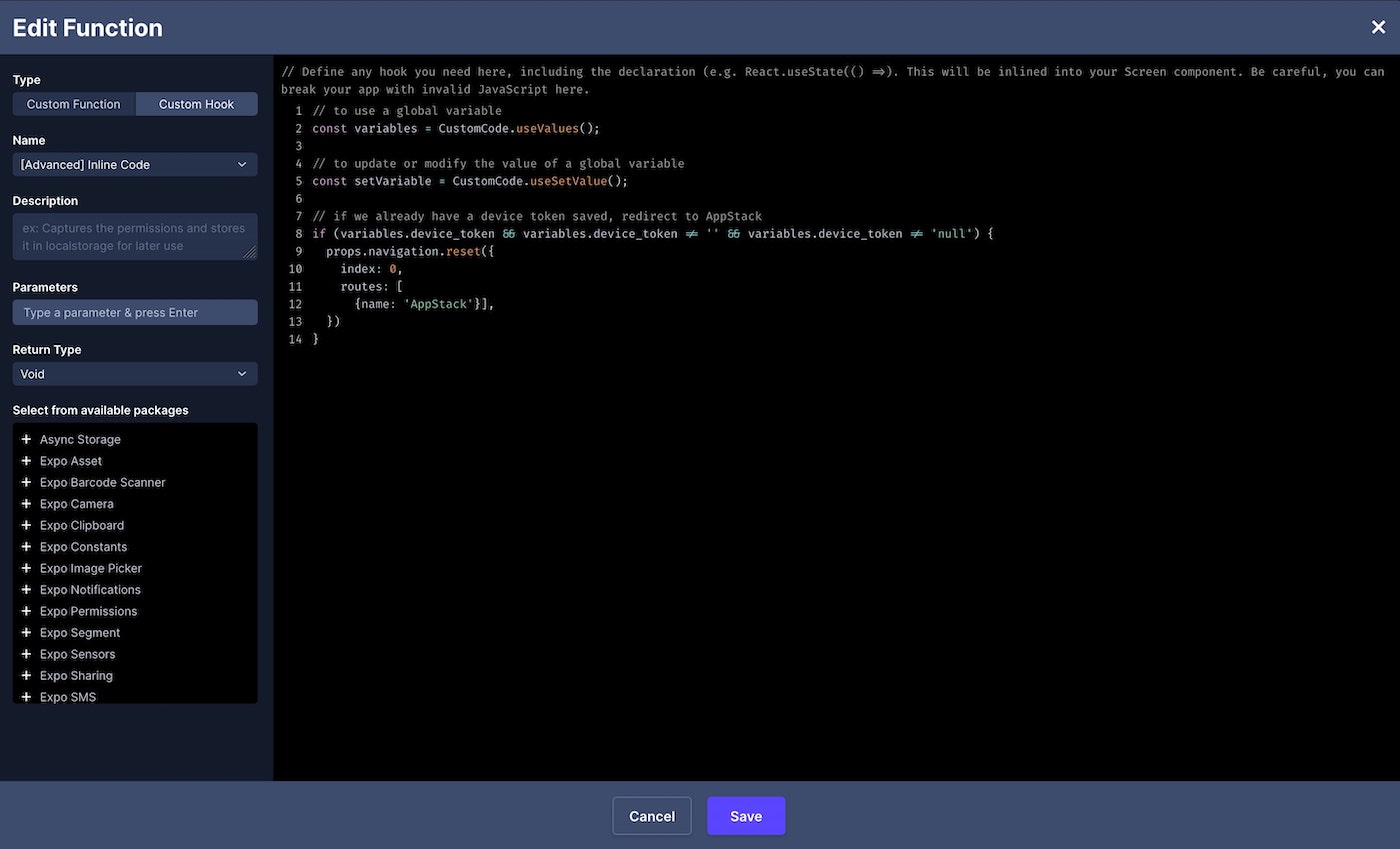
We can accomplish that by inserting this snippet below the export we previously added to the Inline Code Custom Hook.
if (variables.device_token && variables.device_token != '' && variables.device_token != 'null') { props.navigation.reset({ index: 0, routes: [{name: 'AppStack'}] })}This code checks to see if we have a device token currently stored in our device_token Device variable. If we do, then we know the user has been authenticated and redirect them to the AppStack.
Here’s what my Login screen’s Inline Code Custom Hook looks like:
Handling authentication errors
Section titled “Handling authentication errors”Next we need a custom function to handle the errors we might get back from Laravel when we try to authenticate the user. We can do that by creating a new custom function named handleErrors and passing it a response parameter.
If a field has errors, we’ll grab the first one and set it as the value of the associated Screen variable which we’ll setup in the next section.
let errors = response.errors
if (errors != null) {    let email_error = 'email' in errors ? errors['email'][0] : null;    let password_error = 'password' in errors ? errors['password'][0] : null;
    setEmailError(email_error);    setPasswordError(password_error);}
Clearing authentication errors
Section titled “Clearing authentication errors”In order to clear our error messages, we’ll setup a new function named clearErrors and add the following code.
setEmailError(null);setPasswordError(null);Storing authentication data
Section titled “Storing authentication data”When the user’s authentication is successful, we’ll want to store the user data and device token that we received in the our response. We can do that by creating a new function named setGlobalVariables which receives a response parameter and contains the code below.
setVariable({ key: 'user_id', value: response.id });setVariable({ key: 'user_name', value: response.name });setVariable({ key: 'user_email', value: response.email });setVariable({ key: 'device_token', value: response.token });setVariable({ key: 'bearer_token', value: `Bearer ${response.token}` });Redirecting after authentication
Section titled “Redirecting after authentication”Once the user has been authenticated we’ll then want to redirect the user to our AppStack navigator. To do that let’s create a new function named redirectAfterLogin and insert the code below.
props.navigation.reset({ index: 0, routes: [{name: 'AppStack'}],})The reset method on the navigation prop removes the AuthStack from our navigation stack so that the user can’t go back once they’re signed in and replaces it with the AppStack whose initial route is set to the Home screen. You can read more about common navigation methods in their official docs.
Login Button Actions
Section titled “Login Button Actions”Actions are built-in functionality which can be assigned to buttons and other touchable components. They can be stacked in order to create a kind of logic flow. We’ll use them to authenticate our user.
1. Set Screen State
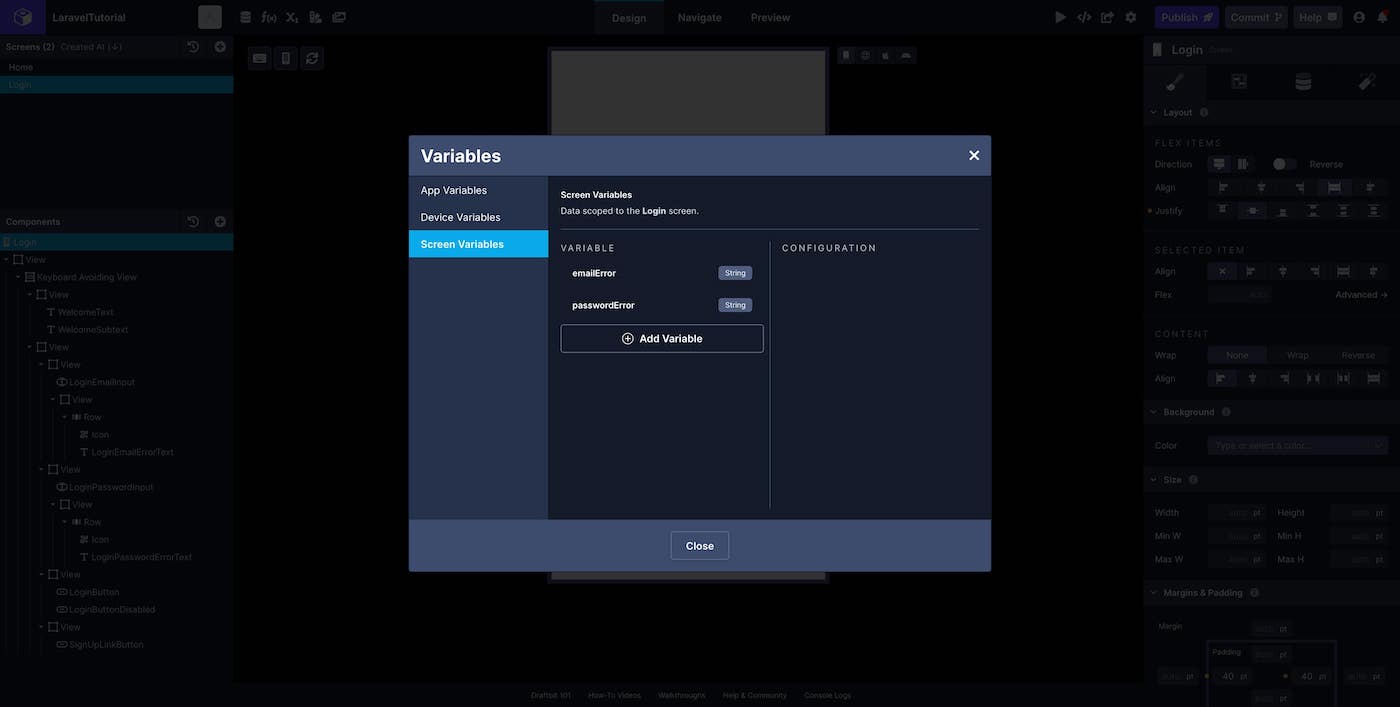
Section titled “1. Set Screen State”First, we’ll create two screen-level variables for our error messages, emailError and passwordError. You can do this in the Variables modal. These two variables will be updated by our custom code we setup earlier.
2. Set Variable
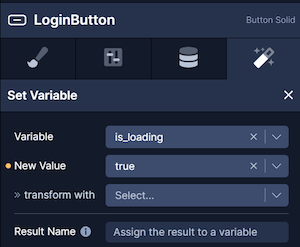
Section titled “2. Set Variable”First, we’ll set the is_loading app variable to true. You can use this to conditionally show components on the screen. I’m using it to determine whether to replace the Login button with another one which is disabled while the API call is being made.
3. Run a Custom Function
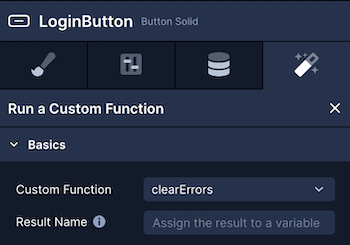
Section titled “3. Run a Custom Function”Here we will clear any existing error messages using our clearErrors custom function.
4. API Request
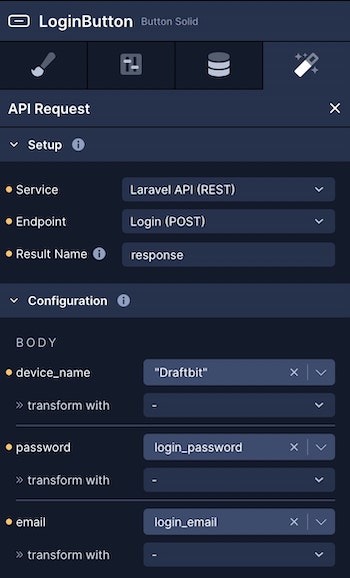
Section titled “4. API Request”Now we’re ready to make the API call to our Laravel application. We can pass the parameters (email, password, device_name) required by our Login endpoint and give the JSON result the name response so we can use it in subsequent Actions.
5. Extract Key
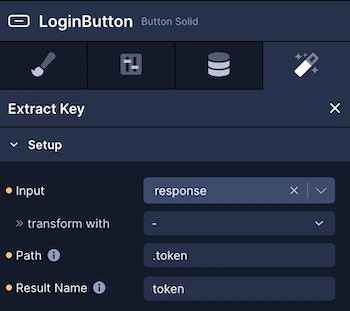
Section titled “5. Extract Key”If the authentication is successful, the response will have a token attribute which we’ll try to extract from the response and assign the result to token.
6. Run a Custom Function
Section titled “6. Run a Custom Function”After that, we need to pass the response argument to our handleErrors function.
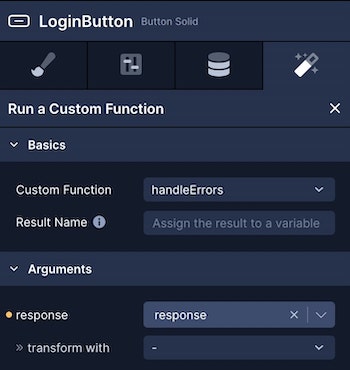
7. Set Variable
Section titled “7. Set Variable”Now that the API call is finished we can update the is_loading app variable to false.
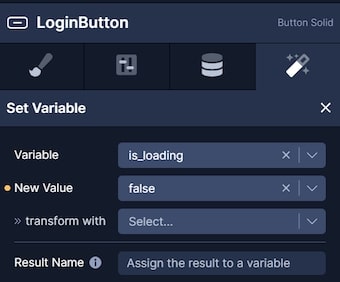
8. Conditional Stop
Section titled “8. Conditional Stop”If our response does not contain a token attribute, we want to stop and only show the error messages. Anything after this Action assumes the authentication was successful.
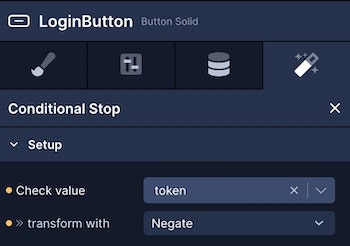
9. Run a Custom Function
Section titled “9. Run a Custom Function”Here we’ll pass the response argument to our setGlobalVariables function.
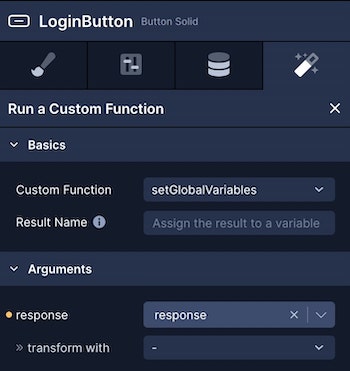
10. Run a Custom Function
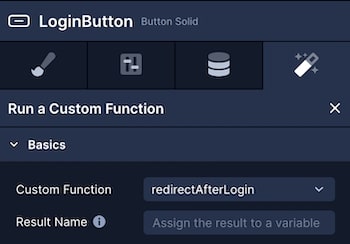
Section titled “10. Run a Custom Function”And, finally, we’ll run our redirectAfterLogin function
Completed Action Stack
Section titled “Completed Action Stack”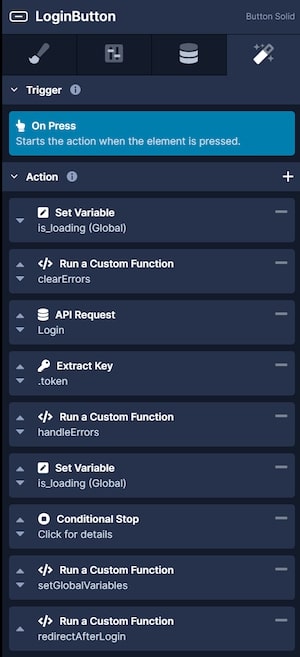
Displaying error messages
Section titled “Displaying error messages”When our handleErrors function runs, it sets our emailError and passwordError Screen variables so we can display them on our screen. We can also configure them to only be displayed if an error exists.
Email Error
Section titled “Email Error”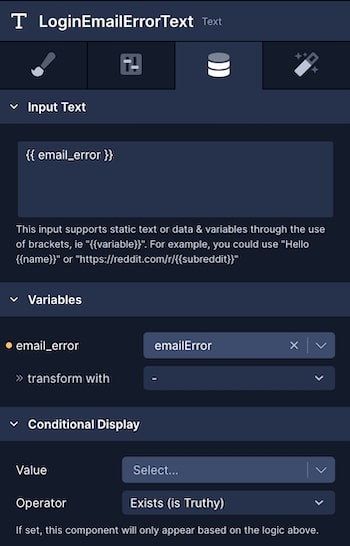
Password Error
Section titled “Password Error”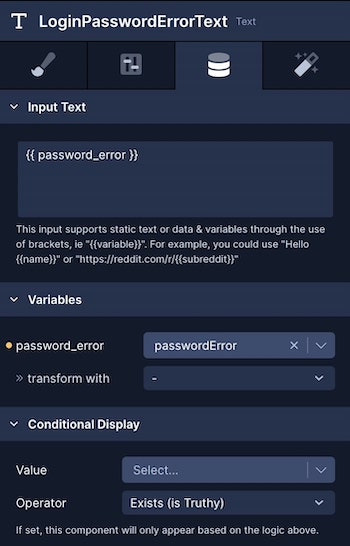
Setup the Home Screen
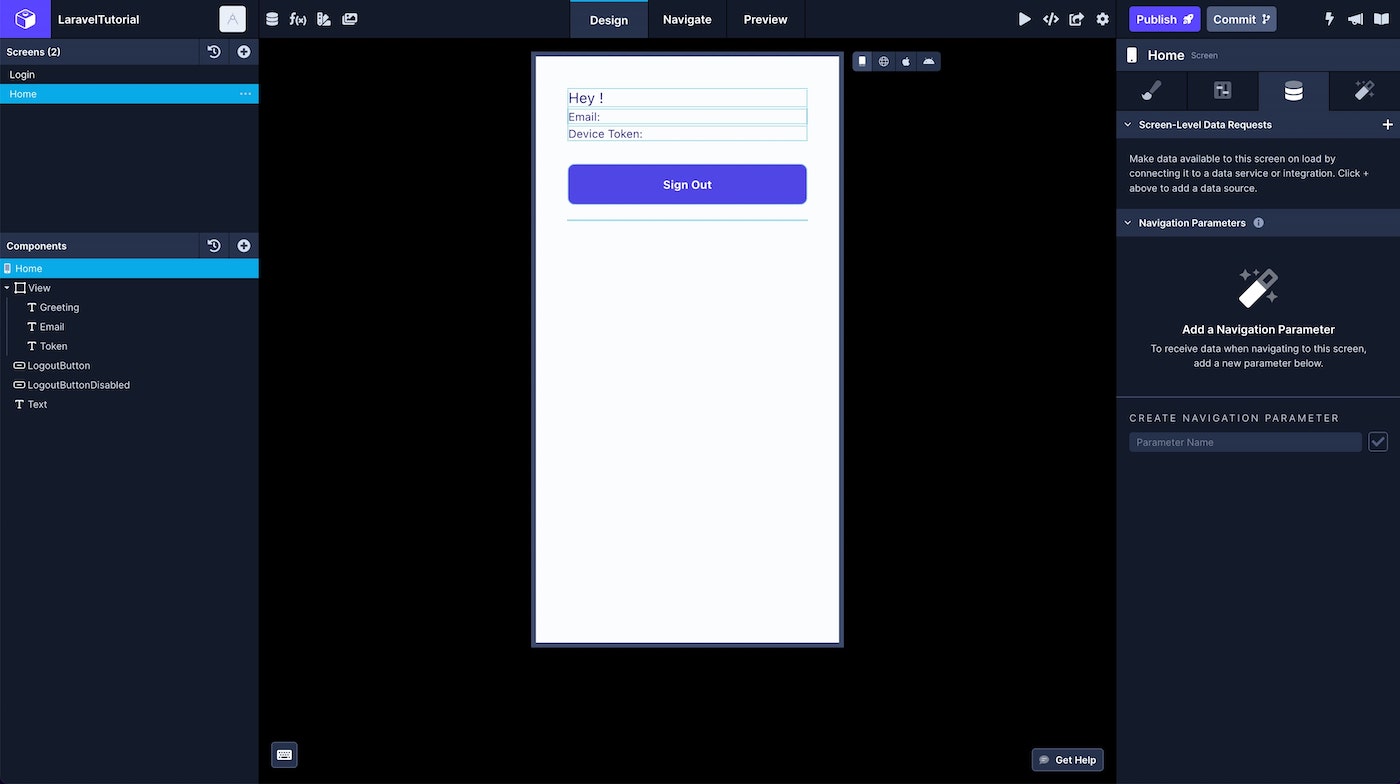
Section titled “Setup the Home Screen”This screen is just to demonstrate how we can use our Device variables in the UI and also how to logout the user.
Screen Components
Section titled “Screen Components”We’ll use the following 4 components:
- Logout button
- Greeting text (optional)
- Email text (optional)
- Device token text (optional)
Here’s what mine looks like:
Custom Code
Section titled “Custom Code”This screen will only require two custom code functions that we’ll use to log the user out of our app.
Accessing global variables
Section titled “Accessing global variables”Follow the same process we used to make Global variables available to our Login screen. Refer to the docs for more details.
Clearing global variables
Section titled “Clearing global variables”First, we’re going to create a new custom code function named unsetGlobalVariables with the following code:
setVariable({ key: 'user_id', value: null });setVariable({ key: 'user_name', value: null });setVariable({ key: 'user_email', value: null });setVariable({ key: 'device_token', value: null });setVariable({ key: 'bearer_token', value: null });setVariable({ key: 'is_loading', value: false });Redirecting after logout
Section titled “Redirecting after logout”Last, we’ll create a function named redirectAfterLogout which will reset our app’s navigator with the AuthStack.
props.navigation.reset({ index: 0, routes: [ {name: 'AuthStack'}],})Logout Button Actions
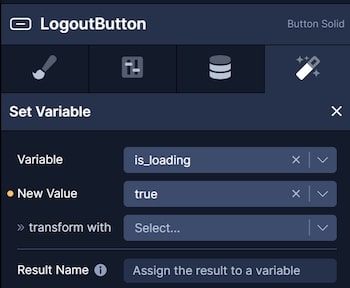
Section titled “Logout Button Actions”1. Set Variable
Section titled “1. Set Variable”Like we did on the Login screen, we’ll set our is_loading App variable to true.
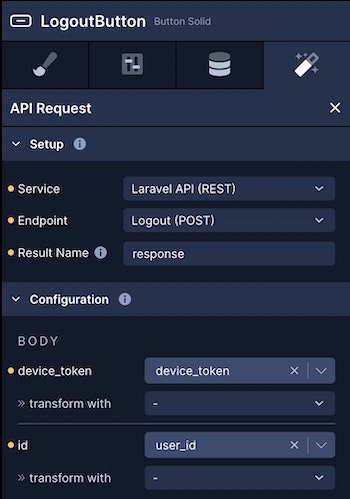
2. API Request
Section titled “2. API Request”Next we’ll make a request to our Logout endpoint, passing it the device_token and user_id Device variables as arguments.
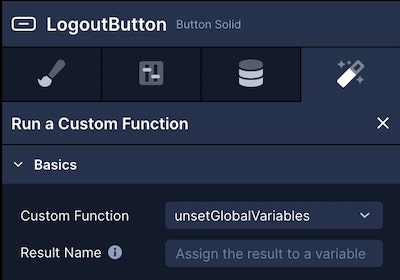
3. Run a Custom Function
Section titled “3. Run a Custom Function”Now we can unset all of our global variables using the unsetGlobalVariables function.
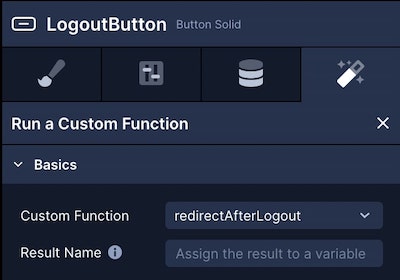
4. Run a Custom Function
Section titled “4. Run a Custom Function”And finally, reset the navigator and redirect the user to the AuthStack with our redirectAfterLogout function.